【備忘録】React Hook Form(v7)を使って、ネストされたフォームを実装する


記事の概要
react-hook-form を使ってネストされたフォームを実装する際に使用する useFieldArray に関して、実装時に少し詰まったのと、公式が用意していた example が TS で書かれていなかったので、備忘録としてこちらに残します。
公式が出している example に関してはこちらから参照していただければと思います。
前提として、記事内部で使用する使用ライブラリのバージョンは以下の通りです。
- React v17.0.2
- React Hook Form v7.15.4
- TypeScript v4.1.2
React Hook From について
React Hook Form は hooks ベースのフォームライブラリです。
フォームの値を取得・変更したり、バリデーションの設定などを行うことができます。
また、React 側で状態を管理しない非制御コンポーネントなため、フォームの値を変更しても都度再レンダリングが走らず、パフォーマンスが良いとされています。
詳細は React Hook Form のトップページと React のドキュメントを読んでいただければと思います。
今回作成するフォームについて
今回は以下の機能を持ったアンケート作成フォームのようなものを作ります。
- 質問を任意の個数作成できる
- 質問の種類をフリーワードか選択式の二種類から選べる
- 選択式の場合は選択肢を任意の個数作成できる
実装
それでは本題の実装についてです。
(今回の実装はGitHubに公開しています。)
まずは質問のみを複数作成できるフォームを作成していきます。
interface Question {
  questionText: string;
}

export interface QuestionForm {
  questions: Question[]
}

const Survey = () => {
  const { handleSubmit, register, control } = useForm<QuestionForm>({
    defaultValues: {
      questions: [{ questionText: "" }]
    }
  });

  const { fields, append, remove } = useFieldArray({
    control,
    name: "questions",
  });

  const addQuestion = () => {
    append({ questionText: "" })
  }

  const removeQuestion = (index: number) => {
    remove(index);
  }

  const doSubmit = (data: QuestionForm) => {
    console.log("data", data);
  }

  return (
    <div className={"container"}>
      <form onSubmit={handleSubmit(doSubmit)} className={"form-container"}>
        {fields.map((field, index) => (
          <QuestionItem
            key={field.id}
            register={register}
            questionIndex={index}
            removeQuestion={removeQuestion}
          />
        ))}
        <div className={"question-add-action-wrapper"}>
          <button onClick={addQuestion} type={"button"}>
            質問を追加
          </button>
        </div>
        <div className={"form-action-wrapper"}>
          <button type="submit">保存</button>
        </div>
      </form>
    </div>
  );
}
interface Props {
  register: UseFormRegister<QuestionForm>;
  questionIndex: number;
  removeQuestion: (index: number) => void;
}

const QuestionItem = ({ register, questionIndex, removeQuestion }: Props) => {
  return (
    <div className={"question-item-container"}>
      <div>
        <label>
          <p>Question {questionIndex + 1}</p>
          <input type="text" {...register(`questions.${questionIndex}.questionText` as const)} />
        </label>
        <button type={"button"} onClick={() => removeQuestion(questionIndex)} style={{ marginLeft: "16px" }}>
          削除
        </button>
      </div>
    </div>
  )
}
質問だけを登録する簡単なフォームが完成しました。
ここまでの部分のコードに関して軽くメモしておきます。
useForm を使って新しいフォームを定義
const { handleSubmit, register, control } = useForm<QuestionForm>({
  defaultValues: {
    questions: [{ questionText: "" }]
  }
});
展開している値も引数に渡している defaultValues もよくある値だけですね。
このフォームでは、レンダリングされた瞬間に質問用のフォームが一つ用意されている形になります。
useFieldArray を使って配列のフォームを定義
const { fields, append, remove } = useFieldArray({
  control,
  name: "questions",
});
fields には先ほどの defaultValues の値(初期レンダリング時の値)が入っています。
append と remove はそれぞれ要素の追加、削除に使用します。prepend という関数も用意されており、appendは配列の最後尾、prepend は配列の先頭に追加と行った使い分けができます。
useForm から受け取った control と name に配列を受け取るプロパティのキー名を指定することで、配列のフォームを制御します。
register を使用して、フォームの要素を react-hook-form で制御できるようにする
<input type="text" {...register(`questions.${questionIndex}.questionText` as const)} />
react-hook-form では 7 系から name にリテラル型を指定する仕様に変わったので、const assertion を使用しています。
key に field.id を指定
field.id にはランダムに生成された文字列が入っています。
{fields.map((field, index) => (
  <QuestionItem
    key={field.id} // e091edb8-3002-4dd4-9582-5f1bb5779407
    ...
  />
))}
この時点での動作はこんな感じです(スタイルは適当です)。
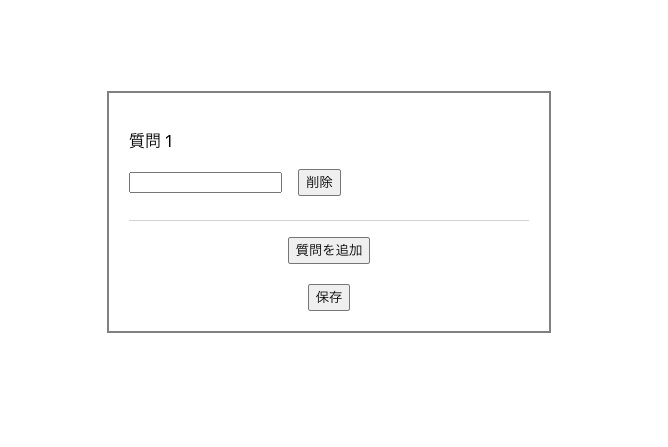
初期状態
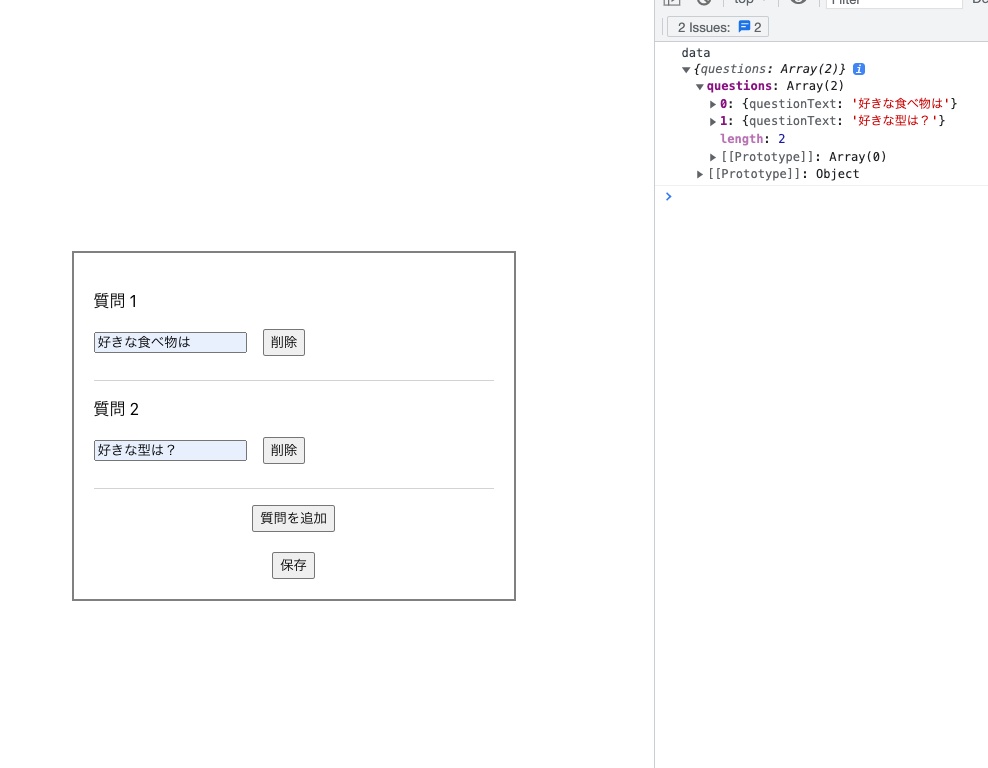
質問を作成して、保存ボタンを押下
次に本題の選択肢の部分(ネストされたフォーム)の実装を追加していきます。
質問において選択肢の設定は任意にしたいので、フリーテキストと選択式の質問を作れることにします。また初期値や質問追加時のデフォルト値はフリーテキストの質問になるように変更します。
変更したコード以外をなるべく省略した Survey はこちらになります。
type QuestionType = "FREE" | "SELECT";

interface Choice {
  choiceText: string;
}

interface Question {
  questionText: string;
  questionType: QuestionType;
  choices: Choice[];
}

const Survey = () => {
  const { handleSubmit, register, control } = useForm<QuestionForm>({
    defaultValues: {
      questions: [{ questionText: "", questionType: "FREE", choices: [] }]
    }
  });

  // ...

  const addQuestion = () => {
    append({ questionText: "", questionType: "FREE", choices: [] })
  }

  // ...

  return (
    <div className={"container"}>
      <form onSubmit={handleSubmit(_handleSubmit)} className={"form-container"}>
        {fields.map((field, index) => (
          <QuestionItem
            key={field.id}
            register={register}
            control={control}
            questionIndex={index}
            removeQuestion={removeQuestion}
          />
        ))}
      {/* ... */}
      </form>
    </div>
  );
}
次に実際に選択肢を追加できるようにしていきます。
仕様と実装の要点としては以下になります。
- 選択肢の配列を追加できるように useFieldArray をもう一つ定義
- 質問の追加と同様に選択肢を追加する処理を定義
- 質問の種類が選択式の時のみ選択肢が表示されるように、出し分けの処理
上記を実装したコードがこちらです。
interface Props {
  register: UseFormRegister<QuestionForm>;
  control: Control<QuestionForm>;
  questionIndex: number;
  removeQuestion: (index: number) => void;
}

const QuestionItem = ({ register, control, questionIndex, removeQuestion }: Props) => {
  const questionType = useWatch({
    control,
    name: `questions.${questionIndex}.questionType` as const
  });

  const { fields, append, remove } = useFieldArray({
    control,
    name: `questions.${questionIndex}.choices` as "questions.0.choices",
  });

  const addChoice = () => {
    append({ choiceText: "" })
  }

  const removeChoice = (choiceIndex: number) => {
    remove(choiceIndex);
  }

  return (
    <div className={"question-item-container"}>
      <div>
        <label>
          <p>Question {questionIndex + 1}</p>
          <input type="text" {...register(`questions.${questionIndex}.questionText` as const)} />
        </label>
        <button type={"button"} onClick={() => removeQuestion(questionIndex)} style={{ marginLeft: "16px" }}>
          削除
        </button>
      </div>
      <div>
        <p>種類</p>
        <label style={{ fontSize: "14px" }}>
          フリーワード
          <input type={"radio"} value={"FREE"} {...register(`questions.${questionIndex}.questionType` as const)} />
        </label>
        <label style={{ fontSize: "14px" }}>
          選択式
          <input type={"radio"} value={"SELECT"} {...register(`questions.${questionIndex}.questionType` as const)} />
        </label>
      </div>
      {questionType === "SELECT" && (
        <>
          {fields.map((field, index) => (
            <ChoiceItem
              key={field.id}
              register={register}
              questionIndex={questionIndex}
              choiceIndex={index}
              removeChoice={removeChoice}
            />
          ))}
          <div style={{ marginTop: "24px", textAlign: "center" }}>
            <button onClick={addChoice} type={"button"}>
              選択肢を追加
            </button>
          </div>
        </>
      )}
    </div>
  )
}
interface Props {
  register: UseFormRegister<QuestionForm>;
  questionIndex: number;
  choiceIndex: number;
  removeChoice: (index: number) => void;
}

const ChoiceItem = ({ register, questionIndex, removeChoice, choiceIndex }: Props) => {
  return (
    <div className={"choice-item-container"}>
      <label>
        <p>Choice {choiceIndex + 1}</p>
        <input type="text" {...register(`questions.${questionIndex}.choices.${choiceIndex}.choiceText` as const)} />
      </label>
      <button onClick={() => removeChoice(choiceIndex)} type={"button"} style={{ marginLeft: "16px" }}>
        削除
      </button>
    </div>
  )
}
見てみると、質問の方の実装とほとんど同じですね。
異なる点を注目してメモしておきます。
選択肢を表示するか制御するために questionType を取得
const questionType = useWatch({
  control,
  name: `questions.${questionIndex}.questionType` as const
});
公式のドキュメント内にもありますが、useFieldArray は非制御コンポーネントなので、react 側で state を所持しているわけではありません。そのため現在の値を取得するためには react-hook-form が用意している関数を使用する必要があります。
今回は個々の値を取得したいので、useWatch を使用して questionType の値を取得しています。
選択肢用の useFieldArray を定義
const { fields, append, remove } = useFieldArray({
  control,
  name: `questions.${questionIndex}.choices` as "questions.0.choices",
});
選択肢用の useFieldArray を呼び出しています。質問の時とほとんど変わらないのですが、ネストされたフォームの場合はテンプレートリテラル + const assertion ではなく、適当な添字を使用したリテラルによるアサーションを行う必要があります。
最終的な動作は以下のようになります。
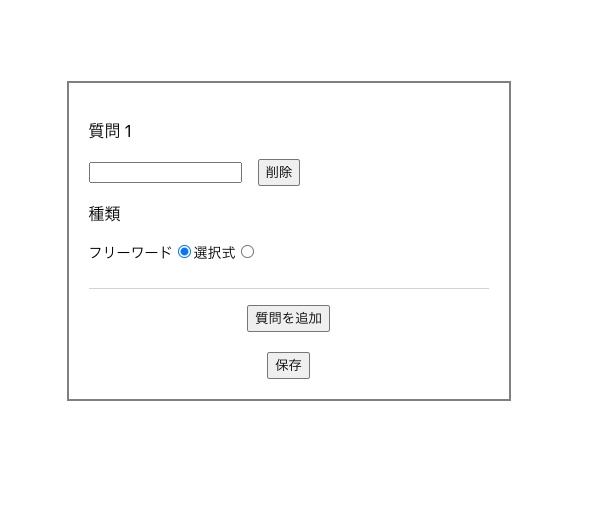
初期状態

質問を作成して、保存ボタンを押下
これで簡単なネストされたフォームの実装ができました。
遭遇した問題
実装していて少し悩んだ箇所があったのでそちらも記載しておきます。
ネストされたフォームを実装していると、fileds が never[] になり、正しくフォームの型を認識してくれない事象が発生
こちらはネストするフォームの型を Optional にしていたことが原因でした。
挙動としては以下のようになります。
interface {
  choices?: Choice[]; // choices がない可能性もあるので、never[] として判定される
  choices: Choice[]; // 正しく認識される
}
質問のタイプを変更に伴って選択肢の表示を切り替えたかったがうまく行かなかった
こちらはものすごく残念な勘違いをしていただけなのですが、以下のように fileds からtype を参照して分岐を記載しているのが原因でした。
本記事内でも触れましたが、値を取得するには useWatch 等を使用する必要があります。逆に言うとフォームの値が変更されても fields が変更されて再レンダリングが起きるわけではないため、当初の実装では動きませんでした。
// NG
return (
  ...
  {fields.map((field, index) => (
    {field.questionType === "SELECT" && (選択肢を表示)}
  ))}
  ...
)

// OK
const questionType = useWatch({...})

return (
  ...
  {questionType === "SELECT" && (選択肢を表示)}
  ...
)
最後に
今回はそこまで複雑な実装ではないですが、react-hook-form は詰まると割と解決に時間がかかることが多いので、些細なことでも備忘録として残しておくのが大事だと感じています。
Zenn への初投稿なので、だいぶ駄文になりましたが、この記事がこれから触る方の役に立てば嬉し
いです。
ご指摘やご質問があれば、コメントいただければと思います。
Discussion
required, min, maxなども指定できるような汎用性のある設計にしたいのですが、コンポーネントわけづらいですね。
本記事の内容を踏襲できているわけではないですが、コンポーネントの引数にregisterなどを渡さず、フック経由でハンドリングしてみました。
フック経由でハンドリングすることでコンポーネントに切り出すサンプルです。
Surveyフォームに寄せたサンプルも作ってみました。
/survey/createがデモページになります。簡単ですが、以上です。