FlutterにOpenApiを入れて、api開発を楽にしよう。
【記事の趣旨】
Flutterやってて、色んな人の個人開発やアプリ開発の事例を聞くと
- Flutter
- Firestore
というスタックでNoSQLでやっている人が多い印象を受けます。
それもあって、最初の個人アプリ開発ではFirestoreを使っていました。
ただ、仕事柄なのか、RDB脳が抜けない自分からすると、
- このデータjoinして返したいんだよなー
- where文絞れなさすぎ!
- セキュリティルールややこしい!
- DBのマイグレーションで定義したい!
みたいな思いがあり、自分はバックエンドを慣れている
Railsで作りたいと考えました。
そこで面倒なのが、Flutter側のapi定義。
慣れた人であればそこまでではないかもしれないですが、
少なくとも以下の準備が必要です。
- httpリクエストを送るパッケージの導入(Dioとか)
- リクエストを送るためのメソッド定義(getUser的な)
- apiから返されるデータモデルの定義(Userモデル)
- レスポンスのjsonデータをFlutter内で使う型に変換(toJsonのようなもの)
これを使うためにFleezedでimmutableにするとかかんとか。。。
とにかくこの辺も流派があったりであまり考えたくなかったのと、
とにかくapiリクエストに関する実装はあまり時間をかけたくない。
これを解消するために、今の現場で導入しているOpenApiを
使って、そのへんの実装は自動化してしまおう!
というのが今回の記事の趣旨です。
あと、自分はモックサーバーを立ち上げるためにDockerを利用しているので、
PCにDockerを導入しているという前提でお話します。
入れていない方は「Docker インストール」等で調べてみてください。
また、今回はFlutter2.0以上を対象にしています。
【そもそもOpenApiとは?】
この方の記事とかを読むといいかなと。
僕が詳しく説明するより、もっと詳しい方の文献のほうが参考になります。
あと、OpenApiを使う上で、Swaggerというツールを使いますが、
基本的にはそれぞれというより、セットで使うもの、という認識で良いと思います。
【OpenApiを導入すると何が楽なの?】
自分が導入していて便利だなと感じたのは
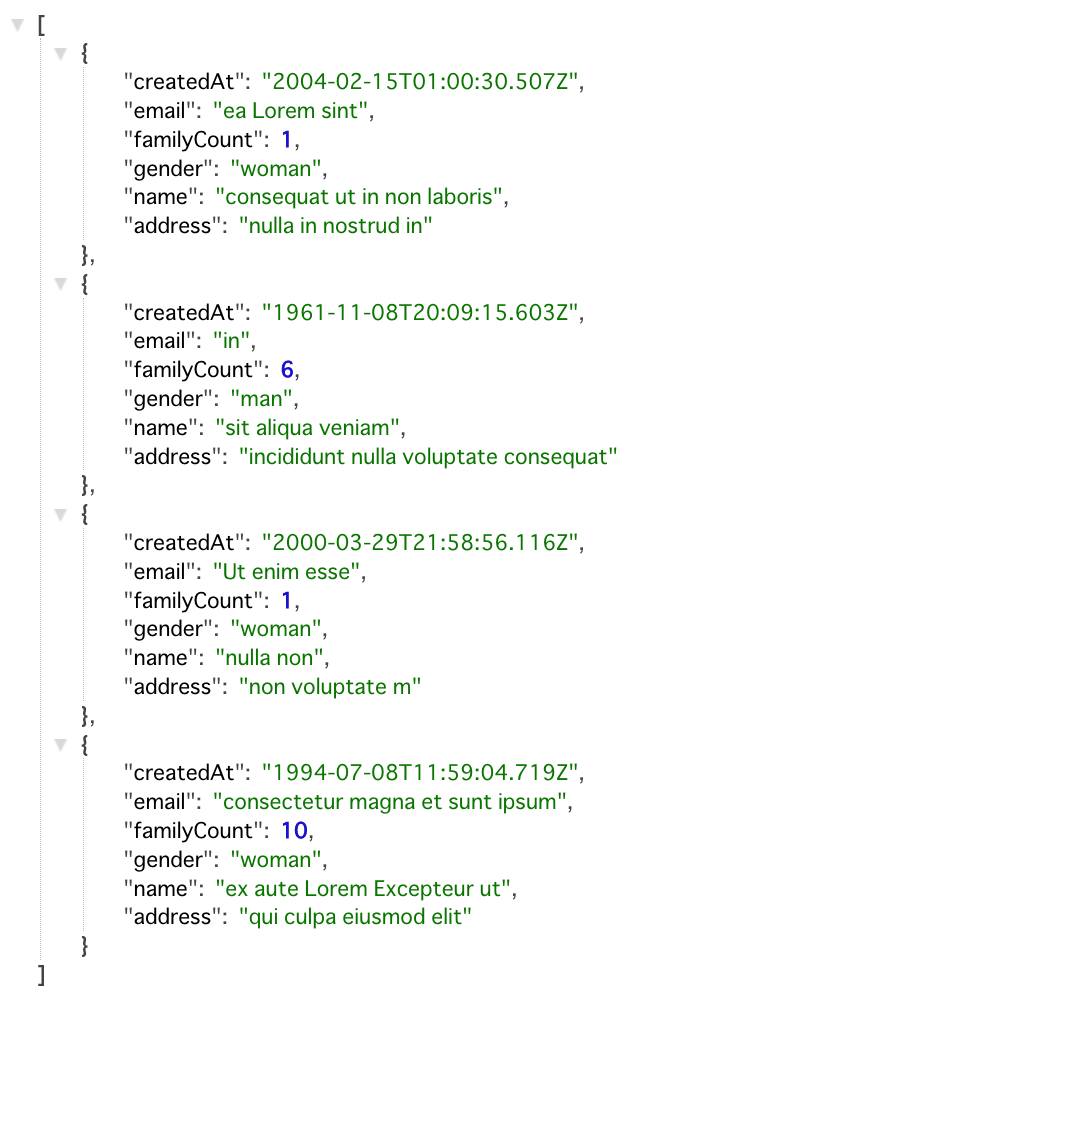
バックエンドを作っていなくても、モックサーバーをさくっと立ち上げられる
- ランダムにモックデータ返却してくれるので、とりあえず画面開発だけに集中できる👍
- Firestoreの頃
- DB内部に毎回テストデータを手打ちして、interfaceの定義が変わるたびにデータを作り直していたので面倒だった😓
OpenApiの定義ファイルをもとにFlutterで使うinterfaceやメソッドを自動生成
- 定義書を読めば、Flutter内で使うデータがすぐ把握できる
- Firestoreの頃
- セキュリティルールにinterface等々の定義を追加
- データ定義が変わるたびに書き換えないといけないのだが、ちょいちょい忘れる🤔
- セキュリティルールにinterface等々の定義を追加
という点です。
とにかくコードを見ながらやるほうが早そうなので、早速書いてみましょう。
【OpenApi導入(あくまで自分のやり方です)】
1. openapiの定義ファイルを作成
A. ルート配下にopenapiフォルダを作成し、そこに以下の2つのファイルを配置
- openapi.yml
- docker-compose.yml
B. openapi.ymlの記述
openapi: 3.0.0
info:
  title: API
  description: Openapiのサンプル
  version: v1

servers:
  - url: http://localhost:8085/ # docker-composeでprismをホストしているポートと同じするものにする(後述)
paths:
  /users:
    $ref: "./resources/path/users.yml"
  /users/{id}: #{}で囲んだ場所は動的なパラメーターになります(後述)
    $ref: "./resources/path/user.yml"
このように定義することで、このプロジェクトでは
http://localhost:8085/users
http://localhost:8085/users/:id
というリクエストが来ますよー😇という定義がひとまず完成します。
ymlの定義の仕方は人それぞれですが、自分は以下のように決めています。
- ルートのymlファイルには以下を記載
- 基本の定義内容(上で言う8行目まで)
- リクエストされるURLのパスと、実際の定義内容の参照パス
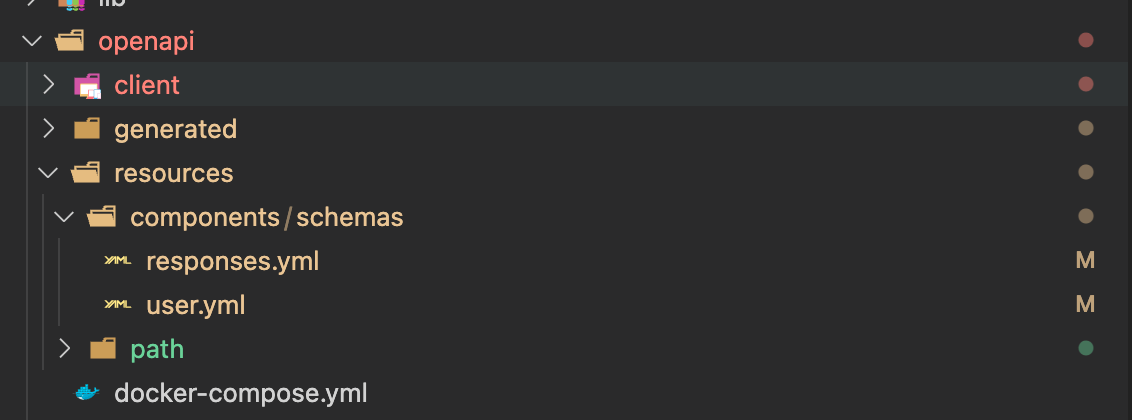
- 具体的な定義ファイルは
openapi/resources/path配下に配置 - 各パスの定義ファイルで共通で使いまわしたいスキーマは
openapi/resources/components/schemas配下に配置
C. レスポンスのステータスコード毎の定義を追加
openapi/resources/components/schemas/responses.ymlを作成
ok:
  type: object
  required:
    - message
  properties:
    message:
      type: string
      example: 作成しました
    errorDetails:
      type: array
      items:
        $ref: '#/components/schemas/error_detail'
created:
  type: object
  required:
    - message
  properties:
    message:
      $ref: '#/components/schemas/message'
    errorDetails:
      type: array
      items:
        $ref: '#/components/schemas/error_detail'
bad_request:
  type: object
  required:
    - message
  properties:
    message:
      type: string
      example: BadRequest
    errorDetails:
      type: array
      items:
        $ref: '#/components/schemas/error_detail'
unauthorized:
  type: object
  required:
    - error
  properties:
    error:
      type: string
      example: 認証されていません
forbidden:
  type: object
  required:
    - message
  properties:
    message:
      type: string
      example: Forbidden
not_found:
  type: object
  required:
    - message
  properties:
    message:
      type: string
      example: Not Found
unprocessable_entity_error:
  type: object
  required:
    - message
  properties:
    message:
      type: string
      example: Unprocessable Entity
    errorDetails:
      type: array
      items:
        $ref: '#/components/schemas/error_detail'
internal_server_error:
  type: object
  required:
    - message
  properties:
    message:
      type: string
      example: Internal Server Error

components:
  schemas:
    error_detail:
      type: object
      required:
        - propertyName
        - propertyMessage
      properties:
        propertyName:
          type: string
          description: エラーになったプロパティ
          example: name
        propertyMessage:
          type: string
          description: エラーメッセージ
          example: 入力値が不正です。
おそらくこの辺の定義はプロジェクトによって変わると思います。
ステータスコードの解釈に関しては別記事でまとめようかと思います。
D. 各パスの具体的な定義ファイルを作成
openapi/components/resources/paths/users.ymlを作成
get:
  summary: すべてのユーザーを取得する
  operationId: getUsers
  tags:
    - users
  responses:
    "200":
      description: "Ok"
      content:
        application/json:
          schema:
            type: array
            items:
              $ref: "../components/schemas/user.yml#/user"
    "401":
      description: "Unauthorized"
      content:
        application/json:
          schema:
            $ref: "../components/schemas/responses.yml#/unauthorized"
    "403":
      description: "Forbidden"
      content:
        application/json:
          schema:
            $ref: "../components/schemas/responses.yml#/forbidden"
    "404":
      description: "Not Found"
      content:
        application/json:
          schema:
            $ref: "../components/schemas/responses.yml#/not_found"
    "500":
      description: "Internal Server Error"
      content:
        application/json:
          schema:
            $ref: "../components/schemas/responses.yml#/internal_server_error"

post:
  summary: 新しいユーザーを追加する
  operationId: addUser
  tags:
    - users
  requestBody:
    description: ユーザー作成の引数
    content:
      application/json:
        schema:
          $ref: "../components/schemas/user.yml#/user_create_params"
  responses:
    "201":
      description: CREATED
このファイル内で、get,post,patch,deleteのパスを定義します。
中身のKeyの意味ですが、ざっくりとは以下のようになるかと。
summary → 該当処理の説明
operationId → OpenApi内で呼び出すためのUID(これがFlutter内部で呼び出すメソッド名になります)
tags → APIで使用されるタグ
responses →  該当処理で発生しうるレスポンスのステータスとその内容
requestBody → apiリクエスト時に送ることができるパラメーター
合わせて、この処理内で必要になるUserのスキーマも定義しておきましょう。
openapi/resources/components/schemas/user.yml
user: # ここに記載した命名が、型名になる(別ファイル等で重複した場合は、User1のように連番になる)
  type: object
  required:
    - name
    - email
    - gender
    - address
    - familyCount
    - createdAt
  properties:
    name:
      type: string
      example: 山田 太郎
      description: ユーザーのフルネーム
    email:
      type: string
      example: test@test.com
      description: ユーザーのメールアドレス
    gender:
      type: string
      enum: [man, woman]
      example: man
      description: 性別
    address:
      type: string
      example: 東京都新宿区
      description: 住所
    familyCount:
      type: integer
      minimum: 1
      maximum: 20
      example: 1
      description: 自分を含む家族の人数
    createdAt:
      type: string
      format: date-time
      description: 作成日
スキーマはけっこう細かく設定できます。とりあえずは
- requiredに設定したフィールドは返却必須
- typeはstring(enumも可), bool, integerなどなど使える
だけ知っておけば最低限使えるかと思います。
もう一つのパスの定義もしましょう。
get:
  summary: idに紐づくuserを取得する
  operationId: getUser
  tags:
    - users
  parameters:
    - in: path # パラメータをパス内に含める
      name: id
      description: ユーザーのID
      required: true
      schema:
        type: string
  responses:
    "200":
      description: Ok
      content:
        application/json:
          schema:
            $ref: "../components/schemas/user.yml#/user"
(中略)
ルートのymlで{id}と記載した場合は、in: pathで定義することで
api側にhttp://localhost:8085/users/3のようにリクエストを
送ることができるようになります。
もしも
api側にhttp://localhost:8085/users/3?name="Manabu"のように
クエリパラメータを渡したい場合は、
- in: query
  name: name
  required: false # 必須ならtrueにする
  schema:
    type: string
    description: 検索対象の名前
のように書けばクエリを渡せるようになります。
E. モックサーバーを立ち上げるためのDockerの定義を追加
A.で作成したdocker-compose.ymlに以下の様に記載
version: '3.7'
services:
  app-frontend-sample-swagger-ui:
    image: swaggerapi/swagger-ui
    container_name: app-frontend-sample-swagger-ui
    volumes:
      - ./openapi.yml:/usr/share/nginx/html/openapi.yml
      - ./resources:/usr/share/nginx/html/resources
    environment:
      API_URL: openapi.yml
    ports:
      - "8080:8080"
  app-frontend-sample-swagger-api:
    image: stoplight/prism:3
    container_name: app-frontend-sample-swagger-api
    ports:
      - "8082:4010" # B.で作成したファイルのsurversのポートを左側に記載
    command: mock -d -h 0.0.0.0 /openapi.yml
    volumes:
      - ./generated/openapi/openapi.yaml:/openapi.yml
  app-frontend-sample-openapi-generator:
    image: openapitools/openapi-generator-cli
    container_name: app-frontend-sample-openapi-generator
    volumes:
      - ./:/workspace
これの設定をすることで、docker内部で
- モックサーバー
- 定義内容をGUIで確認できるサーバー
を立ち上げることができるようになります。
とりあえず、これで下準備は完了です。
2.自動生成のコマンドを実行
プロジェクト配下のパスで、以下の2つのコマンドを、打ってみましょう。
$openapi-generator generate -i openapi/openapi.yml -g openapi-yaml -o ./openapi/generated
$openapi-generator generate -i openapi/openapi.yml -g dart-dio-next -o ./openapi/client
↑
最新のバージョンだと、-gの部分がdart-dio-nextではなく、dart-dioに変わっているケースもあります。
もし、以下のように表示されたら成功です。
################################################################################
# Thanks for using OpenAPI Generator.                                          #
# Please consider donation to help us maintain this project 🙏                 #
# https://opencollective.com/openapi_generator/donate                          #
################################################################################
実行後に新しく、clientというフォルダができているかと思います。
ただ、このままだと、型定義用のg.dartが足りないそうなので、それを生成するコマンドも実行します。
どうやらopenapi側で自動的にimmutableにしてくれるっぽいですね。
$cd ./openapi/client
$flutter pub get
$flutter packages pub run build_runner build --delete-conflicting-outputs
このようにg.dartができていたら成功です。

3.pubspec.ymlにopenapiの設定を記載
pubspec.yml
dependencies:
  flutter:
    sdk: flutter
  (中略)
  openapi:
    path: ./openapi/client # openapiで生成したプロジェクトのパスを記載
やることはこれだけです。
試しに、dockerを立ち上げてみましょう。
$cd openapi ; docker-compose up

上のようになって、立ち上がったら、localhost:8080を入力してみてください。

GUIでリクエストとスキーマの定義が見られるようになりました。
また、実際に立ち上げた状態で、localhost:8085/usersを叩くと、
モックデータが返却されるかと思います。
4.OpenApiを呼び出すための設定を追加
lib/domain/openapi_factory.dartを作成
import 'dart:io';

import 'package:dio/dio.dart';
import 'package:flutter/foundation.dart';
import 'package:openapi/openapi.dart';

class OpenApiFactory {
  OpenApiFactory();

  Openapi build() {
    const flavor = String.fromEnvironment('FLAVOR');
    final String baseUrl;
    bool isAndroid = Platform.isAndroid;
    if (flavor == 'prod') {
      baseUrl = ENV['BASE_URL'];
    } else if (flavor == 'stg') {
      baseUrl = isAndroid ? 'http://10.0.2.2:3000' : 'http://localhost:3000';
    } else {
      baseUrl = isAndroid ? 'http://10.0.2.2:8082' : 'http://localhost:8082';
    }
    return Openapi(
      basePathOverride: baseUrl,
      interceptors: [
        if (kDebugMode) LogInterceptor(requestBody: true, responseBody: true),
      ],
    );
  }
}
自分はFlavorで環境を分けて、それごとに呼び出すURLの矛先を変えています。
dev: モックサーバーのURL
stg: ローカルの開発中サーバーのURL
prod: 本番で運用するサーバーのURL
環境の分け方に関しては
村松さんの記事がわかりやすいので参考にするといいかと思います。
5. コード内で呼び出してみる
任意の呼び出したいファイルにて、openapiを呼び出してみましょう。
import 'package:flutter/material.dart';
import 'package:flutter_hooks/flutter_hooks.dart';
import 'package:front/config/const/theme_word.dart';
import 'package:front/domain/openapi_factory.dart';
import 'package:openapi/openapi.dart';
class TopPage extends HookWidget {
const TopPage({Key? key}) : super(key: key);
Widget build(BuildContext context) {
final users = useState<List<User>>([]); #Openapiで定義したスキーマが、そのまま型として利用可能
void getApiUsers() async {
final Openapi _openApi = OpenApiFactory().build();
final repository = _openApi.getUsersApi();
final response = (await repository.getUsers());
users.value = response.data!.toList();
}
return Scaffold(
appBar: AppBar(
title: const Text(ThemeWord.top),
),
body: Column(children: users.value.map((user) => Text(user.name)).toList()),
floatingActionButton: FloatingActionButton(onPressed: () => getApiUsers()));
}
}
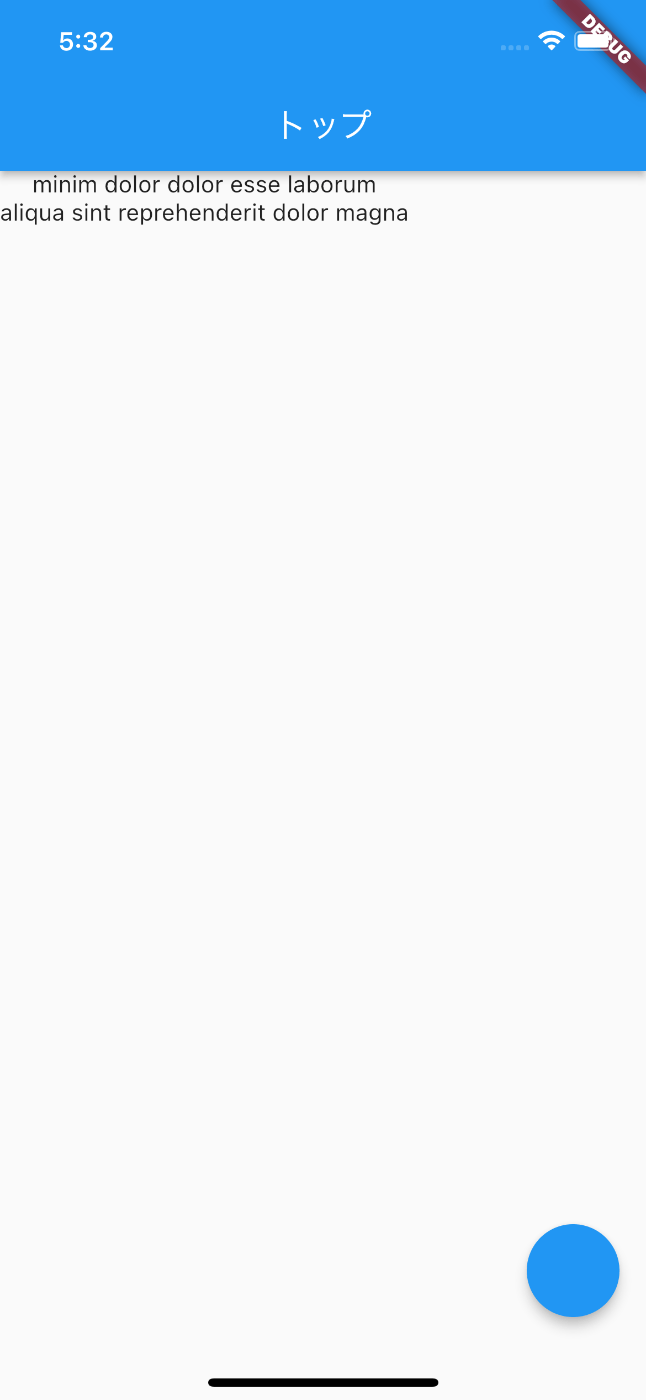
こんな感じで、モックサーバーの値を取れるはずです。
【メモ】 flutter runが立ち上がらなくなる場合がある
自分もハマったのですが、プロジェクトと、openapiで生成したプロジェクトの
dartのversionが異なると
Error: The language version override has to be the same in the library and its part(s).
というエラーが発生する場合があります。
そのため、ルートのpubspec.ymlとopenapi内のpubspec.ymlの該当箇所の
バージョンを揃えておくようにしてください。
pubspec.yml
environment:
  sdk: ">=2.12.0 <3.0.0"
お疲れさまでした!
ここまでできれば、api開発も今まで以上にスムーズに行くでしょうし、
僕自身はこれのおかげで初のRails(Awsサーバー)×Flutterの
個人開発アプリがリリースできました😆
Flutter×OpenApiがもっと普及すれば、
既存のwebアプリのネイティブアプリ化とかも
今以上にハードルさがるんじゃないかなー!
そんなときにこの記事が役に立ってくれたらいいなー!
なんて思いながら書きました。
ぜひ、いいねやコメント等頂けたら嬉しいです。
あと、もしFlutterについて気になるという方がいたら、
自分も入っている「Flutter大学」というコミュニティがあるので、
よかったら参加してみるのも良いと思います💪
では、みなさん、良き開発ライフを〜👋
Discussion
いい記事ありがとうざいました。
しかし、今dart 2.16で、以下のエラーがありました。どうすればいいでしょうか
dartには初心者なので馬鹿な質問かもしれなくてごめんなさい。
ありがとうございます
pubspec.yml は以下のように
質問ありがとうございます!
エラーの内容を見る感じ、null-safetyでないパッケージが
混在していることが原因のような気がします!
例えば、dioは4.0.0からnull-safety対応しているので、
そこを書き直して、再度実行したらいかがでしょうか?🤔
ご返事ありがとうございました。
dioを4にしたら、互換性がないため、自動生成のコードはコンパイルできなくなりそうです。
結局dart 2.16はopenapi generator dart-dio に通用しないかなと思っています
いや、これはdart2.17になる前から試しているので、恐らく出来るはずです!
ちなみに自分のpubspec.ymlにはdioのパッケージは記載していません(自動生成されるコードにて、dio4.0以上が作成されて、そちらでまかなえるため)。
あと、Flutter2以上からはnull-safetyになるので、dart-dioではなく、dart-dio-nextのコマンドで生成する必要があると思います!
こちらは試していただいていたでしょうか?
ここに、自分が作ったサンプルリポジトリがあるので、
これで動くのか試してもらえると、検証できるかなと思います!
とうもありがとうございました!しばらくdart-dioを諦めてdartで行けましたけど、次回試してみます!