【Flutter】persistent_bottom_nav_bar_v2の使い方
はじめに
persistent_bottom_nav_bar_v2 というパッケージの使い方について書いていきます。
このパッケージでは、主に以下2つのことが簡単に実装できます。
- 様々なアニメーション・デザインのBottomNavigationBarを選べる
- BottomNavigationBarを残したまま画面遷移
後者については、以下記事のようにパッケージを使わないで実装するやり方もあるようですが、少々難解に感じたため今回はパッケージを使って実装してみました。
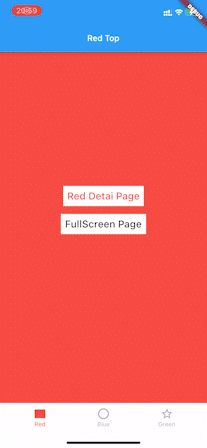
今回作成したサンプルアプリ
ソースコードはこちら
使い方
基本
まずは表示する画面のリストを作成します。
次に、ScaffoldのbodyにPersistentTabViewを設定し、「screens」に作成した画面のリストを設定します。
そして、「items」に作成した画面数分のPersistentBottomNavBarItemを設定します。
class BasePage extends StatelessWidget {
const BasePage({Key? key}) : super(key: key);
Widget build(BuildContext context) {
// 表示する画面のリストを作成
final pages = [
const RedTopPage(),
const BlueTopPage(),
const GreenTopPage(),
];
return Scaffold(
body: PersistentTabView(
context,
screens: pages, // 宣言した画面のリストを設定
navBarStyle: NavBarStyle.simple, // navBarのstyleを設定
items: [
// 画面数の分、「PersistentBottomNavBarItem」を設定
PersistentBottomNavBarItem(
// 選択時のIcon
icon: const Icon(
Icons.rectangle,
),
// 非選択時のIcon
inactiveIcon: const Icon(
Icons.rectangle_outlined,
),
// ラベル
title: 'Red',
// 選択時のColor
activeColorPrimary: Colors.red,
// 非選択時のColor
inactiveColorPrimary: Theme.of(context).disabledColor,
),
.
.
.
],
),
);
}
}
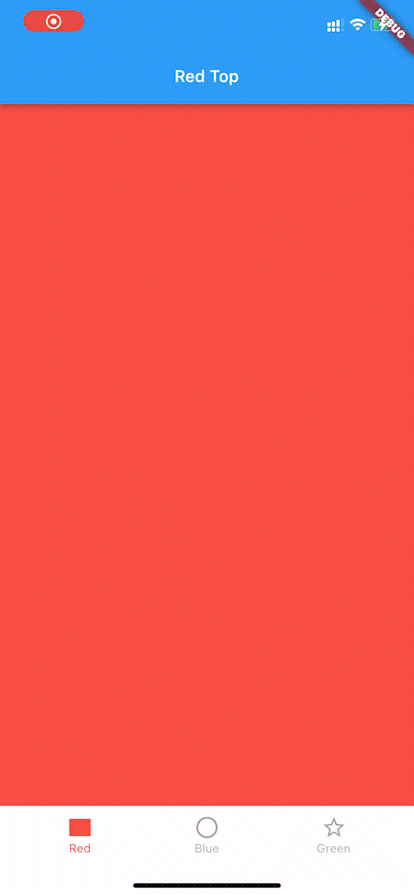
これだけで、↓のような画面が作成できます。
なお、PersistentTabViewのパラメータ 「navBarStyle」 で、様々なstyleを設定することが出来ます。
各styleのデザインについては、大変簡潔にまとめてくださっている記事がありますので是非こちらをご覧ください。
画面遷移
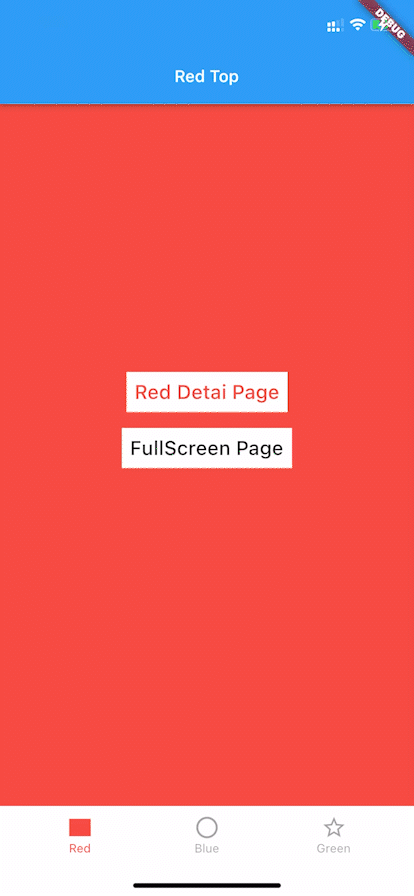
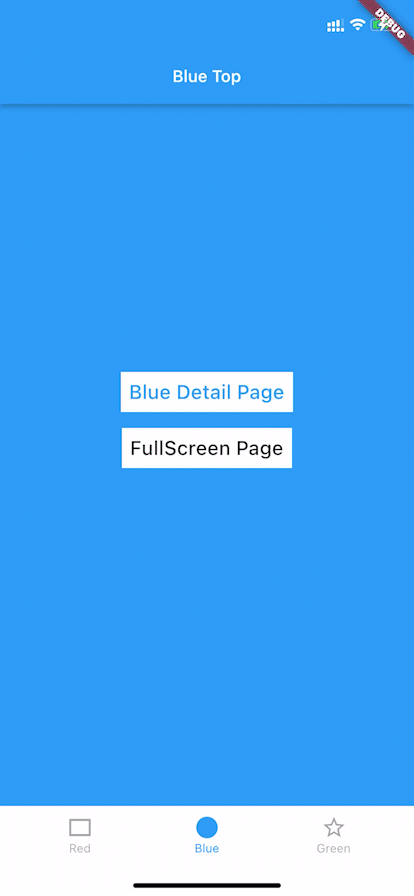
BottomNavBarを残したまま画面遷移する例
Navigator.pushやpushNewScreenを使うことで、BottomNavBarを残したまま画面遷移することができます。
onPressed: () {
Navigator.push<MaterialPageRoute<dynamic>>(
    context,
    MaterialPageRoute(
    builder: (context) => const RedDetailPage(),
    ),
);
// ↓でも可
// pushNewScreen<dynamic>(
//   context,
//   screen: const RedDetailPage(),
// );
},
BottomNavBarを残さずに画面遷移する例
pushNewScreenを使い、パラメータ 「withNavBar」 にfalseを設定することで、BottomNavBarを残さずに画面遷移することができます。
onPressed: () {
 pushNewScreen<dynamic>(
   context,
   screen: const FullscreenPage(),
   withNavBar: false,
 );
},
画面遷移のアニメーションの設定方法
pushNewScreenのパラメータ 「pageTransitionAnimation」 で画面遷移のアニメーションを設定することが出来ます。
| PageTransitionAnimation.cupertino (デフォルト) |
PageTransitionAnimation.slideUp |
|---|---|
 |
 |
つまづいた点
ダイアログからの画面遷移(BuildContextの重複)
showDialogでダイアログを実装する際、以下のようなダイアログからの画面遷移でつまづきました。
- 「キャンセル」を押すとダイアログが閉じる
- 「はい」を押すとダイアログが閉じ、前の画面(green_top_page)へ戻る
原因は、Navigator.popの引数のcontextが重複しているためでした。
そのため、下記のように書き換えることで無事に思い通りの画面遷移ができるようになりました。
Widget build(BuildContext context) {
return Scaffold(
appBar: AppBar(
title: const Text(
'Green Detail',
),
),
body: Container(
height: double.infinity,
width: double.infinity,
color: Colors.green,
child: Column(
children: [
const SizedBox(
height: 260,
),
const Text('Green Detail',
style: TextStyle(fontSize: 32, color: Colors.white)),
TextButton(
child: Container(
padding: const EdgeInsets.all(8),
color: Colors.white,
child: const Text(
'Show Dialog',
style: TextStyle(
color: Colors.green,
fontSize: 24,
),
)),
onPressed: () {
showDialog<AlertDialog>(
context: context,
+ builder: (contextOfDialog) {
- builder: (context) { // ←の「context」の名称を変更
return AlertDialog(
title: const Text('ダイアログ'),
content: const Text('Green Topまで戻りますか?'),
actions: <Widget>[
TextButton(
child: const Text('キャンセル'),
onPressed: () {
+ Navigator.pop(contextOfDialog);
- Navigator.pop(context);
},
),
TextButton(
child: const Text('はい'),
onPressed: () async {
+ Navigator.pop(contextOfDialog);
+ Navigator.pop(context);
- int count = 0;
- Navigator.popUntil(context, (_) => count++ >= 2);
},
),
]);
},
);
}),
],
),
));
}
参考
おわりに
persistent_bottom_nav_bar_v2はとても使いやすい印象を受けました。
様々なデザインのbottomNavigationBarを使えるだけでなく、bottomNavigationBarを残したままの画面遷移も簡単に実装することができますので、是非使ってみてください!
また、もし記事内で至らない部分がありましたらご指摘いただけるととても嬉しいです。
ご覧いただきありがとうございました!
Discussion