MAUIでアプリ作成(1)


MAUIサンプル
MAUIでのアプリ作成を行いたくて、少しずつお勉強
サンプルを作成するのが一番なので、Microsoft公式のURLを見て動作を確認しました。
時計の表示
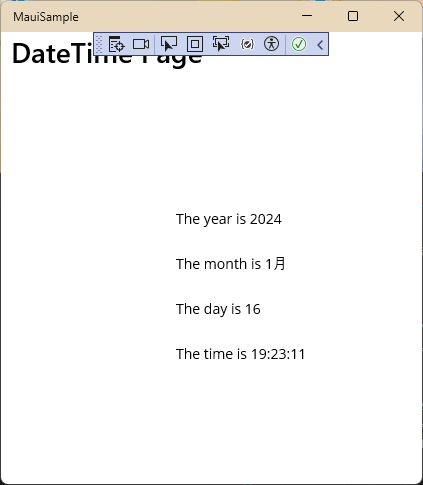
System.DateTimeをBindingして、日時と時刻を表示する。表示の更新もしないので、あまり有用ではないけど、まずは簡単のものから。
実装
プロジェクトを新規作成
プロジェクトの種類は、「.NET MAUIアプリ」を選択
検索窓に「maui」とか入力すると探しやすい

作成されたプロジェクト内の以下のファイルを修正していく。コードをコピペでOK
MainPage.xaml
<?xml version="1.0" encoding="utf-8" ?>
<ContentPage xmlns="http://schemas.microsoft.com/dotnet/2021/maui"
             xmlns:x="http://schemas.microsoft.com/winfx/2009/xaml"
             xmlns:sys ="clr-namespace:System;assembly=netstandard"
             x:Class="MauiSample.MainPage"
             Title="DateTime Page">
    <VerticalStackLayout BindingContext="{x:Static sys:DateTime.Now}"
                         Spacing="25" Padding="30.0"
                         VerticalOptions="Center" HorizontalOptions="Center">
        <Label Text="{Binding Year,StringFormat='The year is {0}'}" />
        <Label Text="{Binding StringFormat='The month is {0:MMMM}'}" />
        <Label Text="{Binding Day,StringFormat='The day is {0}'}" />
        <Label Text="{Binding StringFormat='The time is {0:T}'}" />
    </VerticalStackLayout>

</ContentPage>
動作させてみる。
まずはAndroidでの実施結果

次にWindowsでの実施結果
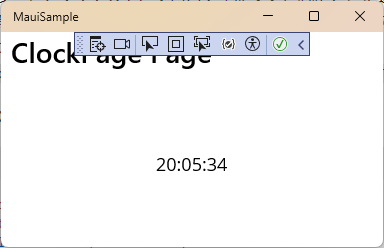
時計の表示(更新あり)
1秒毎の処理で時刻を更新する。プロパティのバインドを理解できる。
実装
新規クラスを追加する

クラス名は、「ClockViewModel」として、クラスの中は以下の実装とする
using System.ComponentModel;
using System.Runtime.CompilerServices;

namespace MauiSample
{
    internal class ClockViewModel : INotifyPropertyChanged
    {
        public event PropertyChangedEventHandler? PropertyChanged;

        private DateTime _dateTime;
        private Timer _timer;

        public DateTime DateTime
        {
            get => _dateTime;
            set {
                if(_dateTime != value)
                {
                    _dateTime = value;
                    OnPropertyChanged();
                }
            }
        }
        public ClockViewModel()
        {
            this.DateTime = DateTime.Now;
            _timer = new Timer(new TimerCallback((s)=> this.DateTime = DateTime.Now),
                null,TimeSpan.Zero,TimeSpan.FromSeconds(1));
        }
        ~ClockViewModel() => _timer.Dispose();

        private void OnPropertyChanged([CallerMemberName]string name = "") =>
            PropertyChanged?.Invoke(this,new PropertyChangedEventArgs(name));
    }
}
デストラクタ初めて書いたよ。
ClockViewModelのコンストラクタ内に記述した、_timer変数の代入処理がキモかと。ここで1秒毎の処理を記述している。
TimerはThreading.Timerを使用。詳細は以下のURLを参照
オーバーロードは複数用意されているが、ソースで使用している物は以下の通りの引数
| 引数 | 型 | 内容 |
|---|---|---|
| 第1引数 | TimerCallback | コールバック関数 |
| 第2引数 | Object | コールバック関数内で使用する情報 |
| 第3引数 | int | コールバックを読み出す前の遅延時間[ms] |
| 第4引数 | int | コールバックを読み出す時間間隔[ms] |
つまり、1[s]毎にDateTime変数を更新している。
このDateTime変数を表示するために、MainPage.xamlファイルを変更する
<?xml version="1.0" encoding="utf-8" ?>
<ContentPage xmlns="http://schemas.microsoft.com/dotnet/2021/maui"
             xmlns:x="http://schemas.microsoft.com/winfx/2009/xaml"
             xmlns:local="clr-namespace:MauiSample"
             x:Class="MauiSample.MainPage"
             Title="ClockPage Page">
    <ContentPage.BindingContext>
        <local:ClockViewModel />
    </ContentPage.BindingContext>
    <Label Text="{Binding DateTime,StringFormat='{0:T}'}"
           FontSize="18"
           HorizontalOptions="Center"
           VerticalOptions="Center" />
</ContentPage>
今回は、xmlnsの設定をsysではなくて、localとしている。
loacalの指定で、プロジェクト内のクラスを参照できるみたい。
ContentPage.BindingContextタグで、作成したクラスを選択すると、次のLabelコントロールにDateTimeプロパティをBindingでOKみたいです。DateTimeを入力する際にインテリセンスが効くのがすごいね。
Windowsで動作確認しました。
もちろんAndroid環境でも動きます。
どちらでもきちんと1[s]毎に時刻が更新されています。
Bindの際に、プロパティの中のさらにプロパティにアクセスする場合でもピリオドでアクセスできる様です。
<Label Text="{Binding DateTime.Second,StringFormat='{0:T}'}"
DateTimeプロパティ内の秒数だけを表示する場合には、DateTime.Secondと記述出来る。
続く
Discussion