Shopify テーマ開発の世界を歩いてみる 🫗
テーマ開発「完全に理解した」と言えるくらいには慣れていきたいので、メモや躓いたところなどを書いていきます。
Shopify CLI は心の友
基本的に Shopify テーマ開発で管理画面一つではできないような少し複雑なことをやろうとすると、CLIの導入は必須のように感じる。開発手法の話になるが、複数人開発とかは CLI は必須かもしれない。
Shopify CLI のインストール方法は公式を参考に。
コマンドはここを参照するのが良さそう。
バージョンの確認。
$ shopify version
Current Shopify CLI version: 3.45.0
💡 Version 3.49.4 available!
テーマのインストールと実行
テーマの作成は shopify theme init で。デフォルトでは Dawn テーマが読み込まれる。
$ shopify theme init
?  Name of the new theme:
✔ maeda-test-store
Cloning https://github.com/Shopify/dawn.git into ${YOUR_CURRENT_DIR}/maeda-test-store
開発環境でテーマを実行。
$ shopify theme dev --store https://${YOUR_SHOPI_ID}.myshopify.com/
ブラウザでの確認は CLI に表示される Customize your theme at the theme editor リンクから。
テーマを本番へ反映させる
$ shopify theme push
> 1. Dawn [live]
  2. Dawn [unpublished]
  3. Development (c990ce-Seiyanonotopasokon) [development] [yours]

? Select theme to push to xn-r8j8auyl1k.myshopify.com (You chose: Dawn [live])
? Are you sure you want to push to your live theme? (You chose: yes)
┏━━ Pushing theme files to Dawn (#161139523860) on xn-r8j8auyl1k.myshopify.com ━━━━━━━━━━━━━━━━━━━━━━━━━━━━━━━━━━━━━━━━━━━━━━━━━━━━━━━━━━━━━━━━━━━━━━━━━━━━━━━━━━━━━━━━━━━━━━━━━━━━━━━━━━━━━━━━━━━━━━
┃                                                                                                                                                                                                100%
┗━━━━━━━━━━━━━━━━━━━━━━━━━━━━━━━━━━━━━━━━━━━━━━━━━━━━━━━━━━━━━━━━━━━━━━━━━━━━━━━━━━━━━━━━━━━━━━━━━━━━━━━━━━━━━━━━━━━━━━━━━━━━━━━━━━━━━━━━━━━━━━━━━━━━━━━━━━━━━━━━━━━━━━━━━━━━━━━━━━━━━━━━ (24.13s) ━━
✓ Your theme was pushed successfully

  View your theme:
  https://xn-r8j8auyl1k.myshopify.com/

  Customize this theme in the Theme Editor:
  https://xn-r8j8auyl1k.myshopify.com/admin/themes/161139523860/editor
ステータスの種類:
- [live]:現在適用されているテーマ
- [unpublished]:下書き状態のテーマ
- [development]:開発用テーマ
反映前にテーマの情報を取得したくなったら --unpublished --json フラグで。
$ shopify theme push --unpublished --json
? Theme name
> Dawn

{"theme":{"id":161141457172,"name":"Dawn","role":"unpublished","shop":"xn-r8j8auyl1k.myshopify.com","editor_url":"https://xn-r8j8auyl1k.myshopify.com/admin/themes/161141457172/editor","preview_url":"https://xn-r8j8auyl1k.myshopify.com/?preview_theme_id=161141457172"}}
これでとりあえずローカルでの開発の準備が整った。
テーマの構造は「Theme architecture」で定義・説明されている。
この考え方に従って構築していくと幸せになれそう。
.
├── assets
├── config
├── layout
├── locales
├── sections
├── snippets
└── templates
    └── customers
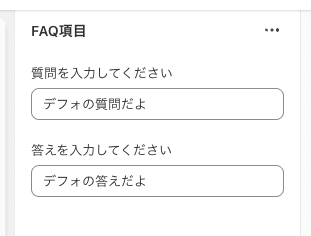
Sections Everywhere
管理画面からセクションを動的に編集できる機能。けっこう使いそうな機能。
Liquid ファイルで schema を定義して、それをビュー(HTML)側で操作できる。親要素 section は Liquid オブジェクトになる。
<section class="page-width">
  <h3>{{ section.settings.title }}</h3>
  <dl>
    {% for block in section.blocks %}
      <dt>{{ block.settings.question }}</dt>
      <dd>{{ block.settings.answer }}</dd>
    {% endfor %}
  </dl>
</section>

{% schema %}
{
  "name": "FAQ",
  "settings": [
    {
      "type": "text",
      "id": "title",
      "label": "FAQ",
      "default": "FAQたいとる"
    }
  ],
  "blocks": [
    {
      "type": "faq_item",
      "name": "FAQ項目",
      "settings": [
        {
          "type": "text",
          "id": "question",
          "label": "質問を入力してください",
          "default": "デフォの質問だよ"
        },
        {
          "type": "text",
          "id": "answer",
          "label": "答えを入力してください",
          "default": "デフォの答えだよ"
        }
      ]
    }
  ],
  "presets": [
    {"name": "FAQ"}
  ]
}
{% endschema %}

shopify populate コマンドは廃止?
テストデータを作成できる shopify populate が公式リファレンスに記載がない(CLI v3)。
$ shopify populate products --help
╭─ error ──────────────────────────────────────────────────────────────────────╮
│                                                                              │
│  Command populate:products not found.                                        │
│                                                                              │
╰──────────────────────────────────────────────────────────────────────────────╯
手動でポチポチかあ。
メタフィールド・メタオブジェクト
これらのデータの使い方次第でテーマ開発がグッと楽になる。
メタフィールド
メタオブジェクト
メタフィールドは固有のオブジェクト(商品や顧客、注文 etc...)の配下に新規の定義や要素を作成できる機能。一方のメタオブジェクトは、それら固有のオブジェクトではなく Shop オブジェクトにまで範囲を広げたもの。
メタフィールドとメタオブジェクトは組み合わせることもできる。
メタフィールド使用例
管理画面で「ネームスペースとキー」を custom.release_date と定義した場合。
{%- if product.metafields.custom.release_date.value -%}
  <p>{{ block.settings.text }}</p>
{%- endif -%}

{% schema %}
...
{
  "type": "release_date",
  "name": "発売日",
  "settings": [
    {
      "type": "text",
      "id": "text",
      "default": "発売日:",
      "label": "発売日"
    }
  ]
},
...
自律カスタム要素
Liquid のコードを追っているとたまに <product-form></product-form> みたいな HTML 標準ではないタグを目にすることがある。これは「自律カスタム要素(Web Components)」というものらしい。
ボタンやウィジェットなどの要素を JavaScript を使って独自のメソッドやプロパティ、イベントを定義できて、それをカプセル化できる機能。
要はオレオレHTMLタグを作れるって思っておけばいいのかな。
ちなみに product-form タグの定義はこんな感じの内容(最初の方だけ載せる)。
if (!customElements.get('product-form')) {
  customElements.define(
    'product-form',
    class ProductForm extends HTMLElement {
      constructor() {
        super();

        this.form = this.querySelector('form');
        this.form.querySelector('[name=id]').disabled = false;
        this.form.addEventListener('submit', this.onSubmitHandler.bind(this));
        this.cart = document.querySelector('cart-notification') || document.querySelector('cart-drawer');
        this.submitButton = this.querySelector('[type="submit"]');

        if (document.querySelector('cart-drawer')) this.submitButton.setAttribute('aria-haspopup', 'dialog');

        this.hideErrors = this.dataset.hideErrors === 'true';
      }
...
Liquid のおまじないたち
Liquid の記述方法を初めて見た時の感想、「癖が強いんじゃあ」。
タグやフィルター、オブジェクトの使い方は聖書である公式リファレンスとニラメッコ。
config の世界
ややこしそうな settings_data.json settings_schema.json の世界。
settings_schema.json はテーマ全体の設定を管理するファイル、settings_data.json は管理画面上で設定された外観や機能を保存するファイル。
以下の記事が参考になる。
設定の仕様は _schema で管理、実際の値は _data が管理。という感じなのかな?(ちょっとまだ理解が追いついてないかもしれない)
_schema の方で遊んでみる
...
{
    "name": {
      "ja": "テストです"
    },
    "settings": [
      {
        "type": "header",
        "content": {
          "ja": "ヘッダーです"
        }
      },
      {
        "type": "checkbox",
        "id": "test_check",
        "label": {
          "ja": "チェックしてください"
        },
        "default": true
      },
      {
        "type": "text",
        "id": "test_text",
        "label": {
          "ja": "入力してください"
        },
        "info": {
          "ja": "お知らせとかとか"
        }
      },
      {
        "type": "color",
        "id": "test_color_text",
        "label": {
          "ja": "色を決めてください"
        },
        "default": "#3a3a3a"
      }
    ]
},
...
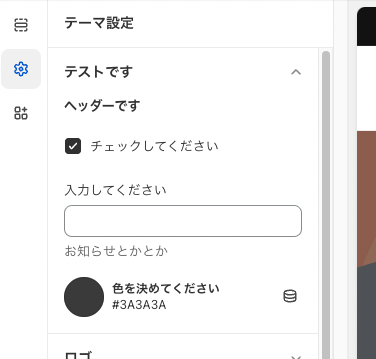
上で定義定義した要素の値取得はこんな感じ。test_text の場合。
{{ settings.test_text }}
config まわりのもうちょっと深そうな話
settings_data.json の編集は計画的に
テーマエディターから変更が入ると、settings_data.json の値が更新されるので、基本的に開発者側で settings_data.json をいじるのは避けたほうがよさそう。
翻訳は DeepL 先生。
Gotchas when tracking changes
One thing to keep in mind when editing or changing the settings_data.json is how you’re keeping track of changes to it, and how that works within your existing workflow.
Because this file is updated by the theme editor, I often see that it is listed as untracked in version control; whether it’s listed in a .gitignore file, as a file to ignore in a config.yml (Theme Kit), or an .env file (Slate). When it is untracked, the changes you make directly in the file can easily be overwritten by the theme editor, or vice versa, if the changes aren’t pulled down from your store and committed/tracked before starting a new feature.
変更を追跡する際のゴッチャ
settings_data.jsonを編集したり変更したりするときに気をつけなければならないことのひとつは、settings_data.jsonへの変更をどのように追跡するか、そしてそれが既存のワークフローの中でどのように機能するかということです。
このファイルはテーマエディターによって更新されるため、バージョン管理で未追跡と表示されることがよくあります。.gitignoreファイルや、config.yml(Theme Kit)で無視するファイルとして表示されたり、.envファイル(Slate)で表示されたりします。.envファイル(Slate)などです。untrackedになっていると、新しい機能を開始する前にストアからコミット/trackされていない場合、そのファイルに直接加えた変更がテーマエディターによって簡単に上書きされたり、逆に上書きされたりする可能性があります。
ゴッチャ。
Templates の管理は2種類
Tempates ファイルは「JSON」「Liquid」の2種類があります。特にJSON テンプレートは「Online Store 2.0」で導入された、開発者体験とユーザー体験のどちらも向上する素晴らしい機能。
JSON テンプレート
これは簡単に言うと読み込むセクションを JSON で管理できるようになると思っておけばよさそう。現状の Dawn テーマでは、ほとんどが JSON テンプレート(.json)で記述されている。
├── templates
│   ├── 404.json
│   ├── article.json
│   ├── blog.json
│   ├── cart.json
│   ├── collection.json
│   ├── customers
│   │   ├── account.json
│   │   ├── activate_account.json
│   │   ├── addresses.json
│   │   ├── login.json
│   │   ├── order.json
│   │   ├── register.json
│   │   └── reset_password.json
│   ├── gift_card.liquid
│   ├── index.json
│   ├── list-collections.json
│   ├── page.contact.json
│   ├── page.json
│   ├── password.json
│   ├── product.json
│   └── search.json
少しさわってみる
これも聖書を参考に。
雛形はこんな感じ。
{
  "wrapper": "div#div_id.div_class[attribute-one=value]",
  "sections": {
    "main": {
      "type": "main-product"
    }
  },
  "order": [
    "main"
  ]
}
出力されるタグはこんな感じ。
<div id="div_id" class="div_class" attribute-one="value">
    <!-- main-product.liquid section が描画される -->
</div>
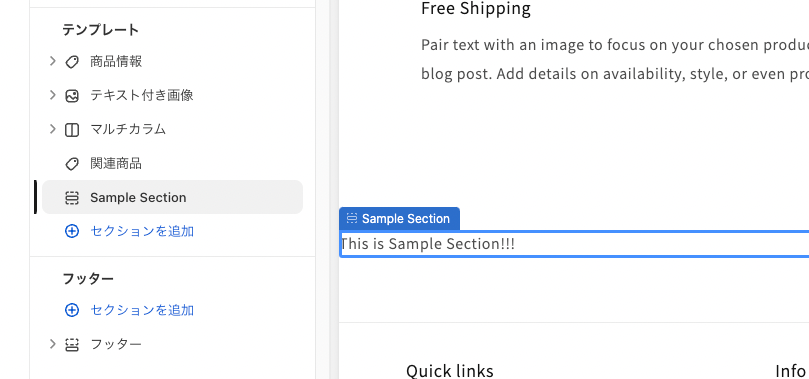
ノってきたので商品ページに変更を加えてみる
商品ページなので対象は templates/product.json で、そこに新規で sample というセクションを登録。
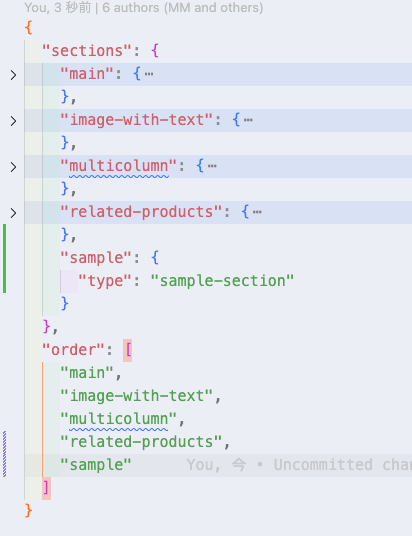
templates/product.json
テンプレートに沿ってsample-section.liquid を作ります。今回はテストなので文字を表示するだけ。
sections/sample-section.liquid
その他
下の記事の「sections 属性」で書かれているように、config/settings_data.json と同じ役割を果たすということなので、肥大化しがちな config/settings_data.json を上手く管理できそうな気配。これもコロケーションの概念なのかしら。
sections属性には、セクション ID をキーとし、セクションデータを値とするオブジェクトを記述します。これは、従来のconfig/settings_data.jsonと同じ役割を果たしており、その時のテーマの状態が記録されます。
テーマ開発時のコードのバージョン管理について
GitHub 連携は簡単
管理画面からポチポチするだけでいける。
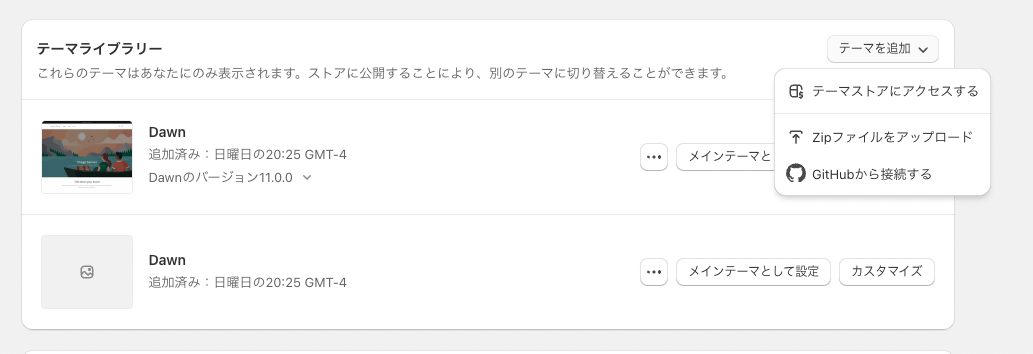

やりたいこと
ブランチ毎に「テーマライブラリ」にブランチが表示されて動作確認できたらいいなあ(下の画像みたいに)。現状だとブランチ作ったら毎回手動で接続しないといけない。
↓デプロイ時に Lighthouse を仕込む方法が公式にあるから、たぶん GitHub Actions とか使えばいいのかな。
テーマライブラリーでブランチ毎に管理したい (未完成)
上で書いた「やりたいこと」をやろうとしたけど上手くいかなかったけど、メモを残しておく。
-
SHOPIFY_STORE_URL:自分のストアURL -
SHOPIFY_THEME_PASSWORD:Theme Access で取得 -
SHOPIFY_THEME_ID:テーマカスタマイズページのURLの数字 etc...- 例:
https://admin.shopify.com/store/[YOUR_STORE_URL]/themes/xxxxxxxxxxxxx/editor - この ID は CLI とか他の方法でも取れる
- 例:
これらの定数を GitHub Actions の Secrets 設定ページで登録しておく。
作ってみたアクション。
name: Deploy Shopify Theme

on:
  push:
    branches:
      - '**'

jobs:
  deploy:
    runs-on: ubuntu-latest

    steps:
    - name: Checkout repository
      uses: actions/checkout@v2

    - name: Setup Shopify Theme Kit
      run: |
        curl -s https://shopify.dev/themekit.py | sudo python3
      shell: bash

    - name: Deploy theme to Shopify
      run: |
        theme deploy --password=${{ secrets.SHOPIFY_THEME_PASSWORD }} --store=${{ secrets.SHOPIFY_STORE_URL }} --themeid=${{ secrets.SHOPIFY_THEME_ID }}
      shell: bash
ログにログイン情報が無効的なものが出てるのでキーまわりがおかしそう。
[API] Invalid API key or access token (unrecognized login or wrong password)
SHOPIFY_THEME_PASSWORD の値が違うのかな?
ちなみにローカル環境でも同じエラーが出たけど、theme get --list コマンドは正常に動作した。
ステップ「Setup Shopify Theme Kit」でインストールしてるツール、Shopify Theme Kit にしているけど Shopify CLI ならどうなのだろうか。shopify theme push すると対話モードになるからそれを突破する方法があればなんとかなりそうだけど、Shopify Theme Kit でやるのが定石な雰囲気。
コマンドを実行すると config.yml が存在しない警告が出てるんだけど、それも関係してる?
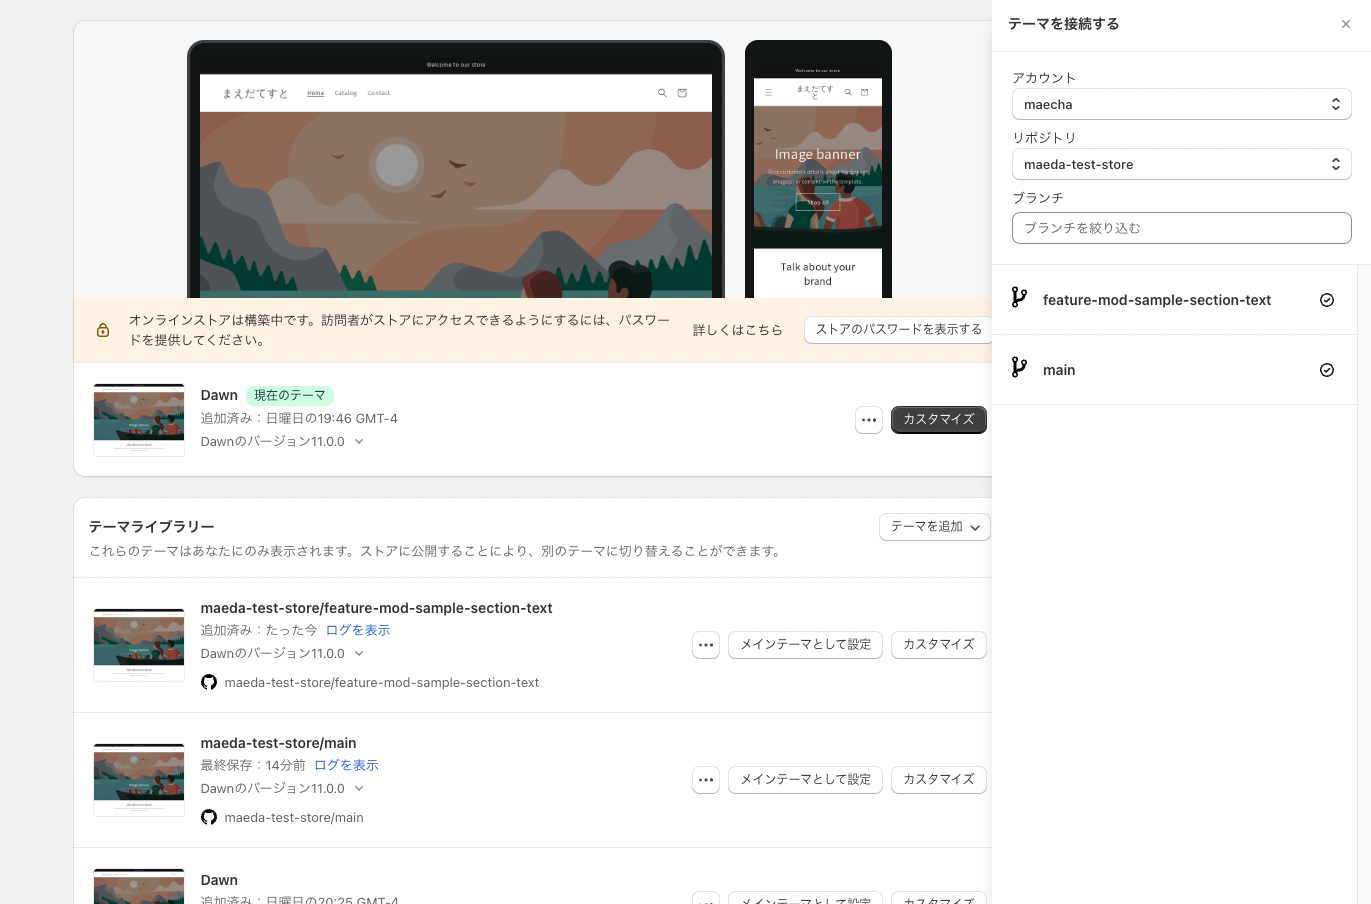
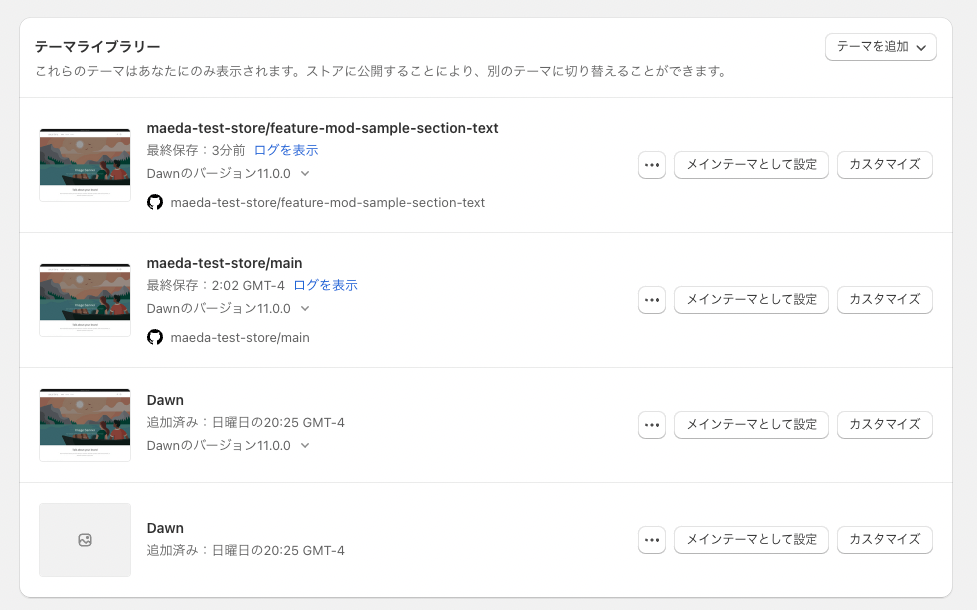
追記:右往左往しながらなんとかやりたいことができたっぽい
ブランチ毎に「テーマライブラリ」にブランチが表示されて動作確認できるようになった。
追加でやったことは、
-
config.ymlを作った - GitHub Actions のコードを少しいじった
- スクリプトの中でテーマ ID を取ってきて、それを
theme deployするときに利用
- スクリプトの中でテーマ ID を取ってきて、それを
以下は修正されたスクリプト。
name: Deploy Shopify Theme

on:
  push:
    branches:
      - '**'

jobs:
  deploy:
    runs-on: ubuntu-latest

    steps:
    - name: Checkout repository
      uses: actions/checkout@v2

    - name: Setup Shopify Theme Kit
      run: |
        curl -s https://shopify.dev/themekit.py | sudo python3
      shell: bash

    - name: Get theme ID by branch name
      id: get-theme-id
      run: |
        THEME_NAME=$(echo "${GITHUB_REF##*/}") #現在のブランチ名
        THEME_ID=$(theme get --list --password=${{ secrets.SHOPIFY_THEME_PASSWORD }} --store=${{ secrets.SHOPIFY_STORE_URL }} | grep $THEME_NAME | awk '{print $1}' | tr -d '[]') # テーマ ID を取得
        echo "THEME_ID=$THEME_ID" >> $GITHUB_ENV
      shell: bash

    - name: Deploy theme to Shopify
      run: |
        theme deploy --password=${{ secrets.SHOPIFY_THEME_PASSWORD }} --store=${{ secrets.SHOPIFY_STORE_URL }} --themeid=${{ env.THEME_ID }}
      shell: bash
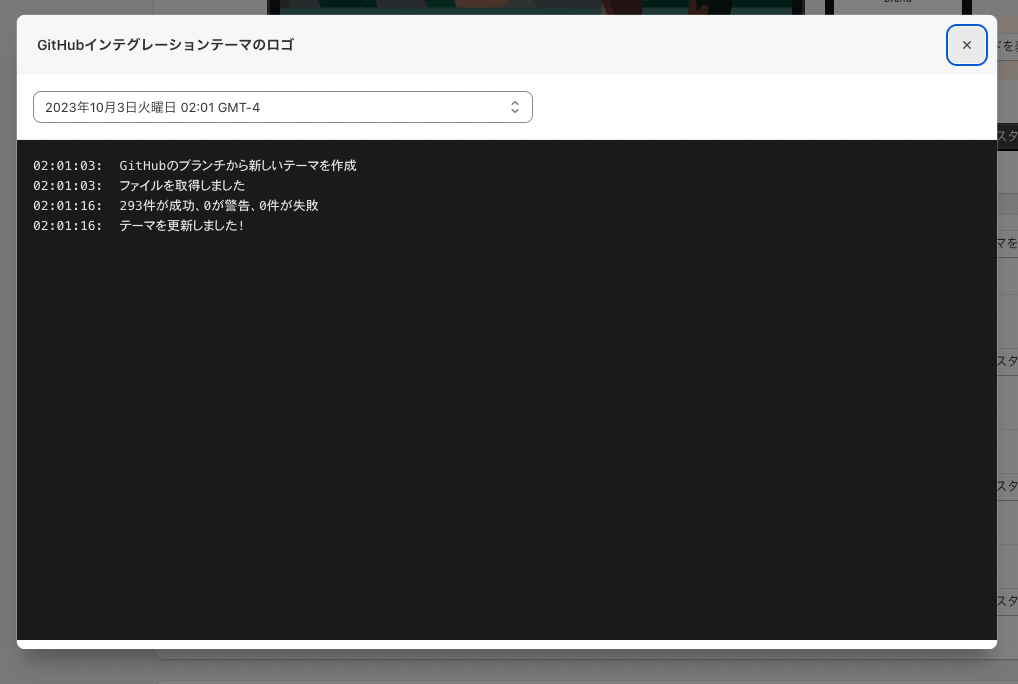
CI のログの一部。
Run theme deploy --*** --store=*** --themeid=xxxxxxxxxx
[development] 293|293 [=================================================]  100 %

[development] 293|293 [=================================================]  100 %
[development] 293 files, No Change: 293
main ブランチへのマージも試してみたら正常に機能してる。
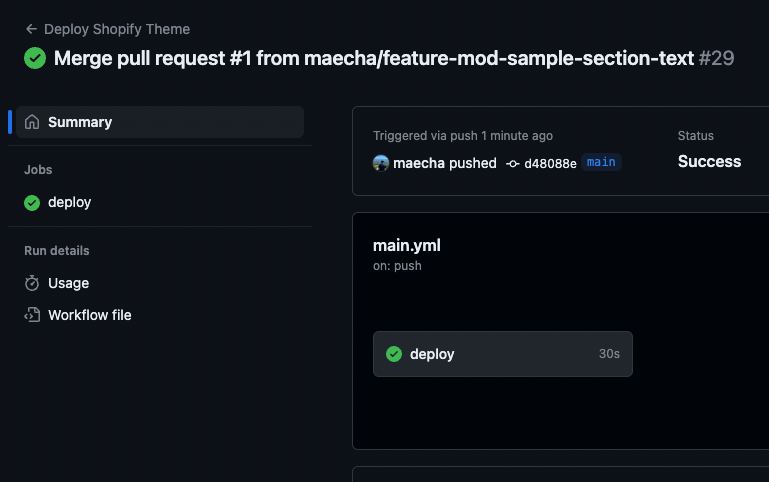
たぶん大丈夫そう。
config.yml で環境定数を利用する
config.yml に生の情報を突っ込んでそのままリモートブランチへプッシュしている記事を見かけるのですが、できたらセキュリティの観点からあまりやりたくないので、PCの環境変数から値を引っ張ってくる方法が公式であったのでそれをやってみた。
各OSで環境変数の保存先が異なるので注意。以下は macOS の場合。
自分の環境では Shopify/Themekit/variables が存在していなかったので手動で作成(たぶんこれでいいはず)。
${HOME}/Library/Application Support/Shopify/Themekit/variables
作成した variables の中に環境変数にしたい値を追加。
SHOPIFY_THEME_PASSWORD: xxxxxxxxxxxxxxxxxxx
SHOPIFY_THEME_ID: "xxxxxxxxxxxx"
SHOPIFY_STORE_URL: xxxxx.myshopify.com
config.yml の中はこんな感じ。
development:
  password: ${SHOPIFY_THEME_PASSWORD}
  theme_id: ${SHOPIFY_THEME_ID}
  store: ${SHOPIFY_STORE_URL}
ちゃんとコマンドが動いてる👌
$ theme get --list
Available theme versions:
  [aaaaa][live] Dawn
  [bbbbb] Development (c990ce-Seiyanonotopasokon)
  [ccccc] Dawn
  [ddddd] Dawn
  [eeeee] maeda-test-store/main
  [fffff] maeda-test-store/feature-mod-sample-section-tex
Liquid 開発の補助ツール
VSCode に入れている拡張機能。
Shopify Liquid Template Snippets
かなり優秀なスニペット拡張機能。例えば _schema と打つと以下のスニペットが出力される。
{% schema %}
  {
    "name": "",
    "class": "",
    "settings": [

    ]
  }
{% endschema %}
Shopify Liquid
この拡張機能は主に Liquid ファイルの整形ツール(Linter / Code Formatter)で利用している。
GitHub に機密情報をコミットしちゃったら
上の「config.yml で環境定数を利用する」で書いたように、もし間違えて GitHub に機密情報をコミットしちゃったらの対象方法をメモしておく。
このあたりは GitHub が公式で対処方法を提示してくれています。
その中で今回は「BFG Repo-Cleaner」というツールでやってみる。このツールは「GitHub 上のコミット履歴から特定の文字が含まれるコミットを削除できる」スグレモノ。
BFG Repo-Cleaner で機密情報を削除
インストールは Homebrew で入れられるお手軽さ(macOS の場合)。
$ brew update
$ brew install bfg
$ bfg --version
bfg 1.14.0

$ git --version
git version 2.40.0
詳しいコマンドの手順は公式に譲るが簡単に言うと、対象レポジトリ(今回は sample-repo.git)と同階層にあるテキストファイル(今回は passwords.txt)に記載された文字列を、コミット履歴から探してそのコミットを削除・改変、そして Git の操作履歴の更新とガベージコレクションを行う。
// `bfg` コマンド実行時のディレクトリ構造。
bfg/
├── sample-repo.git/
└── passwords.txt
コマンドは無事終了... 気になることが
コマンド実行は正常に終了し、GitHub のコミット一覧からも該当コミットが消えているのが確認できた。ただ、該当コミットの詳細ページへのアクセスは未だにできる状態だった。 また以下のメッセージが表示されていた。

これについては、以下、ChatGPT 先生のお言葉。
BFGやgit filter-branchを使用しても、コミットを完全に削除するわけではありません。実際には、指定された内容を持つコミットを書き換える操作を行います。これにより、新しいコミットIDが作成され、古いコミットIDはブランチやタグから参照されなくなります。
しかし、GitHubのURLやローカルのgitリポジトリの履歴を持っている場合、直接そのコミットIDを指定してアクセスすることは可能です。ただし、git gcコマンドを実行した後は、一定期間が経つとgitが孤立したコミットを完全に削除することがあります。
GitHubのリモートリポジトリにおいても、ガベージコレクションが周期的に実行されるため、いずれそのコミットはアクセス不可能になる可能性があります。ただし、完全にアクセス不可能になるまでの期間はGitHubの内部処理に依存します。
機密情報を含むコミットを削除した場合、URLを知っている限り、一時的にはアクセス可能な状態となりますが、セキュリティ上のリスクを最小限にするためにも、機密情報を無効化するなどの対策を検討することが推奨されます。
時間がかかるけどアクセスはできなくなるようです。心配なら GitHub に連絡して削除依頼が手っ取り早そう。
管理画面で複製したテーマへ修正内容を反映させる
テーマの修正内容を共有したいときに便利。
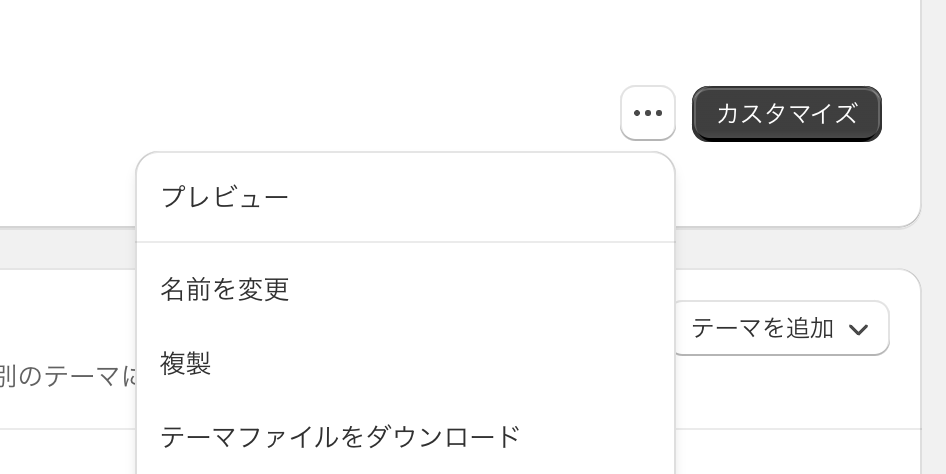
管理画面でテーマを複製する
複製したいテーマから「複製」を選択。ここはポチポチだけの作業。
コマンドラインから修正内容プッシュ
// ログイン
$ shopify theme dev --store https://${YOUR_SHOPI_ID}.myshopify.com/
// テーマ名の一覧を表示
$ shopify theme list
// テーマへの反映(共有要件次第では非公開ステータスを付ける)
$ shopify theme push --unpublished
? Theme name
> xxxxx
┏━━ Pushing theme files to xxxxx (#xxxxxxxxxx) on xxx.myshopify.com ━━━━━━━━
┃                                                                                                              100%
┗━━━━━━━━━━━━━━━━━━━━━━━━━━━━━━━━━━━━━━━━━━━━━━━━━━━━━━━━━━━━━━━━━━━━━━━━━━━━━━━━━━━━━━━━━━━━━━━━━━━━━━ (35.15s) ━━
✓ Your theme was pushed successfully

  View your theme:
  https://xxx.myshopify.com/?preview_theme_id=xxxxxxxxxx

  Customize this theme in the Theme Editor:
  https://xxx.myshopify.com/admin/themes/xxxxxxxxxx/editor
shopify theme push 実行後にテーマのプレビューと管理画面の URL が返却される。
ローカル環境の管理画面でカスタマイズを行った内容を反映させたい場合
テーマの実行コマンドに --theme-editor-sync オプションを付与することで、管理画面で行ったカスタマイズをローカル環境の config/settings_data.json に反映させることができる。
shopify theme dev --store https://${YOUR_SHOPI_ID}.myshopify.com --theme-editor-sync
実行例
$ shopify theme dev --theme-editor-sync
// 〜 管理画面でいろいろ編集! 〜 //
// `config/settings_data.json` に差分が入る //
$ shopify theme push
> テストテーマ
┏━━ Pushing theme files to テストテーマ (#xxxxxxxxx) on xxxxx.myshopify.com ━
┃                                                                                                       100%
┗━━━━━━━━━━━━━━━━━━━━━━━━━━━━━━━━━━━━━━━━━━━━━━━━━━━━━━━━━━━━━━━━━━━━━━━━━━━━━━━━━━━━━━━━━━━━━━━ (42.51s) ━━
✓ Your theme was pushed successfully

  View your theme:
  https://xxxxx.myshopify.com/?preview_theme_id=xxxxxxxxx

  Customize this theme in the Theme Editor:
  https://xxxxx.myshopify.com/admin/themes/xxxxxxxxx/editor
変更された config/settings_data.json を上のようにプッシュすることで、変更が加わったプレビューが閲覧・共有できるようになる。
特定のテーマ管理画面でカスタマイズされた内容をローカル環境に反映させたい場合
例えば下の画像にある「Debut (vintage theme)」でカスタマイズした内容を、ローカル環境に持ってきたいとき。
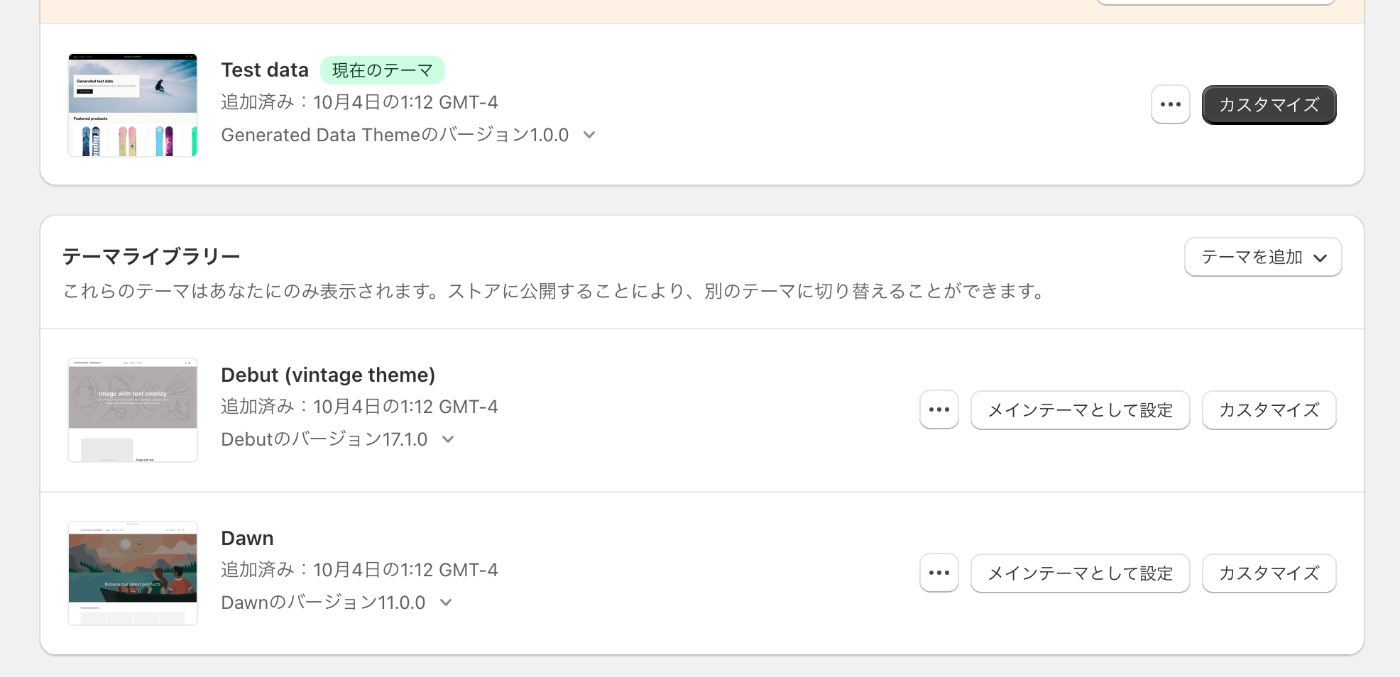
shopify theme pull コマンドで対応
shopify theme pull --store ${ストアID} // -i ${ダウンロードしたいテーマのID} でもOK
このコマンドを実行すると、引数で指定したストアの config/settings_data.json が降ってくるので、それを良しなに扱う。
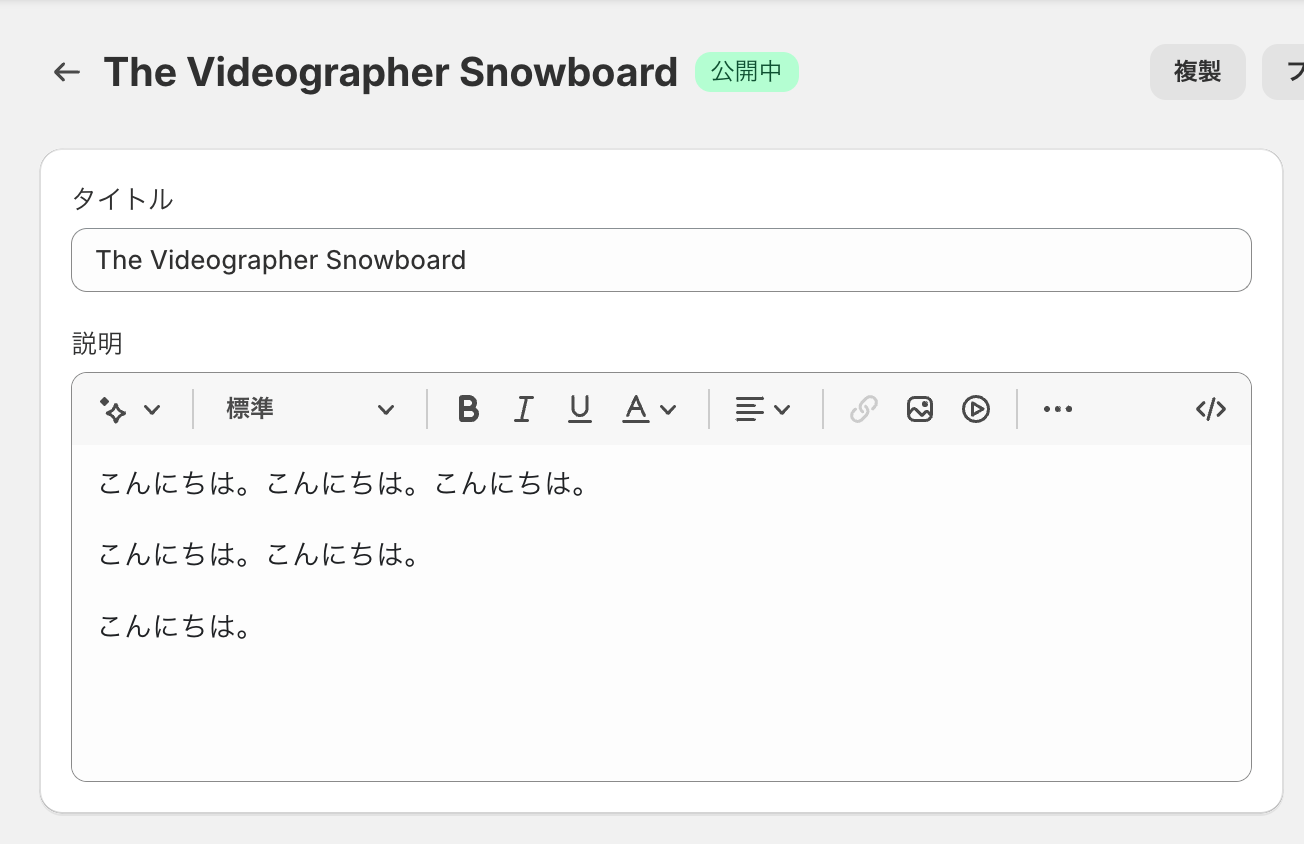
商品の詳細情報が HTML タグの外に挿入されてしまう
商品の詳細情報(以下の こんにちは。〜 の部分)を取得するには product.description を利用する。Shopify 開発をしている人だったら誰しもが打つであろう、なんてことないプロパティ。
このプロパティを p タグの中で受け取ろうと以下のように書いたところ、
<p>
  {{ product.description }}
</p>
こんな感じで出力された。
<p> </p> // `product.description` を囲っていた p タグ
<p>こんにちは。<meta charset="utf-8"><span data-mce-fragment="1">こんにちは。</span><meta charset="utf-8"><span data-mce-fragment="1">こんにちは。</span></p>
<p><span data-mce-fragment="1"><meta charset="utf-8">こんにちは。<meta charset="utf-8">こんにちは。</span></p>
<p><span data-mce-fragment="1"><meta charset="utf-8">こんにちは。</span></p>
<p></p>
外に出ちゃった。なして。そして、あまり見かけない data 属性が付いている。
data-mce-fragment ってなに?
ChatGPT 先生に確認したところ、エディタの要素のようです。
fragment(フラグメント)なので、一時保持とかそういう時に使われているものかもしれません。
data-mce-fragmentはHTMLやWeb開発における特定の属性の一つで、
主にTinyMCEというリッチテキストエディタを使ったコンテンツの編集に関連しています。
TinyMCEはWeb上で使われるリッチテキストエディタの一つで、
ユーザーがフォーマットされたテキストを入力できるようにするものです。
この data 属性は今回の不具合とあまり関係がなさそう。
divタグで受け取る
Shopify データを表示する際のマークアップは厳密にチュックされているのかもと思い、div タグを使ってみました。
<div>
  {{ product.description }}
</div>
<div>
  <p>こんにちは。<meta charset="utf-8"><span data-mce-fragment="1">こんにちは。</span><meta charset="utf-8"><span data-mce-fragment="1">こんにちは。</span></p>
  <p><span data-mce-fragment="1"><meta charset="utf-8">こんにちは。<meta charset="utf-8">こんにちは。</span></p>
  <p><span data-mce-fragment="1"><meta charset="utf-8">こんにちは。</span></p>
</div>
こんにちはー!
期待通りの表示となりました。
ということは Liquid はタグ要素の相互作用をチェックしてるように見える。マークアップは行儀良く書けということですね Shopify さん。