php-Laravel10.x-Log
今度受ける会社がphp推しなのでLaravel(ララベル)の勉強をしてみる。
公式ドキュメント
環境(適宜追加)
Windows 10
インストール
Dockerを使うといい感じになるらしいのでそちらを使う方向にする。
Laravelにはsailというものが用意されていて、こいつを使うといい感じらしい。
Windowsで使うにはまず以下2点をインストールする。他の作業でインストール済みだった。
- Docker DeskTop
- WSL2
新しいプロジェクトを作る
curl -s https://laravel.build/{AppName}| bash
curl : 指定されてURLにいろんなプロトコルでアクセスするコマンド
-s :--silent 進捗の表示をしないオプション
https://laravel.build/{AppName}: {AppName}というプロジェクトを作るためのURL?
| bash: bash実行???🤔
アプリを立ち上げてみる
cd {AppName}
./vendor/bin/sail up
アプリにアクセスしてみる
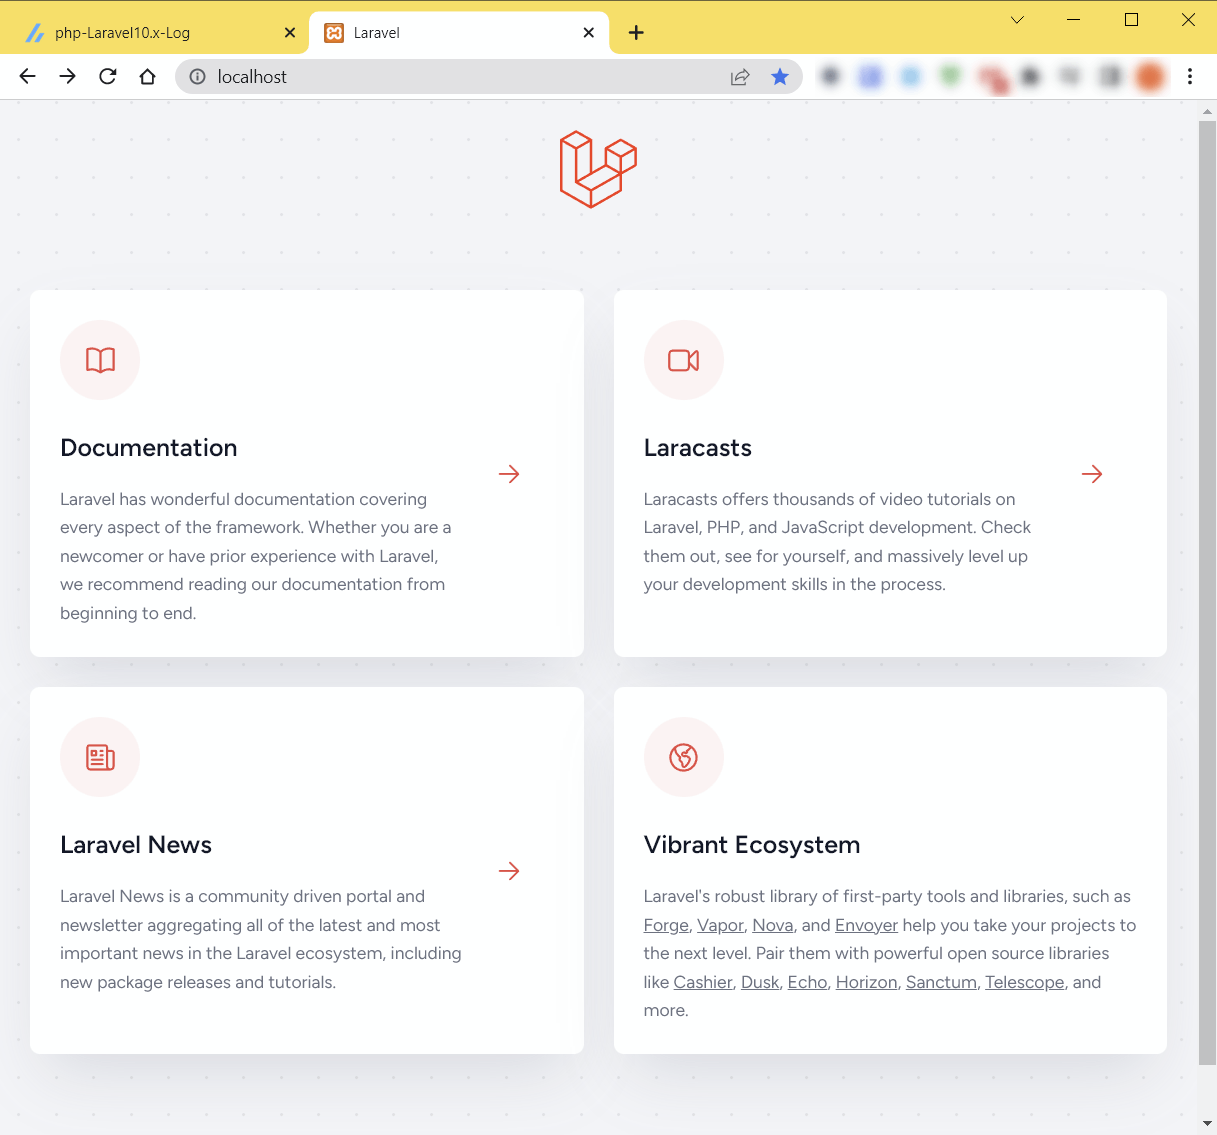
ブラウザでhttp://localhostにアクセスする。
なんかでる。
エイリアスを設定する
毎回 ./vendor/bin/sail upを打つのはめんどいのでaliasを設定する。
 vim ~/.bashrc
…
alias sail='[ -f sail ] && bash sail || bash vendor/bin/sail'
初期設定
Laravelフレームワークのすべての設定ファイルは、configディレクトリに格納されています。各オプションにコメントが記述していますので、気兼ねなくファイルに目を通し、利用可能なオプションに馴染んでください。
Laravelでは、初期の追加設定はほとんど必要ありません。すぐに開発を始められます。しかし、config/app.phpファイルとそのコメントを確認することをお勧めします。このファイルには、timezoneやlocale など、アプリケーションに応じて更新しておきたいオプションが含まれています。
Laravelの設定ファイルは configディレクトリにあるらしい。
見といた方がいいとのことなので見てみる。
Configディレクトリ
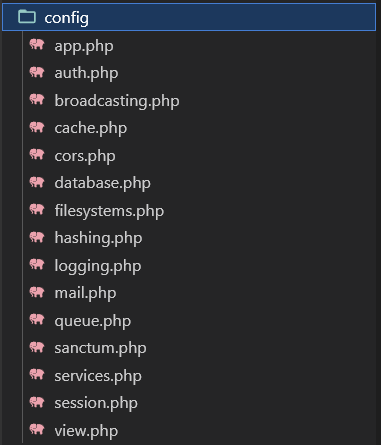
めっちゃある😥
Config/app.php
config/app.phpファイルとそのコメントは見とけ!って書いてるので見てみる。
Application Name
    /*
    |--------------------------------------------------------------------------
    | Application Name
    |--------------------------------------------------------------------------
    |
    | This value is the name of your application. This value is used when the
    | framework needs to place the application's name in a notification or
    | any other location as required by the application or its packages.
    |
    */

    'name' => env('APP_NAME', 'Laravel'),
この値は、アプリケーションの名前です。この値はフレームワークでは、アプリケーションの名前を通知やその他、アプリケーションまたはそのパッケージが必要とする場所。(By DeepL)
アプリケーションの名前を定義する場所?Titleとかになるのかな。
Application Environment
    /*
    |--------------------------------------------------------------------------
    | Application Environment
    |--------------------------------------------------------------------------
    |
    | This value determines the "environment" your application is currently
    | running in. This may determine how you prefer to configure various
    | services the application utilizes. Set this in your ".env" file.
    |
    */

    'env' => env('APP_ENV', 'production'),
この値は、アプリケーションが現在置かれている「環境」を決定するものです。で実行しています。これによって、様々な アプリケーションの利用するサービスです。.env」ファイルで設定します。(By DeepL)
プロジェクトのRootフォルダには.envというファイルがある。
このファイルの中にはURLはこれ~とか、IPアドレスこれ~とか色々書かれてる。
今回の書き方だと'production' 、本番環境用の設定を使ってね~という設定…?
(でも.envに productionの定義がねえ!なんでこいつは動いてるんだ)
Application Debug Mode
    /*
    |--------------------------------------------------------------------------
    | Application Debug Mode
    |--------------------------------------------------------------------------
    |
    | When your application is in debug mode, detailed error messages with
    | stack traces will be shown on every error that occurs within your
    | application. If disabled, a simple generic error page is shown.
    |
    */

    'debug' => (bool) env('APP_DEBUG', false),
アプリケーションをデバッグモードにすると、アプリケーション内で発生したすべてのエラーについて、スタックトレース付きの詳細なエラーメッセージが表示されます。無効にすると、シンプルな一般的なエラーページが表示されます。
ゆるコンピュータ科学ラジオで見たやつだ!!
開発中はtrueにして詳細エラー出して、本番ではfalseにしてエラーを簡易する。
Application URL
    /*
    |--------------------------------------------------------------------------
    | Application URL
    |--------------------------------------------------------------------------
    |
    | This URL is used by the console to properly generate URLs when using
    | the Artisan command line tool. You should set this to the root of
    | your application so that it is used when running Artisan tasks.
    |
    */

    'url' => env('APP_URL', 'http://localhost'),

    'asset_url' => env('ASSET_URL'),
このURLは、Artisanコマンドラインツールを使用する際に、コンソールがURLを適切に生成するために使用されます。Artisanタスクの実行時に使用されるように、これをアプリケーションのルートに設定する必要があります。
Artisan(アルチザン)はLaravelを使うときになんか色々便利なコマンドをまとめたやつ。
このオプションはそのコマンド群のためのURLを定義するためのものっぽい。
Applicaiton Timezone
    /*
    |--------------------------------------------------------------------------
    | Application Timezone
    |--------------------------------------------------------------------------
    |
    | Here you may specify the default timezone for your application, which
    | will be used by the PHP date and date-time functions. We have gone
    | ahead and set this to a sensible default for you out of the box.
    |
    */

-    'timezone' => 'UTC',
+    'timezone' => 'Asia/Tokyo',
ここでは、アプリケーションのデフォルトのタイムゾーンを指定することができます。 は、PHP の日付関数と日付時間関数で使用されます。私たちは、次のようにしました。を選択し、デフォルトで適切な値に設定してください。(by DeepL)
タイムゾーンの設定。UTCになってるのでAsia/Tokyoにしたよ
Application Locale Configuration
    /*
    |--------------------------------------------------------------------------
    | Application Locale Configuration
    |--------------------------------------------------------------------------
    |
    | The application locale determines the default locale that will be used
    | by the translation service provider. You are free to set this value
    | to any of the locales which will be supported by the application.
    |
    */

-    'locale' => 'en',
+    'locale' => 'jp',
アプリケーションロケールは、翻訳サービスプロバイダが使用するデフォルトのロケールを決定します。この値は自由に設定することができます。を、アプリケーションでサポートされるロケールのいずれかに設定します。(by DeepL)
翻訳サービスプロバイダってのが謎だけど、とりあえずjpにしとけばええやろ!
Application Fallback Locale
    /*
    |--------------------------------------------------------------------------
    | Application Fallback Locale
    |--------------------------------------------------------------------------
    |
    | The fallback locale determines the locale to use when the current one
    | is not available. You may change the value to correspond to any of
    | the language folders that are provided through your application.
    |
    */

    'fallback_locale' => 'en',
フォールバックロケールは、現在のロケールが使用できない場合に使用するロケールを決定します。この値は、アプリケーションで提供されている言語フォルダのいずれかに対応するように変更することができます。
localeが使えないときの設定。ここはenから変える必要ないかも。
Faker Locale
    /*
    |--------------------------------------------------------------------------
    | Faker Locale
    |--------------------------------------------------------------------------
    |
    | This locale will be used by the Faker PHP library when generating fake
    | data for your database seeds. For example, this will be used to get
    | localized telephone numbers, street address information and more.
    |
    */

-    'faker_locale' => 'en_US',
+    'faker_locale' => 'ja_JP',
このロケールは、Faker PHP ライブラリがデータベースシード用の偽データを生成する際に使用されます。たとえば、地域化された電話番号や住所情報などを取得する際に使用されます。(DeepL)
ダミーデータを作ってくれる機能のダミーデータをどこの国のもの?を使うか。
ここも日本にしとく。
Encryption Key
    /*
    |--------------------------------------------------------------------------
    | Encryption Key
    |--------------------------------------------------------------------------
    |
    | This key is used by the Illuminate encrypter service and should be set
    | to a random, 32 character string, otherwise these encrypted strings
    | will not be safe. Please do this before deploying an application!
    |
    */

    'key' => env('APP_KEY'),

    'cipher' => 'AES-256-CBC',
このキーはIlluminateの暗号化サービスで使用されるもので、設定する必要があります。
をランダムな32文字の文字列に変換してください。そうしないと、これらの暗号化された文字列は安全ではありません。アプリケーションをデプロイする前に、この作業を行ってください!
.envが持っている'APP_KEY'の値を'key'として定義する。cipherは暗号方式。
Maintenance Mode Driver
    /*
    |--------------------------------------------------------------------------
    | Maintenance Mode Driver
    |--------------------------------------------------------------------------
    |
    | These configuration options determine the driver used to determine and
    | manage Laravel's "maintenance mode" status. The "cache" driver will
    | allow maintenance mode to be controlled across multiple machines.
    |
    | Supported drivers: "file", "cache"
    |
    */

    'maintenance' => [
        'driver' => 'file',
        // 'store'  => 'redis',
    ],
これらの設定オプションは、Laravelの「メンテナンスモード」の状態を決定し、管理するために使用するドライバを決定します。キャッシュドライバを使用すると、複数のマシンでメンテナンスモードを制御することができます。(by DeepL)
?🤔
Autoloaded Service Providers
    /*
    |--------------------------------------------------------------------------
    | Autoloaded Service Providers
    |--------------------------------------------------------------------------
    |
    | The service providers listed here will be automatically loaded on the
    | request to your application. Feel free to add your own services to
    | this array to grant expanded functionality to your applications.
    |
    */

    'providers' => [

        /*
         * Laravel Framework Service Providers...
         */
        Illuminate\Auth\AuthServiceProvider::class,
        Illuminate\Broadcasting\BroadcastServiceProvider::class,
        Illuminate\Bus\BusServiceProvider::class,
        Illuminate\Cache\CacheServiceProvider::class,
        Illuminate\Foundation\Providers\ConsoleSupportServiceProvider::class,
        Illuminate\Cookie\CookieServiceProvider::class,
        Illuminate\Database\DatabaseServiceProvider::class,
        Illuminate\Encryption\EncryptionServiceProvider::class,
        Illuminate\Filesystem\FilesystemServiceProvider::class,
        Illuminate\Foundation\Providers\FoundationServiceProvider::class,
        Illuminate\Hashing\HashServiceProvider::class,
        Illuminate\Mail\MailServiceProvider::class,
        Illuminate\Notifications\NotificationServiceProvider::class,
        Illuminate\Pagination\PaginationServiceProvider::class,
        Illuminate\Pipeline\PipelineServiceProvider::class,
        Illuminate\Queue\QueueServiceProvider::class,
        Illuminate\Redis\RedisServiceProvider::class,
        Illuminate\Auth\Passwords\PasswordResetServiceProvider::class,
        Illuminate\Session\SessionServiceProvider::class,
        Illuminate\Translation\TranslationServiceProvider::class,
        Illuminate\Validation\ValidationServiceProvider::class,
        Illuminate\View\ViewServiceProvider::class,

        /*
         * Package Service Providers...
         */

        /*
         * Application Service Providers...
         */
        App\Providers\AppServiceProvider::class,
        App\Providers\AuthServiceProvider::class,
        // App\Providers\BroadcastServiceProvider::class,
        App\Providers\EventServiceProvider::class,
        App\Providers\RouteServiceProvider::class,

    ],
ここに掲載されているサービスプロバイダーは、アプリケーションへのリクエストで自動的に読み込まれます。この配列に独自のサービスを追加して、アプリケーションに拡張機能を付与することも可能です。
アプリケーションで共通で使いたいクラスがあればここで追加できる。
Class Aliases
    /*
    |--------------------------------------------------------------------------
    | Class Aliases
    |--------------------------------------------------------------------------
    |
    | This array of class aliases will be registered when this application
    | is started. However, feel free to register as many as you wish as
    | the aliases are "lazy" loaded so they don't hinder performance.
    |
    */

    'aliases' => Facade::defaultAliases()->merge([
        // 'ExampleClass' => App\Example\ExampleClass::class,
    ])->toArray(),
このクラス別名の配列は、本アプリケーションを起動したときに登録されます。エイリアスは "遅延ロード "されるため、パフォーマンスの妨げになることはありませんが、好きなだけ登録することができます。
アプリケーションで共通で使いたいクラスがあればここで追加できる…。
あれ?Autoloaded Service Providersとの違いはなんだ…。
リクエストに含まれるかどうかの違い?
見終えたゾ!

Laravel Bootcamp
curl -s "https://laravel.build/chirper" | bash
phpコマンドとかArtisanコマンドとかnpmコマンドとかは直接実行せずにsail経由で実行する。
./vendor/bin/sail php --version
./vendor/bin/sail artisan --version
./vendor/bin/sail composer --version
./vendor/bin/sail npm --version
Breeze というHTMLテンプレート(?)をインストールする。
sail composer require laravel/breeze --dev
sail:Laravelが用意した便利コマンドたち
composer: phpの依存関係とか管理しながらライブラリ入れてくれるやつ
├require: 必須なライブラリとして指定?
├ laravel/breeze:ライブラリの名前
└ --dev: 開発環境向けの定義
Vueをインストールする?
sail artisan breeze:install vue
インストールしたやつを色々準備する
sail npm run dev
🤔:npm run devって何?
🤖:
npm run dev は、Node.js によって提供されるパッケージマネージャーである npm を使って、Laravel アプリケーションの開発時に必要な前処理を実行するコマンドです。
具体的には、npm run dev コマンドは、webpack.mix.js ファイルを読み込み、定義されたタスク(主に CSS や JavaScript のコンパイル、圧縮、最適化など)を実行します。これにより、Laravel アプリケーションを開発する際に必要なフロントエンドのリソースを事前に処理し、ブラウザ上での表示や動作に必要なファイルを生成することができます。
npm run dev コマンドを実行するには、Node.js と npm がインストールされている必要があります。また、webpack.mix.js ファイルがプロジェクトルートに存在する必要もあります。通常、Laravel アプリケーションを新規に作成する場合には、npm install コマンドを実行して必要なパッケージをインストールし、その後に npm run dev コマンドを実行することが一般的です。
ブラウザ(http://localhost)開く→開かん!😥
migrateする
sail artisan migrate
ブラウザ(http://localhost)開く→開かん!😥
なんかポート付きURL(http://localhost:5173/)あるから押して見る→開いた。

これは、あなたのLaravelアプリケーションにHot Module Replacementを提供するVite開発サーバーです。
Laravelアプリケーションにアクセスするには、ローカル開発サーバーを実行する必要があります。
npm runで起動したのはなんかあかん?🤔
sail up -dしてみる。
なんか右上に増えてる。
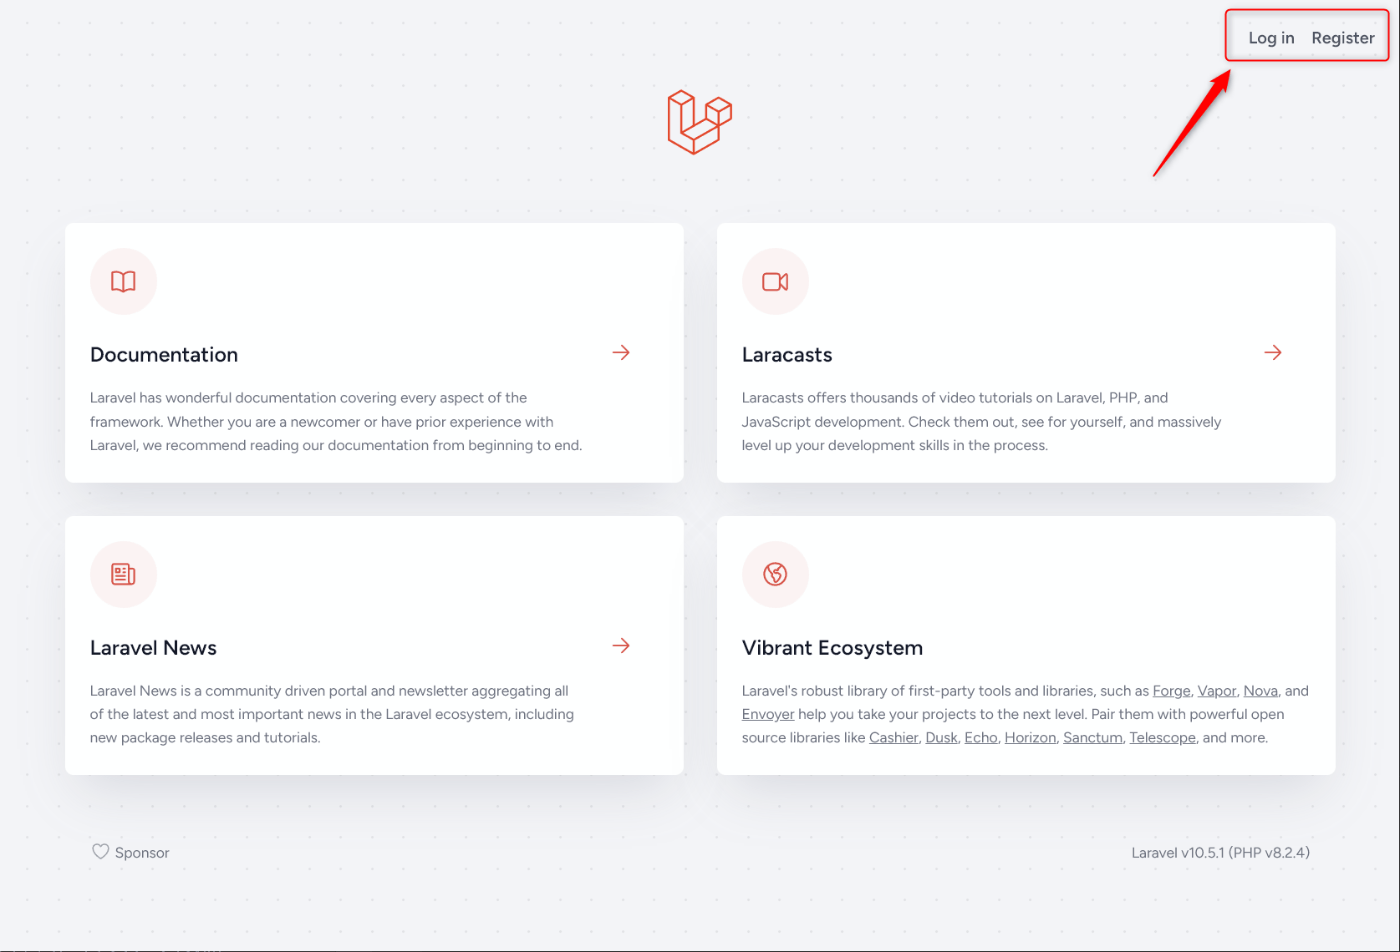
Login 押してみる
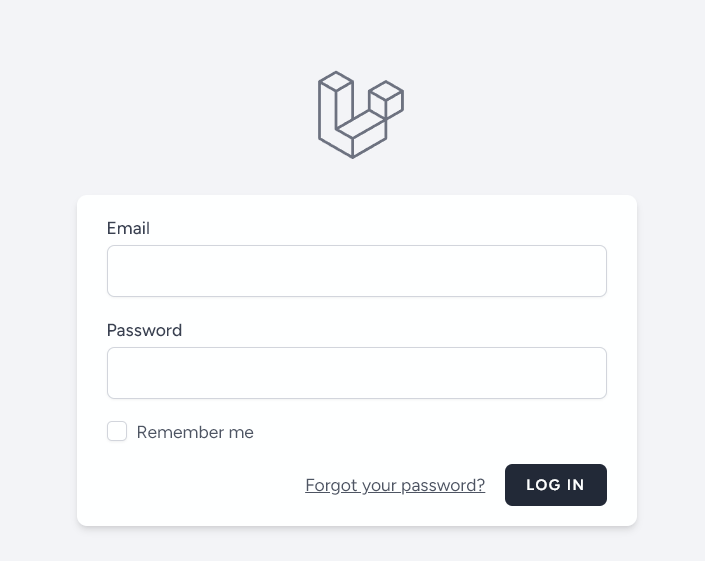
当然、何も登録してないのでログインできない
のでRegisterにいってみる
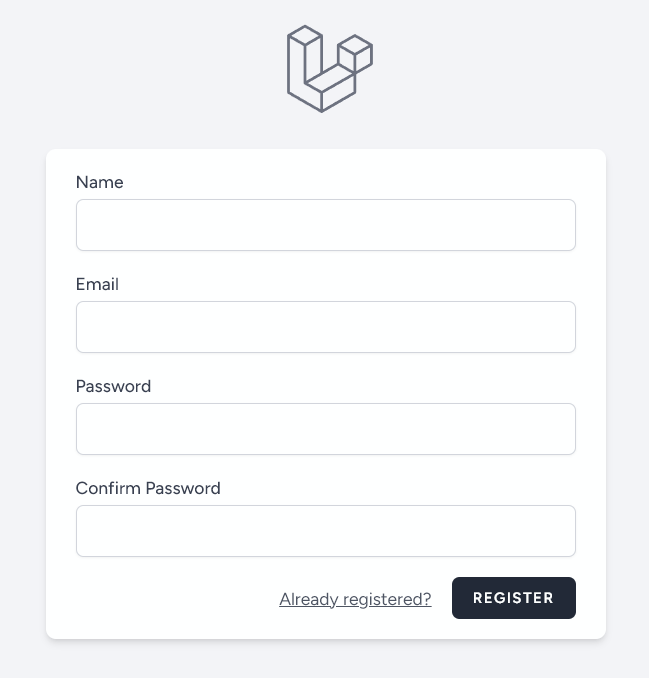
登録画面が表示された
適当にメアドとパスワードをいれて登録してみる
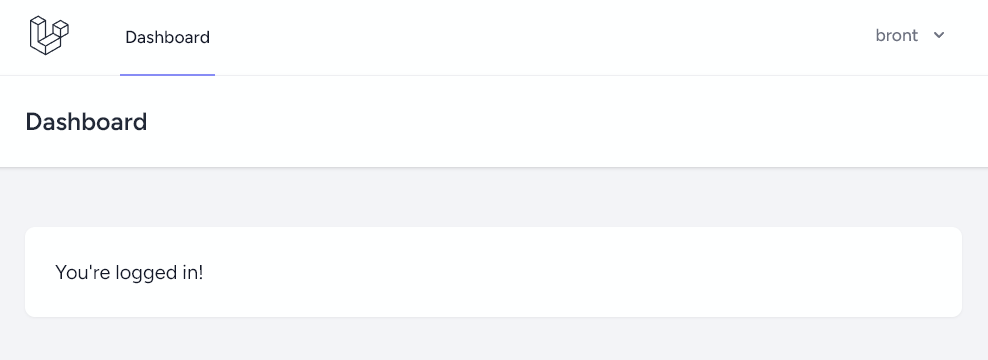
ログインできた。
そもそもインストールしたbleezeってなんなん。なんでログイン画面と登録画面ができてるんだ…??
Laravel Breezeは、ログイン、ユーザー登録、パスワードリセット、メール確認、パスワード確認など、すべての認証機能を最小かつシンプルにLaravelへ実装したものです。さらに、Breezeには、ユーザーが名前、電子メールアドレス、パスワードを更新できるシンプルな「プロファイル」ページが含まれています。
naruhodo.
Chirps?を投稿できるサイトを作るには、まずModel,Migrations,controllersをつくる必要がある。
Model:モデルは、データベースのテーブルと対話するための、強力で楽しいインターフェイスを提供します。
Migrations:マイグレーションによって、データベースのテーブルを簡単に作成したり変更したりすることができます。また、アプリケーションを実行するすべての場所で、同じデータベース構造が存在することを保証します。
Controllers:コントローラーは、お客様のアプリケーションに対して行われたリクエストを処理し、レスポンスを返す責任を負います。
Model,Migration,Controllerを作るコマンド
sail artisan make:model -mrc Chirp
make:model モデルを作るための指定コマンド
-m : マイグレーションも作る(create tableっぽいやつ)
-c:コントローラーも作る
-r: -cオプションだけだと空っぽのコントローラーを作るが-rをつけるとそれっぽい関数を持ったコントローラーを作ってくれる

Model(Chirp.php,create_chirps_table.php,ChirpController.pnpが作られた)
php:app/Models/Chirp.php
<?php

namespace App\Models;

use Illuminate\Database\Eloquent\Factories\HasFactory;
use Illuminate\Database\Eloquent\Model;

class Chirp extends Model
{
    use HasFactory;
}
php:app/Http/Controllers/ChirpController.php
<?php

namespace App\Http\Controllers;

use App\Models\Chirp;
use Illuminate\Http\Request;

class ChirpController extends Controller
{
    /**
     * Display a listing of the resource.
     */
    public function index()
    {
        //
    }

    /**
     * Show the form for creating a new resource.
     */
    public function create()
    {
        //
    }

    /**
     * Store a newly created resource in storage.
     */
    public function store(Request $request)
    {
        //
    }

    /**
     * Display the specified resource.
     */
    public function show(Chirp $chirp)
    {
        //
    }

    /**
     * Show the form for editing the specified resource.
     */
    public function edit(Chirp $chirp)
    {
        //
    }

    /**
     * Update the specified resource in storage.
     */
    public function update(Request $request, Chirp $chirp)
    {
        //
    }

    /**
     * Remove the specified resource from storage.
     */
    public function destroy(Chirp $chirp)
    {
        //
    }
}
yyyy_mm_dd_hhmmss_create_chirps_table.php
<?php

use Illuminate\Database\Migrations\Migration;
use Illuminate\Database\Schema\Blueprint;
use Illuminate\Support\Facades\Schema;

return new class extends Migration
{
    /**
     * Run the migrations.
     */
    public function up(): void
    {
        Schema::create('chirps', function (Blueprint $table) {
            $table->id();
            $table->timestamps();
        });
    }

    /**
     * Reverse the migrations.
     */
    public function down(): void
    {
        Schema::dropIfExists('chirps');
    }
};
Routingを追加する
ルーティングの設定はroutesというフォルダにあるファイルで定義されている。
webに関するルーティングはweb.phpに記載する。
<?php

+ use App\Http\Controllers\ChirpController;
use App\Http\Controllers\ProfileController;
use Illuminate\Foundation\Application;
use Illuminate\Support\Facades\Route;
use Inertia\Inertia;

/*
|--------------------------------------------------------------------------
| Web Routes
|--------------------------------------------------------------------------
|
| Here is where you can register web routes for your application. These
| routes are loaded by the RouteServiceProvider within a group which
| contains the "web" middleware group. Now create something great!
|
*/

Route::get('/', function () {
    return Inertia::render('Welcome', [
        'canLogin' => Route::has('login'),
        'canRegister' => Route::has('register'),
        'laravelVersion' => Application::VERSION,
        'phpVersion' => PHP_VERSION,
    ]);
});

+ Route::resource('chirps', ChirpController::class)
+    ->only(['index', 'store'])
+    ->middleware(['auth', 'verified']);

Route::get('/dashboard', function () {
    return Inertia::render('Dashboard');
})->middleware(['auth', 'verified'])->name('dashboard');

Route::middleware('auth')->group(function () {
    Route::get('/profile', [ProfileController::class, 'edit'])->name('profile.edit');
    Route::patch('/profile', [ProfileController::class, 'update'])->name('profile.update');
    Route::delete('/profile', [ProfileController::class, 'destroy'])->name('profile.destroy');
});

require __DIR__.'/auth.php';
Route::resource('chirps', ChirpController::class)ChirpController.phpに定義されているindex,create,store,show,edit,update,destoryすべてのルーティングを作成する。
->only(['index', 'store']) only関数を使ってindexとstoreだけルーティングを作るようにしている。
middleware(['auth', 'verified']); 認証済みかつ、メールアドレスの確認が終わっているやつだけアクセスできるように制御する?
コントローラーを修正してHelloWorldを表示してみる。
+ use Illuminate\Http\Response;

class ChirpController extends Controller
{
    /**
     * Display a listing of the resource.
     */
-    public function index()
+   public function index(): Response
    {
-        //
+      return response('Hello World!');
    }
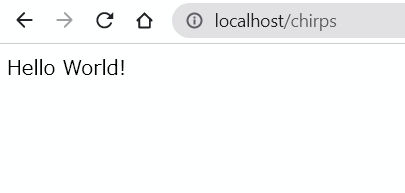
できた!
次はVueを使ってページを表示する。
まずはコントローラーを直す。
use App\Models\Chirp;
use Illuminate\Http\Request;
- use Illuminate\Http\Response;
+ use Inertia\Inertia;
+ use Inertia\Response;

class ChirpController extends Controller
{
    /**
     * Display a listing of the resource.
     */
    public function index(): Response
    {
-       return response('Hello World!');
+      return Inertia::render('Chirps/Index', []);
    }
InertiaはLaravelとVueとかReactをつなげてくれるやつ。
ResponseもInertiaに変えてる。
続いてVueファイルを作る。
<script setup>
import AuthenticatedLayout from '@/Layouts/AuthenticatedLayout.vue';
import InputError from '@/Components/InputError.vue';
import PrimaryButton from '@/Components/PrimaryButton.vue';
import { useForm, Head } from '@inertiajs/vue3';

const form = useForm({
    message: '',
});
</script>

<template>
    <Head title="Chirps" />

    <AuthenticatedLayout>
        <div class="max-w-2xl mx-auto p-4 sm:p-6 lg:p-8">
            <form @submit.prevent="form.post(route('chirps.store'), { onSuccess: () => form.reset() })">
                <textarea
                    v-model="form.message"
                    placeholder="What's on your mind?"
                    class="block w-full border-gray-300 focus:border-indigo-300 focus:ring focus:ring-indigo-200 focus:ring-opacity-50 rounded-md shadow-sm"
                ></textarea>
                <InputError :message="form.errors.message" class="mt-2" />
                <PrimaryButton class="mt-4">Chirp</PrimaryButton>
            </form>
        </div>
    </AuthenticatedLayout>
</template>
変なところに配置するんだなあ。Vueってこういうもの…?てかVueの勉強もせなあかんのか…ヴァヴァヴァ!
この状態でsail up -dしてブラウザでアクセス…すると例外がでた。
エラーページがすごい豪華。(開発者モードにしてるのもあるんだろうけど)
Unable to locate file in Vite manifest: resources/js/Pages/Chirps/Index.vue.
Vite manifestファイルがないらしい。
ViteはLaravelのフロント側で使われる技術でなんたらかんたらだった気がする。
ググったところ、以下のページを発見。
- npm run devしてないとViteが動かない
- npm run devしてない場合はローカルのファイルを見に行く
- なんもしてないので当然ローカルのファイルもないので例外発生
ってことらしい。
解決策としてnpm run buildでローカルのファイルを作るとよいらしい。
実行後にページを再表示。
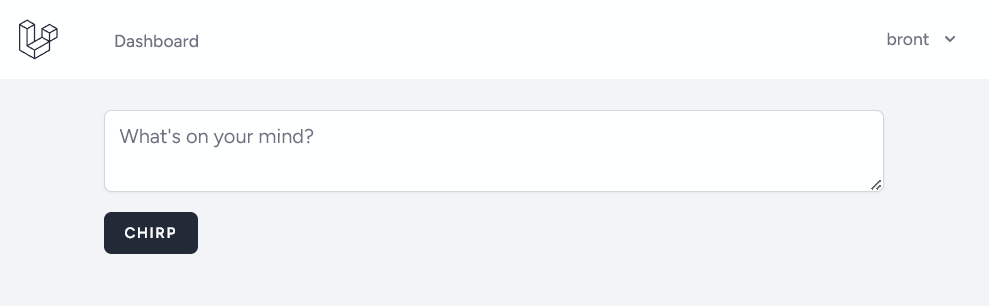
でた。