モデルの型定義ファイル(TypeScript)を共有モジュール化してGitHub Packages(npmレジストリ)で配信する
はじめに
マイクローサービス設計をしていくと、複数のアプリケーションを構築していくことになると思います。
その際に、モデルの型定義ファイルをそれぞれのアプリケーションで持つ必要があり、「片一方のアプリケーションで型定義ファイルの更新を行ったが、別のアプリケーションでは更新が漏れていた!?」などの管理上の複雑性は悩ましい問題かと思います。
また、モノレポを導入して型定義周りは1つのリポジトリで共有モジュールとして扱う解決策などもありますが、リリースタイミングが揃わないアプリケーションをを同一リポジトリで構成管理するのはリリースを難しくする可能性もあり避けたいと思われます。
そこで今回は、モデルの型定義ファイルを共有モジュール化、GitHub Packagesのnpmレジストリを使用しいて、パッケージ配信する方法についてまとめたいと思います。
GitHub Packagesとは?
GitHub Packages は、コンテナーやその他の依存関係を含むパッケージをホストおよび管理するためのプラットフォームです。 GitHub Packagesは、ソースコードとパッケージを 1 か所にまとめ、統合された権限管理と支払いを提供し、GitHub 上でのソフトウェア開発を一元化できるようにします。
また、GitHub Packagesでは下記のレジストリがサポートされています。
それぞれの詳細はリンク先のドキュメントを参考にしてくださ。
※ 今回はnpmレジストリを使用します。
- Container registry
- Docker registry
- RubyGems registry
- npm registry
- Apache Maven registry
- Gradle registry
- NuGet registry
共有パッケージの作成
GitHubリポジトリの作成
共有パッケージのコードベースを管理するためのリポジトリを作成します。

ローカルにリポジトリをクローンし、npmパッケージの初期化
ローカルにリポジトリをクローン
git clone https://github.com/<ユーザー名>/<リポジトリ名>.git
// ※「ユーザー名」と「リポジトリ名」は任意の値を入れてください。

// ↓(Output)
Cloning into 'github-packages-npm-registry-sample'...
remote: Enumerating objects: 3, done.
remote: Counting objects: 100% (3/3), done.
remote: Compressing objects: 100% (2/2), done.
remote: Total 3 (delta 0), reused 0 (delta 0), pack-reused 0
Receiving objects: 100% (3/3), done.
.gitignoreの作成
node_modules/
dist/
npmパッケージの初期化
cd <リポジトリ名>
// ※「リポジトリ名」は任意の値を入れてください。
npm init

// インタラクティブに項目を聞かれます。任意の値を入力してpackage.jsonを作成してください。 -->
// ↓(Output) -->
This utility will walk you through creating a package.json file.
It only covers the most common items, and tries to guess sensible defaults.

See `npm help init` for definitive documentation on these fields
and exactly what they do.

Use `npm install <pkg>` afterwards to install a package and
save it as a dependency in the package.json file.

Press ^C at any time to quit.
package name: (github-packages-npm-registry-sample)
version: (1.0.0) v0.0.1
description: This is a sample of using the npm registry of GitHub Packages to distribute shared packages.
entry point: (index.js)
test command: npm run test
git repository:
keywords:
author: r-knm
license: (ISC)
About to write to /Users/r-knm/MyWork/Git/github-packages-npm-registry-sample/package.json:

{
  "name": "github-packages-npm-registry-sample",
  "version": "0.0.1",
  "description": "This is a sample of using the npm registry of GitHub Packages to distribute shared packages.",
  "main": "index.js",
  "scripts": {
    "test": "npm run test"
  },
  "author": "r-knm",
  "license": "ISC"
}


Is this OK? (yes)
package.jsonが作成されたことを確認
ls

// ↓(Output)
README.md	package.json
npm installしてpackage-lock.jsonを作成
npm install

// ↓(Output)
up to date, audited 1 package in 192ms

found 0 vulnerabilities
package-lock.jsongが作成されたことを確認
ls

// ↓(Output)
README.md		package-lock.json	package.json
package.jsonにてパッケージの設定を定義する
下記項目を変更、追加しpackage.jsonを更新します。
name
実際にインストールする際の名前として使用されます。
今回はわかりやすい様に、@<ユーザー名>/<リポジトリ名>のスタイルで入力します。
例: @r-knm/github-packages-npm-registry-sample
types
パッケージの型定義が格納されたファイルパスを記載します。
今回は、tscでビルドした時に作成されるファイルを使用するため、dist/index.d.tsと記載します。
scripts
下記2つのプロパティを追加してください。
"prepublishOnly": "npm run build""build": "npx tsc"
・prepublishOnly
Runs BEFORE the package is prepared and packed, ONLY on npm publish.
publishConfig
下記2つのプロパティを追加してください。
- "access": "restricted"
- "registry": "https://npm.pkg.github.com/"
When publishing scoped packages, the access level defaults to restricted. If you want your scoped package to be publicly viewable (and installable) set --access=public. The only valid values for access are public and restricted. Unscoped packages always have an access level of public.
今回は、プライベートパッケージの配信なのでrestrictedを指定してください。
The base URL of the npm package registry.
配信に使用するレジストリのURLを設定してください。今回はnpm registryを使用するので、https://npm.pkg.github.com/をセットします。
repository
Specify the place where your code lives. This is helpful for people who want to contribute. If the git repo is on GitHub, then the npm docs command will be able to find you.
構成管理を行なっているリポジトリを設定してください。
{
  "name": "@<ユーザー名>/<リポジトリ名>",
  "version": "0.0.1",
  "description": "This is a sample of using the npm registry of GitHub Packages to distribute shared packages.",
  "main": "index.js",
  "types": "dist/index.d.ts",
  "scripts": {
    "prepublishOnly": "npm run build",
    "build": "npx tsc",
    "test": "npm run test"
  },
  "publishConfig": {
    "access": "restricted",
    "registry": "https://npm.pkg.github.com/"
  },
  "repository": {
    "type": "git",
    "url": "git://github.com/r-knm/github-packages-npm-registry-sample"
  },
  "author": "r-knm",
  "license": "ISC"
}
型定義ファイルを作成する
TypeScriptの開発環境を構築する
ライブラリのインストール
npm install -D ts-node typescript

// ↓(Output)
added 20 packages, and audited 21 packages in 2s

found 0 vulnerabilities
tsconfig.jsonの作成
npx tsc --init

// ↓(Output)
Created a new tsconfig.json with:
                                                                                               TS
  target: es2016
  module: commonjs
  strict: true
  esModuleInterop: true
  skipLibCheck: true
  forceConsistentCasingInFileNames: true


You can learn more at https://aka.ms/tsconfig
- compilerOptionsに関しては、
tsconfig.jsonを編集してプロジェクトごとに最適な設定を指定してください -
"exclude": ["node_modules", "dist"]と"include": ["src"]を追加してください- ※ プロジェクトごとに最適な値をしてしてください
型定義ファイルを作成する
export type Tenant = {
  id: string;
  name: string;
  address: string;
  createdAt: Date;
  updatedAt: Date;
};
export type User = {
  id: string;
  name: string;
  createdAt: Date;
  updatedAt: Date;
};
一括エクスポートをする
今回はパッケージのエントリーポイントから一括エクスポートできるよう下記の様にsrc/index.tsを作成します。
// Export models
export * from "./tenant.model";
export * from "./user.model";
ビルドの確認
ビルドコマンドを実行してください。
npm run build

// ↓(Output)
> @r-knm/github-packages-npm-registry-sample@0.0.1 build
> npx tsc
dist/が生成されていることを確認してください。
ls
README.md		node_modules		package.json		tsconfig.json
dist			package-lock.json	src
dist内にビルド後のファイルが作成されていることを確認してください。
ls dist
index.d.ts		tenant.model.d.ts	user.model.d.ts
index.js		tenant.model.js		user.model.js
パッケージ配信用のGitHub Actionsワークフローを作成する
公式のドキュメントを参考に作成してください。
scopeへ値を設定することで、インストールする際に使用するパッケージ名のプレフィックスへ任意の値を設定することができます。
name: Publish package to GitHub Packages
on:
  release:
    types: [published]
jobs:
  build:
    runs-on: ubuntu-latest
    permissions:
      contents: read
      packages: write
    steps:
      - uses: actions/checkout@v4
      # Setup .npmrc file to publish to GitHub Packages
      - uses: actions/setup-node@v4
        with:
          node-version: "20.x"
          registry-url: "https://npm.pkg.github.com"
          # Defaults to the user or organization that owns the workflow file
          scope: "@r-knm"
      - run: npm ci
      - run: npm publish
        env:
          NODE_AUTH_TOKEN: ${{ secrets.GITHUB_TOKEN }}
パッケージを配信する
実装したファイル一式をリモートへプッシュ
実装したファイル一式をリモートリポジトリへプッシュしてください
git add -A
git commit
git push origin main
GitHubにてリリースを作成してパッケージを配信する

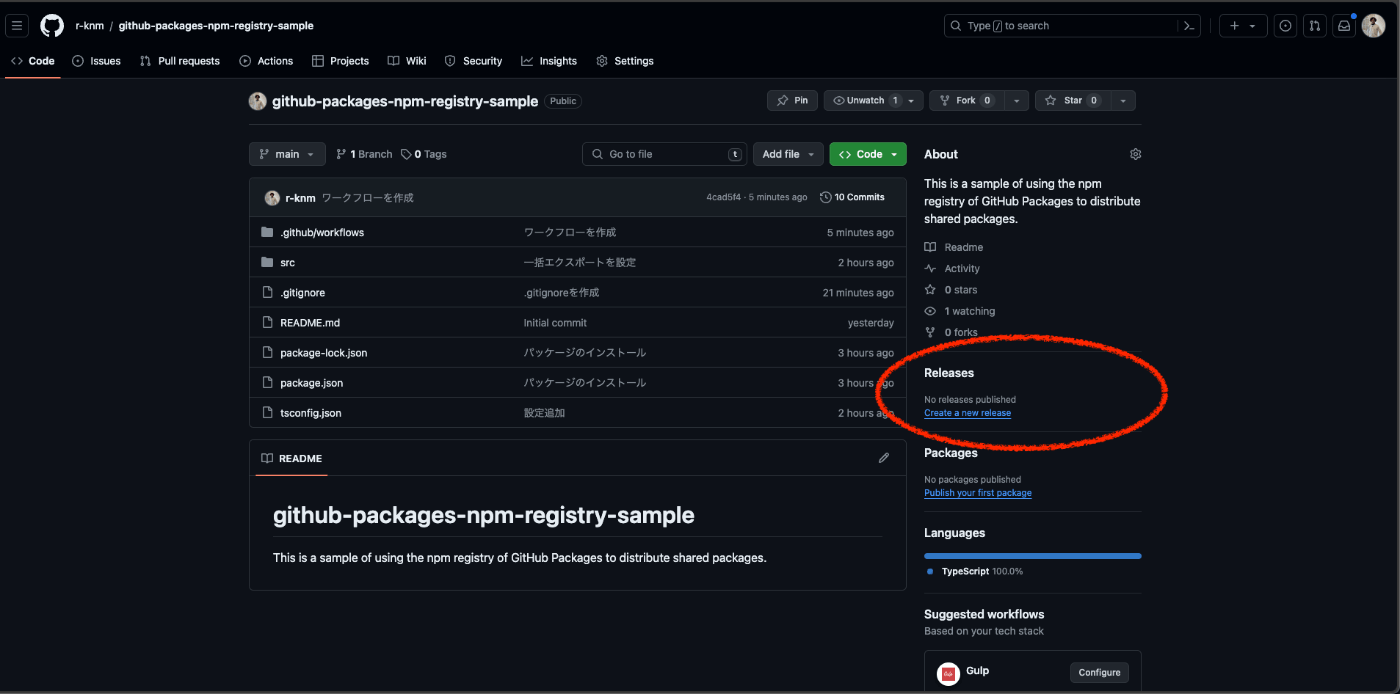
Create a new releaseをクリックする
タグ番号とリリース名を設定してPublish releaseをクリックする

↓
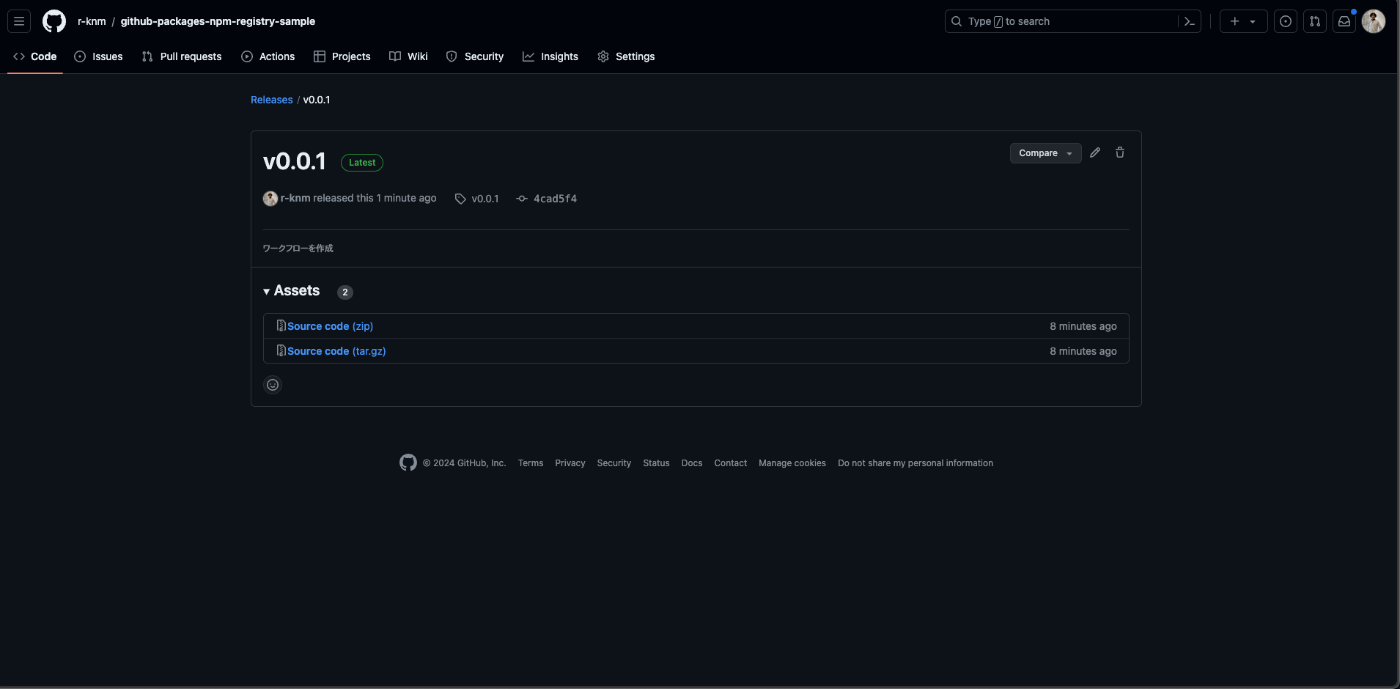
Actionsタブにてトリガーされたワークフローを確認する

新しくPackageが作成されていることを確認する

↓

以上が「共有パッケージの作成」方法になります。
共有パッケージをインストールして使用する
インストール先プロジェクトのpackage.jsonを更新
package.jsonのdependenciesに独自パッケージのレジストリを指定します。
指定方法は、GitHubのパッケージにて下記画像の赤丸の箇所をコピーしてください。

(今回だと下記の様に指定します)
"dependencies": {
    "@r-knm/github-packages-npm-registry-sample": "0.0.1"
  },
インストール先プロジェクトにて.npmrcを作成
独自のnpmレジストリを使用する場合、下記の内容で.npmrcを作成してください。
{SCOPE_OR_USER_NAME}に関しては、パッケージ配信時にscopeを指定した場合はそちらの値を、指定していない場合はユーザ名(または組織名)を指定してください。
今回のサンプルの場合は@r-knmを指定します。
//npm.pkg.github.com/
@{SCOPE_OR_USER_NAME}:registry=https://npm.pkg.github.com
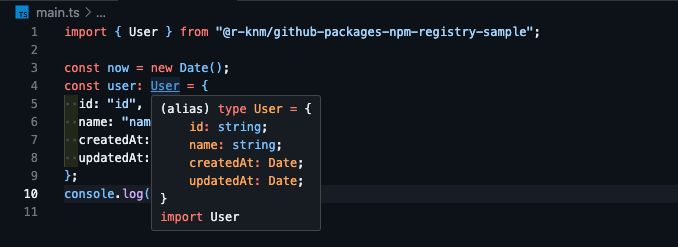
モデルの型定義ファイルのインストールを実施
あとはnpm installを実行し、npmのパッケージとして型定義ファイルを使用できます。
さいごに
今回は、GitHub Packagesを使った型定義ファイルの共有モジュール化についてまとめました。
マイクロサービス化でリポジトリ分割をしていくと型定義ファイルをリポジトリごとに持つことになり、管理面で相当なリスクを抱えておりましたが、共有パッケージ化しておくことでスムーズなファイル管理が実現できるようになったと実感しております。
また、GitHub Packages自体はパッケージを配信するための汎用的な仕組みで、非常にシンプルに扱うことができます。さまざまな用途で使用できるので今後も活用していきたいと思います。

Discussion