NestJSアプリケーションから複数のAzure Cosmos DBへ接続する
はじめに
NestJSアプリケーションから複数のAzure Cosmos DB NoSQL API(以下 Cosmos DB)へ接続する方法を実装したので紹介したいと思います。
NestJSからCosmos DBへ接続する場合、基本的にはazure-databaseというライブラリを使用して実装をしていくことになると思います。
その上で、1つのNestJSアプリケーションから複数のCosmos DBへ接続するパターンを構築する必要があり、azure-databaseのUsageでは実装方法が見当たらなかったため(2024年05月19日時点)、検討をして実装を実現しました。
今回はサンプルコードをもとに実装方法を紹介したいと思います。
実装ガイド
★ 今回紹介するサンプルコードは下記のGitHubリポジトリにて公開しております。★
r-knm/nestjs-azure-database-multiple-connections-sample
サンプルのアプリケーションアーキテクチャ
Tenant(テナント)用とUser(ユーザー)用のDBを2つ用意し、1つのNestJSアプリケーションから接続する構成となっています。APIはテナント作成(POST /tenants)とユーザー作成(POST /users)を用意し、それぞれTantnt DBとUser DBへ書き込みを行います。

Moduleクラスにて複数のCosmoso DBモジュールをimportする
import { Module } from '@nestjs/common';
import { AppController } from './app.controller';
import { AppService } from './app.service';
import { ConfigModule, ConfigService } from '@nestjs/config';
import configuration from './configuration';
import { AzureCosmosDbModule } from '@nestjs/azure-database';
import { TenantEntity } from './entities/tenant.entity';
import { UserEntity } from './entities/user.entity';

const TENANT_DB_CONNECTION = 'tenant';
const USER_DB_CONNECTION = 'user';

@Module({
  imports: [
    ConfigModule.forRoot({
      ignoreEnvFile: false,
      isGlobal: true,
      load: [configuration],
    }),
    AzureCosmosDbModule.forRootAsync({
      connectionName: TENANT_DB_CONNECTION, // Specify the connection name
      imports: [ConfigModule],
      useFactory: async (configService: ConfigService) => ({
        endpoint: configService.get<string>('azCosmos.endpoint'),
        key: configService.get<string>('azCosmos.key'),
        dbName: configService.get<string>('azCosmos.dbId4Tenant'),
      }),
      inject: [ConfigService],
    }),
    AzureCosmosDbModule.forRootAsync({
      connectionName: USER_DB_CONNECTION, // Specify the connection name
      imports: [ConfigModule],
      useFactory: async (configService: ConfigService) => ({
        endpoint: configService.get<string>('azCosmos.endpoint'),
        key: configService.get<string>('azCosmos.key'),
        dbName: configService.get<string>('azCosmos.dbIdr4User'),
      }),
      inject: [ConfigService],
    }),
    AzureCosmosDbModule.forFeature(
      [{ collection: 'Tenants', dto: TenantEntity }],
      TENANT_DB_CONNECTION, // Specify the connection name
    ),
    AzureCosmosDbModule.forFeature(
      [{ collection: 'Users', dto: UserEntity }],
      USER_DB_CONNECTION, // Specify the connection name
    ),
  ],
  controllers: [AppController],
  providers: [AppService],
})
export class AppModule {}
① AzureCosmosDbModule.forRootAsync
ModuleクラスにてAzureCosmosDbModule.forRootAsyncを接続するDB個数分importします。
そして、引数として渡す設定情報のconnectionNameプロパティにてそれぞれのコネクション名を指定します。
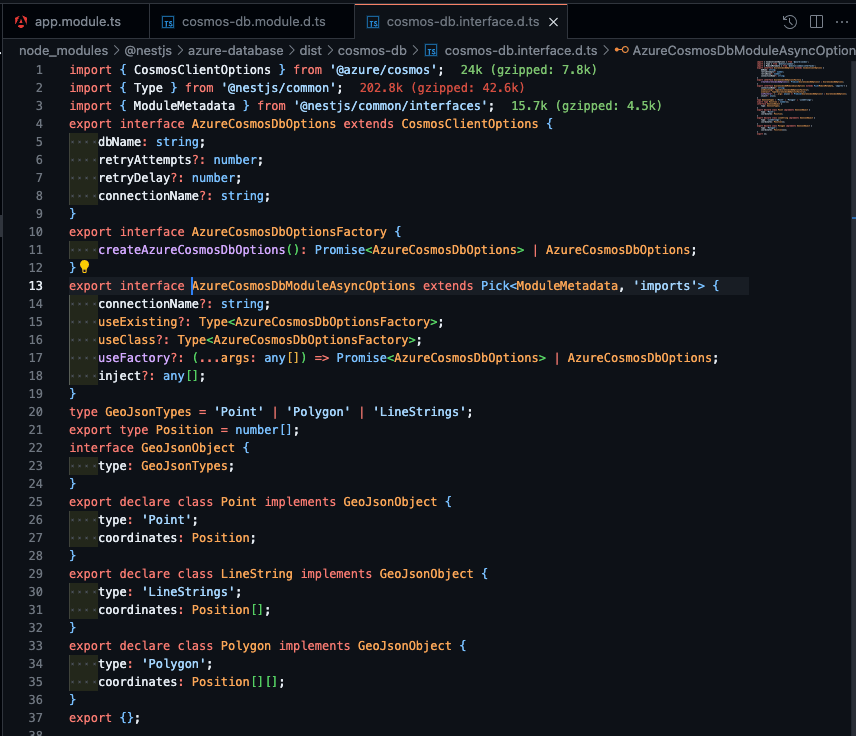
ライブラリ側のコードでは下記の様にconnectionNameがオプショナルで設定できるように定義されております。
② AzureCosmosDbModule.forFeature
ModuleクラスにてAzureCosmosDbModule.forRootAsyncを使用するコンテナ数分importします。
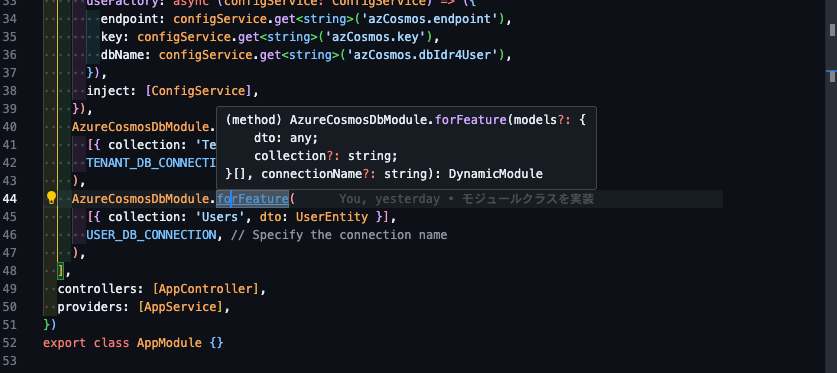
そして、第2引数にてconnectionNameをオプショナルで受け取れるようになっているので、接続先DBのコネクション名を指定します。
VSCodeで見るとメソッドの第2引数にconnectionNameが設定できることがわかります。
@InjectModelを使用してCosmos DB Containerクラスのインスタンスを取得する
import { InjectModel } from '@nestjs/azure-database';
import { Injectable } from '@nestjs/common';
import { Container } from '@azure/cosmos';
import { v4 as uuidv4 } from 'uuid';
import { TenantEntity } from './entities/tenant.entity';
import { UserEntity } from './entities/user.entity';

@Injectable()
export class AppService {
  constructor(
    @InjectModel(TenantEntity)
    protected readonly tenantsContainer: Container,

    @InjectModel(UserEntity)
    protected readonly usersContainer: Container,
  ) {}

  async createTenant(): Promise<TenantEntity> {
    const now = new Date();
    const newTenant = {
      id: uuidv4(),
      name: 'My Tenant',
      createdAt: now,
      updatedAt: now,
    };

    const { resource: tenantItem } =
      await this.tenantsContainer.items.create(newTenant);

    return tenantItem;
  }

  async createUser(): Promise<UserEntity> {
    const now = new Date();
    const user = {
      id: uuidv4(),
      name: 'My User',
      createdAt: now,
      updatedAt: now,
    };

    const { resource: userItem } = await this.usersContainer.items.create(user);

    return userItem;
  }
}
@InjectModelを使用して、Cosmos DB Containerクラスのインスタンスを取得します。
あとは、ライブラリの使用方法に従ってDBへのデータ操作を実装してください。
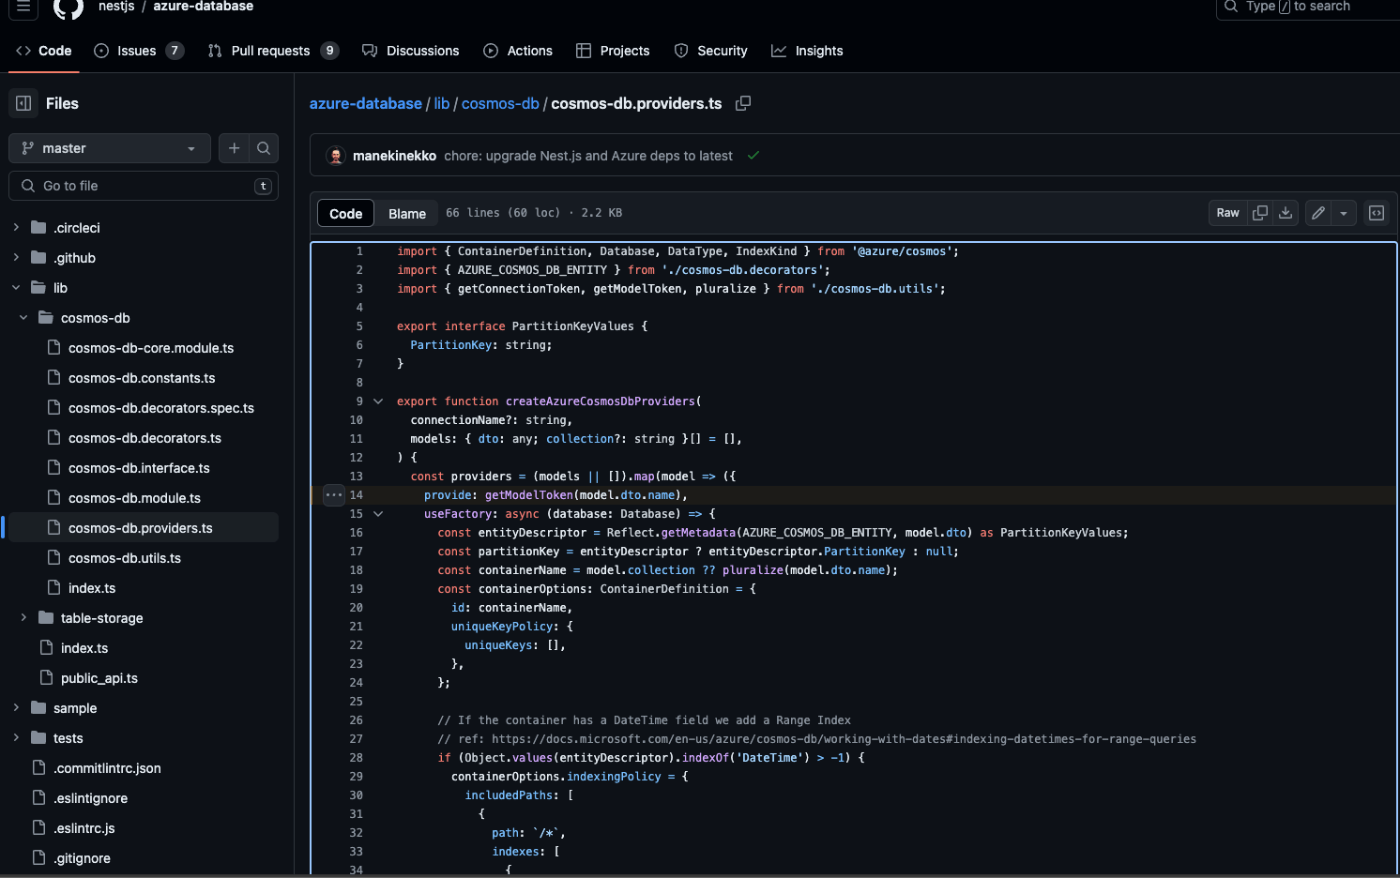
Cosmos DB Containerクラスのインスタンス取得時、ConnectionNameの指定などは不要だったので、どのような仕組みになっているのか気になり調査した結果、ライブラリ側のコードを読んでいくとモジュールクラスでのAzureCosmosDbModule.forFeatureのimort時に渡すDTOクラス名をDynamicモジュールのProvider名に渡していることがわかります。
azure-database/lib/cosmos-db/cosmos-db.providers.ts
動作確認
コンテナ作成
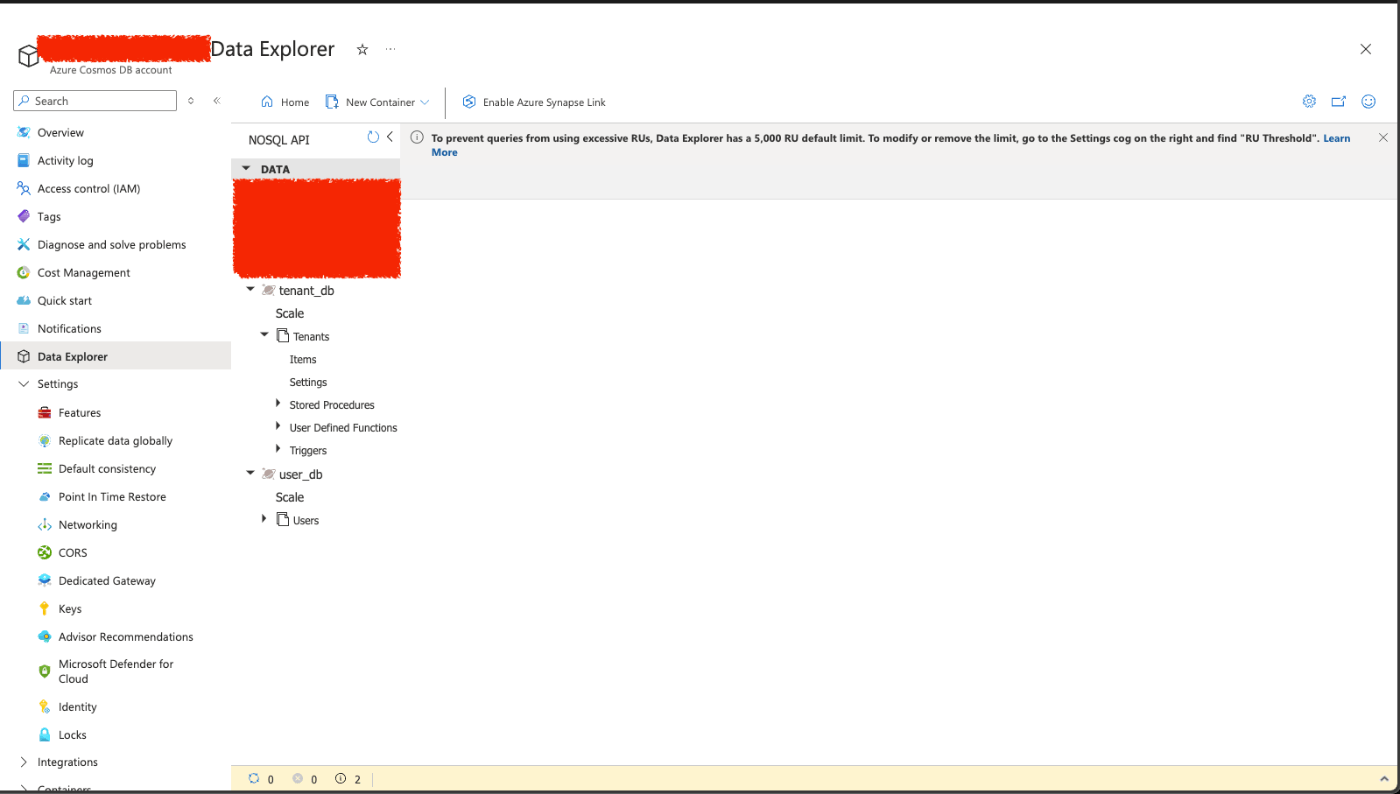
NestJSアプリケーションを起動すると、コンテナが存在しない場合は自動で作成されます。
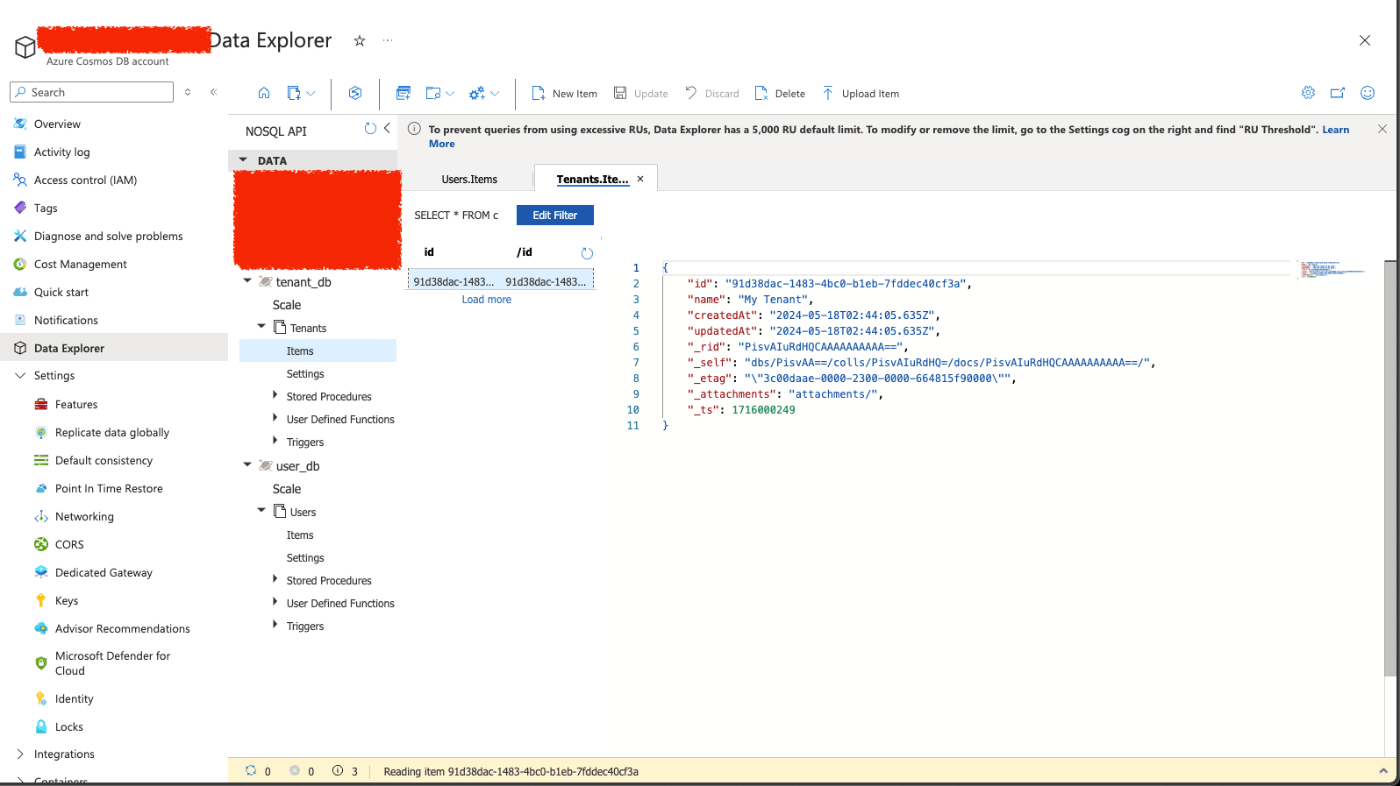
今回は、tenant_dbへTenantsコンテナ、user_dbへUsersコンテナが作成されたことが確認できます。
tenantアイテムの作成
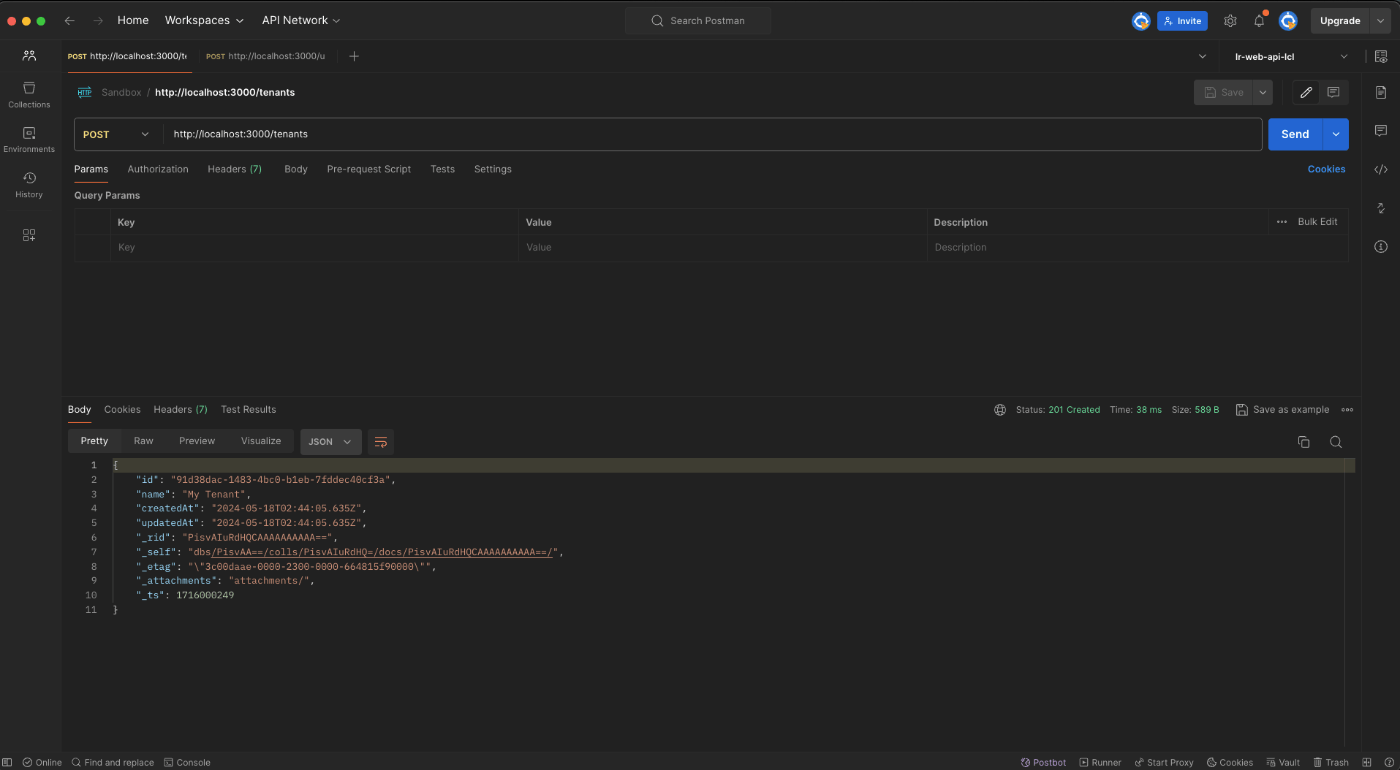
PostmanからAPIリクエストを実施し、tenant_dbのTenantsコンテナにてtenantアイテムが作成されたことが確認できます。
userアイテムの作成
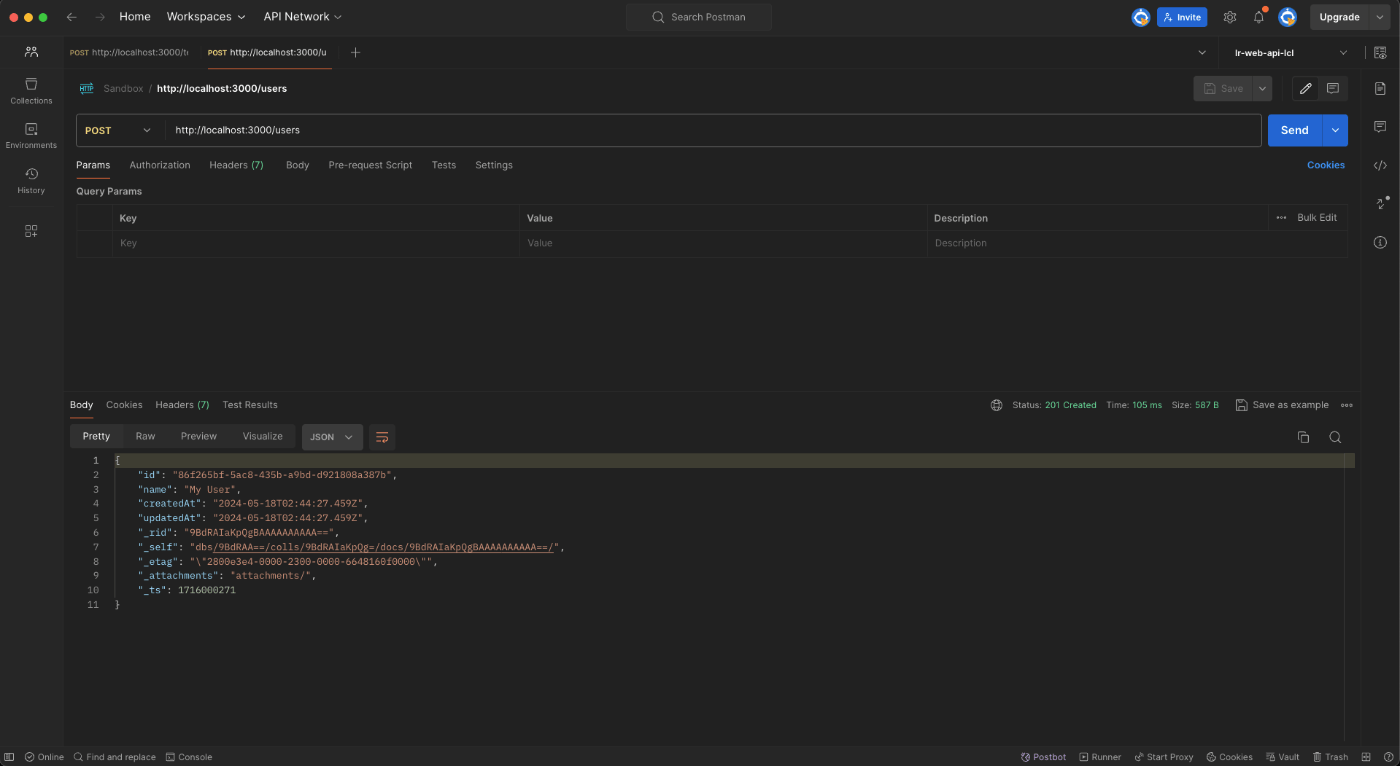
PostmanからAPIリクエストを実施し、user_dbのTenantsコンテナにてuserアイテムが作成されたことが確認できます。

おわりに
今回はNestJSから複数のCosmos DBへ接続する必要があるケースにおいてazure-databaseを使用してどのように実現するかをサンプルコード付きで解説しました。
ライブラリのUsageからは情報が見つかりませんでしたが(2024年05月19日時点)、ライブラリ側のコードを調査していくとしっかりと設定用プロパティが用意されていることがわかりました。(TypeORMにて同様のプロパティが存在していたので、それを参考に調査を進めました)
そして、実装したサンプルアプリケーションからも、複数のDBへ接続ができることが確認できました。
アーキテクチャによっては、1つのNestJSアプリケーションから複数のCosmos DBへ接続することは存在し得るパターンのため今回紹介した方法が役に立つかと考えております。
★ 今回紹介したサンプルコードは下記のGitHubリポジトリにて公開しております。★
r-knm/nestjs-azure-database-multiple-connections-sample
Discussion