勉強会用のDiscordbotをCloudflare Workers + Honoで作ってみる
HonoとCloudflareの入門がてら勉強会用のDiscordbotを作ってみる
作りたいアプリはこの記事で紹介している以前Slack用に作って今も運用しているもの。
今回、勉強会のコミュニケーションツールをSlackからDiscordに移行するので、作り直すこととなった。
正直Honoも、Cloudflareも、Discordbotもなにもわかってない。。なのでチュートリアルを見ながら手探りで進める。
たぶんDiscordbotからサーバーにPOSTリクエストを送って、それを検証して何らかのデータを返す感じになると思うので、とりあえずHonoでPOSTリクエストを受信するエンドポイントを作ってみる。
を読みながらやってみる。bunも試してみる(初見の技術試しすぎて後で後悔しそう・・)
$ bunx create-hono mokumoku-bot
起動してみる
$ cd mokmoku-bot
$ bun run dev
出た
Cloudflareへのデプロイ
$ bun run deploy
出た
めっちゃ簡単。すごい
POSTリクエスを受け取れるようにする。
src/index.tsに追記
app.post('/greeting', async (c) => {
  const body = await c.req.json()

  if ('name' in body) {
    return c.json({ message: `hello ${body.name}` })
  } else {
    c.status(400)
    return c.json({ message: 'name is required' })
  }
})
正常

異常

Discordとの連携を考える。
参考になりそうな記事
とりえあずDiscord上でbotユーザーをつくるっぽい。
にアクセスしてbotを作成。トークン等々をメモしておく。
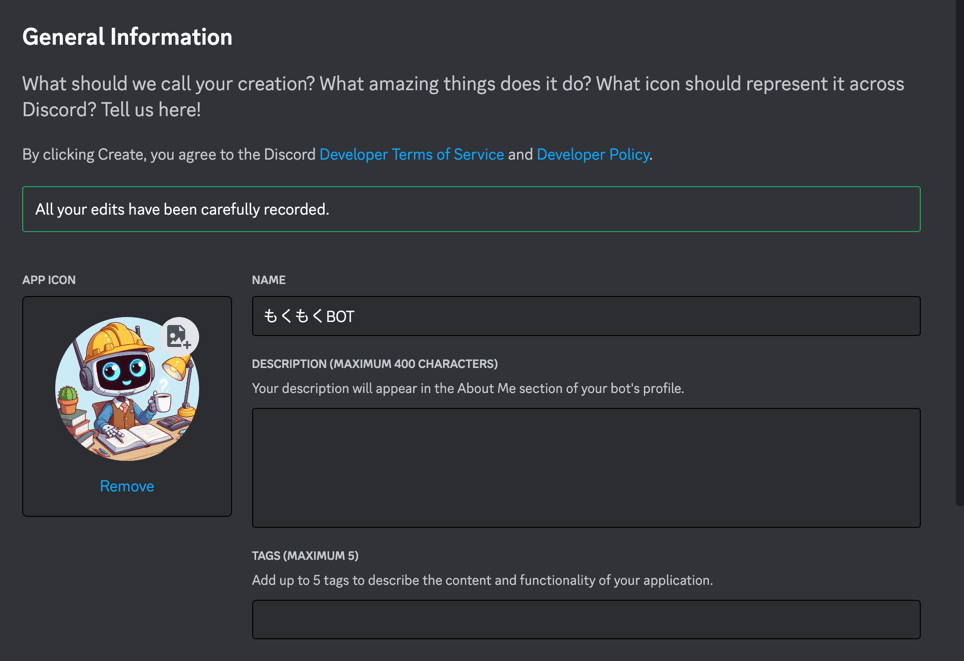
OAuth2タブよりpermissionを設定。下に出てくるURLにアクセスして、Botを対象のDiscordチャネルに追加

次にメモしたトークンなどなどをcloudflareのsecretに入れる。
ローカルように、.dev.varsを作成
DISCORD_TOKEN=xxx
DISCORD_PUBLIC_KEY=xxx
DISCORD_APPLICATION_ID=xxx
リモートにも追加
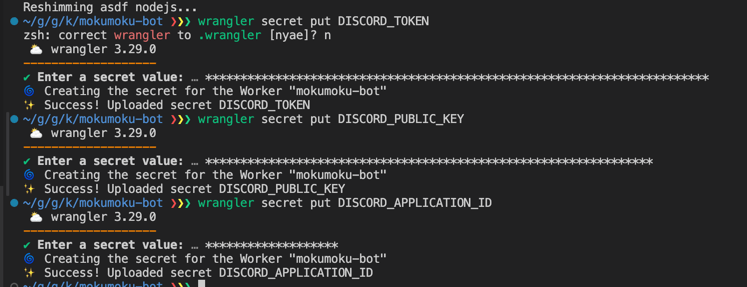
試しにWorkerのサーバーにPOSTリクエストしたら、それをDiscord上に投稿できるところまでやってみる。
からコードを読み解く。
これが使えそう。
追加する。
bun i discord-interactions
リクエストの検証を試す。
index.tsに以下を追記
app.post('/interaction', async (c) => {
  const { DISCORD_PUBLIC_KEY } = env<{ DISCORD_PUBLIC_KEY: string }>(c)

  const signature = c.req.header('X-Signature-Ed25519')!;
  const timestamp = c.req.header('X-Signature-Timestamp')!;
  const isValidRequest = verifyKey(c.res.body as any, signature, timestamp, DISCORD_PUBLIC_KEY);
  if (!isValidRequest) {
    c.status(401)
    return c.json({ message: 'invalid request signature' });
  } else {
    return c.json({ message: 'ok' });
  }
})
workersにdeploy後に、Discordボットの設定にURLを追記

設定できない。たぶんエンドポイントの処理がダメ
Discordbotの基礎がわかってないので調べる
あと、スラッシュコマンドをbotに登録する必要があるらしい。
app.post('/interaction', async (c) => {
  const { DISCORD_PUBLIC_KEY } = env<{ DISCORD_PUBLIC_KEY: string }>(c)

  const signature = c.req.header('X-Signature-Ed25519')!;
  const timestamp = c.req.header('X-Signature-Timestamp')!;
  const isValidRequest = verifyKey(await c.req.raw.clone().text(), signature, timestamp, DISCORD_PUBLIC_KEY);

  if (!isValidRequest) {
    c.status(401)
    return c.json({ message: 'invalid request signature' });
  } else {
    const body = await c.req.json();
    if (body.type === InteractionResponseType.PONG) {
      return c.json({ type: InteractionResponseType.PONG });
    } else {
      return c.json({
        type: InteractionResponseType.CHANNEL_MESSAGE_WITH_SOURCE,
        data: {
          content: 'Hello world',
        },
      });
    }
  }
})
このコードでエンドポイント登録はできた。pingに対して特定のレスポンスを返す必要があったぽい。
なんか検証部分が冗長なので、middlewareか何かで書けないかな
が使えそう
Honoのcustom middlewareを作ってみた
import { InteractionResponseType, verifyKey } from "discord-interactions";
import { Context } from "hono";
import { env } from "hono/adapter";
import { BlankInput, Env, Next } from "hono/types";

export const verifyDiscordInteraction = async (c: Context<Env, string , BlankInput>, next: Next) => {
  const { DISCORD_PUBLIC_KEY } = env<{ DISCORD_PUBLIC_KEY: string }>(c)
  const signature = c.req.header('X-Signature-Ed25519')!;
  const timestamp = c.req.header('X-Signature-Timestamp')!;

  const rawBody = await c.req.raw.clone().text();
  const isValidRequest = verifyKey(rawBody, signature, timestamp, DISCORD_PUBLIC_KEY);

  if (!isValidRequest) {
    return c.json({ message: 'invalid request signature' }, 401);
  }

  const body = JSON.parse(rawBody);
  if(body.type === InteractionResponseType.PONG) {
    return c.json({ type: InteractionResponseType.PONG });
  }
  await next()
}
使う側
app.use('/interaction', verifyDiscordInteraction)
app.post('/interaction', async (c) => {
  return c.json({
    type: InteractionResponseType.CHANNEL_MESSAGE_WITH_SOURCE,
    data: {
      content: 'Hello world',
    },
  });
})
いいですね!MiddlewareはこのcreateMiddleware()というヘルパーを使うのをおすすめしています。
おおおお!!ありがとうございます!!
試してみます!!
次はスラッシュコマンドの登録
これかなー
試しに公式のやつをやってみた。
const url = "https://discord.com/api/v10/applications/xxxxx/commands";

// This is an example CHAT_INPUT or Slash Command, with a type of 1
const json = {
    "name": "blep",
    "type": 1,
    "description": "Send a random adorable animal photo",
    "options": [
        {
            "name": "animal",
            "description": "The type of animal",
            "type": 3,
            "required": true,
            "choices": [
                {
                    "name": "Dog",
                    "value": "animal_dog"
                },
                {
                    "name": "Cat",
                    "value": "animal_cat"
                },
                {
                    "name": "Penguin",
                    "value": "animal_penguin"
                }
            ]
        },
        {
            "name": "only_smol",
            "description": "Whether to show only baby animals",
            "type": 5,
            "required": false
        }
    ]
}

// For authorization, you can use either your bot token
const headers = {
    "Content-Type": "application/json",
    "Authorization": "Bot xxx"
}


fetch(url, {
    method: 'POST',
    headers: headers,
    body: JSON.stringify(json)
}).then(response => response.json())
.then(data => console.log(data))
.catch(error => console.error('Error:', JSON.stringify(error, null, 2)));
出た!
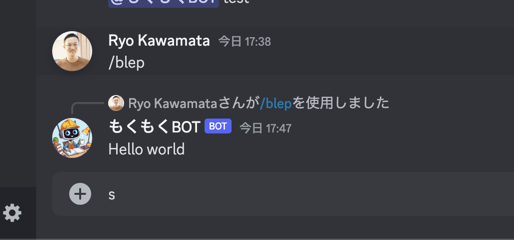
Modalを表示する。
APIのパラメーターの組み立てで楽したいので以下を追加
bun add discord-api-types
index.tsを修正する
app.post('/interaction', verifyDiscordInteraction, async (c) => {
  const modalResponse: APIModalInteractionResponse = {
    type: InteractionResponseType.Modal,
    data: {
      custom_id: "mokumoku",
      title: "もくもくBOT",
      components: [
        {
          type: ComponentType.ActionRow,
          components: [
            {
              type: ComponentType.TextInput,
              custom_id: "profile",
              label: "自己紹介",
              style: TextInputStyle.Paragraph,
              min_length: 1,
              max_length: 2000,
              required: true,
              placeholder: "山田太郎です。水戸でエンジニアをしています。趣味は俳句です。"
            },
          ]
        },
        {
          type: ComponentType.ActionRow,
          components: [
            {
              type: ComponentType.TextInput,
              custom_id: "todo",
              label: "今日やること",
              style: TextInputStyle.Paragraph,
              min_length: 1,
              max_length: 2000,
              required: true,
              placeholder: "今日は新しい機能の実装をします。"
            }
          ]
        }
      ]
    },

  }
  return c.json(modalResponse);
})
表示された :tada:
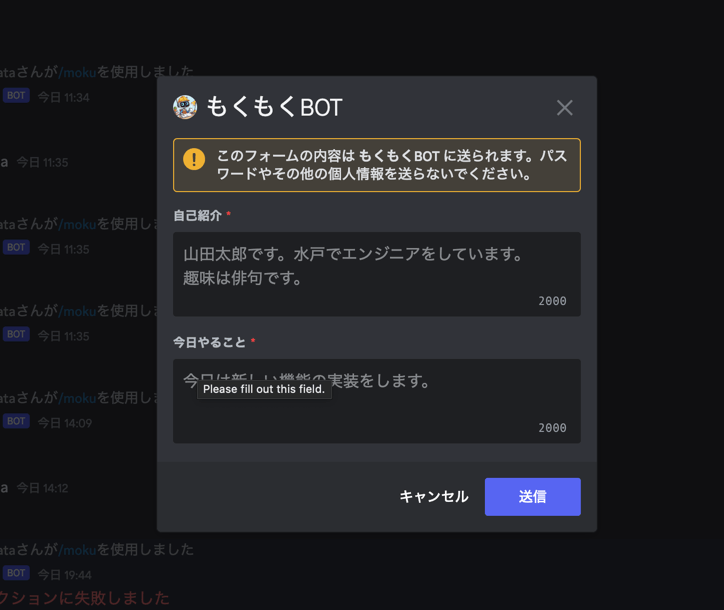
次は、モーダルからのレスポンスを受けて、内容を投稿するまで。
いろいろやってこんなものが投稿できるところまで来た

完成系