1. はじめに
以前、これらの記事にてPathfindingについてご紹介させていただきました。
こちらでは基礎的な情報や、地形について解説していますが、せっかく経路探索が使えるなら、決まったポイントに移動するだけではなく、状況に応じて動的に動き回るNPCも作ってみたいですよね。
そこで今回は応用編として、PlayerCharacterに追従するNPCを作ってみようと思います!
Pathfindingについての基礎的な説明はこの記事では行わないので、先ほどの記事をまだ読んでいない方は、先にそちらをお読みください。
バージョン: 0.664.0.6640713
2. Rigの準備
まずは、NPCとして動くRigを用意しましょう。
「アバター」タブから「リグビルダー」を開き、Rigを生成します。


今回はメッシュアバター(2016)を使用しますが、どれを選んでも問題ありません。
Rigを追加したら、Rigの子にScriptを一つ追加します。名前は「AccompanyingNpc」としておきます。
これがPathfindingを用いたNPCの挙動が記述されるScriptになります。
さらに、AccompanyingNpcの子にObjectValueを追加します。名前は「Target」としておきます。
名前の通り、その時追従するTargetを参照するためのObjectValueになります。

さらに、このままではNPCを動かしても、歩行、ジャンプなどの際のAnimationは行ってくれません。
そこで、以前の記事でご紹介した方法を使います。
以下の記事にしたがって、全てのクライアント上で動作するAnimateを作成し、初めから付いているAnimateと入れ替えてください。
リンク先の記事内の「3. 前準備」の項目は、飛ばしてしまって構いません。

ここまでできたら、RigをReplicatedStorageに移してRigの準備は完了です。

3. Setup
さぁ早速Pathfindingの作成と解説を…と行きたい所ですが、まだやる事があります。
ServerScriptServiceに、Scriptを一つ追加してください。名前は「AccompanyingNpcSetup」としておきます。

これに、Playerが入室した時にNPCを一体追加する処理を書き込んでいきます。
--!strict

-- Service
local Players = game:GetService("Players")
local ReplicatedStorage = game:GetService("ReplicatedStorage")
local StarterPlayer = game:GetService("StarterPlayer")

-- NPCの複製元になるRig
local Rig = ReplicatedStorage:WaitForChild("Rig")

-- 存在しているNPCのリスト.
local NPCs = {}::{Model}

-- ModelのPivotをおおよその足元に設定する関数.
local function setPivot(model: Model)
	local orientation, boundingBox = model:GetBoundingBox()
	if model.PrimaryPart then
		model.PrimaryPart.PivotOffset = CFrame.new(0, -boundingBox.Y * 0.5, 0)
	end
end

-- Playerが退出したらNPCを破棄する.
Players.PlayerRemoving:Connect(function(player: Player)
	if NPCs[player.UserId] then
		NPCs[player.UserId]:Destroy()
		NPCs[player.UserId] = nil
	end
end)

-- Playerが入室したら付いてくるNPCを追加する.
Players.PlayerAdded:Connect(function(player: Player)
	-- Rigを複製.
	local npc = Rig:Clone()

	-- Pivotをおおよその足元に設定.
	setPivot(npc)

	-- PlayerCharacterもPivotをおおよその足元に設定.
	local playerCharacter = player.Character or player.CharacterAdded:Wait()
	setPivot(playerCharacter)

	-- 基本の移動速度を設定.
	local humanoid = npc:WaitForChild("Humanoid")
	humanoid.WalkSpeed = StarterPlayer.CharacterWalkSpeed

	-- UserIdをキーにしてNPCを保持しておく.
	NPCs[player.UserId] = npc

	-- PlayerCharacterの前方に、PlayerCharacterの方を向けて生成する.
	local pcCFrame = playerCharacter:GetPivot()
	npc:PivotTo(CFrame.new(pcCFrame.Position + pcCFrame.LookVector * 20, pcCFrame.Position))

	-- Targetを設定.
	npc:WaitForChild("AccompanyingNpc"):WaitForChild("Target").Value = playerCharacter

	-- workspace下へ.
	npc.Parent = workspace

	-- 全てのBasePartのNetworkOwnerをサーバーにする.
	for i, v in ipairs(npc:GetDescendants()) do
		if v:IsA("BasePart") then
			v:SetNetworkOwner(nil)
		end
	end
end)
基本的にはコメントを読んでもらえればよいのですが、大事な所だけ解説していきます。
Pivotを足元に設定する
最初にNPCとPlayerCharacterのPivotOffsetをModelの足元にしていますが、これはPathfindingで基準の座標にする際、Pivotが中心付近だと小さな段差の近くに立った際に段差の上にいると判定されてしまうことがあるためです。
問題になることは少ないですが、一応足元にしておいた方が安定します。
リグビルダーで生成したRigは最初からPivotが足元に設定されているので、事前に用意したRigしか使わないのであれば、NPCの方はScriptで設定する必要はありません。
一応、GetBoundingBoxを利用する方法だと、おおよその足元になるだけで、厳密な足元の座標ではない点に注意してください。
NetworkOwnerの設定を変更する
NPCを動かす際にとても大事な点です。
NetworkOwnerとは、そのBasePartの物理演算処理などをどこで行うかを決定している情報で、サーバー側のScriptからBasePart:SetNetworkOwnerを使用することで指定することができます。
通常のデフォルトはAutoになっており、基本はサーバー側で、近くにPlayerCharacterがいるとそのPlayerのクライアントで動作します。
今回は説明を簡単にするためにNPCをサーバー側で動作させるのですが、Autoのままにしておくと、近くのPlayerにNetworkOwnerが移ってしまい、サーバー側からは正しく動作させられなくなってしまいます。
常にサーバー側で動作させたい場合、BasePart:SetNetworkOwnerにnilを渡すことでサーバーに固定することができます。
よりリアルタイム性が高いゲームなどでNPCをクライアント側で動作させたい場合、BasePart:SetNetworkOwnerにPlayerを渡すことで、そのPlayerのクライアントに固定できます。
また、NPCでは使いませんが、BasePart:SetNetworkOwnershipAutoを実行することでAutoに設定しなおすこともできます。
4. 追尾するNPC
お待たせしました、ようやく本題のPathfindingです。
ReplicatedStorageに置いておいたRigの中の、AccompanyingNpcを編集していきます。
定期的な再探索
今回はPlayerCharacterを追尾するNPCです。
つまり、目標地点が常に移動しうるので、定期的に移動ルートを生成しなおす必要があります。
まずは必要な変数を立てて、Pathの設定と作成をした上で、RunService.Heartbeatのコールバック関数の中でタイマーを設けることで、定期的な実行ができるようにします。
--!strict

-- Service
local PathfindingService = game:GetService("PathfindingService")

-- Constant
local WAIT = 0.16

-- Variable
local TargetValue = script:WaitForChild("Target")
local target_:PVInstance? = TargetValue.Value

local humanoid_ = script.Parent:WaitForChild("Humanoid")
local timer_ = 0

-- 経路探索関連.
local blockedConnection_: RBXScriptConnection?
local reachedConnection_: RBXScriptConnection?
local waypoints_: {PathWaypoint} = {}
local nextWaypointId_ = 2

-- Pathの作成.
local path_:Path do
	local agentParams_ = {
		-- AgentRadiusとAgentHeightは今回は固定値だが、Modelの情報を元に設定しても良い.
		AgentRadius = 2.5,
		AgentHeight = 6,
		AgentCanJump = true,
		WaypointSpacing = 4,
		Costs = {
			Jump = 3,
		}
	}::{[string]:any}

	path_ = PathfindingService:CreatePath(agentParams_)
end

-- 追尾ターゲットが変わったら設定.
TargetValue:GetPropertyChangedSignal("Value"):Connect(function()
	if TargetValue.Value and TargetValue.Value:IsA("PVInstance") then
		target_ = TargetValue.Value
	else
		target_ = nil
	end
end)

game:GetService("RunService").Heartbeat:Connect(function(deltaTime: number)
	-- タイマーを進める.
	timer_ -= deltaTime

	-- 規定時間を過ぎるまでは何もしない.
	if timer_ > 0 then
		return
	end
	timer_ += WAIT

	-- 自分の状態チェック.
	local state = humanoid_:GetState()::Enum.HumanoidStateType
	if state == Enum.HumanoidStateType.Dead then
		return
	end

	-- ターゲットの存在チェック.
	if not target_ then
		return
	end

	-- 経路探索と移動開始.
	-- TODO
end)
WAITの値は、大きすぎると不自然な動きに、小さすぎると処理負荷が高くなってしまうので、ゲーム内容に応じて適切な値を設定しましょう。
これで、関数の定期的な実行ができるようになりました!
経路探索
次に、経路探索を行う関数を追加します。
経路探索と移動の仕組みそのものは、単純に目標地点へ向かうだけの場合と同様です。
移動はHumanoid:MoveToを使用して行う予定なので、Humanoid.MoveToFinishedのコールバック関数の中で次のポイントへの移動を組み込むことで、最終的な目標地点へ向かってくれるようにします。
経路のどこかがブロックされた場合はPath.Blockedで検出できるので、どこがブロックされたか確認し、既に通った位置だったら無視して移動、これから移動する先であればその時点で移動を中断するようにしておきます。
中断しても、RunService.Heartbeatで定期的にルートが再探索されているので、新たなルートで移動を開始してくれます。
では、RunService.Heartbeatに接続するより前の行に以下の関数を追加してください。
-- 目標のWaypointに到達した時のイベントコールバック関数.
local function onMoveToFinished(reached: boolean)
	-- MoveToがタイムアウトした時は現在のWaypointsなどを初期化する.
	if not reached then
		waypoints_ = {}
		nextWaypointId_ = 2
		return
	end

	-- 次のポイントへ向かう.
	if nextWaypointId_ < #waypoints_ then
		nextWaypointId_ += 1
		-- 移動開始.
		-- TODO
	end
end

-- 経路が遮断された時のイベントコールバック関数.
local function onBlocked(blockedWaypointIdx: number)
	-- 今向かっているWaypointより背後だったら無視.
	if blockedWaypointIdx < nextWaypointId_ then
		return
	end

	-- 前方だったら移動を中断.
	if reachedConnection_ then
		reachedConnection_:Disconnect()
		reachedConnection_ = nil
	end
	if blockedConnection_ then
		blockedConnection_:Disconnect()
		blockedConnection_ = nil
	end
end

--[[
	経路探索、及び移動の開始を行います.
	@param humanoid: Humanoid 行動するHumanoid.
	@param destination: Vector3 目標地点.
	@return boolean 経路探索の成否.
]]
local function toDestination(humanoid: Humanoid, destination :Vector3)
	-- 経路探索.
	local success = pcall(path_.ComputeAsync, path_, script.Parent:GetPivot().Position, destination)
	if not success or path_.Status == Enum.PathStatus.NoPath then
		return false
	end

	-- 過去の接続があったら破棄.
	if reachedConnection_ then
		reachedConnection_:Disconnect()
		reachedConnection_ = nil
	end
	if blockedConnection_ then
		blockedConnection_:Disconnect()
		blockedConnection_ = nil
	end

	-- イベントを接続.
	reachedConnection_ = humanoid.MoveToFinished:Connect(onMoveToFinished)
	blockedConnection_ = path_.Blocked:Connect(onBlocked)

	-- WaypointIdを初期化 開始地点が1なので、最初の目標地点は2.
	nextWaypointId_ = 2

	-- PathWaypointの配列を取得.
	waypoints_ = path_:GetWaypoints()::{PathWaypoint}

	-- 移動開始.
	if waypoints_[nextWaypointId_] then
		-- TODO
	end

	return true
end
そして、Heartbeatのコールバック関数の最後のTODOの部分に、toDestination関数の呼び出しを追加してください。
game:GetService("RunService").Heartbeat:Connect(function(deltaTime: number)

	-------- 中略 --------

	-- ターゲットの存在チェック.
	if not target_ then
		return
	end

	-- 経路探索と移動開始.
+	toDestination(humanoid_, target_:GetPivot().Position)
-	-- TODO
end)
一見これでうまくいきそうですが、まだ一つ問題があります。
地上を歩くだけならいいのですが、ジャンプなどを行う場合、Pathfindingの経路に「空中」という概念は無いため、ジャンプ中の空中で再探索された際に近くの足元が次の目標となり、ジャンプの目標地点へ行かずにその場でジャンプを繰り返すなどの不具合や不自然な挙動を引き起こします。
そこで、ジャンプ行動中や、今現在空中にいる場合は探索しないようにしておきます。
空中かどうかは、今現在立っている足場のMaterialが取得できるプロパティであるHumanoid.FloorMaterialがEnum.Material.Airかどうかで判別できます。
ただし、Humanoid:GetStateで確認できるHumanoidStateTypeがEnum.HumanoidStateType.Climbingの場合は、例外的に再探索OKとしておきます。
Climbingは梯子などに掴まっている状態を示すのですが、梯子上り中の足元は空中のため、不意の接触で梯子判定に掴まってしまうと、探索を行わずその場で動けなくなってしまう場合があるためです。
というわけで、toDestination関数の最初に以下の内容を追加します.
 --[[
 	経路探索、及び移動の開始を行います.
 	@param humanoid: Humanoid 行動するHumanoid.
 	@param destination: Vector3 目標地点.
 	@return boolean 経路探索の成否.
 ]]
local function toDestination(humanoid: Humanoid, destination :Vector3)
+	-- 現在の行動がジャンプ中だったら何もしない.
+	local waypoint = waypoints_[nextWaypointId_]
+	if waypoint and string.find(waypoint.Label, "Jump") then
+		return false
+	end
+
+	-- 足元が現在空中じゃない ただし、梯子登り中は空中でもOK 意図的でない梯子判定に触れて固まってしまうのを回避するため.
+	local state = humanoid:GetState()
+	if humanoid_.FloorMaterial == Enum.Material.Air and state ~= Enum.HumanoidStateType.Climbing then
+		return false
+	end
+
	-- 経路探索.
	local success = pcall(path_.ComputeAsync, path_, script.Parent:GetPivot().Position, destination)

	------ 以下省略 ------
これで、経路探索ができるようになりました!
移動
ついにNPCを移動させます。
PathWaypoint.Actionで大まかな行動のタイプが確認できるので、それに従って行動選択する関数を、onMoveToFinished関数の前に追加しましょう。
前述の通り、NPCの移動はHumanoid:MoveToを使用して行い、Humanoid:ChangeStateにEnum.HumanoidStateType.Jumpingを渡すことでジャンプさせられます。
--[[
	PathWaypointに従って移動を行います.
	@param humanoid :Humanoid 対象のHumanoid
	@param startPathWaypoint :PathWaypoint 移動元のPathWaypoint
	@param endPathWaypoint :PathWaypoint 移動先のPathWaypoint
]]
local function move(humanoid :Humanoid, startPathWaypoint :PathWaypoint, endPathWaypoint :PathWaypoint)
	if endPathWaypoint.Action == Enum.PathWaypointAction.Walk then -- 歩行.
		humanoid:MoveTo(endPathWaypoint.Position)

	elseif endPathWaypoint.Action == Enum.PathWaypointAction.Jump then	-- ジャンプ.
		-- 空中ジャンプ防止.
		if humanoid.FloorMaterial ~= Enum.Material.Air then
			-- ジャンプ.
			humanoid:ChangeState(Enum.HumanoidStateType.Jumping)
		end
		humanoid:MoveTo(endPathWaypoint.Position)

	end
end
そして、onMoveToFinished関数とtoDestination関数の中にあるTODOの部分に、move関数の呼び出しを追加してください。
 -- 目標のWaypointに到達した時のイベントコールバック関数.
local function onMoveToFinished(reached: boolean)
	-- MoveToがタイムアウトした時は現在のWaypointsなどを初期化する.
	if not reached then
		waypoints_ = {}
		nextWaypointId_ = 2
		return
	end

	-- 次のポイントへ向かう.
	if nextWaypointId_ < #waypoints_ then
		nextWaypointId_ += 1
		-- 移動開始.
+		move(humanoid_, waypoints_[nextWaypointId_ - 1], waypoints_[nextWaypointId_])
-		-- TODO
	end
end

 ------ 中略 ------

local function toDestination(humanoid: Humanoid, destination :Vector3)

	------ 中略 ------

	-- PathWaypointの配列を取得.
	waypoints_ = path_:GetWaypoints()::{PathWaypoint}

	-- 移動開始.
	if waypoints_[nextWaypointId_] then
+		move(humanoid, waypoints_[nextWaypointId_ - 1], waypoints_[nextWaypointId_])
-		-- TODO
	end

	return true
end
それでは早速動作させて確認してみます。
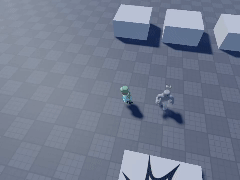
これでひとまず、PlayerCharacterに追従するようになりました!
5. サンプルコード
今回作成した最終的なサンプルコードを掲載しておきます。
サンプルコード
--!strict

-- Service
local Players = game:GetService("Players")
local ReplicatedStorage = game:GetService("ReplicatedStorage")
local StarterPlayer = game:GetService("StarterPlayer")

-- NPCの複製元になるRig
local Rig = ReplicatedStorage:WaitForChild("Rig")

-- 存在しているNPCのリスト.
local NPCs = {}::{Model}

-- ModelのPivotをおおよその足元に設定する関数.
local function setPivot(model: Model)
	local orientation, boundingBox = model:GetBoundingBox()
	if model.PrimaryPart then
		model.PrimaryPart.PivotOffset = CFrame.new(0, -boundingBox.Y * 0.5, 0)
	end
end

-- Playerが退出したらNPCを破棄する.
Players.PlayerRemoving:Connect(function(player: Player)
	if NPCs[player.UserId] then
		NPCs[player.UserId]:Destroy()
		NPCs[player.UserId] = nil
	end
end)

-- Playerが入室したら付いてくるNPCを追加する.
Players.PlayerAdded:Connect(function(player: Player)
	-- Rigを複製.
	local npc = Rig:Clone()

	-- Pivotをおおよその足元に設定.
	setPivot(npc)

	-- PlayerCharacterもPivotをおおよその足元に設定.
	local playerCharacter = player.Character or player.CharacterAdded:Wait()
	setPivot(playerCharacter)

	-- 基本の移動速度を設定.
	local humanoid = npc:WaitForChild("Humanoid")
	humanoid.WalkSpeed = StarterPlayer.CharacterWalkSpeed

	-- UserIdをキーにしてNPCを保持しておく.
	NPCs[player.UserId] = npc

	-- PlayerCharacterの前方に、PlayerCharacterの方を向けて生成する.
	local pcCFrame = playerCharacter:GetPivot()
	npc:PivotTo(CFrame.new(pcCFrame.Position + pcCFrame.LookVector * 20, pcCFrame.Position))

	-- Targetを設定.
	npc:WaitForChild("AccompanyingNpc"):WaitForChild("Target").Value = playerCharacter

	-- workspace下へ.
	npc.Parent = workspace

	-- 全てのBasePartのNetworkOwnerをサーバーにする.
	for i, v in ipairs(npc:GetDescendants()) do
		if v:IsA("BasePart") then
			v:SetNetworkOwner(nil)
		end
	end
end)
--!strict

-- Service
local PathfindingService = game:GetService("PathfindingService")

-- Constant
local WAIT = 0.16

-- Variable
local TargetValue = script:WaitForChild("Target")
local target_:PVInstance? = TargetValue.Value

local humanoid_ = script.Parent:WaitForChild("Humanoid")
local timer_ = 0

-- 経路探索関連.
local reachedConnection_: RBXScriptConnection?
local blockedConnection_: RBXScriptConnection?
local waypoints_: {PathWaypoint} = {}
local nextWaypointId_ = 2

-- Pathの作成.
local path_:Path do
	local agentParams_ = {
		-- AgentRadiusとAgentHeightは今回は固定値だが、Modelの情報を元に設定しても良い.
		AgentRadius = 2.5,
		AgentHeight = 6,
		AgentCanJump = true,
		WaypointSpacing = 4,
		Costs = {
			Jump = 3,
		}
	}::{[string]:any}

	path_ = PathfindingService:CreatePath(agentParams_)
end

-- 追尾ターゲットが変わったら設定.
TargetValue:GetPropertyChangedSignal("Value"):Connect(function()
	if TargetValue.Value and TargetValue.Value:IsA("PVInstance") then
		target_ = TargetValue.Value
	else
		target_ = nil
	end
end)

--[[
	PathWaypointに従って移動を行います.
	@param humanoid :Humanoid 対象のHumanoid
	@param startPathWaypoint :PathWaypoint 移動元のPathWaypoint
	@param endPathWaypoint :PathWaypoint 移動先のPathWaypoint
]]
local function move(humanoid :Humanoid, startPathWaypoint :PathWaypoint, endPathWaypoint :PathWaypoint)
	if endPathWaypoint.Action == Enum.PathWaypointAction.Walk then -- 歩行.
		humanoid:MoveTo(endPathWaypoint.Position)

	elseif endPathWaypoint.Action == Enum.PathWaypointAction.Jump then -- ジャンプ.
		-- 空中ジャンプ防止.
		if humanoid.FloorMaterial ~= Enum.Material.Air then
			-- ジャンプ.
			humanoid:ChangeState(Enum.HumanoidStateType.Jumping)
		end
		humanoid:MoveTo(endPathWaypoint.Position)

	end
end

-- 目標のWaypointに到達した時のイベントコールバック関数.
local function onMoveToFinished(reached: boolean)
	-- MoveToがタイムアウトした時は現在のWaypointsなどを初期化する.
	if not reached then
		waypoints_ = {}
		nextWaypointId_ = 2
		return
	end

	-- 次のポイントへ向かう.
	if nextWaypointId_ < #waypoints_ then
		nextWaypointId_ += 1
		-- 移動開始.
		move(humanoid_, waypoints_[nextWaypointId_ - 1], waypoints_[nextWaypointId_])
	end
end

-- 経路が遮断された時のイベントコールバック関数.
local function onBlocked(blockedWaypointIdx: number)
	-- 今向かっているWaypointより背後だったら無視.
	if blockedWaypointIdx < nextWaypointId_ then
		return
	end

	-- 前方だったら移動を中断.
	if reachedConnection_ then
		reachedConnection_:Disconnect()
		reachedConnection_ = nil
	end
	if blockedConnection_ then
		blockedConnection_:Disconnect()
		blockedConnection_ = nil
	end
end

--[[
	経路探索、及び移動の開始を行います.
	@param humanoid: Humanoid 行動するHumanoid.
	@param destination: Vector3 目標地点.
	@return boolean 経路探索の成否.
]]
local function toDestination(humanoid: Humanoid, destination :Vector3)
	-- 現在の行動がジャンプ中だったら何もしない.
	local waypoint = waypoints_[nextWaypointId_]
	if waypoint and string.find(waypoint.Label, "Jump") then
		return false
	end

	-- 足元が現在空中じゃない ただし、梯子登り中は空中でもOK 意図的でない梯子判定に触れて固まってしまうのを回避するため.
	local state = humanoid:GetState()
	if humanoid_.FloorMaterial == Enum.Material.Air and state ~= Enum.HumanoidStateType.Climbing then
		return false
	end

	-- 経路探索.
	local success = pcall(path_.ComputeAsync, path_, script.Parent:GetPivot().Position, destination)
	if not success or path_.Status == Enum.PathStatus.NoPath then
		return false
	end

	-- 過去の接続があったら破棄.
	if reachedConnection_ then
		reachedConnection_:Disconnect()
		reachedConnection_ = nil
	end
	if blockedConnection_ then
		blockedConnection_:Disconnect()
		blockedConnection_ = nil
	end

	-- イベントを接続.
	reachedConnection_ = humanoid.MoveToFinished:Connect(onMoveToFinished)
	blockedConnection_ = path_.Blocked:Connect(onBlocked)

	-- WaypointIdを初期化 開始地点が1なので、最初の目標地点は2.
	nextWaypointId_ = 2

	-- PathWaypointの配列を取得.
	waypoints_ = path_:GetWaypoints()::{PathWaypoint}

	-- 移動開始.
	if waypoints_[nextWaypointId_] then
		move(humanoid, waypoints_[nextWaypointId_ - 1], waypoints_[nextWaypointId_])
	end

	return true
end

game:GetService("RunService").Heartbeat:Connect(function(deltaTime: number)
	-- タイマーを進める.
	timer_ -= deltaTime

	-- 規定時間を過ぎるまでは何もしない.
	if timer_ > 0 then
		return
	end
	timer_ += WAIT

	-- 自分の状態チェック.
	local state = humanoid_:GetState()::Enum.HumanoidStateType
	if state == Enum.HumanoidStateType.Dead then
		return
	end

	-- ターゲットの存在チェック.
	if not target_ then
		return
	end

	-- 経路探索と移動開始.
	toDestination(humanoid_, target_:GetPivot().Position)
end)
6. まとめ
- 関係するModelのPivotを足元にしておくと経路探索が安定する
- NPCに含まれるBasePartのNetworkOwnerを、BasePart:SetNetworkOwnerで動作させたい環境に指定する
- RunService.Heartbeatを使って、定期的に再探索する
- 経路探索や移動そのものは通常と変わらない
- 梯子以外で空中にいる時は再探索しないようにしておく
今回で、PlayerCharacterに追従するNPCの基礎ができました!
ただし現状では、ひたすらPlayerCharacterの座標を目指すので常に密着してしまいますし、時々ジャンプが届かない、PathfindingLinkにも対応していない等、まだまだ修正点がありそうです。
それらの修正や追加は、次回の記事でご紹介させていただきますのでぜひご覧ください!
最後までお読みいただき、ありがとうございました!
7. 参考

当社ではRobloxを活用したゲームの開発、 また企業の商品やサービスの認知度拡大に寄与する3Dワールドの制作など、 Robloxにおける様々な活用支援を行っております。 Robloxのコンテンツ開発をご検討されている企業様は、お気軽にご相談ください。 landho.co.jp/
Discussion