1. はじめに
今回は、「ボタンを押すと一定距離を素早く一直線に進む」というダッシュ機能を作ってみようかと思います。
空中の場合はダッシュ中に落下せず、まっすぐ進むイメージです。
一見、単純に一直線に移動させればいいようですが、プレイヤーキャラクターの挙動は基本は物理演算で処理されているので、空中だと常に重力がかかって落下してしまいます。
適切に上方向に持ち上げる力をかけたり、落下速度を毎フレーム0で上書きすることでも実装できなくはなさそうですが、なかなか管理が面倒そうです。
こういう時に便利なのが、LinearVelocityです。
バージョン:0.669.0.6690660
2. LinearVelocity
LinearVelocityとは、物理演算の処理としてBasePartの持つ速度(BasePart.AssemblyLinearVelocity)を指定した速度になるよう調整するオブジェクトで、Attachment0プロパティに設定したAttachmentによって、対象にするBasePartと、そのどこに力をかけるのかを指定して使用します。
プロパティが多くちょっとややこしいのですが、それは一部のプロパティの設定によってモードが変わり、それに応じて機能するプロパティが変化するためで、実際に一度に意識する必要のあるプロパティの数はさほど多くありません。
そのモードを設定するプロパティがVelocityConstraintModeです。
VelocityConstraintMode
VelocityConstraintModeは、LinearVelocityによってどのような成分のベクトルを指定するかを決めるプロパティで、Vector、Plane、Lineの三種類のモードがあります。
モードによって機能する大半のプロパティが変化しますが、プロパティ名の最初にモード名が付いているものが多いので、そこを見ると多少理解しやすいかと思います。
まずは、一番わかりやすいVectorモードを使ってダッシュを作ってみることにします。
Vectorモードは、VectorVelocityというプロパティに設定しているVector3の値を元に、BasePartのAssemblyLinearVelocityを全て指定できるモードです。
これでワールド空間におけるY方向の加速度が0になるようにしてしまえば、とりあえず空中ダッシュでも落下しないというわけです。
RelativeTo
もう一つ、他のプロパティに影響するプロパティとして、RelativeToがあります。
これは、LinearVelocityのベクトルを何を基準に指定するか、というもので、Attachment0、Attachment1、Worldの三種類があります。
これらは、VelocityConstraintModeとの組み合わせで影響の仕方が変わってくるのですが、どのモードでも基本的な考え方は一緒なので、まずはVectorモードにおいての説明をします。
Attachment0は、BasePartに接続するために使っているAttachmentの向きを基準にします。
Attachment自体の向きはAttachment.AxisとAttachment.SecondaryAxisという二つのVector3の値によって定義されており、付けているBasePartの向きにAttachmentの向きが合わさって最終的な向きになりますが、Attachmentの向きをデフォルトのまま変えなければ、BasePartの向きがそのままAttachmentの最終的な向きになってくれます。
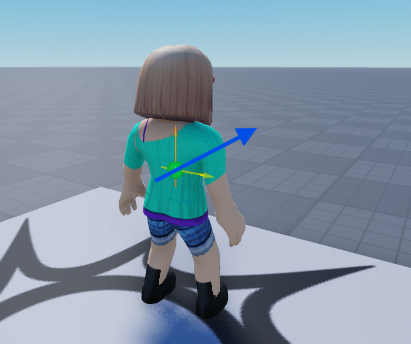
黄色がAxis、オレンジがSecondaryAxis、青がAttachmentの向き(LookVectorの方向)
Robloxにおける座標系はいわゆる右手系のY-upと呼ばれるもので、負のZ方向が前方を示すので、VectorVelocityに(0, 0, -1)を指定すれば、BasePartがどこを向いていてもBasePartの前方に対して1のベクトルになります。
これはダッシュに都合が良さそうですね。
ちなみに、Attachment自体の向きについて正確に説明すると、「Attachment.AxisとAttachment.SecondaryAxisという二つの正規化されたVector3の値によって定義されており、その二つの単位ベクトルによって作られる面の負の法線方向がAttachment自体の向きになる」という感じなのですが、今回は詳しく理解しなくても大丈夫です!
Attachment1は、指定する方式はAttachment0と同じなのですが、参照するAttachmentは、RelativeToをAttachment1に設定した時だけ有効になるプロパティのLinearVelocity.Attachment1に設定したものになります。
LinearVelocityをBasePartに接続しているAttachmentとは無関係なAttachmentを指定したい時に用います。
Worldは、そのままワールド空間におけるベクトルを指定するもので、例えばVectorVelocityに(1, 0, 0)を指定すれば、そのままワールド空間上でのXが正の方向への1のベクトルになります。
BasePartやAttachmentの向きは関係ありません。
BasePart.AssemblyLinearVelocityもワールド空間におけるベクトルとなっているので、単純にベクトルを指定したい時はこれがわかりやすいと思います。
ダッシュの時に毎回進行方向のベクトルを指定してやればWorldも良さそうですが、今回は簡単にダッシュが作れそうなAttachment0を使用します。
ForceLimitsEnabled
さらにもう一つ、他のプロパティが機能するかどうかに影響するプロパティとしてForceLimitsEnabledがあるのですが、これはLinearVelocityの与える力に制限をかけるかどうかを指定できるようにするもので、trueにすると与える力の上限を指定するプロパティが有効になります。
上限を指定するプロパティもVelocityConstraintModeによってどれを使うかが変わるのですが、今回は使用しないので説明は省略します。ForceLimitsEnabledはfalseにしておきましょう。
さて、説明が長くなりましたが、ここからScriptの作成をしていきましょう。
3. Vectorモードを使ったダッシュ
前準備
それでは、StarterCharacterScriptsにLocalScriptを追加してください。
名前は「Dash」としておきます。

前項の内容を元に、まずは最初の準備の記述を行いましょう。
--!strict

-- Service
local RunService = game:GetService("RunService")

-- Constant
local AIR_DASH_MAX = 1 -- 最大空中ダッシュ回数.
local DASH_FORCE = 100 -- ダッシュの強さ.
local DASH_DURATION = 0.5 -- ダッシュ時間(秒単位).
local ACTION_NAME: "Dash" = "Dash" -- アクション名.

-- Variable
local player_ = game:GetService("Players").LocalPlayer
local character_ = player_.Character or player_.CharacterAdded:Wait()
local rootPart_ = character_:WaitForChild("HumanoidRootPart")::Part
local humanoid_ = character_:FindFirstChildWhichIsA("Humanoid")

local baseWalkSpeed_ = humanoid_.WalkSpeed -- 元々の移動速度を保持.
local airDashCount_ = 0 -- 現在のダッシュ回数.

local heartbeatConnection_: RBXScriptConnection?
local endThread_: thread?

-- LinearVelocity用のAttachmentを作成.
local attachment = Instance.new("Attachment", rootPart_)
attachment.WorldPosition = rootPart_.AssemblyCenterOfMass -- 重心に力をかければ、角速度には影響しない.

-- LinearVelocityを作成.
local linearVelocity_ = Instance.new("LinearVelocity", rootPart_)
linearVelocity_.Name = "DashLinearVelocity"
linearVelocity_.Enabled = false
linearVelocity_.ForceLimitsEnabled = false -- LinearVelocityの強さに制限を付けない.
linearVelocity_.Attachment0 = attachment
linearVelocity_.RelativeTo = Enum.ActuatorRelativeTo.Attachment0 -- Attachment0の方向を基準にベクトルを決める.

linearVelocity_.VelocityConstraintMode = Enum.VelocityConstraintMode.Vector -- モードをVectorに設定.

-- Vectorモード用の設定.
linearVelocity_.VectorVelocity = Vector3.new(0, 0, -DASH_FORCE) -- 負のZ方向は前方を示す.

-- 保険の転倒禁止.
humanoid_:SetStateEnabled(Enum.HumanoidStateType.FallingDown, false)

-- 仮のダッシュ終了処理.
local function dashEnd()
	linearVelocity_.Enabled = false
end

-- 仮のダッシュ関数.
local function dash()
	linearVelocity_.Enabled = true

	task.delay(DASH_DURATION, dashEnd)
end

-- BindActionで、キーボードならEキー、スマートデバイスならUI上のボタンを押した時にダッシュするようにする.
do
	-- BindActionで設定するコールバック関数
	local function onAction(actionName: string, inputState: Enum.UserInputState, _inputObject: InputObject)
		if actionName ~= ACTION_NAME then
			return
		end

		if inputState ~= Enum.UserInputState.Begin then
			return
		end

		-- ダッシュ.
		dash()
	end

	-- アクションを設定 Eキーでダッシュ.
	local ContextActionService = game:GetService("ContextActionService")
	ContextActionService:BindAction(ACTION_NAME, onAction, true, Enum.KeyCode.E)

	-- スマートデバイス用のUIボタンを調整.
	local button = ContextActionService:GetButton(ACTION_NAME)::ImageButton
	if button then
		button.AnchorPoint = Vector2.new(1, 1)
		button.Size = UDim2.fromOffset(button.Size.X.Offset * 1.5, button.Size.Y.Offset * 1.5)
	end
end
必要そうな情報と、入力受付まわりを記述しました。
VelocityConstraintModeはVector、RelativeToはAttachment0、ForceLimitsEnabledはfalseになっており、VectorVelocityが前方を示す方向に指定されています。
この状態でEキーを押すと、LinearVelocity.Enabledがtrueになり、高速で前方に移動しだします。
まだそれだけなので曲がったりできちゃいますが、空中で使用しても落下しません。
LinearVelocityの挙動や、それを利用した空中ダッシュができそうな雰囲気は感じられます。
RBXScriptConnectionやthreadなど、現時点では「何に使うんだろう?」みたいな変数もありますが、この後出てきますので今は置いておきましょう。
保険の転倒禁止があるのは、高速で移動していると、地形と当たった時などにキャラクターが大きく回転してしまい、転倒状態(FallingDown状態)になって吹っ飛んでしまうことがあるためです。
これを回避するにも色々と工夫があるのですが、長くなってしまうので一旦今はFallingDownを禁止するだけで対応しています。
転倒が発生するような状況で怪しい挙動はしますが、とりあえず転倒はしなくなります。
ダッシュ
次に、実際のダッシュの挙動を作っていきましょう。
まずは、現状EnabledをtrueにしてからdashEndを予約しているだけの仮のダッシュ関数の中身を作っていきます。
仮のダッシュ関数を以下の内容に差し替えてください。
-- ダッシュ関数.
local function dash()
	-- ダッシュ中は使用不可.
	if linearVelocity_.Enabled then
		return
	end

	-- 死亡中は使用不可.
	if humanoid_:GetState() == Enum.HumanoidStateType.Dead then
		return
	end

	-- 空中ダッシュ回数上限.
	if airDashCount_ >= AIR_DASH_MAX then
		return
	end

	-- 空中の場合、空中ダッシュ回数をカウント.
	if humanoid_.FloorMaterial == Enum.Material.Air then
		airDashCount_ += 1
	end

	--現在の移動入力方向を取得.
	local direction = humanoid_.MoveDirection

	-- 移動している場合.
	if direction ~= Vector3.new() then
		-- 向きを移動方向に.
		rootPart_.CFrame = CFrame.new(rootPart_.Position, rootPart_.Position + direction)
	end

	-- 歩行速度を0に.
	humanoid_.WalkSpeed = 0

	-- LinearVelocityを有効にして現在の向きへダッシュ.
	linearVelocity_.Enabled = true

	-- ダッシュ中毎フレーム行うイベントを接続.
	local rotation = rootPart_.CFrame.Rotation
	heartbeatConnection_ = RunService.Heartbeat:Connect(function(deltaTime: number)
		-- ダッシュ中は常に進行方向を向かせる.
		rootPart_.CFrame = CFrame.new(rootPart_.CFrame.Position) * rotation
	end)

	-- 一定時間後に終了
	endThread_ = task.delay(DASH_DURATION, dashEnd)
end
使用不可の状況をチェックしているガード節や、空中ダッシュ回数のカウントをした後、Humanoid.MoveDirectionで現在の移動入力の方向をチェックし、キャラクターの向きをその方向に補正しています。
これは、単純に前方にダッシュさせるだけだと、振り向きの最中などではまだキャラクターが入力方向に向ききっておらず、プレイヤーの意図通りの方向にダッシュしてくれないためです。
その後、歩行速度を0にすることで、ダッシュ中は方向を変えられなくしています。
さらに、ダッシュ中は毎フレーム向きをダッシュ開始時の方向に直していますが、これは地形との接触などで向きが変わってしまっても元の向きに戻すためです。
最後にdashEndをtask.delayで予約して、戻り値のthreadを変数で受け取っています。
これはこの後のダッシュ終了処理で使用します。
それでは、仮のダッシュ終了処理も差し替えていきましょう。
-- ダッシュ終了処理.
local function dashEnd()
	-- ダッシュ中でなければ何もしない.
	if not linearVelocity_.Enabled then
		return
	end

	-- 終了処理が予約されていたらキャンセル.
	if endThread_ then
		pcall(task.cancel, endThread_)
		endThread_ = nil
	end

	-- イベントを切断.
	if heartbeatConnection_ then
		heartbeatConnection_:Disconnect()
		heartbeatConnection_ = nil
	end

	-- ダッシュ終了.
	linearVelocity_.Enabled = false

	-- 移動速度を元に戻す.
	humanoid_.WalkSpeed = baseWalkSpeed_

	-- 終わり際のAssemblyLinearVelocityを補正.
	local osVec = rootPart_.CFrame:VectorToObjectSpace(rootPart_.AssemblyLinearVelocity)
	rootPart_.AssemblyLinearVelocity = rootPart_.CFrame:VectorToWorldSpace(Vector3.new(0, 0, osVec.Z * 0.5))
end
基本的には開始時に行った事の後始末を行っている形です。
簡易的に、LinearVelocity.Enabledをダッシュ中かどうかのフラグとして利用しています。
その後、ダッシュ関数の最後に受け取ったthreadをキャンセルしています。
これは、task.delayによって実行される前に別の手段でdashEndが実行された場合に、task.delayで再度実行されないようにするためです。
最後の速度の補正では、現在のHumanoidRootPart.AssemblyLinearVelocityを、HumanoidRootPartのCFrame:VectorToObjectSpaceを使ってHumanoidRootPartのローカル空間のベクトルに変換し、前方へのベクトル成分だけを残したうえで減速して、CFrame:VectorToWorldSpaceを使ってワールド空間のベクトルに戻してHumanoidRootPart.AssemblyLinearVelocityに設定しています。
こうすることで適切に減速し、終わり際に地形に接触したりしても挙動をある程度安定させられます。
これでダッシュっぽい挙動になりましたが、このままだと一度空中ダッシュするとダッシュできなくなってしまいます。
着地で空中ダッシュ回数が復活するようにしましょう。
以下のコードを、LocalScriptの末尾に追加してください。
-- ジャンプでキャンセルできるように.
humanoid_.StateChanged:Connect(function(old: Enum.HumanoidStateType, new: Enum.HumanoidStateType)
	if new == Enum.HumanoidStateType.Jumping then
		dashEnd()
	end
end)

-- FloorMaterialで地上と空中を判断.
humanoid_:GetPropertyChangedSignal("FloorMaterial"):Connect(function()
	if humanoid_.FloorMaterial == Enum.Material.Air then
		-- ダッシュで空中に出た時、1回空中ダッシュ使用済みとして扱う.
		if not linearVelocity_.Enabled then
			return
		end
		airDashCount_ += 1

	else
		-- 接地時に空中ダッシュ回数をリセット
		airDashCount_ = 0
	end
end)
ついでに、ダッシュ状態をジャンプでキャンセルできるようにしてみました。
先ほどのthreadのキャンセルが意味を持ちましたね。
そして、着地で空中ダッシュ回数が復活するほかに、ダッシュで崖から空中に出た時も空中で一回使用したとカウントするようにしてみました。
これでひとまず、ダッシュの基本的な挙動は完成…したものの、どうせならダッシュっぽいモーションを取らせたいところです。
アニメーション
説明のために新規でモーションを作るのは大変なので、今回はRobloxが公開している既存のモーションを流用します。
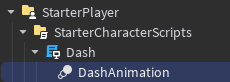
まずは、DashのScriptの子にAnimationを追加します。
名前は「DashAnimation」としておきます。
そして、DashAnimationのAnimationIdに「rbxassetid://10921157929」と入力しましょう。
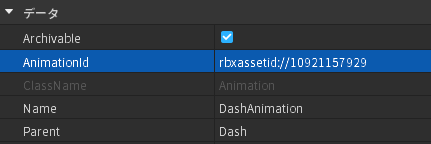
これは、Robloxが公開している「Ninja Animation Package」の中の「Ninja Run」のAnimationIDです。
Animationは通常、エクスペリエンスで使用する場合、自身がアップロードしたものか、そのエクスペリエンスを所有するグループがアップロードしたものしか使用できないのですが、Robloxが公開しているものは誰でも使用できます。
以下の公式ガイドのリンクから一部のAnimationIDを見ることができるので、自分で作らなくてもよさそうなものはこちらを利用するのもよいでしょう。
そして、以下のようにコードに追記してください。
 ------- 省略 -------

 -- Vectorモード用の設定.
linearVelocity_.VectorVelocity = Vector3.new(0, 0, -DASH_FORCE) -- 負のZ方向は前方を示す.
+
+-- AnimationTruckを作成.
+local animator_ = humanoid_:WaitForChild("Animator")::Animator
+local dashAnimTrack_ = animator_:LoadAnimation(script:WaitForChild("DashAnimation"))
+dashAnimTrack_.Priority = Enum.AnimationPriority.Action

 -- 保険の転倒禁止.
humanoid_:SetStateEnabled(Enum.HumanoidStateType.FallingDown, false)

 -- ダッシュ終了処理.
local function dashEnd()

 	------- 省略 -------

 	-- 終わり際のAssemblyLinearVelocityを補正.
	local osVec = rootPart_.CFrame:VectorToObjectSpace(rootPart_.AssemblyLinearVelocity)
	rootPart_.AssemblyLinearVelocity = rootPart_.CFrame:VectorToWorldSpace(Vector3.new(0, 0, osVec.Z * 0.5))
+
+	-- Animation終了.
+	dashAnimTrack_:Stop(0.2)
end

 -- ダッシュ関数.
local function dash()

 	------- 省略 -------

 	-- ダッシュ中毎フレーム行うイベントを接続.
	local rotation = rootPart_.CFrame.Rotation
	heartbeatConnection_ = RunService.Heartbeat:Connect(function(deltaTime: number)
 		-- ダッシュ中は常に進行方向を向かせる.
		rootPart_.CFrame = CFrame.new(rootPart_.CFrame.Position) * rotation
	end)
+
+	-- Animationを再生.
+	dashAnimTrack_:Play(0.1, nil, 0)
+	dashAnimTrack_.TimePosition = 0.6

	-- 一定時間後に終了
	endThread_ = task.delay(DASH_DURATION, dashEnd)
end
最初に、ロードしたAnimationTruckのPriorityをActionに設定しています。
これは通常デフォルトで行われている歩行、ジャンプ等のAnimationより優先順位が高いので、それらのモーションを上書きして再生されます。
そして、再生する時に再生速度を0、TimePositionを0.6に設定しています。
0.6秒時点から速度0で再生することで、Animationの中の0.6秒時点の状態を固定のポーズとして再生しているわけです。
これで、ダッシュっぽいポーズを取らせています。
さっそく実行して確認してみましょう。
これでひとまず、LinearVelocityのVectorモードを使ったダッシュ機能が完成しました!
4. サンプルコード
今回作成した最終的なサンプルコードを掲載しておきます。
サンプルコード
--!strict

-- Service
local RunService = game:GetService("RunService")

-- Constant
local AIR_DASH_MAX = 1 -- 最大空中ダッシュ回数.
local DASH_FORCE = 100 -- ダッシュの強さ.
local DASH_DURATION = 0.5 -- ダッシュ時間(秒単位).
local ACTION_NAME: "Dash" = "Dash" -- アクション名.

-- Variable
local player_ = game:GetService("Players").LocalPlayer
local character_ = player_.Character or player_.CharacterAdded:Wait()
local rootPart_ = character_:WaitForChild("HumanoidRootPart")::Part
local humanoid_ = character_:FindFirstChildWhichIsA("Humanoid")

local baseWalkSpeed_ = humanoid_.WalkSpeed -- 元々の移動速度を保持.
local airDashCount_ = 0 -- 現在のダッシュ回数.

local heartbeatConnection_: RBXScriptConnection?
local endThread_: thread?

-- LinearVelocity用のAttachmentを作成.
local attachment = Instance.new("Attachment", rootPart_)
attachment.WorldPosition = rootPart_.AssemblyCenterOfMass -- 重心に力をかければ、角速度には影響しない.

-- LinearVelocityを作成.
local linearVelocity_ = Instance.new("LinearVelocity", rootPart_)
linearVelocity_.Name = "DashLinearVelocity"
linearVelocity_.Enabled = false
linearVelocity_.ForceLimitsEnabled = false -- LinearVelocityの強さに制限を付けない.
linearVelocity_.Attachment0 = attachment
linearVelocity_.RelativeTo = Enum.ActuatorRelativeTo.Attachment0 -- Attachment0の方向を基準にベクトルを決める.

linearVelocity_.VelocityConstraintMode = Enum.VelocityConstraintMode.Vector -- モードをVectorに設定.

-- Vectorモード用の設定.
linearVelocity_.VectorVelocity = Vector3.new(0, 0, -DASH_FORCE) -- 負のZ方向は前方を示す.

-- AnimationTruckを作成.
local animator_ = humanoid_:WaitForChild("Animator")::Animator
local dashAnimTrack_ = animator_:LoadAnimation(script:WaitForChild("DashAnimation"))
dashAnimTrack_.Priority = Enum.AnimationPriority.Action

-- 保険の転倒禁止.
humanoid_:SetStateEnabled(Enum.HumanoidStateType.FallingDown, false)

-- ダッシュ終了処理.
local function dashEnd()
	-- ダッシュ中でなければ何もしない.
	if not linearVelocity_.Enabled then
		return
	end

	-- 終了処理が予約されていたらキャンセル.
	if endThread_ then
		pcall(task.cancel, endThread_)
		endThread_ = nil
	end

	-- イベントを切断.
	if heartbeatConnection_ then
		heartbeatConnection_:Disconnect()
		heartbeatConnection_ = nil
	end

	-- ダッシュ終了.
	linearVelocity_.Enabled = false

	-- 移動速度を元に戻す.
	humanoid_.WalkSpeed = baseWalkSpeed_

	-- 終わり際のAssemblyLinearVelocityを補正.
	local osVec = rootPart_.CFrame:VectorToObjectSpace(rootPart_.AssemblyLinearVelocity)
	rootPart_.AssemblyLinearVelocity = rootPart_.CFrame:VectorToWorldSpace(Vector3.new(0, 0, osVec.Z * 0.5))

	-- Animation終了.
	dashAnimTrack_:Stop(0.2)
end

-- ダッシュ関数.
local function dash()
	-- ダッシュ中は使用不可.
	if linearVelocity_.Enabled then
		return
	end

	-- 死亡中は使用不可.
	if humanoid_:GetState() == Enum.HumanoidStateType.Dead then
		return
	end

	-- 空中ダッシュ回数上限.
	if airDashCount_ >= AIR_DASH_MAX then
		return
	end

	-- 空中の場合、空中ダッシュ回数をカウント.
	if humanoid_.FloorMaterial == Enum.Material.Air then
		airDashCount_ += 1
	end

	--現在の移動入力方向を取得.
	local direction = humanoid_.MoveDirection

	-- 移動している場合.
	if direction ~= Vector3.new() then
		-- 向きを移動方向に.
		rootPart_.CFrame = CFrame.new(rootPart_.Position, rootPart_.Position + direction)
	end

	-- 歩行速度を0に.
	humanoid_.WalkSpeed = 0

	-- LinearVelocityを有効にして現在の向きへダッシュ.
	linearVelocity_.Enabled = true

	-- ダッシュ中毎フレーム行うイベントを接続.
	local rotation = rootPart_.CFrame.Rotation
	heartbeatConnection_ = RunService.Heartbeat:Connect(function(deltaTime: number)
		-- ダッシュ中は常に進行方向を向かせる.
		rootPart_.CFrame = CFrame.new(rootPart_.CFrame.Position) * rotation
	end)

	-- Animationを再生.
	dashAnimTrack_:Play(0.1, nil, 0)
	dashAnimTrack_.TimePosition = 0.6

	-- 一定時間後に終了
	endThread_ = task.delay(DASH_DURATION, dashEnd)
end

-- BindActionで、キーボードならEキー、スマートデバイスならUI上のボタンを押した時にダッシュするようにする.
do
	-- BindActionで設定するコールバック関数
	local function onAction(actionName: string, inputState: Enum.UserInputState, _inputObject: InputObject)
		if actionName ~= ACTION_NAME then
			return
		end

		if inputState ~= Enum.UserInputState.Begin then
			return
		end

		-- ダッシュ.
		dash()
	end

	-- アクションを設定 Eキーでダッシュ.
	local ContextActionService = game:GetService("ContextActionService")
	ContextActionService:BindAction(ACTION_NAME, onAction, true, Enum.KeyCode.E)

	-- スマートデバイス用のUIボタンを調整.
	local button = ContextActionService:GetButton(ACTION_NAME)::ImageButton
	if button then
		button.AnchorPoint = Vector2.new(1, 1)
		button.Size = UDim2.fromOffset(button.Size.X.Offset * 1.5, button.Size.Y.Offset * 1.5)
	end
end

-- ジャンプでキャンセルできるように.
humanoid_.StateChanged:Connect(function(old: Enum.HumanoidStateType, new: Enum.HumanoidStateType)
	if new == Enum.HumanoidStateType.Jumping then
		dashEnd()
	end
end)

-- FloorMaterialで地上と空中を判断.
humanoid_:GetPropertyChangedSignal("FloorMaterial"):Connect(function()
	if humanoid_.FloorMaterial == Enum.Material.Air then
		-- ダッシュで空中に出た時、1回空中ダッシュ使用済みとして扱う.
		if not linearVelocity_.Enabled then
			return
		end
		airDashCount_ += 1

	else
		-- 接地時に空中ダッシュ回数をリセット
		airDashCount_ = 0
	end
end)
5. まとめ
- LinearVelocityは、付けたBasePartのAssemblyLinearVelocityを指定できるオブジェクト
- VelocityConstraintModeは、どのような成分のベクトルを指定するかを決めるプロパティで、Vector、Plane、Lineの3つのモードがある
- Vectorモードは、AssemblyLinearVelocityを全て指定できるモード
- RelativeToは、LinearVelocityのベクトルを何を基準に指定するかを決めるプロパティで、Attachment0、Attachment1、Worldの三種類がある
- Attachment0は、BasePartとの接続に使用しているAttachmentの向きを基準に指定する
- ForceLimitsEnabledをtrueにすると、LinearVelocityが与える力の強さに上限を設定できるようになる
- CFrame:VectorToObjectSpaceは、Vector3をそのCFrameのローカル空間のベクトルに、CFrame:VectorToWorldSpaceはワールド空間のベクトルに変換できる
今回は、LinearVelocityのVectorモードを使ったダッシュ、エアダッシュを作成しました!
ただしこのダッシュ、坂道や壁に接触すると引っかかってしまう問題があります。
それらの対応には、今回紹介できなかったPlaneモードやLineモードが使えたりするのですが、それは次回の記事でご紹介させていただきますので、次回もぜひご覧ください!
最後までお読みいただき、ありがとうございました!
6. 参考

当社ではRobloxを活用したゲームの開発、 また企業の商品やサービスの認知度拡大に寄与する3Dワールドの制作など、 Robloxにおける様々な活用支援を行っております。 Robloxのコンテンツ開発をご検討されている企業様は、お気軽にご相談ください。 landho.co.jp/
Discussion