はじめに
今回はRobuxを使用してゲーム内アイテムを購入できるようにする実装について共有していきます。
今回やること動画
手順
- ボタンなどのUIを用意
- ローカルスクリプト配置
- 開発者製品をプロジェクトに登録しIDを取得
- 先ほどのIDを含めて
MarketplaceServiceのAPIを叩けるようにする -
ServerScriptServiceにMarketplaceServiceのハンドラを作成 - 購入したときの処理を書く
終了
開発者製品の登録

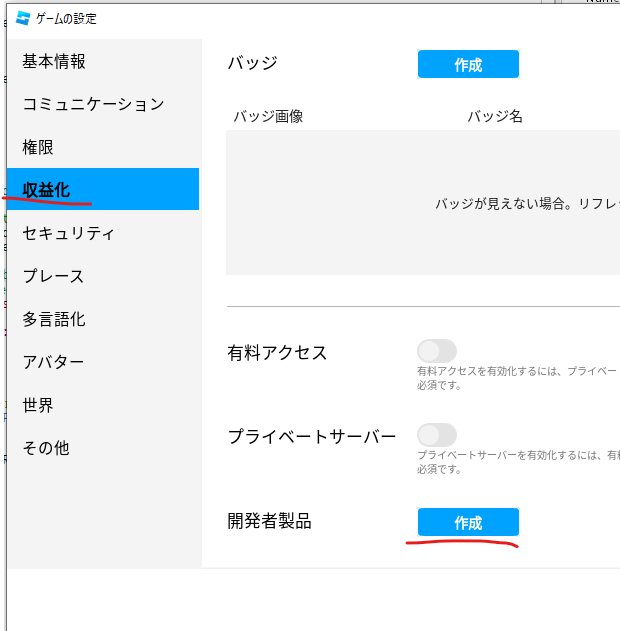

ホームタブからゲーム設定を開き収益化タブを開くと開発者製品を作成するボタンがある。
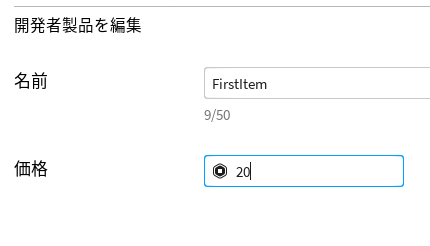
名前とその価格を設定する。今回は二つ製品を用意しました。
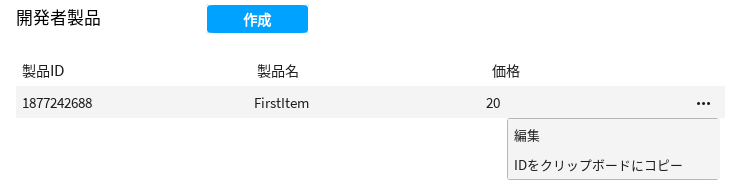
作成したらIDが発行されるのでメモっておきましょう。
UIを配置
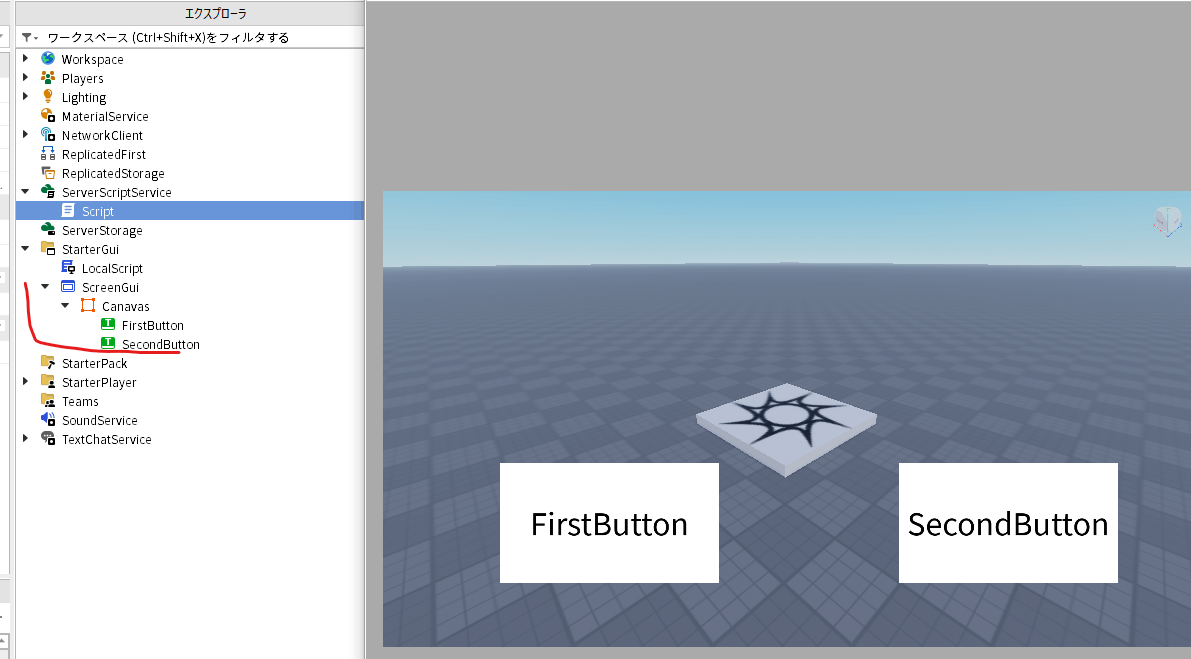
今回は適当に二つの製品があるので二つのボタンを用意する。
フォルダ階層
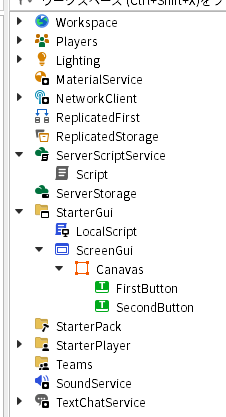
ローカルスクリプト
local Players = game:GetService("Players")
local MarketplaceService = game:GetService("MarketplaceService")

local player = Players.LocalPlayer

local gui = script.Parent.ScreenGui
local canvas = gui.Canavas

local firstButton = canvas.FirstButton
local secondButton = canvas.SecondButton

local function promptProductPurchase(productId)
	MarketplaceService:PromptProductPurchase(player, productId)
end

firstButton.Activated:Connect(function()
	promptProductPurchase(1877242688)
end)

secondButton.Activated:Connect(function()
	promptProductPurchase(1877243557)
end)
promptProductPurchaseを用意する。引数に先ほどメモしたIDを入れて実行していくことでそのIDの製品が購入できる感じだ。
サーバースクリプト
local Players = game:GetService("Players")
local MarketplaceService = game:GetService("MarketplaceService")

local productFunctions = {}

--first itemが購入されたときに実行される
productFunctions[1877242688] = function(receipt, player)
	print("FirstItemが購入された")
end

``second itemが購入されたときに実行される
productFunctions[1877243557] = function(receipt, player)
	print("SecondItemが購入された")
end

local function processReceipt(receiptInfo)
	local userId = receiptInfo.PlayerId
	local productId = receiptInfo.ProductId

	local player = Players:GetPlayerByUserId(userId)
	if player then

        local handler = productFunctions[productId]
		local success, result = pcall(handler, receiptInfo, player)
		if success then

			return Enum.ProductPurchaseDecision.PurchaseGranted
		else
			warn("Failed to process receipt:", receiptInfo, result)
		end
	end

	return Enum.ProductPurchaseDecision.NotProcessedYet
end

MarketplaceService.ProcessReceipt = processReceipt
productFunctionsという関数の配列の殻を用意する。そして先ほどメモったIDをキーにして関数の中身を書いていく。
ローカルスクリプトのpromptProductPurchaseを実行したら自動でprocessReceipt関数が動く。
processReceipt関数の中身のlocal handler = productFunctions[productId]で指定した開発者製品の処理がpcallで実行されていく感じだ。
関数をキーとペアにして実行するテクニックの基本についてはこちら
応用
開発者製品を購入したら自分のゲーム内通貨が増える実装をしてみます。
変更を加えるのサーバースクリプトのみになります。
local Players = game:GetService("Players")
local MarketplaceService = game:GetService("MarketplaceService")

local productFunctions = {}

Players.PlayerAdded:Connect(function(player)

	local info = Instance.new("Folder")
	info.Name = "Info"
	info.Parent = player

	local coins = Instance.new("IntValue")
	coins.Name = "Coins"
	coins.Value = 0
	coins.Parent = info

end)

--first itemが購入されたときに実行される
productFunctions[1877242688] = function(receipt, player)
	player.Info.Coins.Value += 100
	print("Coins : ".. player.Info.Coins.Value)
end

--second itemが購入されたときに実行される
productFunctions[1877243557] = function(receipt, player)
	player.Info.Coins.Value += 500
	print("Coins : ".. player.Info.Coins.Value)
end

local function processReceipt(receiptInfo)
	local userId = receiptInfo.PlayerId
	local productId = receiptInfo.ProductId

	local player = Players:GetPlayerByUserId(userId)
	if player then

        local handler = productFunctions[productId]
		local success, result = pcall(handler, receiptInfo, player)
		if success then

			return Enum.ProductPurchaseDecision.PurchaseGranted
		else
			warn("Failed to process receipt:", receiptInfo, result)
		end
	end

	return Enum.ProductPurchaseDecision.NotProcessedYet
end

MarketplaceService.ProcessReceipt = processReceipt
プレイヤーが入室したらIntValueを作成します。
それぞれの購入処理の中に通貨を増やす処理を書く。
これだけですね!あとはデータストアとかで保存できるようにすればちゃんとしたゲームが作れそうです!

Discussion