👏
htmxコア入門
htmxの実装は4000行弱のJavaScriptファイルで、そんなに特殊なこともしていなかったので読みやすかった
なんか懐しい感じがすると思ったけどjQuery世代の設計っぽい。変数がvarで定義されているし
全体
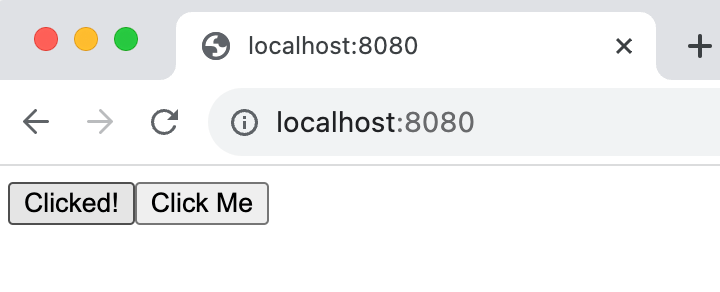
以下のようなDOMで考えてみる
<body>
    <button hx-get="/clicked" hx-swap="outerHTML">Click Me</button>
</body>
❯ curl http://127.0.0.1:8080/clicked
<button hx-get="/clicked" hx-swap="outerHTML">Clicked!</button>
-
querySelectorAll()でbody以下を探索して
hx-*attributesが定義されたelementsにCustomEventhtmx:*のリスナーを追加 - aタグやformタグからXHRを送信してonload()内の処理からdispatchEvent()で
htmx:*イベントをシーケンシャルに呼んでいく - イベントからDOMのswap(入れ替え)フェーズに入り、内部状態をclassListに保持
- insertBefore()でXHRで受け取ったレスポンスをouterHTMLとして描画したHTMLを追加して、removeChild()で古い<button>を消す
なのでswap中に両方のelementが見える
> document.body.outerHTML
'<body><button hx-get="/clicked" hx-swap="outerHTML" class="htmx-added">Clicked!</button><button hx-get="/clicked" hx-swap="outerHTML" class="htmx-request htmx-swapping">Click Me</button>
</body>'

デバッグの仕方
htmx.jsをGitHubからダウンロードしてきてローカルから読み込んでVSCodeからデバッグ
npx http-server
<script src="/htmx.js"></script>
<body>
    <button hx-get="/clicked" hx-swap="outerHTML">Click Me</button>
</body>
{
    "version": "0.2.0",
    "configurations": [
        {
            "type": "chrome",
            "request": "launch",
            "name": "Launch Chrome against localhost",
            "url": "http://localhost:8080",
            "webRoot": "${workspaceFolder}"
        }
    ]
}
重要な処理
エントリーポイント
DOMContentLoadedに反応している場所から見る
exports
アプリケーション側のwindow.htmxから以下が触れる
triggerEvent
processVerbs
リクエストが発生した時に呼ばれる処理を登録している個所
processNode -> findElementsToProcess -> initNodeと呼ばれている
Discussion