Closed8
Playwright > Getting Started > Installation
2024年4月10日時点でのPlaywright > Getting Started > Installationをやる
前提
- masOS Ventura 13.1
- Node.js v20.9.0
Installing Playwright
お試し用のディレクトリ直下で以下のコマンドを実行し、 Playwrightをインストールする。
(インストールというよりプロジェクトの作成や初期化という表現が正しいと思う。)
npm init playwright@latest
以下が表示されるのでyを入力しEnterキーを押す。
Need to install the following packages:
  create-playwright@1.17.132
Ok to proceed? (y)
Playwrightプロジェクトの初期設定を行う。全部デフォルト値のままEnterキーを押し続ける。
Getting started with writing end-to-end tests with Playwright:
Initializing project in '.'
✔ Do you want to use TypeScript or JavaScript? · TypeScript
✔ Where to put your end-to-end tests? · tests
✔ Add a GitHub Actions workflow? (y/N) · false
✔ Install Playwright browsers (can be done manually via 'npx playwright install')? (Y/n) · true
What's Installed
初期化すると以下のファイルが作成されるとドキュメントに書かれている。
実際は以下に加えて.gitignoreも作成された。
playwright.config.ts
package.json
package-lock.json
tests/
  example.spec.ts
tests-examples/
  demo-todo-app.spec.ts
初期化だけして(正確にいうと初期化後にライセンスだけ自分で追加している)コミットしたので、初期化により作成されたファイルの詳細は以下のコミットから見れる。
Running the Example Test
以下のコマンドを実行し、テストを実行する。
npx playwright test
Running 6 tests using 4 workers
  6 passed (7.7s)

To open last HTML report run:

  npx playwright show-report
workerが4というのがよくわからないが一旦置いておく。
HTML Test Reports
以下のコマンドを実行し、レポートをブラウザで確認する。
npx playwright show-report
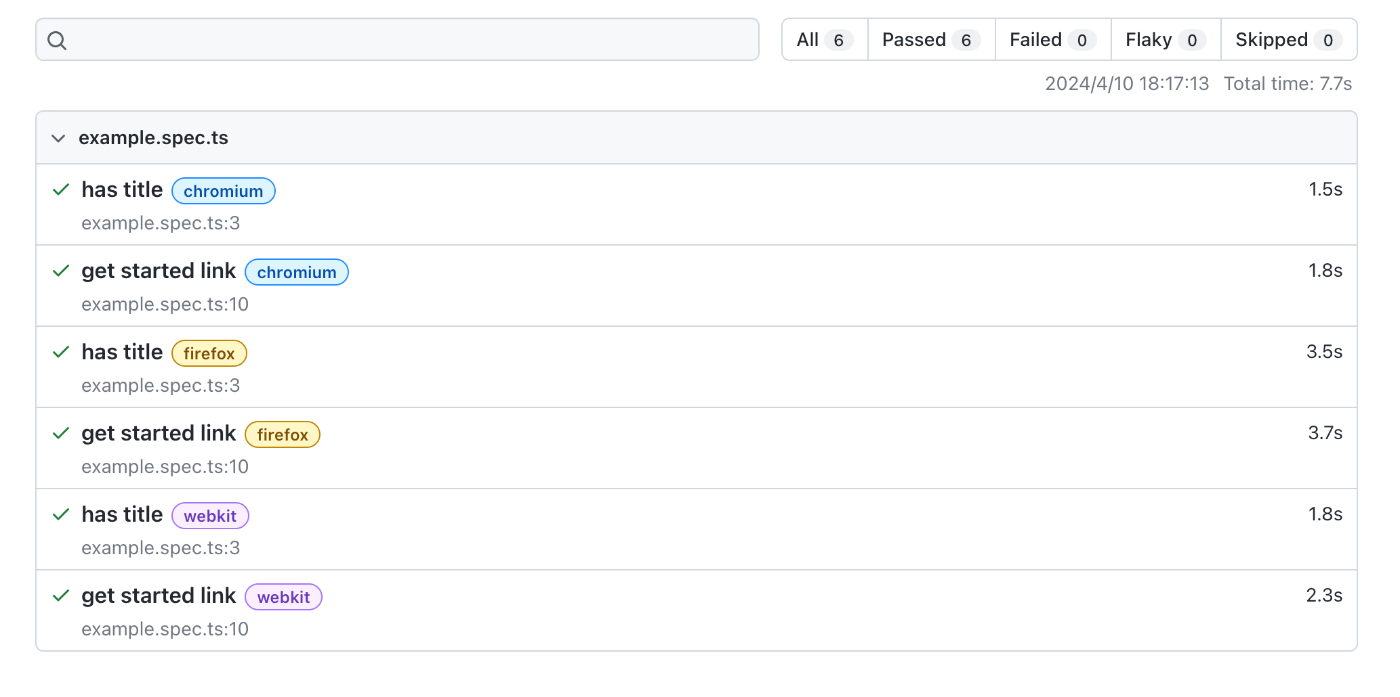
以下のページがhttp://localhost:9323で立ち上がった。

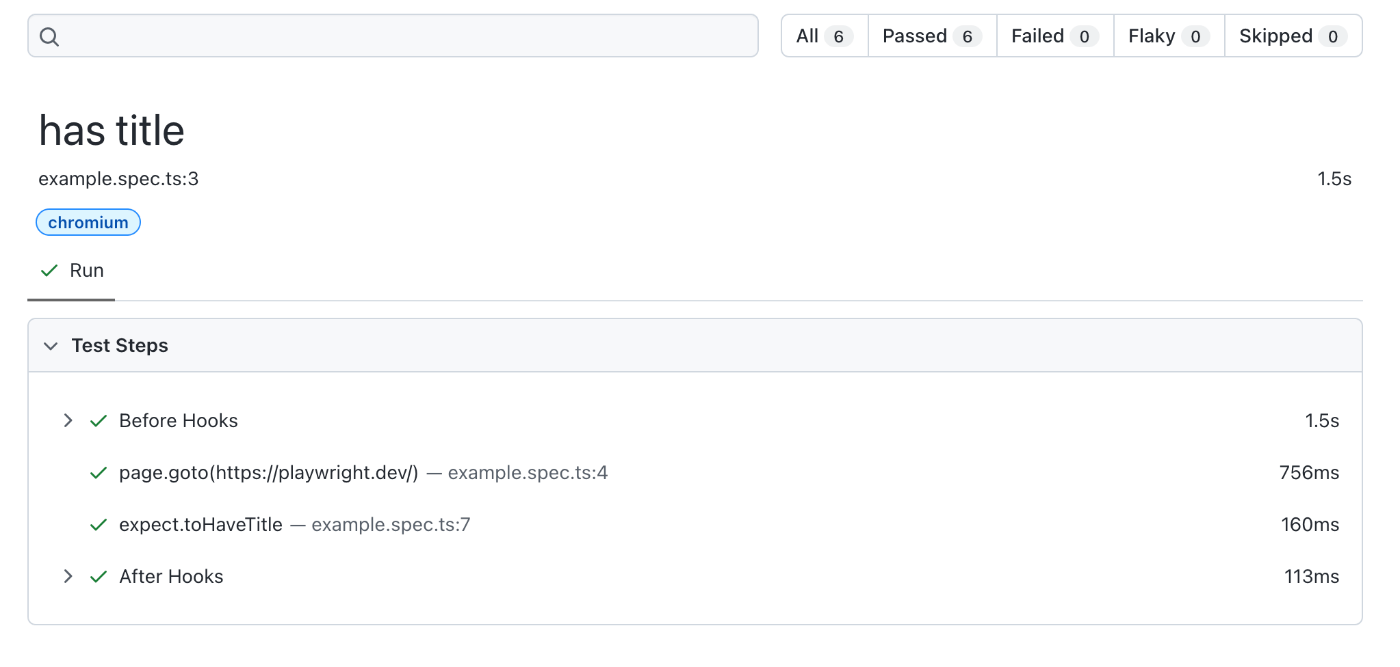
一番上に表示されているテストchromiumのhas titleをクリックすると以下のようにテストの詳細を確認できる。

Running the Example Test in UI Mode
以下のコマンドを実行し、UIモードでテストを実行する。正確にはコマンドを実行してもテストがすぐに実行されるわけではなく、テストを実行できるUIが立ち上がる。
npx playwright test --ui
Updating Playwright
最新のバージョンで初期化したばかりなので試してないが以下のコマンドが紹介されている。
npm install -D @playwright/test@latest
# Also download new browser binaries and their dependencies:
npx playwright install --with-deps
合わせてバージョンの確認方法も紹介されている。
npx playwright --version
Version 1.43.0
このスクラップは2024/04/10にクローズされました