Bitbucket PipelinesによるAWS Lambda へのデプロイ環境を構築する
事前準備
Bitbucketリポジトリの作成
以下記事の1~2が完了していること
構築手順
1.Bitbucketの設定
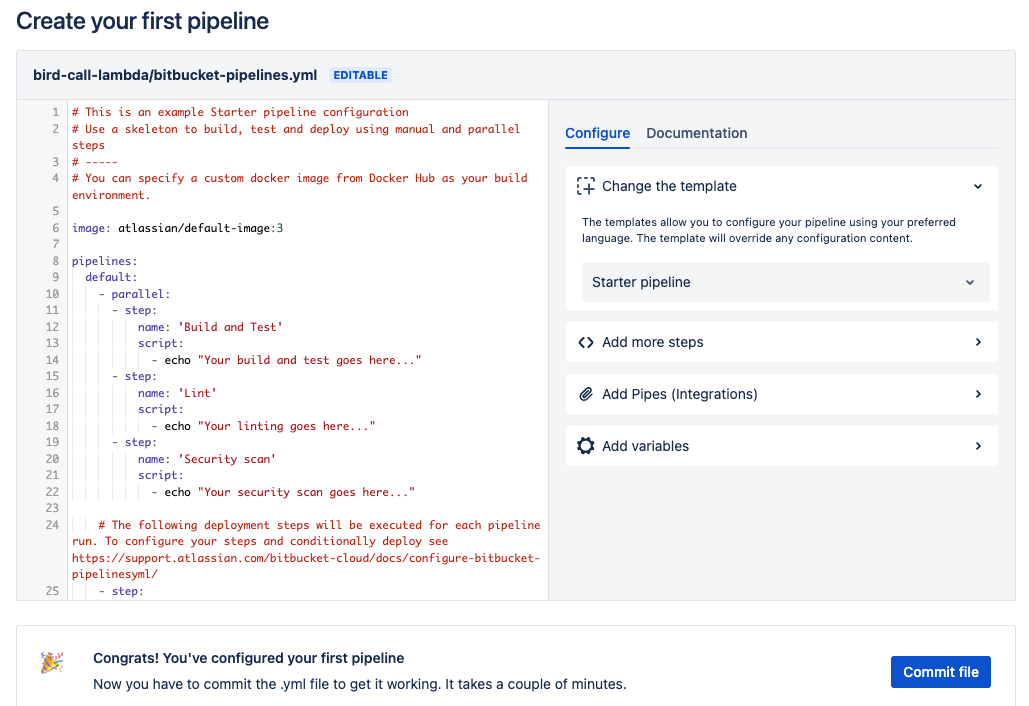
①左メニューよりパイプライン > Starter pipelineを選択

②bitbcuket-pipelines.ymlを編集する
添付画像部分に、下記ソースコードを貼り付ける

image: php:latest

pipelines:
  default:
    - step:
        name: Deploy to AWS Lambda
        script:
          - apt-get update
          - apt-get install -y awscli unzip
          - curl -OL https://github.com/aws/aws-sam-cli/releases/latest/download/aws-sam-cli-linux-x86_64.zip
          - unzip aws-sam-cli-linux-x86_64.zip -d ./sam-installation
          - ./sam-installation/install
          - rm -rf aws-sam-cli-linux-x86_64.zip
          - rm -rf ./sam-installation
          - aws configure set aws_access_key_id <YOUR_ACCESS_KEY_ID>
          - aws configure set aws_secret_access_key <YOUR_SECRET_ACCESS_KEY>
          - aws configure set default.region <AWS_REGION>
          - sam package --s3-bucket <YOUR_S3_BUCKET_NAME> --template-file template.yaml --output-template-file bref-output.yaml
          - sam deploy --template-file bref-output.yaml --stack-name <YOUR_STACK_NAME> --capabilities CAPABILITY_IAM
<YOUR_ACCESS_KEY_ID>
<YOUR_SECRET_ACCESS_KEY>
<AWS_REGION>
<YOUR_S3_BUCKET_NAME>
<YOUR_STACK_NAME>
を設定する
<補足>
apt-get install -y awscli unzip:AWS CLIとunzipをインストール
curl -OL https://github.com/aws/aws-sam-cli/releases/latest/download/aws-sam-cli-linux-x86_64.zip :AWS SAM CLIをダウンロードし、解凍する(AWS LambdaにデプロイするためのCLIツール)
sam package --s3-bucket <YOUR_S3_BUCKET_NAME> --template-file template.yaml --output-template-file bref-output.yaml:AWS SAM CLIを使って、Lambda関数をパッケージ化し、指定したS3バケットにアップロード
sam deploy --template-file bref-output.yaml --stack-name <YOUR_STACK_NAME> --capabilities CAPABILITY_IAM:パッケージ化したLambda関数をAWS上にデプロイ
2.リポジトリにPushする
下記記事の①の1~2のファイル群を対象リポジトリにpushする
ファイル構成は以下
・vendor
・composer.json
・composer.lock
・index.php
・templete.yaml
・bitbucket-pipelines.yml(1-②で作成したもの)
②Bitbcuketよりパイプラインが正常に動作しているか確認
左メニューよりパイプラインをクリック
ステータスが「Successful」になっていることを確認

Lambdaでデプロイされているか確認

※関数名は、template.yamlのFunctionNameで設定した名前
参考にした記事
Discussion