[Unity]XR Interaction ToolkitからOculus Integrationのコントローラーモデルを動かす


XR Interaction Toolkitを使用している環境で、Oculus Integrationに入っているOculus Touchのコントローラ―のモデルを動かすメモです。
前提条件
- Windows 10
- Unity 2021.2.1f1
- XR Interaction Toolkit 2.0.0-pre.5
- XR Plugin Management 4.0.7
- Oculus Integration 35.0

XR Plugin Management、XR Interaction Toolkit、Oculus Integrationをインストールして、諸々設定&シーンにXR Originを配置した状態とします。
コントローラ―のモデルを追加する
Oculus > VR > Meshesの中に、デバイスごとのモデルを格納しているフォルダがあります。
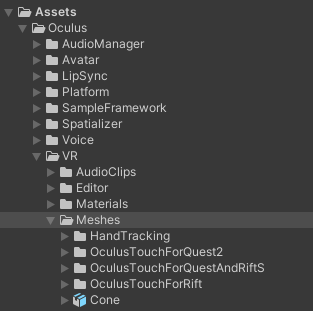
それぞれのフォルダには、デバイスごとのモデルと、AnimationController、Materialが格納されています。
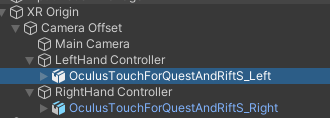
今回はOculusTouchForQuestAndRiftSフォルダの下にある、OculusTouchForQuestAndRiftS_LeftとOculusTouchForQuestAndRiftS_Rightを、XR Originの中にあるLeftHand ControllerとRightHand Controllerの下にそれぞれ配置しました。
また、コントローラのAnimatorに、対応するAnimation Controllerを格納します。
Animation Controllerは、モデルが格納されているフォルダにあるAnimationフォルダの下に入っています。

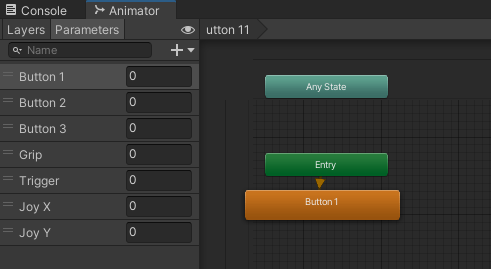
Animatorの中は下の画像のようになっていて、Button 1、Button 2等のパラメータを設定すると、コントローラーのモデルの対応するボタンが動作します。
InputActionを作成する
コントローラーの入力を取得してAnimatorを動作させるため、それぞれのボタンと対応するInput Actionを作成します。
プロジェクトウインドウを右クリックして、Create > Input ActionsでInput Actionを作成します。名前は仮にOculus Controller Actionsとしておきます。
作成したInput Actionを開いて、入力の設定を行っていきます。

まず、左右のコントローラ―用のAction Mapを追加しています。ここでは名前をOculus Left ControllerとOculus Right Controllerにしています。
Oculus Left Controllerについて、それぞれのボタンと対応するActionとBindingを追加します。
| Actions | Action Type | Control Type | Binding |
|---|---|---|---|
| Primary Button | Button | なし | XR Controller > XR Controller(Left Hand) > Optional Controls > primaryButton [LeftHand XR Controller] |
| Secondary Button | Button | なし | XR Controller > XR Controller(Left Hand) > Optional Controls > secondaryButton [LeftHand XR Controller] |
| Menu Button | Button | なし | XR Controller > XR Controller(Left Hand) > Optional Controls > menuBotton [LeftHand XR Controller] |
| Trigger | Value | Axis | XR Controller > XR Controller(Left Hand) > Optional Controls > trigger [LeftHand XR Controller] |
| Grip | Value | Axis | XR Controller > XR Controller(Left Hand) > Optional Controls > grip [LeftHand XR Controller] |
| Thumbstick | Value | Vector2 | XR Controller > XR Controller(Left Hand) > Optional Controls > thumbstick [LeftHand XR Controller] |
右のコントローラーも同様に設定します。右のコントローラーを設定する際は、XR Controller(Left Hand)をXR Controller(Right Hand)にする必要があります。
以下のようなInput Actionが作成されます。

InputActionの入力を受け取って、アニメーションを更新する
LeftHand Controller、Right HandControllerにそれぞれ、以下のようなスクリプトを追加します。
using UnityEngine;
using UnityEngine.InputSystem;

public class OculusControllerAnimation : MonoBehaviour
{
	[SerializeField]
	private InputActionReference primaryButtonAction;

	[SerializeField]
	private InputActionReference secondaryButtonAction;

	[SerializeField]
	private InputActionReference menuButtonAction;

	[SerializeField]
	private InputActionReference thumbstickAction;

	[SerializeField]
	private InputActionReference triggerAction;

	[SerializeField]
	private InputActionReference gripAction;

	[SerializeField]
	private Animator m_animator;

	private void Awake()
	{
		if (m_animator == null)
		{
			m_animator = GetComponent<Animator>();
		}
	}

	private void Update()
	{
		// Animatorが存在しない場合は終了
		if (m_animator == null) return;

		// モデルのボタン等を更新
		m_animator.SetFloat("Button 1", primaryButtonAction.action.ReadValue<float>());
		m_animator.SetFloat("Button 2", secondaryButtonAction.action.ReadValue<float>());
		m_animator.SetFloat("Button 3", menuButtonAction.action.ReadValue<float>());
		m_animator.SetFloat("Joy X", thumbstickAction.action.ReadValue<Vector2>().x);
		m_animator.SetFloat("Joy Y", thumbstickAction.action.ReadValue<Vector2>().y);
		m_animator.SetFloat("Trigger", triggerAction.action.ReadValue<float>());
		m_animator.SetFloat("Grip", gripAction.action.ReadValue<float>());
	}
}
それぞれのスクリプトに、先ほど作成したOculus Controller Actionsから、対応するInput Action Referenceを格納します。
また、AnimatorにはOculusTouchForQuestAndRiftS_XXXのAnimatorを格納します。

コントローラが動作するようになります。
その他
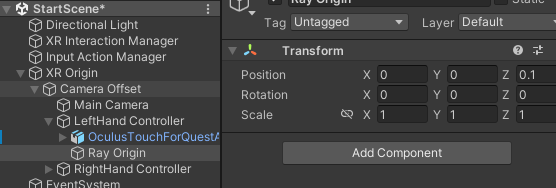
Rayの開始位置がコントローラーと被るので、LeftHand Controller、RightHand Controllerに付いているXR Ray InteractorコンポーネントのRay Origin Transformを設定してRayの開始位置をZ軸方向に少しずらすとコントローラーと被らなくなります。

Discussion