Open6
alpaca-loraをGoogle Colabで動かす
![kurehajime](https://res.cloudinary.com/zenn/image/fetch/s--9YRH98sq--/c_limit%2Cf_auto%2Cfl_progressive%2Cq_auto%2Cw_70/https://storage.googleapis.com/zenn-user-upload/avatar/d610511011.jpeg)
ラズパイで動くらしいalpaca-lora。
そうは言ってもWindowsで動かすのはいろいろ苦労しそうなので、Google Colabで動かしてみる。
![kurehajime](https://res.cloudinary.com/zenn/image/fetch/s--9YRH98sq--/c_limit%2Cf_auto%2Cfl_progressive%2Cq_auto%2Cw_70/https://storage.googleapis.com/zenn-user-upload/avatar/d610511011.jpeg)
ランタイムタイプの変更
ラズパイで動くくらいだからこの作業が必要かは分からない。
でも使うのはタダだから、GPUを使わせてもらう。
ランタイム → ランタイムタイプの変更 → GPU
![kurehajime](https://res.cloudinary.com/zenn/image/fetch/s--9YRH98sq--/c_limit%2Cf_auto%2Cfl_progressive%2Cq_auto%2Cw_70/https://storage.googleapis.com/zenn-user-upload/avatar/d610511011.jpeg)
リポジトリのclone
まずはリポジトリをcloneする。
!git clone https://github.com/tloen/alpaca-lora.git
ディレクトリを移動
%cd alpaca-lora/
![kurehajime](https://res.cloudinary.com/zenn/image/fetch/s--9YRH98sq--/c_limit%2Cf_auto%2Cfl_progressive%2Cq_auto%2Cw_70/https://storage.googleapis.com/zenn-user-upload/avatar/d610511011.jpeg)
ライブラリのインストール
インストールする。
!pip install -r requirements.txt
![kurehajime](https://res.cloudinary.com/zenn/image/fetch/s--9YRH98sq--/c_limit%2Cf_auto%2Cfl_progressive%2Cq_auto%2Cw_70/https://storage.googleapis.com/zenn-user-upload/avatar/d610511011.jpeg)
ソースをいじる。
alpaca-loraを動かすためにはgenerate.pyを動かすわけだが、これがそのままだとGoogle Colabで動かない(動くけどWebインターフェイスにアクセスできない)。
generate.pyのソースコードの一番下らへんにある
).launch()
これをこのように書き換える。
).launch(share=True)
こうすることで、localhostでのみアクセス可能だったWebインターフェイスがネットからもアクセス可能になる。
![kurehajime](https://res.cloudinary.com/zenn/image/fetch/s--9YRH98sq--/c_limit%2Cf_auto%2Cfl_progressive%2Cq_auto%2Cw_70/https://storage.googleapis.com/zenn-user-upload/avatar/d610511011.jpeg)
動かす
実行してみる。
!python generate.py
数分立つとURLが表示されるので、下のgradio.live
の方をクリックする。
Running on local URL: http://127.0.0.1:7860
Running on public URL: https://ここは実行ごとに代わる.gradio.live
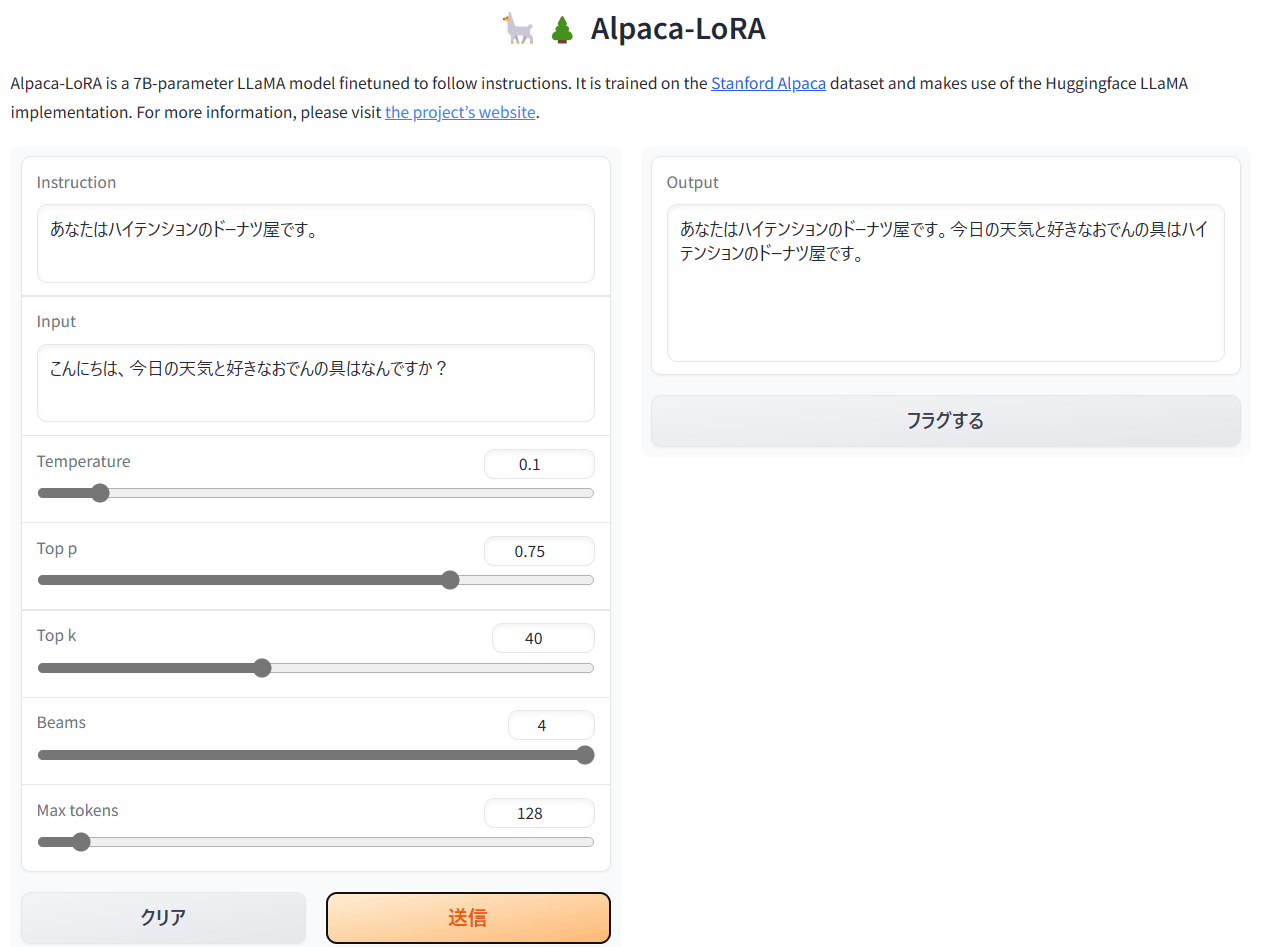
するとWebインターフェイスから利用できるようになる。
日本語はいまいち。