M1 MacBook ProでStable Diffusionを動かすまでのメモ
画像生成AIのStable Diffusionがオープンソースとして公開されましたね。さっそく動かしてみたいなと思って触ってみることにしましたが、手元にあるのはMacBookだけなので、なかなか大変でした。
ありがたいことに、先人がたくさんいるので参考にして環境構築ができました!
たぶんそれなりにすぐにすんなり動かせるようになると思いますけど、今すぐやってみたくてトラブってる人の参考になればと、わりとなぐり書きで恐縮ですが書いておきます。
動作速度とか
ちなみに気になる実行速度ですが、自分が使っているのはMacBookPro 14インチモデルの一番スペックが低いやつでして
- 8コアCPU、14コアGPU、16コアNeural Engine搭載Apple M1 Pro
- メモリ32GB
です。
画像生成中は15〜20GBほどメモリを消費し、5分ほどで画像が6枚生成できます。
学習モデルを取得する
macOS特有のことはないです。
https://huggingface.co/CompVis/stable-diffusion-v-1-4-original でユーザー登録してリポジトリをクローンします。
ソースコードを取得する
https://github.com/CompVis/stable-diffusion/pull/47 のPRのコードを取得します。具体的には、https://github.com/magnusviri/stable-diffusion/tree/apple-silicon-mps-support のブランチのコードをクローンします。
環境セットアップ
condaコマンドとrustを使えるようにします。homebrewで入りました。
brew install anaconda miniconda rust
シェルに応じた環境構築をします。自分はzshを使っているのでこんな感じ。ちなみにこれ、~/.zshrcの末尾に自動的にあれこれ追加するので、あとで好みに応じて変更したほうがいいと思います。
conda init zsh
stable-diffusionのルートディレクトリに移動して、conda envを実行するといろいろ環境が異なる的なエラーが表示されます。
$ conda env create -f environment-mac.yaml
Collecting package metadata (repodata.json): done
Solving environment: failed

ResolvePackageNotFound:
  - python=3.8.5
なので、自分の環境にあわせてenvironment-mac.yamlを編集しました。具体的には、手元の環境にあわせてバージョン番号を変えちゃう感じです。
ResolvePackageNotFoundのエラーが消えると、依存パッケージのインストールが始まります。自分の場合、opencv-pythonでエラーになってしまったのでバージョンの指定方法を変えています。ビルド時にエラーが出た場合に続きから再開するには、updateを実行します。
$ conda env update -f environment-mac.yaml
自分の最終的なenvironment-mac.yamlはこんな風になりました。
diff --git a/environment-mac.yaml b/environment-mac.yaml
index d923d56..c8a0a8e 100644
--- a/environment-mac.yaml
+++ b/environment-mac.yaml
@@ -3,14 +3,14 @@ channels:
   - pytorch
   - defaults
 dependencies:
-  - python=3.8.5
-  - pip=20.3
+  - python=3.9.12
+  - pip=21.2.4
   - pytorch=1.12.1
   - torchvision=0.13.1
   - numpy=1.19.2
   - pip:
     - albumentations==0.4.3
-    - opencv-python==4.1.2.30
+    - opencv-python>=4.1.2.30
     - pudb==2019.2
     - imageio==2.9.0
     - imageio-ffmpeg==0.4.2
次にactivateをします。
conda activate ldm
学習モデルにリンクを貼ります。公式ドキュメントの通りですね。
mkdir -p models/ldm/stable-diffusion-v1
ln -s /path/to/stable-diffusion-v-1-4-original/sd-v1-4.ckpt models/ldm/stable-diffusion-v1/model.ckpt
画像錬成に挑戦!
環境ができたので早速錬成したいところですが、このままtxt2imageを実行してもPyTorch関連のエラーが出てしまいます。
$ python scripts/txt2img.py --prompt "a photograph of an astronaut riding a horse" --plms
〜 中略 〜
NotImplementedError: The operator 'aten::index.Tensor' is not current implemented for the MPS device. If you want this op to be added in priority during the prototype phase of this feature, please comment on https://github.com/pytorch/pytorch/issues/77764. As a temporary fix, you can set the environment variable `PYTORCH_ENABLE_MPS_FALLBACK=1` to use the CPU as a fallback for this op. WARNING: this will be slower than running natively on MPS. (ldm) hawk:~/ghq/../magnusviri/stable-diffusion
PyTorchのnightlyが必要なので入れます。
conda install pytorch torchvision torchaudio -c pytorch-nightly
これでもまだエラーがでます。
$ python scripts/txt2img.py --prompt "a photograph of an astronaut riding a horse" --plms
    return torch.layer_norm(input, normalized_shape, weight, bias, eps, torch.backends.cudnn.enabled)
RuntimeError: view size is not compatible with input tensor's size and stride (at least one dimension spans across two contiguous subspaces). Use .reshape(...) instead.
https://github.com/CompVis/stable-diffusion/issues/25#issuecomment-1221667017 に記載の通りにスクリプトを書き換えます。
vi /opt/homebrew/Caskroom/miniconda/base/envs/ldm/lib/python3.9/site-packages/torch/nn/functional.py
ちなみに変更箇所はこう。
--- functional.py_      2022-08-23 17:07:29.000000000 +0900
+++ functional.py       2022-08-23 17:07:31.000000000 +0900
@@ -2506,9 +2506,9 @@ def layer_norm(
     """
     if has_torch_function_variadic(input, weight, bias):
         return handle_torch_function(
-            layer_norm, (input, weight, bias), input, normalized_shape, weight=weight, bias=bias, eps=eps
+            layer_norm, (input.contiguous(), weight, bias), input, normalized_shape, weight=weight, bias=bias, eps=eps
         )
-    return torch.layer_norm(input, normalized_shape, weight, bias, eps, torch.backends.cudnn.enabled)
+    return torch.layer_norm(input.contiguous(), normalized_shape, weight, bias, eps, torch.backends.cudnn.enabled)
できた〜!!!
$ python scripts/txt2img.py --prompt "a photograph of an astronaut riding a horse" --plms
...
Your samples are ready and waiting for you here:
outputs/txt2img-samples

Enjoy.
まとめ
いやすごいですね。時間かかるとはいえ、普段使っているマシンでも画像錬成ができるようになるなんてびっくり。いろいろテストがしやすそうで良いです。
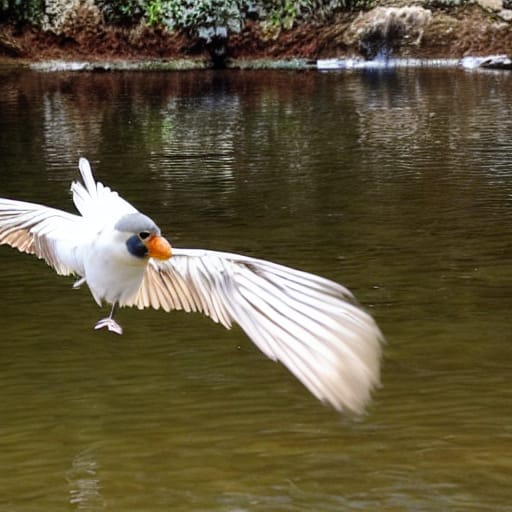
python scripts/txt2img.py --prompt "a photo of cockatiel swimming gracefully on the river" --plms
 |
 |
 |
|---|---|---|
追記
M1 MacBook Airだとなんと画像3枚で50分もかかるそうです。GPUがフルに使われてないらしい。
手元のMacBook Proだとどうなるかというと、こうでした。1、2回実行したくらいじゃファンは回らないけど、しばらく続けてるとさすがにぶんぶんいいだします。

Discussion
おかげで,僕もできました.Macbook Pro 13 inch, 2020, 16GBメモリー,8 core CPU, 16 core GPUです.
僕の場合は,なぜか
$ conda env create -f environment-mac.yaml
がノーエラーで進みました(なおすごく時間かかりました.寝ちゃったので正確な時間はわからず)
これがよかったのか悪かったのか,結論からいいますと,
$ conda install pytorch torchvision torchaudio -c pytorch-nightly
でPytorch のNightlyを入れたのが,不完全にしか入らず,
一度,完全にアンインストール
conda uninstall pytorch
pip uninstall torch
pip uninstall torch # run this command twice
( https://stackoverflow.com/questions/43664444/how-can-l-uninstall-pytorch-with-anaconda を参照)
して,
それから再び,nightly buildを,Pytorch公式にあるコマンドでインストールしました
pip3 install --pre torch torchvision torchaudio --extra-index-url https://download.pytorch.org/whl/nightly/cpu ←ここまで1行
conda install pytorch torchvision torchaudio -c pytorch-nightly
これで入ったようです.
なお,僕の場合,functional.pyは
~/miniforge3/envs/ldm/lib/python3.10/site-packages/torch/nn/functional.py
にありました.
なお,1枚の生成速度ですが,
python scripts/txt2img.py --prompt "a photograph of an astronaut riding a horse" --plms
では,
316秒,
PLMS Sampler: 100%|█████████████████████████████| 50/50 [04:36<00:00, 5.53s/it] という速度でした.
RTX3060(12GB)で,1枚50秒ぐらいでしたので,まあ,だいたい,下の記事にある速度(Tesla V100 16GBの1/6)と同じぐらいでしょうか.
もうちょっとPytorchのApple Silicon対応が進むといいですね
追記:https://huggingface.co/CompVis/stable-diffusion-v-1-4-original にある,でかい方のモデルだと,Segmentation Faultになってしまいました.メモリーに入りきらなかった模様.残念.