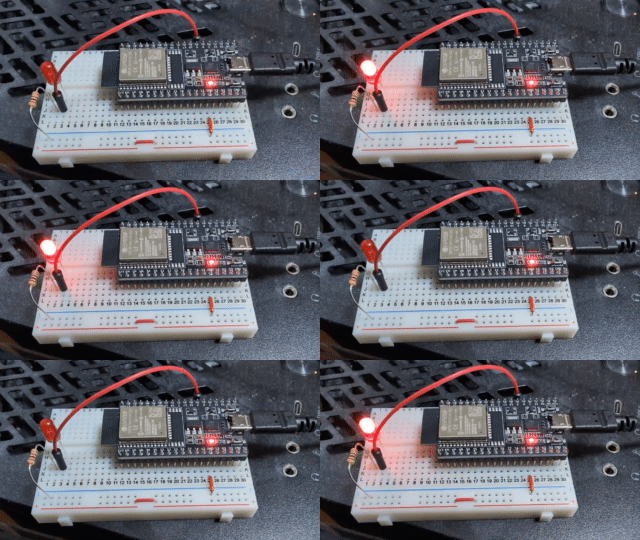
ESP32-DevKitC-32E + WSL2 + Rust でLチカ
WSL2 + Rust + ESP32-DevKitC-32E でLチカをするためのメモ。
WSL2 でホストマシンの USB デバイスを使う
ホストマシン(Windows)の USB デバイスを WSL2 から制御できるようにする。
usbipd のインストール
winget で usbidp をインストールする。
winget install usbipd
USB デバイスの接続
usbipd list で接続されている USB デバイスを確認する。
> usbipd list
Connected:
BUSID  VID:PID    DEVICE                                                        STATE
4-2    10c4:ea60  Silicon Labs CP210x USB to UART Bridge (COM4)                 Not shared

Persisted:
GUID                                  DEVICE
BUSID は 4-2 だった。STATE に Not shared と表示されており、デバイスはまだ共有されていない。
usbipd bind でデバイスを共有状態にする。--busid フラグで先程確認した BUSID を渡す。
> usbipd bind --busid 4-2
> usbipd list
Connected:
BUSID  VID:PID    DEVICE                                                        STATE
4-2    10c4:ea60  Silicon Labs CP210x USB to UART Bridge (COM4)                 Shared

Persisted:
GUID                                  DEVICE
STATE が Shared に変わった。これで接続の準備ができた。
usbipd attach でデバイスを WSL2 に接続する。
> usbipd attach --wsl --busid 4-2
usbipd: info: Using WSL distribution 'Arch' to attach; the device will be available in all WSL 2 distributions.
usbipd: info: Using IP address 172.28.160.1 to reach the host.
wsl2 内で ls してみると USB デバイスが確認できる。
$ ls -la /dev/ttyUSB*
crw-rw---- 1 root uucp 188, 0 Mar 13 20:34 /dev/ttyUSB0
Rust で ESP32 の開発をするためのツールチェイン郡は esp-rs の org で開発されているようだ。
ESP32 用 Rust ツールチェインのインストール
espup でビルドに必要なツールチェインをインストールする。
cargo で espup をインストールする。
cargo install espup
espup install で Rust ツールチェインをインストールする。
$ espup install
[info]: Installing the Espressif Rust ecosystem
[info]: Checking Rust installation
[info]: Installing Xtensa LLVM
[info]: Installing RISC-V Rust targets ('riscv32imc-unknown-none-elf', 'riscv32imac-unknown-none-elf' and 'riscv32imafc-unknown-none-elf') for 'nightly' toolchain
[info]: Installing Xtensa Rust 1.76.0.1 toolchain
[info]: Installing GCC (xtensa-esp-elf)
[info]: Downloading 'idf_tool_xtensa_elf_clang.tar.xz'
[info]: Downloading 'xtensa-esp-elf.tar.xz'
[info]: Downloading 'rust.tar.xz'
[info]: Creating symlink between '/home/koyashiro/.local/share/rustup/toolchains/esp/xtensa-esp32-elf-clang/esp-16.0.4-20231113/esp-clang/lib' and '/home/koyashiro/.espup/esp-clang'
[info]: Installing 'rust' component for Xtensa Rust toolchain
[info]: Downloading 'rust-src.tar.xz'
[info]: Installing 'rust-src' component for Xtensa Rust toolchain
[info]: Installation successfully completed!

        To get started, you need to set up some environment variables by running: '. /home/koyashiro/export-esp.sh'
        This step must be done every time you open a new terminal.
            See other methods for setting the environment in https://esp-rs.github.io/book/installation/riscv-and-xtensa.html#3-set-up-the-environment-variables
環境変数の追加のために $HOME/export-esp.sh を読み込むように指示される。今回は手動で読み込む。
. "$HOME/export-esp.sh"
rustup toolchain list を確認すると esp が追加されている。
$ rustup toolchain list
stable-x86_64-unknown-linux-gnu (default)
nightly-x86_64-unknown-linux-gnu
esp
プロジェクトの作成
esp-idf-template を使ってプロジェクトを作成する。
cargo generate でプロジェクトを作成する。
$ cargo generate esp-rs/esp-idf-template cargo
⚠️    Favorite `esp-rs/esp-idf-template` not found in config, using it as a git repository: https://github.com/esp-rs/esp-idf-template.git
🤷   Project Name: esp32-sandbox
🔧   Destination: /home/koyashiro/esp32-sandbox ...
🔧   project-name: esp32-sandbox ...
🔧   Generating template ...
✔ 🤷   Which MCU to target? · esp32
✔ 🤷   Configure advanced template options? · false
🔧   Moving generated files into: `/home/koyashiro/esp32-sandbox`...
🔧   Initializing a fresh Git repository
✨   Done! New project created /home/koyashiro/esp32-sandbox
作成したプロジェクトのディレクトリに移動して cargo build をしてみる。
cargo build
.cargo/config.toml にいい感じに設定が記述されているようで、明示的に +esp をつけなくても esp ツールチェインでビルドされた。
espflash と espmonitor のインストール
ESP32 に書き込むための espflash とシリアルモニタ espmonitor をインストールする。
cargo install espflash
cargo install espmonitor
.cargo/config.toml に runner = "espflash flash --monitor" が設定されているため cargo run をしただけで ESP32 への書き込みとシリアルモニターへの接続が実行されるようだ。これは便利。
準備ができたのでLチカを試す。今回は GPIO4 を使う。
use std::{thread, time::Duration};

use esp_idf_svc::hal::{gpio::PinDriver, prelude::Peripherals};

fn main() {
    esp_idf_svc::sys::link_patches();

    esp_idf_svc::log::EspLogger::initialize_default();

    // pinMode(4, OUTPUT);
    let peripherals = Peripherals::take().unwrap();
    let mut led = PinDriver::output(peripherals.pins.gpio4).unwrap();

    loop {
        // digitalWrite(4, HIGH);
        led.set_high().unwrap();
        thread::sleep(Duration::from_millis(1000));

        // digitalWrite(4, LOW);
        led.set_low().unwrap();
        thread::sleep(Duration::from_millis(1000));
    }
}
cargo run で実行する[1]。
cargo run
無事にLチカさせることができた。

-
実態は
espflash flash --monitor <IMAGE>のようだ。 ↩︎
USB デバイスの後片付け
WSL2 への接続を解除。
usbipd detach --busid 4-2
デバイスの共有を解除。
usbipd unbind --busid 4-2
STATE が Not shared に戻った。
> usbipd list
Connected:
BUSID  VID:PID    DEVICE                                                        STATE
4-2    10c4:ea60  Silicon Labs CP210x USB to UART Bridge (COM4)                 Not shared