🐒
MacのインストーラーにPaneを追加する(Installer Plug-in)
はじめに
XcodeのInstaller Plug-inテンプレートを使ってみたかったので、その備忘録として記載します
やらないこと
pkgbuildコマンド、productbuildコマンドの説明
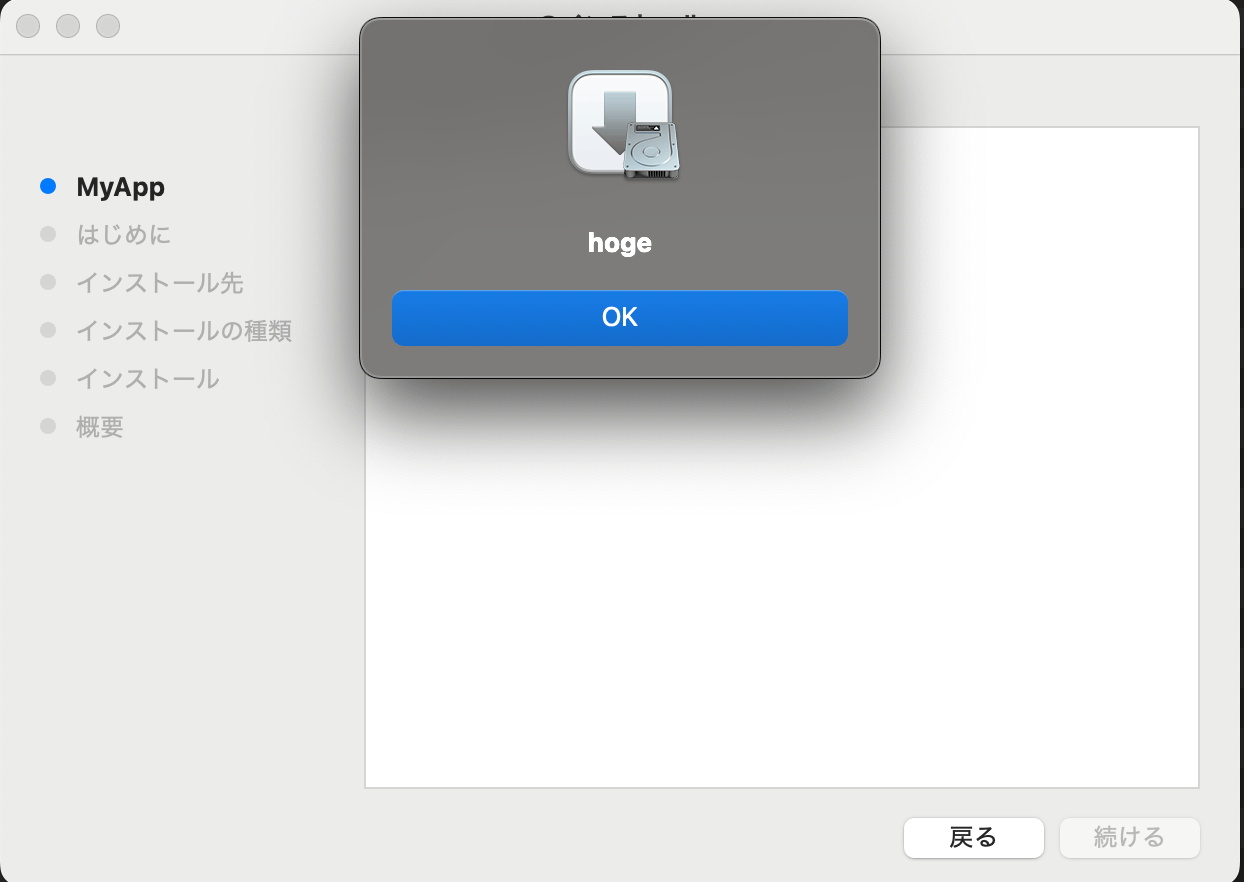
完成イメージ


手順
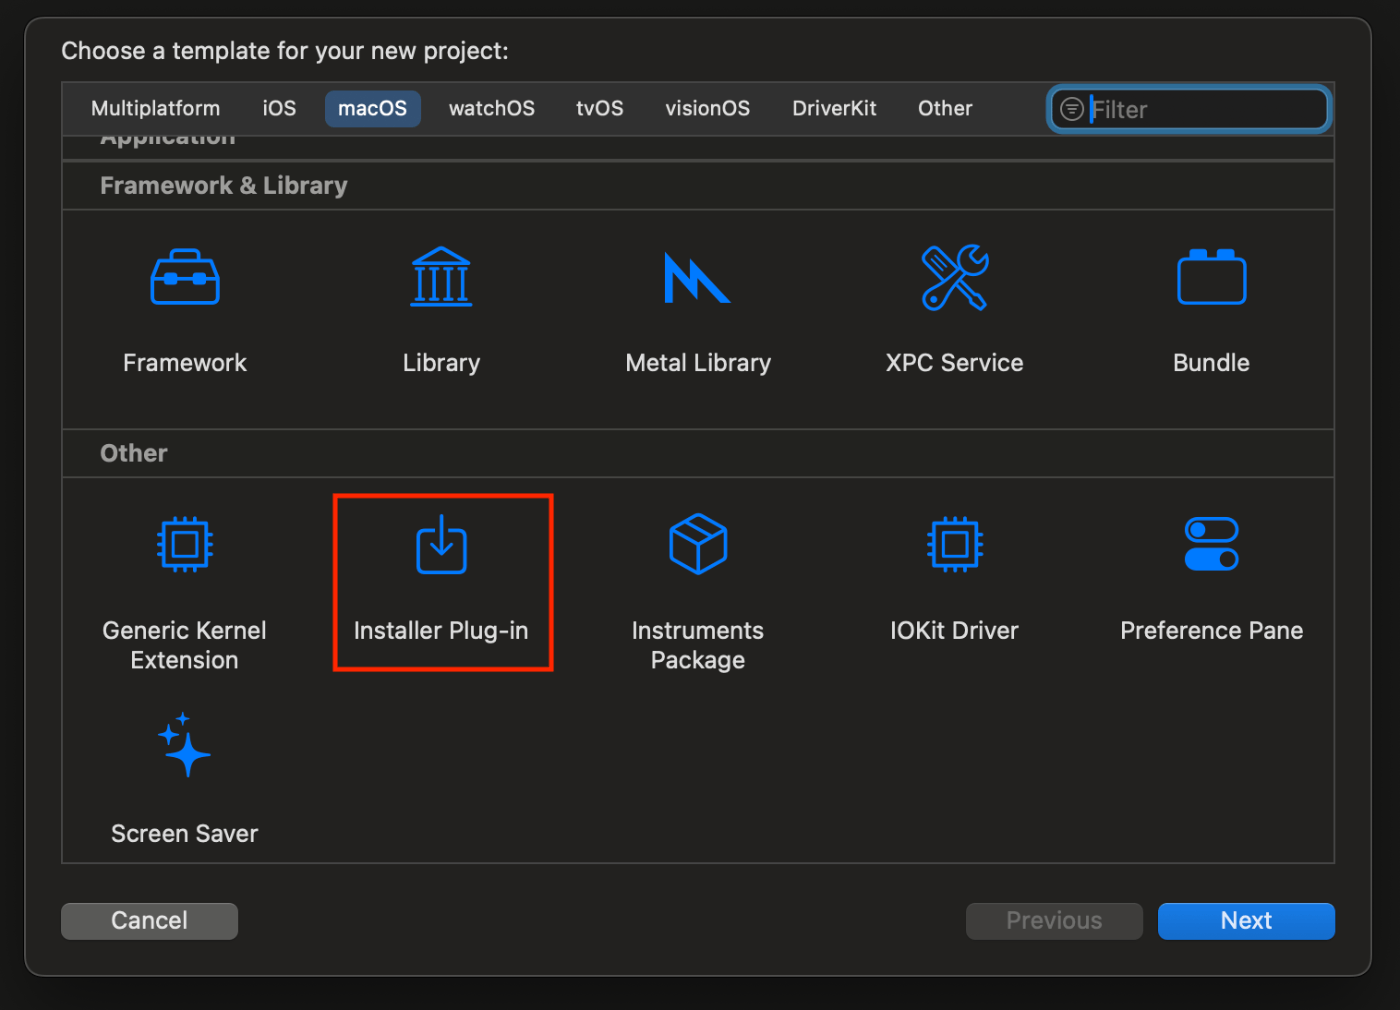
Installer Plug-inのテンプレートを作成
テンプレートプロジェクトでInstaller Plug-inを選択
Product Nameなどを入力し、プロジェクトを作成
※Product NameはMyAppとしています。

Paneを編集
テンプレートプロジェクトをカスタマイズしていきます。
今回はシンプルに、下記の変更を行います。
・Interface Builderで、Paneにラベルを表示
・Pane表示イベントを拾い、ダイアログを表示
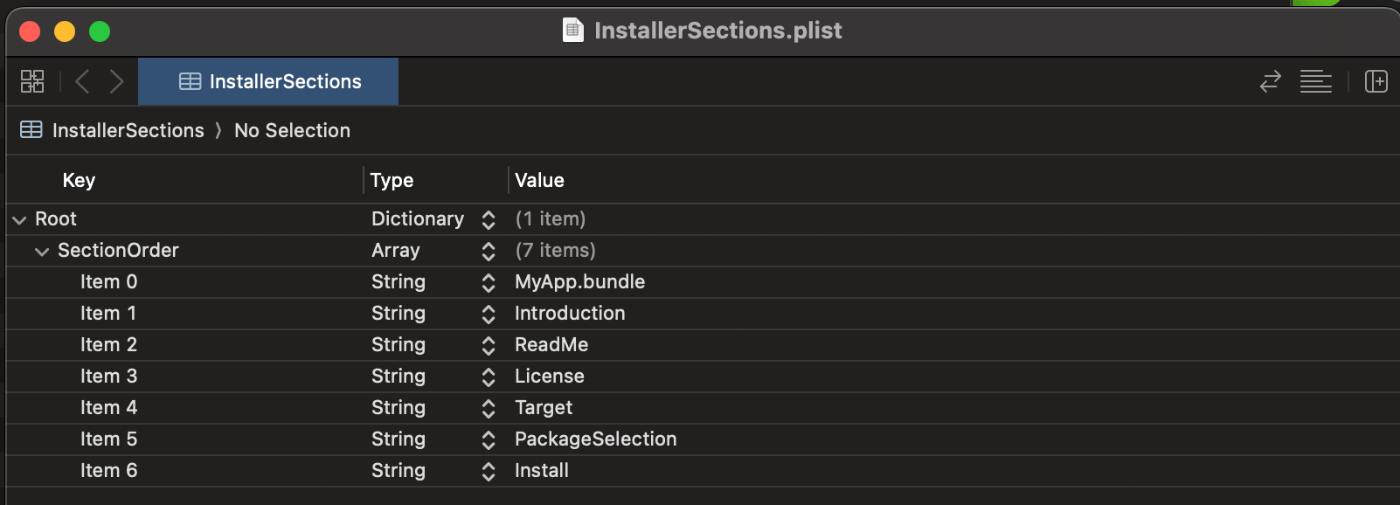
・InstallerSections.plistを編集し、Paneの出す位置を変更
ラベルを追加

ダイアログ表示
#import "MyInstallerPane.h"

@implementation MyInstallerPane

- (NSString *)title
{
    return [[NSBundle bundleForClass:[self class]] localizedStringForKey:@"PaneTitle" value:nil table:nil];
}

# 追加部分(didEnterPaneイベントを使用)
- (void)didEnterPane:(InstallerSectionDirection)dir
{
    NSAlert *alert = [[NSAlert alloc] init];
    [alert setMessageText:@"hoge"];
    [alert addButtonWithTitle:@"OK"];
    [alert runModal];
}

@end
Installersections.plist
最初に表示されるようにMyApp.bundleのOrderを変更しています

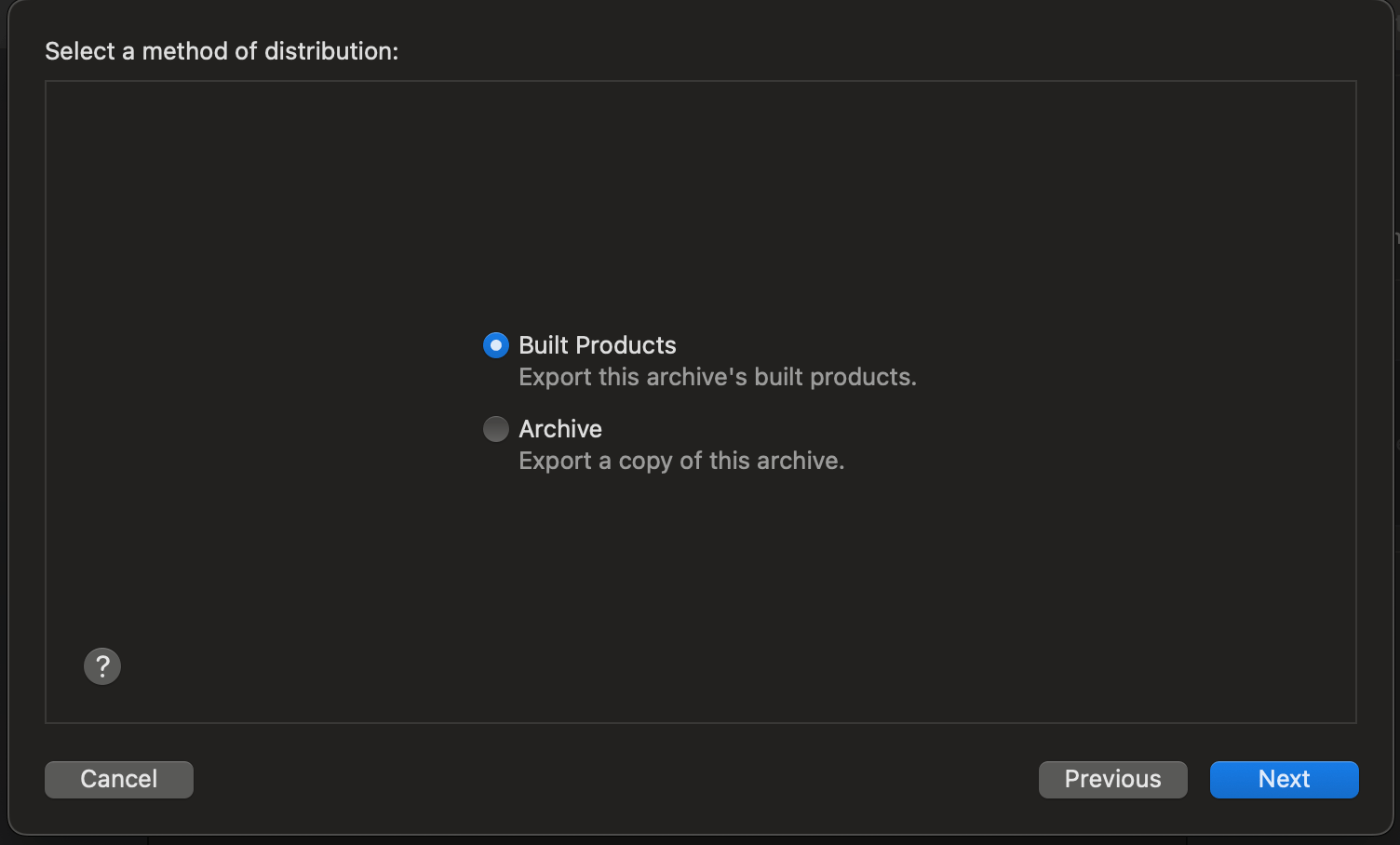
プラグインのExport
Built Productsを選択し、BundleファイルをExport

Bundleファイルと同じ階層に、InstallerSections.plistを配置
以下のような構成にしています
├── App
│   └── <インストールするアプリ>
├── Distribution
│   └── Distribution.xml
├── Packages
├── Plugins
│   ├── InstallerSections.plist
│   └── MyApp.bundle
└── Scripts
    ├── postinstall
    └── preinstall
pkgファイルを作成
pkgbuild --root ./App --identifier <Indentifir> --version 1.0 --install-location /Applications --scripts Scripts ./Packages/MyApp.pkg
distribution形式のpkgファイルを作成
productbuild --distribution ./Distribution/Distribution.xml --package-path ./Packages --plugins ./Plugins ./Packages/MyPackage.pkg
作成されたMyPackage.pkgがプラグイン追加後のパッケージとなります。
終わりに
インストーラーについて、事前にShellScriptを動かせたり、既存のPaneをHTMLで置き換えたり、結構カスタマイズできる部分があります
参考になれば幸いです
Discussion