astroでthree.jsを動かす方法
検索しても出てこなかったので。
Reactを使います(React Three Fiberは後述)
astroにReactをインストール
ドキュメントを見るとReactをインストールする方法は自動と手動の2つあって、今回は自動で行います。手動だと、reactをブラウザで解釈するためのreact/domというライブラリを入れたり、コンフィグいじったりしなければならないですが、自動だと全部よろしくやってくれます。
npx astro add react

✔ Resolving packages...
  Astro will run the following command:
  If you skip this step, you can always run it yourself later

 ╭────────────────────────────────────────────────────────────╮
 │ npm install @astrojs/react@^3.0.9 @types/react@^18.2.46    │
 │ @types/react-dom@^18.2.18 react@^18.2.0 react-dom@^18.2.0  │
 ╰────────────────────────────────────────────────────────────╯

✔ Continue? … yes
✔ Installing dependencies...
  Astro will make the following changes to your config file:

 ╭ astro.config.mjs ─────────────────────────────╮
 │ import { defineConfig } from 'astro/config';  │
 │                                               │
 │ import react from "@astrojs/react";           │
 │                                               │
 │ // https://astro.build/config                 │
 │ export default defineConfig({                 │
 │   integrations: [react()]                     │
 │ });                                           │
 ╰───────────────────────────────────────────────╯

✔ Continue? … yes
   success  Added the following integration to your project:
  - @astrojs/react
  Astro will make the following changes to your tsconfig.json:

 ╭ tsconfig.json ──────────────────────────╮
 │ {                                       │
 │   "extends": "astro/tsconfigs/strict",  │
 │   "compilerOptions": {                  │
 │     "jsx": "react-jsx",                 │
 │     "jsxImportSource": "react"          │
 │   }                                     │
 │ }                                       │
 ╰─────────────────────────────────────────╯

✔ Continue? … yes
   success  Successfully updated TypeScript settings
Reactファイルにthreejsのサンプルコードを記述
three.jsのサンプル
※npm i threeでインストール済み前提
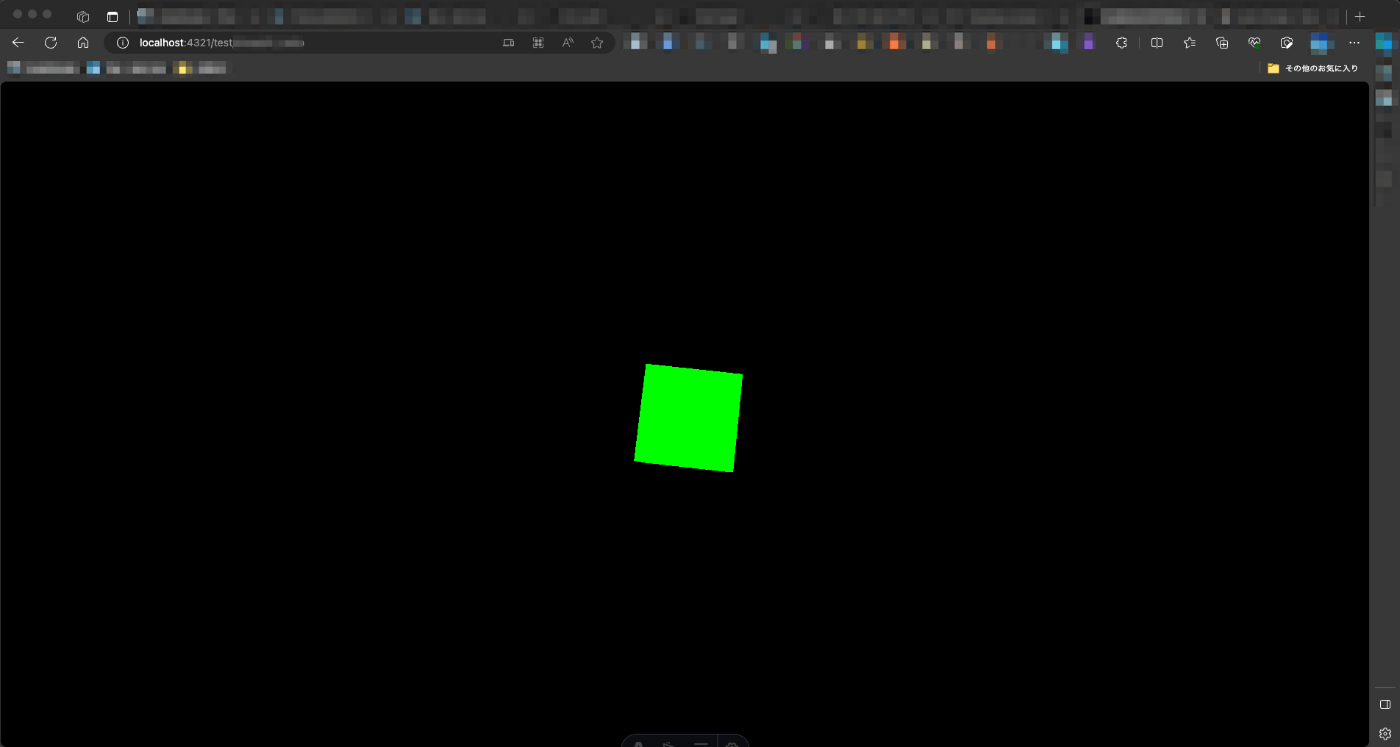
import * as THREE from 'three';

export default function App() {
  const scene = new THREE.Scene();
  const camera = new THREE.PerspectiveCamera( 75, window.innerWidth / window.innerHeight, 0.1, 1000 );

  const renderer = new THREE.WebGLRenderer();
  renderer.setSize( window.innerWidth, window.innerHeight );
  document.body.appendChild( renderer.domElement );

  const geometry = new THREE.BoxGeometry( 1, 1, 1 );
  const material = new THREE.MeshBasicMaterial( { color: 0x00ff00 } );
  const cube = new THREE.Mesh( geometry, material );
  scene.add( cube );

  camera.position.z = 5;

  function animate() {
    requestAnimationFrame( animate );

    cube.rotation.x += 0.01;
    cube.rotation.y += 0.01;

    renderer.render( scene, camera );
  }
  return(
    <>
    {animate()}
    </>
  )
}
astroファイルに読み込む
---
import Layout from '@/layouts/Blank.astro';
import ReactComponents from '@/components/React.jsx';
---
<Layout>
  <main>
    <ReactComponents client:only="react" />
  </main>
</Layout>

<style lang="scss">
//
</style>
注意点はclient:only="react"でしょうか。クライアントで実行するため、ここはreactのコードだよと明示しないと実行されません。(react-dom使ってねということ。)
表示されます
asyncを使う場合
画像やjsonなど外部から何かを読み込んで処理する場合はasyncを使用しますが、先程のやり方では「Uncaught Error: Objects are not valid as a React child」というエラーが出てしまいました。
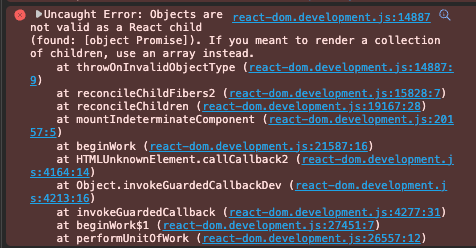
このエラーはJSXコンポーネントでasyncを使用しており、domがまだ生成されておらず予期せぬオブジェクトタイプ(この場合プロミスですね)を子要素として受け取った場合に発生します。
解決策:useEffectとuseState
useEffectフックを使用してdomが生成されたらレンダリングされるようにする
import * as THREE from 'three';
import { useEffect, useState } from 'react';

export default function App() {
  const [threeElement, setthreeElement] = useState(null);
  useEffect(() => {
    async function init() {
      // canvasを生成する処理で画像をasyncで読み込んでいる
      // 生成されたcanvas要素をsetthreeElementで状態にセット
      const scene = new THREE.Scene();
    const camera = new THREE.PerspectiveCamera(
      75,
      window.innerWidth / window.innerHeight,
      0.1,
      1000
    );

    const renderer = new THREE.WebGLRenderer();
    renderer.setSize(window.innerWidth, window.innerHeight);
    document.body.appendChild(renderer.domElement);

    const geometry = new THREE.PlaneGeometry(20, 10);
    const texLoader = new THREE.TextureLoader();
    const texture = await texLoader.loadAsync("/assets/images/dammy.jpg");
    const material = new THREE.MeshBasicMaterial({ map: texture });
    const cube = new THREE.Mesh(geometry, material);
    scene.add(cube);

    camera.position.z = 30;

    let i = 0;
    function animate() {
      requestAnimationFrame(animate);
      // console.log(i++);
      cube.rotation.x = cube.rotation.x + 0.01;
      cube.rotation.y += 0.01;

      renderer.render(scene, camera);
    }
    animate()
    }

    init();
  }, []);// 空の依存配列を渡すことで、コンポーネントがマウントされたときに1回だけ実行される

  return(
    <>
    {threeElement}
    </>
  )
}
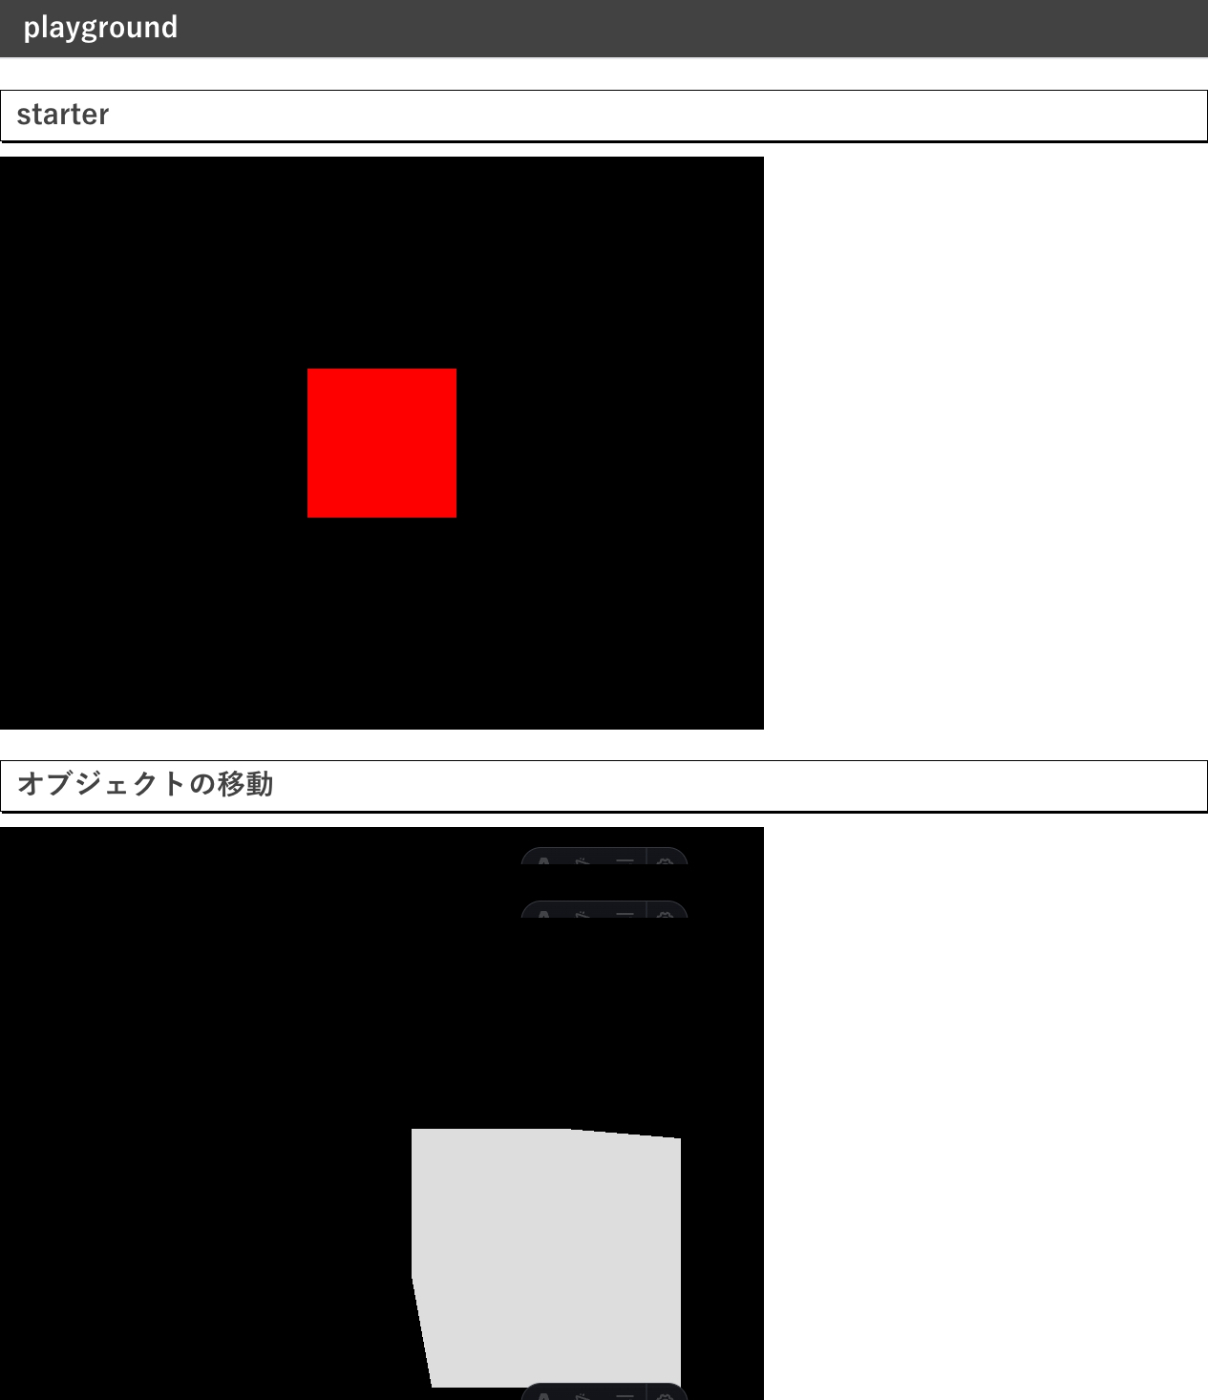
表示されます

いろいろ試した結果これが雛形になりました
document.body.appendChild(renderer.domElement);
の部分など、このコンポーネントを組み入れると他のタグを無視してbody直下に入れてしまったり、このコンポーネント内でcanvasを生成して画像ファイルのように扱いたいので改良し、以下のようになりました。
import * as THREE from 'three';
import { useEffect, useRef } from 'react';

export default function starter() {
  const canvasRef = useRef(null);
  useEffect(() => {
    async function init() {
      // --------------------------------------------------
      // scene
      // --------------------------------------------------
      const scene = new THREE.Scene();

      // --------------------------------------------------
      // object
      // --------------------------------------------------
      const geometry = new THREE.BoxGeometry(1, 1, 1);
      const material = new THREE.MeshBasicMaterial({ color: 0xff0000 });
      const mesh = new THREE.Mesh(geometry, material);
      scene.add(mesh);

      // --------------------------------------------------
      // camera
      // --------------------------------------------------
      const sizes = {
        width: 800,
        height: 600,
      };
      const camera = new THREE.PerspectiveCamera(75, sizes.width / sizes.height);
      camera.position.z = 3;
      scene.add(camera);

      // --------------------------------------------------
      // render
      // --------------------------------------------------
      const canvas = canvasRef.current;
      const renderer = new THREE.WebGLRenderer({
        canvas: canvas
      })
      renderer.setSize(sizes.width, sizes.height)
      renderer.render(scene, camera)

      // --------------------------------------------------
      // Animation
      // --------------------------------------------------
      // function animate() {
      //   requestAnimationFrame(animate);
      //   mesh.rotation.x = mesh.rotation.x + 0.01;
      //   mesh.rotation.y += 0.01;

      //   renderer.render(scene, camera);
      // }
      // animate()
    }

    init();
  }, []);

  return <><canvas ref={canvasRef}></canvas></>;
}
こうすることにより、画像ファイルのように複数箇所設置しても問題なくなりました。
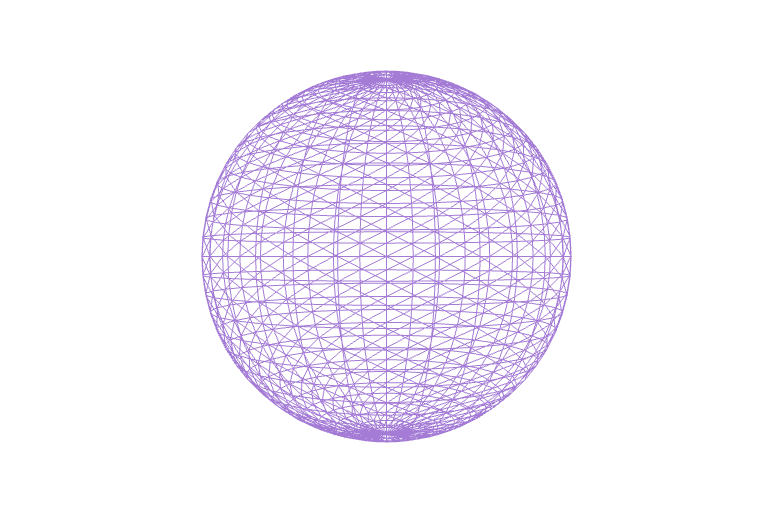
React Three Fiber(R3F)を使う
今まではネイティブのthree.jsを使ってやってましたが、astroでReact使うならReact Three Fiberを使った方が圧倒的に簡単らしいです。R3FはReact レンダラーです。JSXを記述すると、Three.jsにレンダリングされます。
npm i @react-three/fiber
import { Canvas } from '@react-three/fiber';
export default function React04Fiber() {
  return (
    <>
      <Canvas>
        <mesh>
          <sphereGeometry args={[1.5, 32, 32]} />
          <meshBasicMaterial color='mediumpurple' wireframe />
        </mesh>
      </Canvas>
    </>
  );
}
表示されます
こちらは、また研究したいと思います。
Discussion