👌
【Shopify オリジナル構築⑦】 バリエーション選択肢を画像で表示させる(アマゾンみたいな表示)
はじめに
この記事では、バリエーション選択肢を画像で表示させる(アマゾンみたいに)方法について解説します。
上側がPC版、下側がSP版の完成UIです。
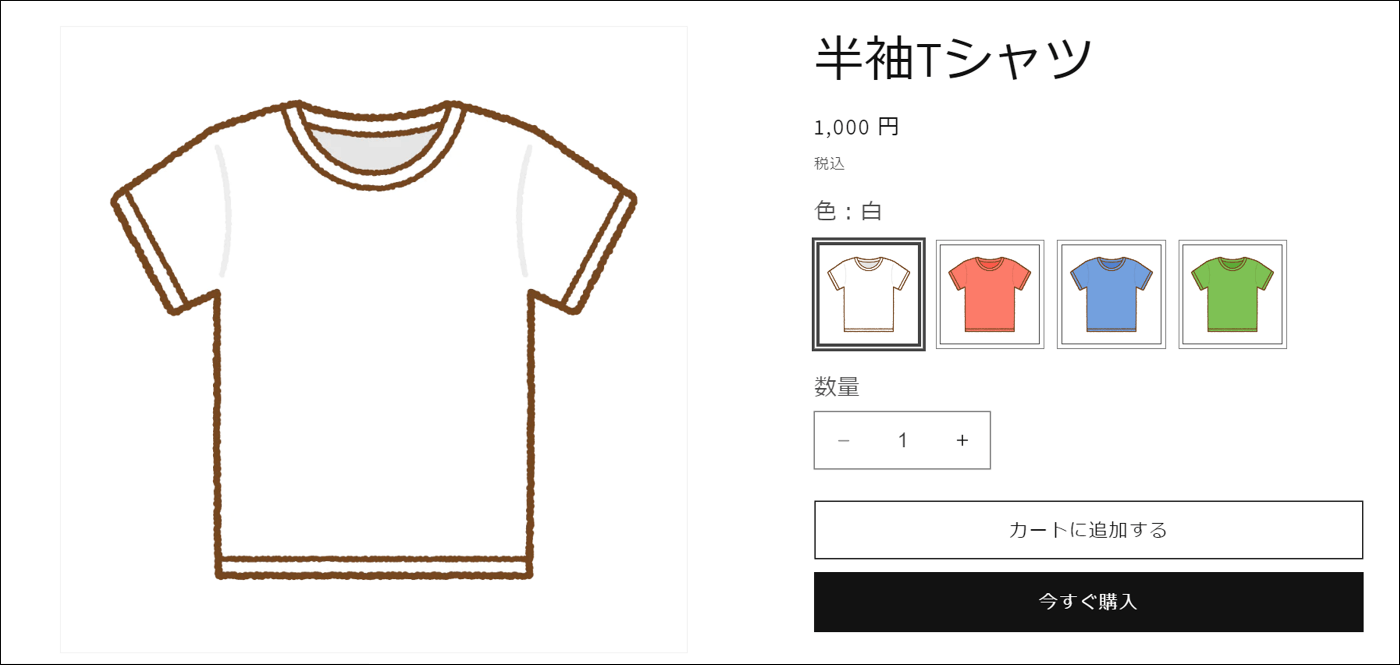
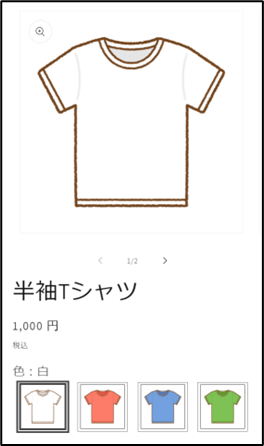
バリエーションの選択肢がかなりわかりやすくなっていると思います。
メタフィールドの設定について
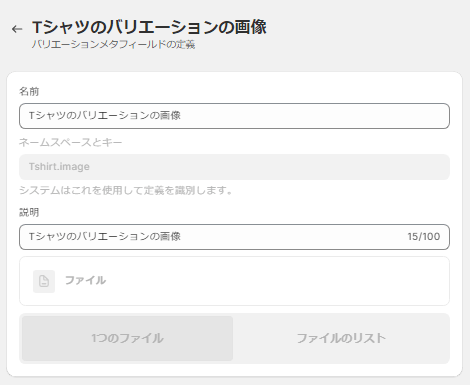
バリエーションの選択肢で使用する画像はメタフィールドを用いて設定します。
設定 > カスタムデータ > メタフィールド > バリエーション で新しくメタフィールドを作成します。
ここでは、Tshirt.imageをネームスペースキーとします。
商品管理ページに戻り、各バリエーションごとの画像を登録してください。
コード編集 その1
スニペット > product-variant-options.liquidを編集します。
対象コードは、こちらです。
product-variant-options.liquid
{%- if block.settings.picker_type == 'button' -%}
    <input
      type="radio"
      id="{{ section.id }}-{{ option.position }}-{{ forloop.index0 }}"
      name="{{ option.name }}"
      value="{{ value | escape }}"
      form="{{ product_form_id }}"
      {% if option.selected_value == value %}
        checked
      {% endif %}
      {% if option_disabled %}
        class="disabled"
      {% endif %}
    >
    /* このlabelタグを編集 */
    <label for="{{ section.id }}-{{ option.position }}-{{ forloop.index0 }}">
      {{ value -}}
      <span class="visually-hidden">{{ 'products.product.variant_sold_out_or_unavailable' | t }}</span>
    </label>
このlabelタグをこちらのように書き換えます。
labelタグの編集
 <label
  class=“variant-label"
  for="{{ section.id }}-{{ option.position }}-{{ forloop.index0 }}"
 >
  {%- if option_disabled -%}
    <span class="visually-hidden">{{ 'products.product.variant_sold_out_or_unavailable' | t }}</span>
  {%- endif %}
  <img
    src=“{{ product.variants[forloop.index0].metafields.Tshirt.image | img_url : "master"  }}"
  >
</label>
こちらのコードでメタフィールドの画像が設定されます。
コード編集 その2
上記のコードを整えるCSSを記述します。
新しくCSSファイルを作成して、main-product.liquidで読み込ませてください。
ファイル名をvariant-img-radiobutton.cssとします。
以下のコードを記述してください。
product-variant-options.liquidのCSS
.product-form__input input[type="radio"] + label.variant-label {
  border-radius: unset;
  margin-right: 10px;
  cursor: pointer;
  background: none;
  padding: 3px;
  margin-right: 10px;
  background: none;
}
.product-form__input label.variant-label img {
  width: 80px;
  height: 80px;
  border: 1px solid #444;
  vertical-align: bottom;
}
.product-form__input input[type="radio"]:checked + label.variant-label img {
  outline: 2px solid #444;
}
.product-form__input input[type="radio"] + label:before {
  display: none;
}
@media screen and (max-width: 750px) {
  .product-form__input .form__label_wrapper {
    justify-content: space-around;
  }
  .product-form__input input[type="radio"] + label.variant-label {
    margin: 0;
  }
}
動画確認
しっかりバリエーション画像の切り替えができていますね!
注意
今回の仕様は、「バリエーションピッカー」ブロックでビルボタンに設定しなければ実装できません。あらかじめご注意ください。

Shopifyの構築を承ります!
Shopifyで実装したいデザインなどがござましたら、お気軽にご相談、お問い合わせくださいませ!
Discussion
参考になりました。ありがとうございます。
一点質問させてください。
バリエーションの選択を画像で表示させることはできましたが、選択肢たバリエーション名(カラー名など)のテキストの表示がされません。
このデモ動画ではカラー選択するとそのカラー名の表示もされるようになっていますが、記事の通りlabel部分の書き換えとcssの書き換えのみだとカラー名の表示ができず「Color」だけ表示される状態になります。
これは何か追加でjsファイルやliquidファイルに追記が必要なのでしょうか。