「Androidアプリ開発研修【ミクシィ22新卒技術研修】」をやってみる
目的
- 基礎学習
- Android開発の特徴、魅力
範囲
- Android実行環境概要
- Androidアプリの基本構造
- UIレイアウト
- ActivityからView操作
- リスト表示 (RecyclerView)
- 非同期処理とKotlin Coroutine
- ViewModelとリアクティブストリーム(LiveData)
- MotionLayout
- ハンズオン (ストップウォッチ作成)
研修のゴール
ラップ機能付きストップウォッチを作る

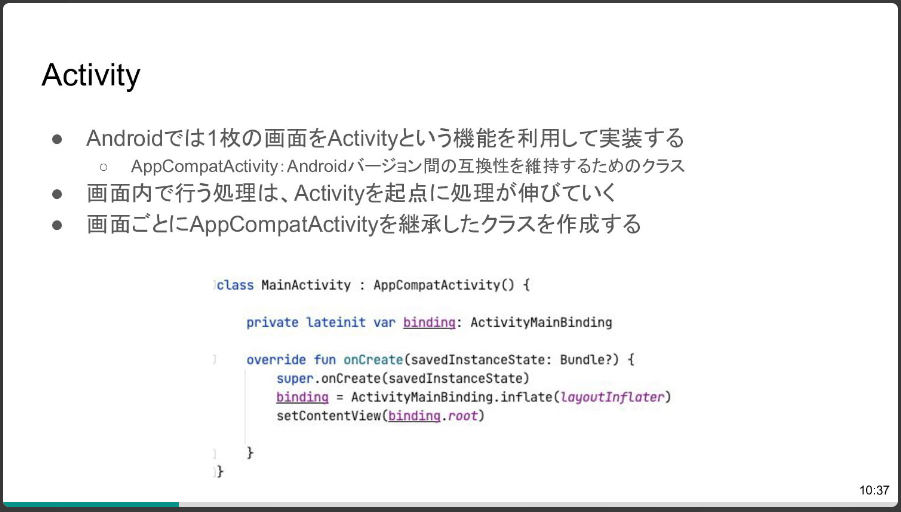
Androidアプリの基本構造①
やりながら忘れないようにする。

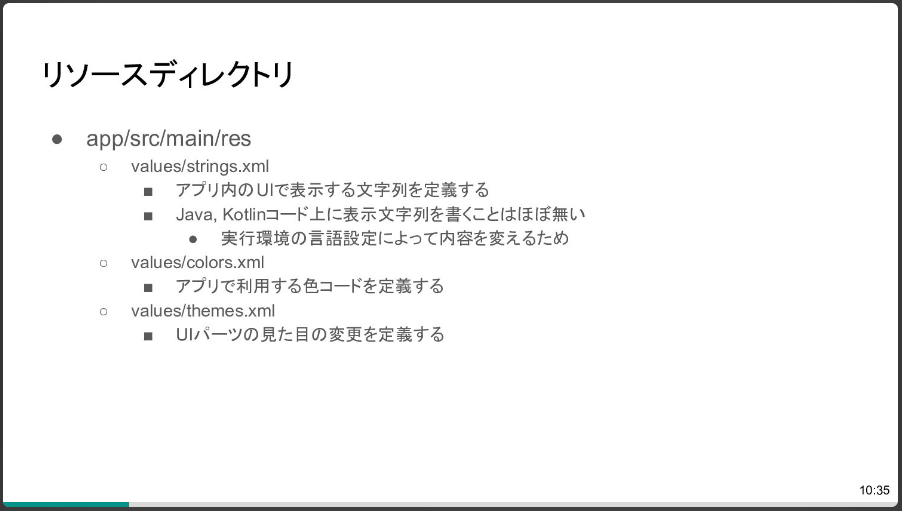
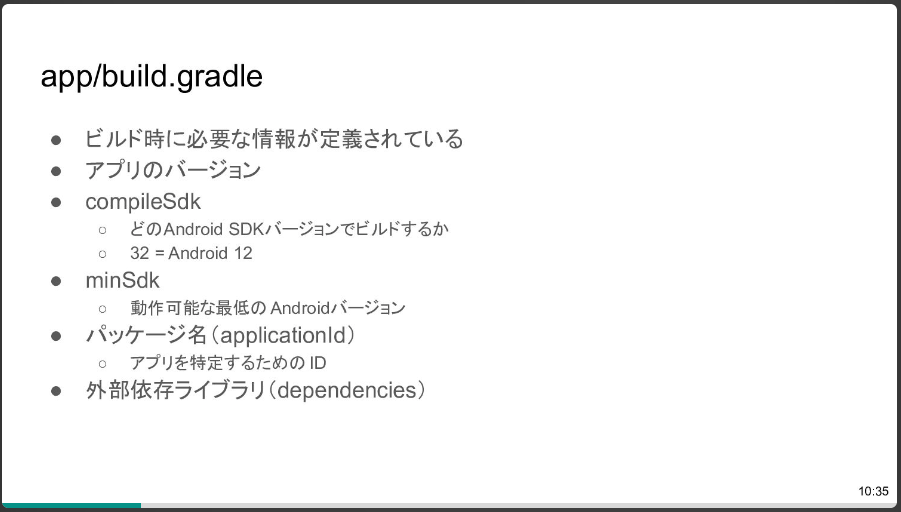
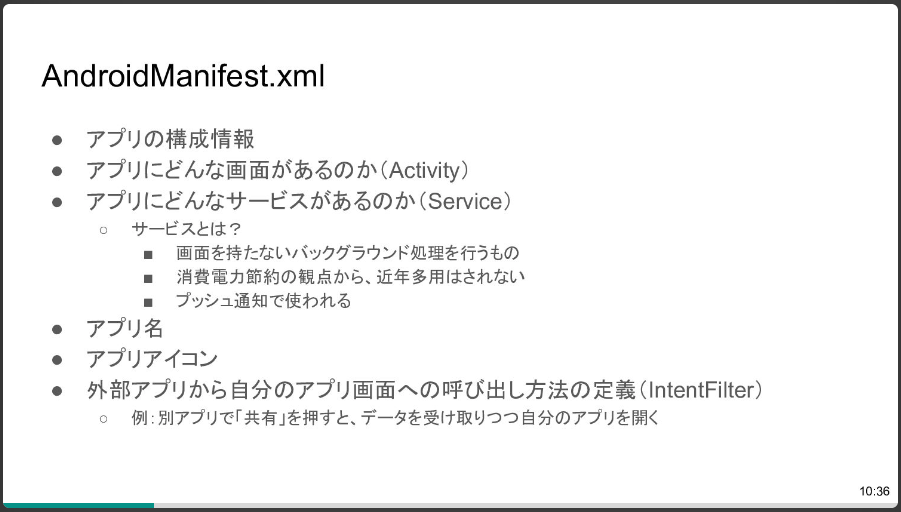
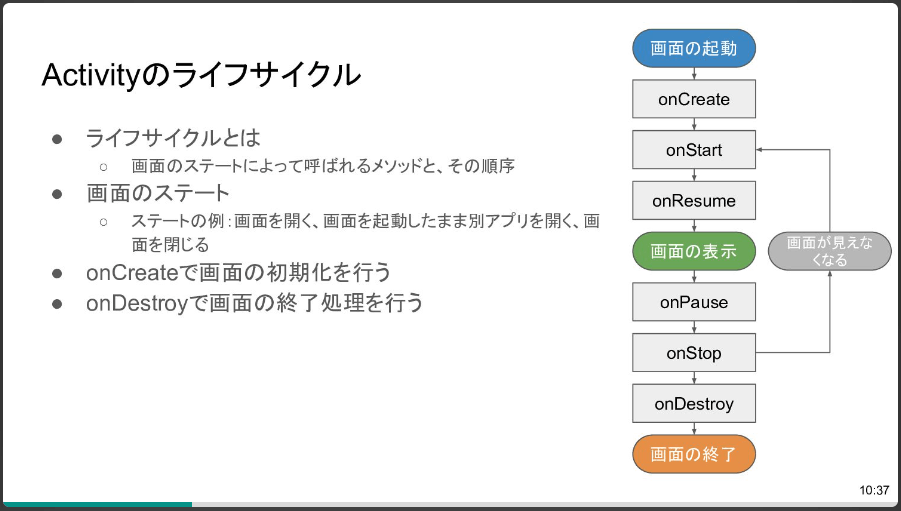
Androidアプリの基本構造②
ハンズオンのための準備
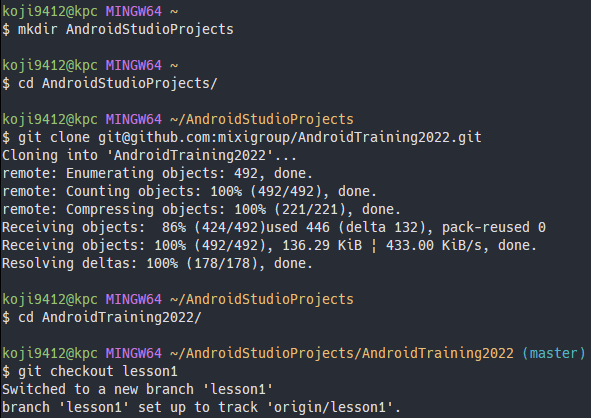
$ cd ~
$ mkdir AndroidStudioProjects
$ cd AndroidStudioProjects
$ git clone git@github.com:mixigroup/AndroidTraining2022.git
$ cd AndroidTraining2022
$ git checkout lesson1
結果
UIレイアウト①
Viewとは
画面上に何か表示するためのコンポーネント。
AndroidではViewを継承した様々なクラスが用意されている。
- TextView:文字列を表示
- ImageView:画像を表示
- Button:ボタンを表示
- EditText:文字列入力フォームを表示
これら必要なViewをXML (レイアウトXMLファイル) で記述する。
UIレイアウト②
レイアウトXMLとActivity (Kotlinコード)の関係とは
- Viewを利用するにはインスタンスが必要
- レイアウトXMLをViewインスタンスに変換することでプログラム上で操作が可能になる
- レイアウトXMLというのはViewインスタンスを用意するための手段
- レイアウトXMLに限らず、AndroidではXML定義した要素は全てインスタンス化して利用する
- レイアウトXMLをインスタンス化する機能は LayoutInflater (レイアウトインフレーター) が提供している
- 1つのXMLに存在するViewをまとめるためのHolderとしてViewBindingが利用される
- ActivityにsetContentViewすることで、その画面のUIとして利用される

XMLがあって、Viewの束とみなしてViewBindingに格納してActivity内のコードとして利用する
UIレイアウト③
TextViewとは
- 文字列を表示させるためのView
- XMLに記載のある属性を変更することで書式を変えることができる

例
- android:id Viewを特定するためのID
- style 別途定義した属性を参照する
- android:text 表示するテキスト内容
- android:textColor テキストの色
- android:textSize 文字の大きさ
リソースとして定義した値は「@.../」で参照することが可能
- @color/
- @string/
UIレイアウト④
Buttonとは
- ボタンを表示するためのView
- TextViewのサブクラスなので、TextViewと属性は共通

UIレイアウト⑤
サイズ単位 sp, dp とは
- 世の中のAndroid端末のディスプレイには高解像度・低解像度の端末が混在している
- なので、pixel単位はそのまま利用できない
- pixelを使うと、低解像度のディスプレイだと大きく表示されてしまうし、高解像度だと小さく表示されてしまう
- よって、サイズ指定には dp を使う
- dpとは、画面のピクセル密度を考慮したサイズ指定が可能な単位
- テキストサイズ指定には sp を使う
- dp に加えて、OSのフォントサイズ設定によって変化する単位
- OS側のフォントサイズが標準に設定されているのであれば 14sp = 14dp となる
- dp に加えて、OSのフォントサイズ設定によって変化する単位
UIレイアウト⑥
ViewGroupとは
- Viewを複数並べるためのコンポーネント
代表的なViewGroup
- FrameLayout (フレームレイアウト): 上に重ねて表示
- LinearLayout (リニアレイアウト): 縦方向や横方向に並べて表示
- ConstraintLayout (コンストレインレイアウト): View動詞の制約 (制約 = 並べ方) を定義して表示
- ScrollView (スクロールビュー): 表示領域をはみ出るくらいの大きなViewをスクロール可能にする
- RecyclerView (リサイクラービュー): スクロール可能な表示領域のみViewを配置する
これらも同じくレイアウトXMLに記述する。
UIレイアウト⑦
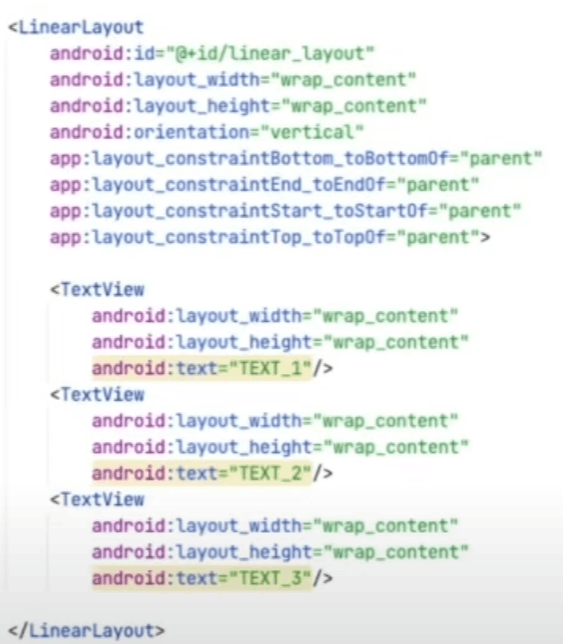
LinearLayout の詳細
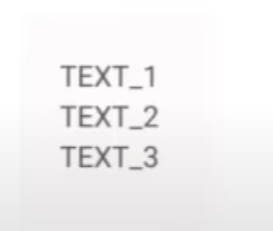
- 縦方向や横方向に並べて表示
- 実際のXMLはこのような形
- 縦方向、横方向の切り替えは「android:orientation」の値を変更する
- vertical: 縦に並べる
- horizontal: 横に並べる
UIレイアウト⑧
ConstraintLayout の詳細
- View同士の制約を設定して並べる
// start(左側面) を親の左側面にくっつける
app:layout_constraintlayoutStart_toStartOf="parent"

// top (上側面) を親の上側面にくっつける
app:layout_constraintlayoutTop_toTopOf="parent"

// start (左側面) を TEXT_1 の右側にくっつける
app:layout_constraintlayoutStart_toEndOf="@id/test_view_1"

// top (上側面) を TEXT_1 の下側面にくっつける
app:layout_constraintlayoutTop_toBottomOf="@id/test_view_1"
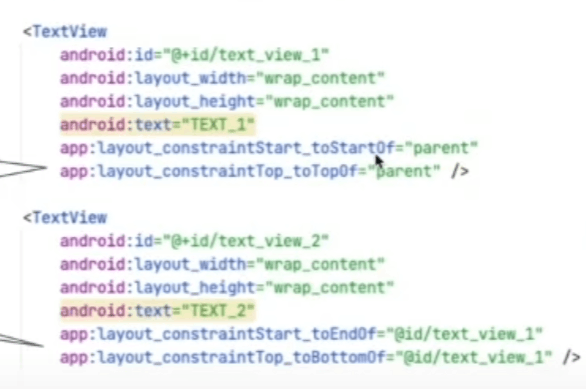
このように定義すると、斜めに配置することが可能。
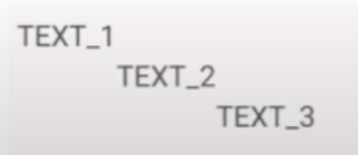
ConstraintLayoutは自由度が高いので、Android開発のレイアウトの主流になっている。
UIレイアウト⑨
ViewGroupに対しての属性指定について
- ViewGroupに属しているViewは、親に対してどのようなサイズ・位置にするかを指定できる
- 「layout_」がついている属性は親に対する指定になる
- 親側に対して横幅と高さをどうするか指示する
それぞれのコードについて説明していく。
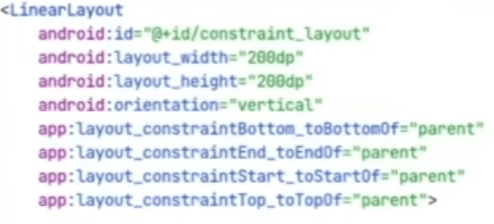
親要素
- 親要素はこのようになっている (黒枠部分)
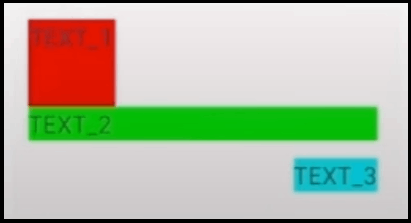
Text_1
android:layout_width="50dp"
android:layout_height="50dp"
TEXT_1 は正方形になるようにしている


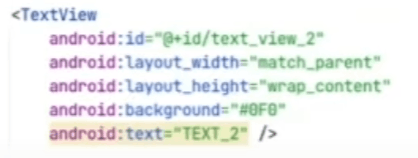
Text_2
こちらの2つの属性についても学ぶ。
- wrap_content: Viewのコンテンツが収まるようにする
- match_parent: 親要素の大きさに合わせる
TEXT_2 は 横幅がmatch_parent、高さがwrap_contentになっている。
つまり、横幅は親要素に合わせ、高さはViewのコンテンツが収まるようにしている。

Text_3
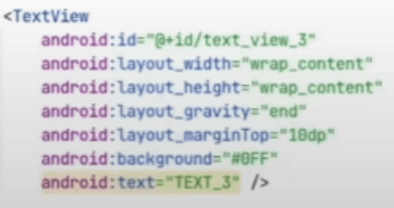
1つの属性について学ぶ。
- android:layout_margin... :マージンを取って位置を決定する
# 例: marginをTOPに10dp置く
android:layout_marginTop="10dp"
Text_3 の上側に10dp分のマージンが置かれていることがわかる

UIレイアウト⑩
ConstraintLayout Chainとは
- ConstraintLayoutにおいて、お互いに依存しあった制約が設定されていると、センタリングしてくれる機能
- Chainを使うとその際の並べ方を指定できる
「お互い依存しあった制約」とは何か
図を使った例

- ボタン1はボタン2の左側に置いてくれという指定がされている
- ボタン2はボタン1の右側に置いてくれという指定がされている
- これはお互いが参照し合ってチェーンになる
- その際に並べ方が指定できる
書き方
android:layout_constraint(Horizontal/Vertical)_chainStyle
-
packed
間をなくしてセンタリング

-
spread
ボタン1とボタン2が均等に配置されるように置かれる

-
spread_inside
packedと逆で2つの要素同士をできるだけ離して置かれる

UIレイアウト⑪
ConstraintLayout Chain の作り方 (エディタ上)
- ConstraintLayout Chain は作りづらい
- LayoutEditorで実際に触って説明する
-
git checkout example1
-
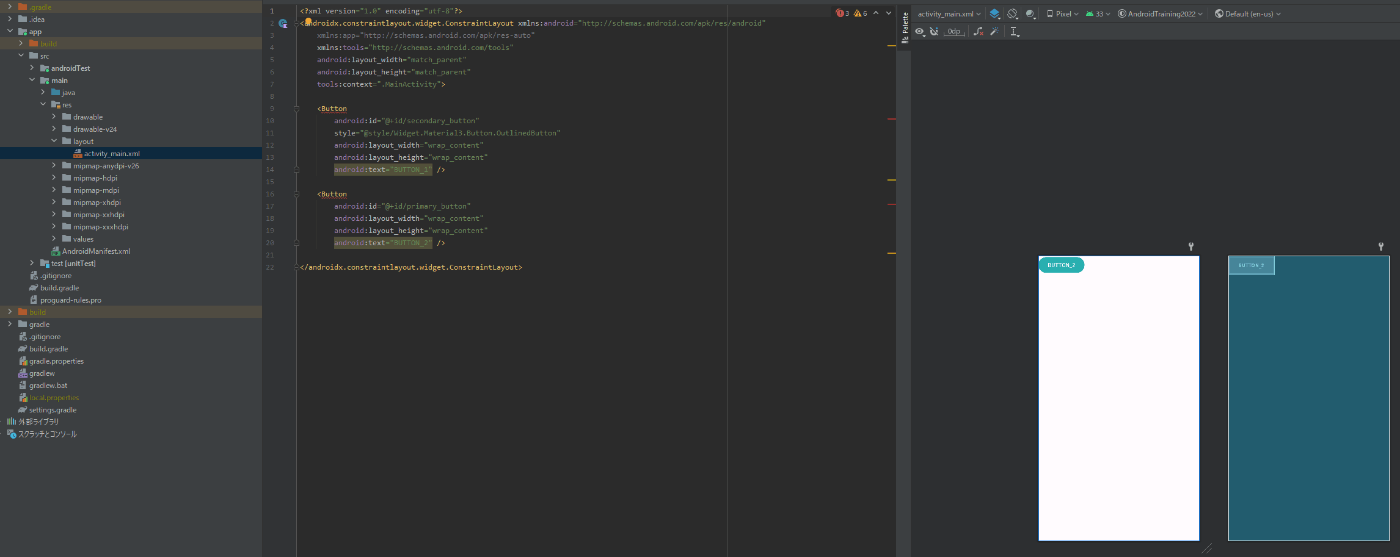
LayoutのXMLを開く
app/src/main/res/layout/activity_main.xml
-
ボタンを見えるようにコードを書き換える
    <Button
        android:id="@+id/secondary_button"
        style="@style/Widget.Material3.Button.OutlinedButton"
        android:layout_width="wrap_content"
        android:layout_height="wrap_content"
        app:layout_constraintTop_toTopOf="parent"
        app:layout_constraintStart_toStartOf="parent"
        android:text="BUTTON_1" />

    <Button
        android:id="@+id/primary_button"
        android:layout_width="wrap_content"
        android:layout_height="wrap_content"
        app:layout_constraintTop_toTopOf="parent"
        app:layout_constraintStart_toEndOf="@id/secondary_button"
        android:text="BUTTON_2" />
-
Code から Design に変更

-
Component TreeからChainする
- Command (Ctrl)を押しながら2つ選択して右クリック
- Chains → Create Horizontal Chain
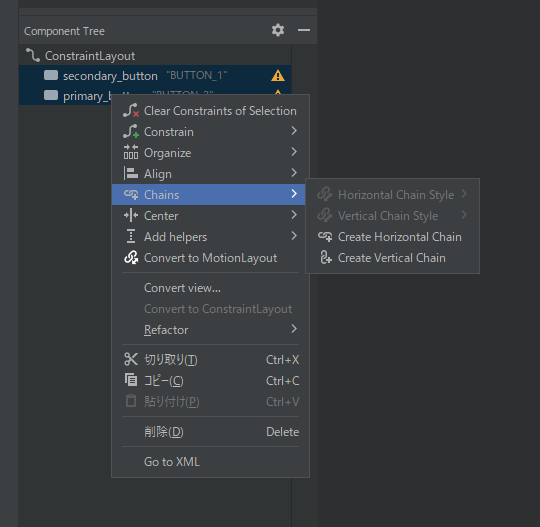
Chainされている

- Chain Styleを変更してみる
- 1つ目のボタンを右クリック
- Chains → Horizontal Chain Style から選べる

※ 画像は spread_inside を選択済み
ハンズオン
秒数表示・ボタンを置く
-
ブランチ lesson2 をcheckout
-
app/src/main/res/layout/activity_main.xml
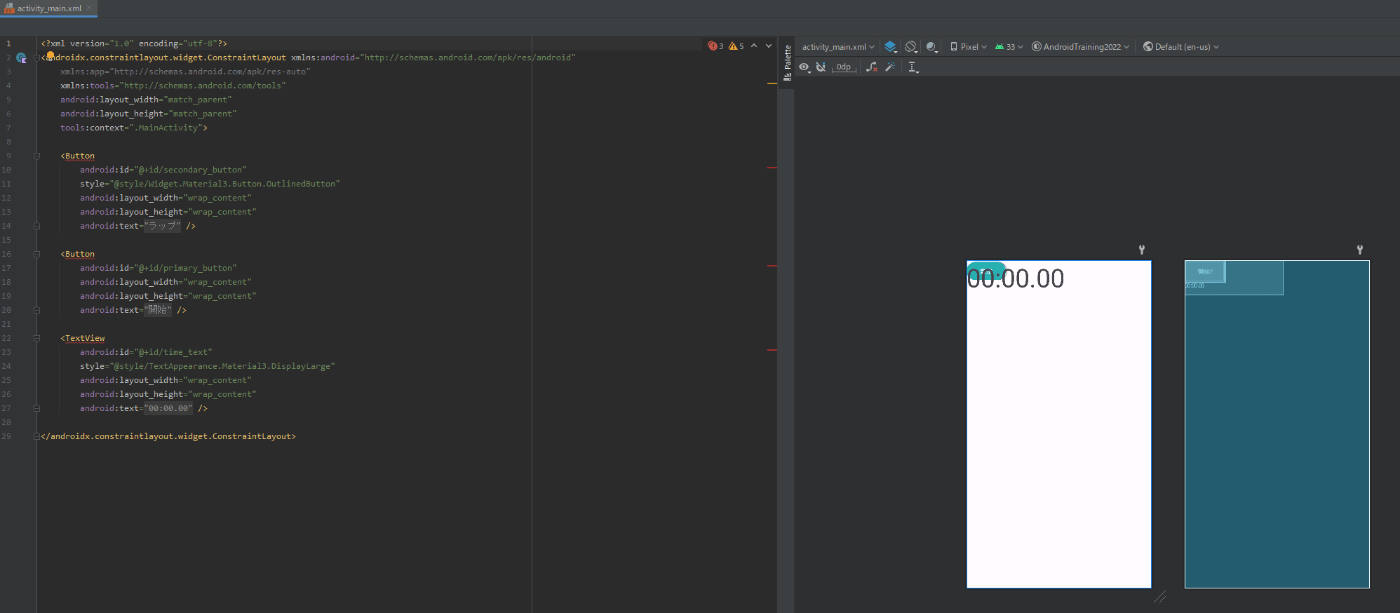
デザインが崩れてるので以下のように修正してみる
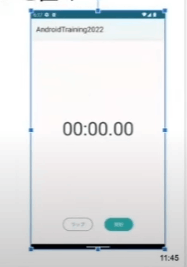
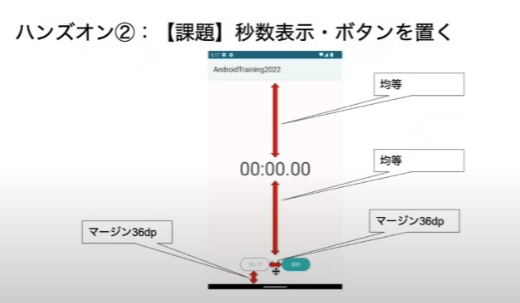
-
ボタンは下から36dp
-
ボタン同士も36dp
-
時間の表示はボタンとParentの間
10分間で修正を行う。
Next
ハンズオンで学んだこと (1)
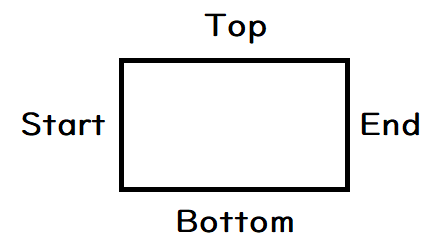
- ConstraintLayoutは xxx を 指定要素の yyyに置く、のイメージ
※例は当要素の左側を指定要素の右側に設置

ハンズオンで学んだこと (2)
このような書き方をするとHoriszonが中央に寄ることなる
        app:layout_constraintStart_toStartOf="parent"
        app:layout_constraintEnd_toEndOf="parent"/>

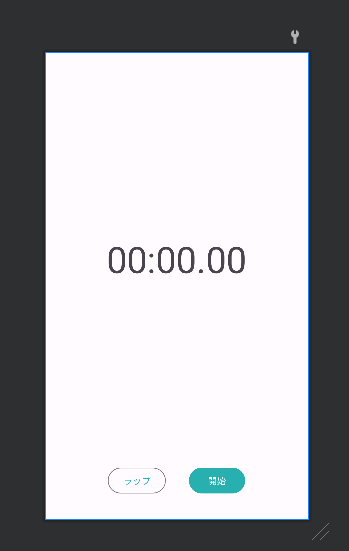
ハンズオン UI 完成
    <Button
        android:id="@+id/secondary_button"
        style="@style/Widget.Material3.Button.OutlinedButton"
        android:layout_width="wrap_content"
        android:layout_height="wrap_content"
        android:text="ラップ"
        android:layout_marginEnd="36dp"
        android:layout_marginBottom="36dp"
        app:layout_constraintBottom_toBottomOf="parent"
        app:layout_constraintEnd_toStartOf="@+id/primary_button"
        app:layout_constraintHorizontal_bias="0.5"
        app:layout_constraintHorizontal_chainStyle="packed"
        app:layout_constraintStart_toStartOf="parent" />

    <Button
        android:id="@+id/primary_button"
        android:layout_width="wrap_content"
        android:layout_height="wrap_content"
        android:text="開始"
        app:layout_constraintTop_toTopOf="@id/secondary_button"
        app:layout_constraintEnd_toEndOf="parent"
        app:layout_constraintHorizontal_bias="0.5"
        app:layout_constraintStart_toEndOf="@+id/secondary_button" />

    <TextView
        android:id="@+id/time_text"
        style="@style/TextAppearance.Material3.DisplayLarge"
        android:layout_width="wrap_content"
        android:layout_height="wrap_content"
        android:text="@string/time_initial"
        app:layout_constraintTop_toTopOf="parent"
        app:layout_constraintBottom_toTopOf="@+id/secondary_button"
        app:layout_constraintStart_toStartOf="parent"
        app:layout_constraintEnd_toEndOf="parent"/>
ActivityからViewを操作する
- ActivityからViewを操作するにはActivityのコード上で参照できなければいけない
- XMLで定義したViewというのは「ActivityMainBinding」 に格納されている
- 今回のサンプルでは「binding」に格納されている
- ActivityMainBinding というクラスは自動生成される
- activity_main.xml だと ActivityMainBinding になる
- 「setContentView」でActivityの画面として設定する
# app/src/main/java/jp/co/mixi/androidtraining2022/MainActivity.kt
package jp.co.mixi.androidtraining2022

import androidx.appcompat.app.AppCompatActivity
import android.os.Bundle
import androidx.activity.viewModels
import jp.co.mixi.androidtraining2022.databinding.ActivityMainBinding

class MainActivity : AppCompatActivity() {

    private lateinit var binding: ActivityMainBinding

    override fun onCreate(savedInstanceState: Bundle?) {
        super.onCreate(savedInstanceState)
        binding = ActivityMainBinding.inflate(layoutInflater)
        setContentView(binding.root)

    }
}
クラスからViewを操作する方法
- binding内のプロパティとして各Viewが作られている
- idをtime_textにした場合、ローワーキャメルケースでtimeTextという風に変換されている
- bindingの中にあるViewのインスタンスのプロパティを以下のように変えることができる
class MainActivity : AppCompatActivity() {

    private lateinit var binding: ActivityMainBinding

    override fun onCreate(savedInstanceState: Bundle?) {
        super.onCreate(savedInstanceState)
        binding = ActivityMainBinding.inflate(layoutInflater)
        setContentView(binding.root)

       # timeTextというidのtextViewの文字列を変えている
        binding.timeText.text = "任意のテキスト"
    }
}
任意のタイミングでViewを操作する
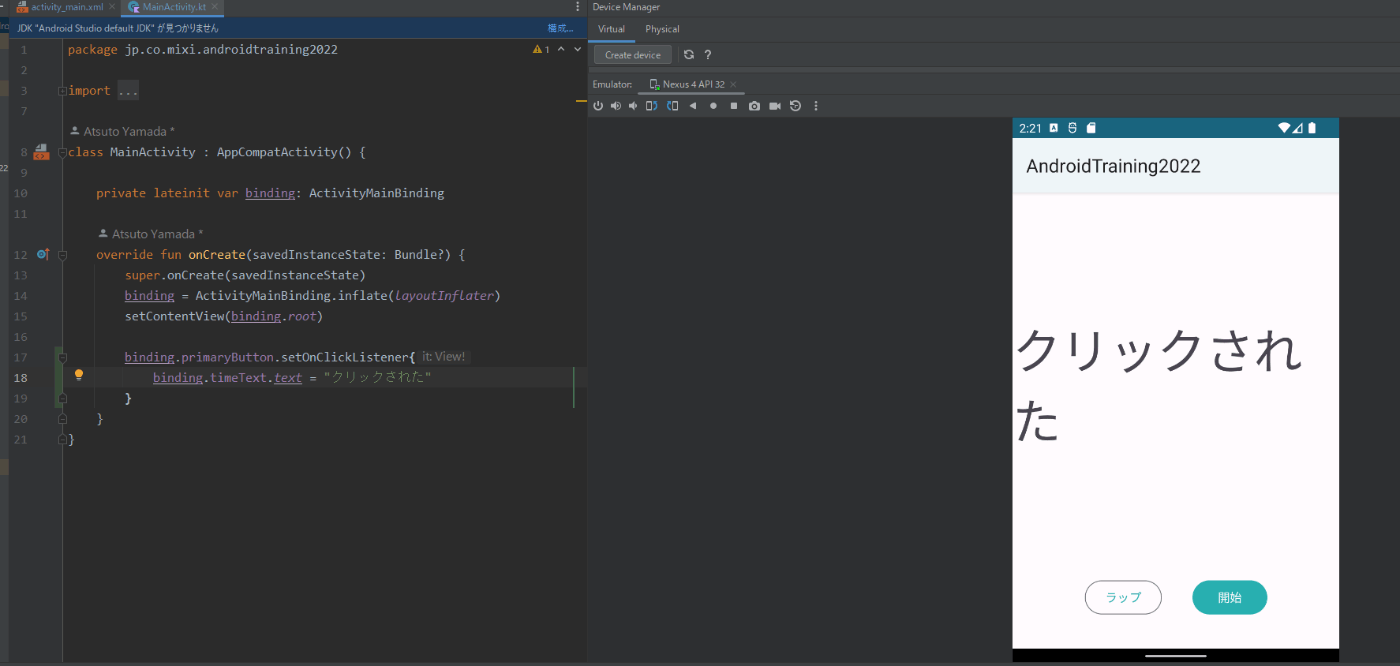
クリック時の操作
- setOnClickListener を使うことでViewがクリックされたときに動作させることができる
class MainActivity : AppCompatActivity() {

    private lateinit var binding: ActivityMainBinding

    override fun onCreate(savedInstanceState: Bundle?) {
        super.onCreate(savedInstanceState)
        binding = ActivityMainBinding.inflate(layoutInflater)
        setContentView(binding.root)

        binding.primaryButton.setOnClickListener{
            binding.timeText.text = "クリックされた"
        }
    }
}
「開始」をクリック時に動作させることができる
新しいやつが出ていたのでこれはこれでやる
