【Udemy(CSS / Sass) : CSSをSassへ
CSS をSassへ
◎カラー関係は常に変数で = その方が、素早く変更することができる
◎一度しか使用しないような場所などは、変に変数を当てたりする必要はない
.btn:hover{
    transform: translateY(-3px);
    box-shadow: 0 .5rem 1rem rgba(0,0,0,.2);
}
◎変換後
.btn:hover{
    transform: translateY(-3px);
    // rgbaを使って、16進数の色を識別することは、Sassでしかできない。CSSだとRGBAの色を別々に定義する必要があった
    box-shadow: 0 .5rem 1rem rgba($color-black,.2);
}
しかし、上記のような状態でも**&(アンパサンド)を使用してネストできる**。
┣ VSコード[ command + D ]

.header{
    height: 95vh;
    background-image: linear-gradient(
        to right bottom,
        rgba($color-primary-light, 0.8),
        rgba($color-primary-dark, 0.8)),
        url(../img/hero.jpg);
    background-size: cover;
    background-position: top;
    position: relative;

    clip-path: polygon(0 0,100% 0,100% 75vh, 0 100%);

    &__logo-box{
        position: absolute;
        top: 4rem;
        left: 4rem;
    }
    &__logo{
        height: 3.5rem;
    }

    &__text-box{
        position: absolute;
        top: 40%;
        left: 50%;
        transform: translate(-50%,-50%);
        text-align: center;
    }
}
CSSが当たると下記のようにコンパイルされる

ex)下記の場合はこうなる
.btn:link,
.btn:visited{
    text-transform: uppercase;
    text-decoration: none;
    padding: 1.5rem 4rem;
    display: inline-block;
    border-radius: 10rem;
    transition: all .2s;
    position: relative;
    font-size: 1.6rem;
}

.btn:hover{
    transform: translateY(-3px);
    // rgbaを使って、16進数の色を識別することは、Sassでしかできない。CSSだとRGBAの色を別々に定義する必要があった
    box-shadow: 0 .5rem 1rem rgba($color-black,.2);
}
.btn:active{
    transform: translateY(-1px);
}
.btn--white{
    background-color: $color-white;
    color: $color-grey-dark;
}
.btn::after{
    content:"";
    display: inline-block;
    height: 100%;
    width: 100%;
    border-radius: 100px;
    position: absolute;
    top: 0;
    left: 0;
    z-index: -1;
    transition: all .4s;
}
.btn--white::after{
    background-color: $color-white;
}
.btn:hover::after{
    transform: scaleX(1.4) scaleY(1.6);
    opacity: 0;
}

.btn--animated{
    animation: moveInBottom .5s ease-out .75s;
    animation-fill-mode: backwards;
}
.btn{
    &:link,
    &:visited{
        text-transform: uppercase;
        text-decoration: none;
        padding: 1.5rem 4rem;
        display: inline-block;
        border-radius: 10rem;
        transition: all .2s;
        position: relative;
        font-size: 1.6rem;
    }
    &:hover{
        transform: translateY(-3px);
        // rgbaを使って、16進数の色を識別することは、Sassでしかできない。CSSだとRGBAの色を別々に定義する必要があった
        box-shadow: 0 .5rem 1rem rgba($color-black,.2);

        &::after{
            transform: scaleX(1.4) scaleY(1.6);
            opacity: 0;
        }
    }
    &:active{
        transform: translateY(-1px);
    }
    &--white{
        background-color: $color-white;
        color: $color-grey-dark;

        &::after{
            background-color: $color-white;
        }
    }
    &::after{
        content:"";
        display: inline-block;
        height: 100%;
        width: 100%;
        border-radius: 100px;
        position: absolute;
        top: 0;
        left: 0;
        z-index: -1;
        transition: all .4s;
    }

    &--animated{
        animation: moveInBottom .5s ease-out .75s;
        animation-fill-mode: backwards;
    }

}
⭐️⭐️⭐️CSSアーキテクチャ width Sass
フォルダが多くなってきたのでまとめる
◎基本的なプロジェクトの定義を入れるbaseフォルダを作成
・base / base.scssを作成 = このファイルは、HTML / body要素のセレクタのリセットやスタイルなど本当に低レベルの基本的なことを行うためのもの。このファイルは、後でメインのsassファイルにインポートできるよう、部分ファイルである必要があること(パーシャル)に注意
◎実際のメインファイルにインポート
//ファイルへのパスを書く、今回の場合は_main.scss起点で考える。そのため、アンダーバーがいらなくなる
@import "base/base";

$color-primary: #55c57a;
$color-primary-light: #7ed56f;
$color-primary-dark: #28b485;
◎アーキテクチャは、大規模なマルチページのwebサイトやwebアプリケーションを扱うために設計されていることを心に留めておく。
続けてディレクトリを作成
・abstractsをsass配下に作成:CSSを出力しないコードのみを置く。
・componentsをsass配下に作成:コンポーネントはページのレイアウトによって保持されていることを忘れない
・layoutをsass配下に作成:上記すべてのコンポーネントをまとめるもの。このアーキテクチャは複数ページのプロジェクト用に設計されているため、これらのレイアウト要素は全てのページで機能する必要があることを忘れない
・pagesをsass配下に作成:例えばHPのような特定のページに対して非常に特殊なスタイルがある場合、その特定のページに対して新しいファイルを作成し、pagesフォルダでそれを行うことができる。ランディングページをHPのように扱えるので、そのページだけに適用させるスタイルがある。そして、将来架空の会社が拡大してページを増やした場合、他の異なるページにも異なるスタイルを持たせることができる
記述
main.scssに下記を記述し読み込む
┣ 下記のように、main.scssは他の全てのファイルをインポートするためのものでしかない。
@import "abstracts/functions";
@import "abstracts/mixins";
@import "abstracts/variables";

@import "base/animation";
@import "base/base";
@import "base/typography";
@import "base/utility";

@import "pages/home";
他の記述を、あるべき場所へ移行
main.scssは最終的にこうなる

⭐️⭐️⭐️レスポンシブデザインの4つの原則
float / Flexbox / CSS Gridを使用する
※メディアクエリだけでは、基本的に全く意味がない
1. フルードレイアウト
・ webページが現在のビューポート幅に帝王することを可能にする
・pxの代わりに、パーセント単位を使うだけで、非常に簡単に流体レイアウトを作成することができる
・通常は、単にwidthプロパティではなく、max-widthプロパティを使用する必要がある。
2. レスポンシブユニット
・CSSで定義する長さのほとんどに、pxではなくrem単位を使いましょうということ。
・こうすることで、必要に応してページ全体を自動的に拡大・縮小することが簡単にできるようになる
3. フレキシブルイメージ
• デフォルトでは、画像は自動的に拡大縮小されません。ビューポートを変更するので、それを修正する必要があります
• max-width プロパティを使用することで、画像の寸法には常に % を一緒に使用し、画像の柔軟性を高める。
4. メディアクエリ
・メディアクエリによって、ブレイクポイントと呼ばれる特定のビューポート幅でスタイルを変更することができる。
・メディアクエリによって、開発者は様々な種類のデバイス用に異なるバージョンのwebサイトを作成することができる。

フルードレイアウトについて
CSSには現在、webページやwebアプリケーションをレイアウトするための主要な方法が3つある。
1. float layouts
float CSS プロパティを使用し、複数のボックスを横に並べてレイアウトを構築してきた。
まだ使えますが、2020年代古くなってしまいました。
2. flexbox
要素をレイアウトする現代的な方法の一つ。
flexboxの場合、一次元のレイアウトを構築するのに最適。(列だけのレイアウト)
3. css grid
完全な2次元レイアウトを構築できるので、大きなページのレイアウトや、より複雑なコンポーネントを制作するのに非常に適している

Float レイアウト
一貫したスペース(ガター)
列:列は常にコンテナにはいいている。このコンテナを行と呼ぶ

_variables.scss
//grid
$grid-width: 114rem;
$gutter-vertical: 8rem;
$gutter-horizontal: 6rem;
//layout/_grid.scss
.row{
    max-width: $grid-width;
    background-color: #eee;
    margin: 0 auto;

    //最後の要素のみ適用させない
    //&:notは最後の子を選択する。last-childを追加 = 最後の行の要素を追加
    //&:not(:last-child) = 最後の子以外を選択
    &:not(:last-child){
        margin-bottom: $gutter-horizontal;
    }
    .co1-1-of-2{

    }
}
幅の計算方法
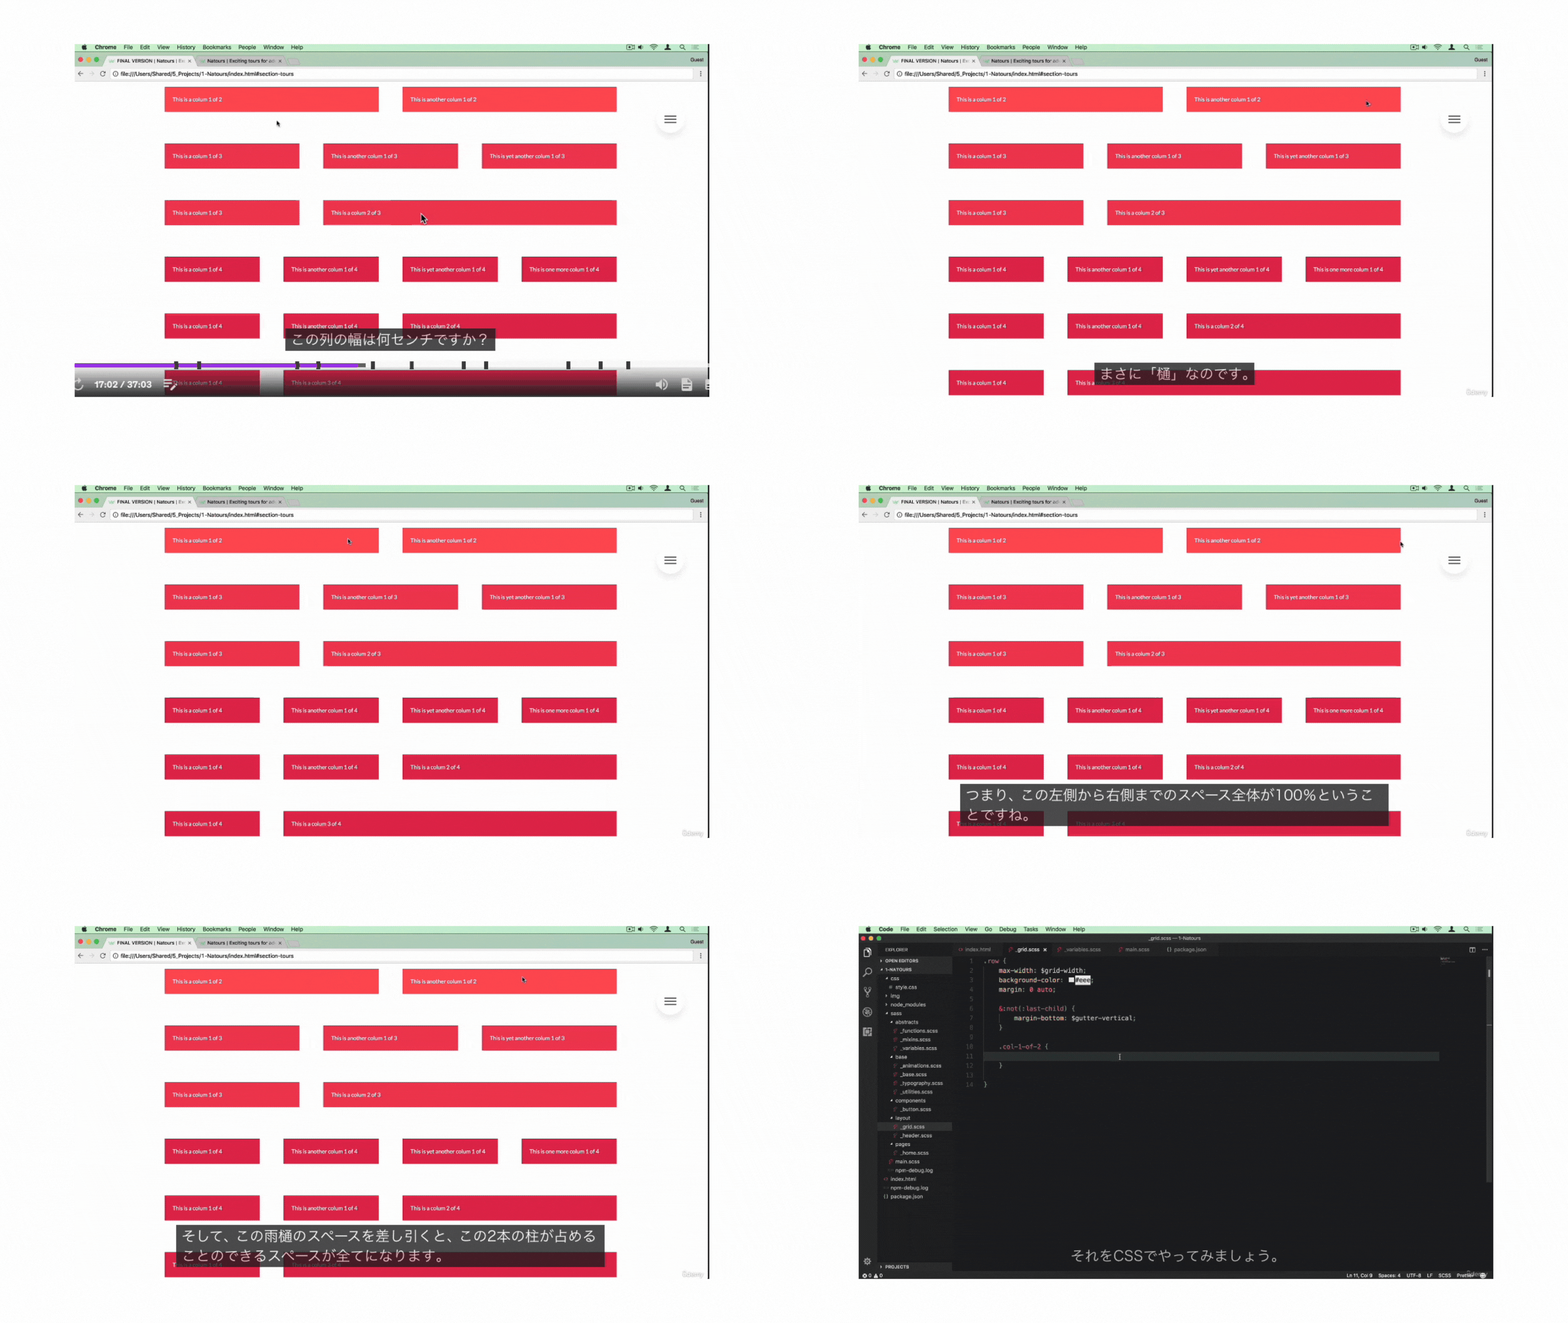
calc
・数学的な演算、単位で計算も可能
※rem、px、%を混ぜて計算することはできない
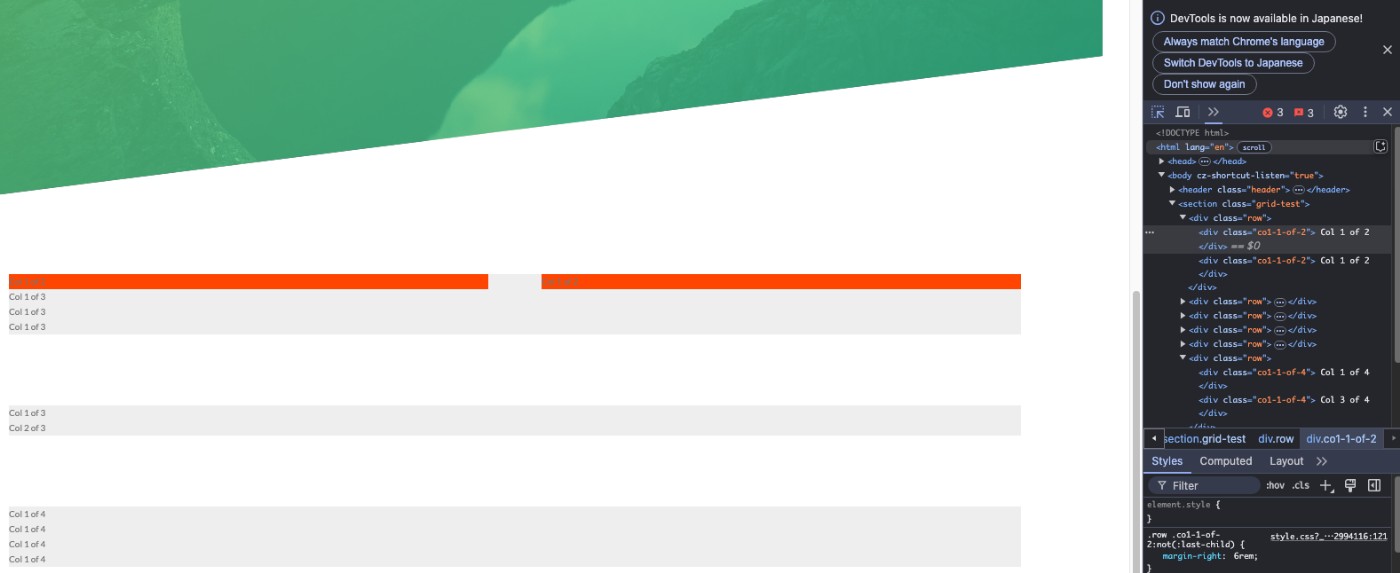
.co1-1-of-2{
    // sassでの書き方
    width: calc((100% - #{$gutter-horizontal}) /2);
    background-color: orangered;
    float: left;

    &:not(:last-child){
        margin-right: $gutter-horizontal;
    }
}
Aboutセクション
• コンポーネントについて考える。
• ユーティリティ クラスを使用する方法。特にテキストでの
• 特にテキストでのbackgroud-clip
• 複数のプロパティを同時に変換する方法
• アウトラインと一緒にoutline-offsetプロパティを使用する方法
• 他の要素がホバーされているのに、ホバーされていない要素をスタイルする方法を学ぶ

構築する前に、アーキテクトという考え方を思い出す
構築する前に、どう記述するかを考える。
ex)
・再利用可能なところはコードを使い回す
・背景色がグレーである等
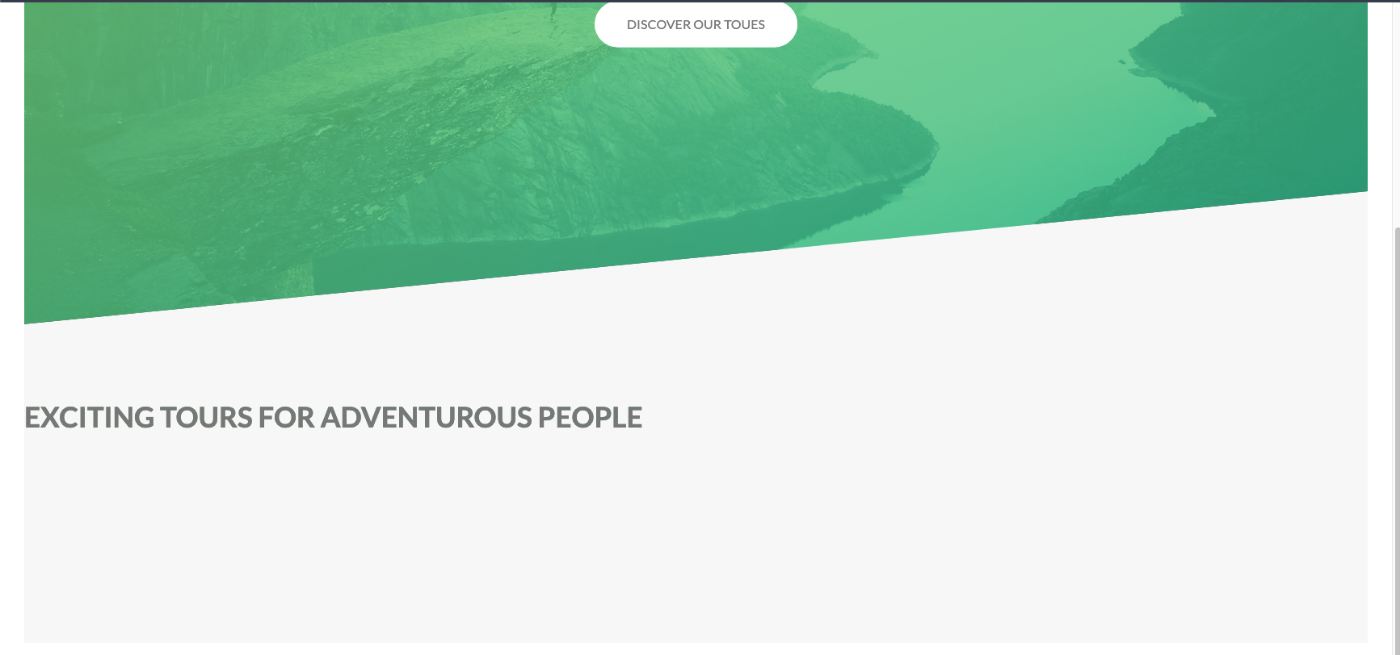
グラデーション
.heading-secondary{
font-size: 3.5rem;
text-transform: uppercase;
font-weight: 700;
// h2グラデーション
display: inline-block; // これを入れることで、文字幅内にすることができる
background-image: linear-gradient(to right, $color-primary-light , $color-primary-dark);
}


.heading-secondary{
    font-size: 3.5rem;
    text-transform: uppercase;
    font-weight: 700;
    display: inline-block;
    background-image: linear-gradient(to right, $color-primary-light , $color-primary-dark);

    // background-clip: textを当てると、背景が切り取られ文字色の後ろにいる
    // 文字色の後ろにグラデーションがいるため、文字色をtransparentで無色にする
    -webkit-background-clip: text;
    color: transparent;
}

.heading-secondary{
    font-size: 3.5rem;
    text-transform: uppercase;
    font-weight: 700;
    display: inline-block;
    background-image: linear-gradient(to right, $color-primary-light , $color-primary-dark);

    -webkit-background-clip: text;
    color: transparent;
    letter-spacing: .2rem;
    transition: all .2s;

    &:hover{
        transform: skewY(2deg) skew(15deg) scale(1.1); // 文字を傾かせる
        text-shadow: (.5rem 1rem 2rem rgba($color-black, .2));
    }
}
}

テキストの中央揃え
divで囲い、u-center-textとつける
上記続き
h3の部分を組んで、_typography.scssへ
ちょっとしたテクニック
同じクラス名2箇所つけたい時は、マルチカーソルで増やす

CSSでユニットを処理する方法
確認できる(computed)

特殊記号
一箇所に変数を定義し、変更時は一箇所だけ変えればいいようにする

上記続き
エメットの記述方法
components/ _composition.scssを作成
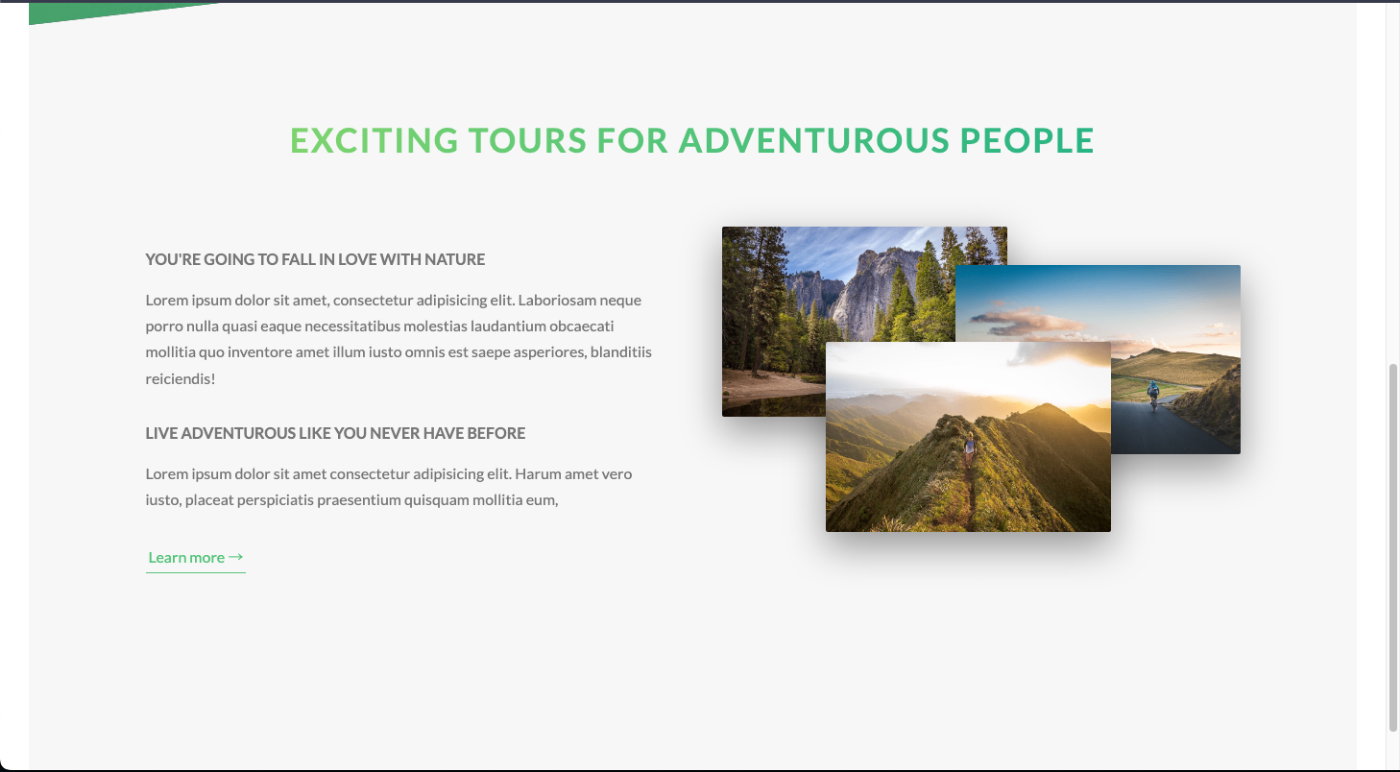
レイアウト参考
.composition{
    position: relative;

    &__photo{
        width: 55%;
        box-shadow: 0 1.5rem 4rem rgba($color-black, .4);
        border-radius: 2px;
        position: absolute;

        &--p1{
            left: 0;
            top: -2rem;
        }

        &--p2{
            right: 0;
            top: 2rem;
        }

        &--p3{
            left: 20%;
            top: 10rem;
        }
    }

}
◎緑の枠線
・outlineプロパティ
┣ ボーダーではできないことができる。それは、アウトラインのオフセット
セクション3
・アイコンフォントを組み込む方法と使用方法について
• 斜めの断面のデザインを作る別の方法
• ダイレクトチャイルドせれくたの使い方とタイミングも

Linea アイコン
styes.cssとfontsフォルダを、使用するディレクトリへコピー

head内に下記記述を読み込み、適用させる
<link rel="stylesheet" href="css/icon-font.css">
使用するアイコンのクラス名を入れる
・_ICONFONT / icons-referene.htmlで開ける

<section class="section-features">
    <i class="使用するアイコンのクラス名"></i>
</section>

<!-- 最終的にはこう  -->
<div class="row">
    <div class="col-1-of-4">
        <div class="feature-box">
            <i class="feature-box__icon icon-basic-world"></i>
            <h3 class="heading-tertiary">Explore the world</h3>
            <p class="feature-box__text">
                Lorem ipsum, dolor sit amet consectetur adipisicing elit.
            </p>
        </div>

    </div>
</div>

◎_home.scss
.section-features{
    padding: 20rem 0;
    background-image: linear-gradient(
        to right bottom,
        rgba($color-primary-light, 0.8),
        rgba($color-primary-dark, 0.8)),
        url(../img/nat-4.jpg);
    // セクション全体を綺麗にカバーすることができる
    background-size: cover;
}
ボタンセクションの装飾
.feature-box{
    background-color: rgba($color-white,.8);
    font-size: 1.5rem;
    padding: 2.5rem;
    text-align: center;
    border-radius: 3px;
    box-shadow: 0 1.5rem 4rem rgba($color-black, .15);

    &__icon{
        //iconは事実上フォントであることを忘れない
        font-size: ;
    }

    &__text{

    }
}
アイコンのグラデーション
&__icon{
       //iconは事実上フォントであることを忘れない
       font-size: 6rem;
       margin-bottom: .5rem;
       display: inline-block;
       background-image: linear-gradient(
           to right,
           $color-primary-light ,
           $color-primary-dark);
       -webkit-background-clip: text;
       color: transparent;
   }
//スキューデザイン:clip-path以外のもう一つの方法
    transform: skewY(-7deg);
┣ この場合
・ただ斜めになる
//スキューデザイン:clip-path以外のもう一つの方法
    transform: skewY(-7deg);
// 上記内容を該当ファイルに記述してもいいが、面倒になるので、下記方法で
    & > *{
        transform: skewY(7deg);
    }
・左上に余白ができる

カードの回転
素晴らしい回転カードを作成する方法;
• CSS のperspectiveとbackface-isibilityプロパティの使い方
• 背景ブレンドモードの使用。
• box-decoration-break をいつどのように使用するか。

⭐️⭐️⭐️カードの回転処理
◎Y軸を中心に180度回転するだけ
<div class="col-1-of-3">
    <div class="card">
        <div class="card__side card__side--front">
            front
        </div>
        <div class="card__side card__side--back">
            back
        </div>
    </div>
</div>
.card{
    // perspective:視点を定義する
    perspective: 150rem;
    -moz-perspective: 150rem; // Firefox用

    //↑カードの子要素にプロパティを設定する必要がある
    &__side{
        background-color: orangered;
        height: 50rem;
        transition: all .8s; // 回転のアニメーション

        &--front{
            background-color: orangered;
        }

        &--back{
            background-color: green;
            transform: rotateY(180deg); //カードを反転する前に、この裏面は基本的にすでに反転している
        }
    }

    &:hover &__side--front{
        transform: rotateY(180deg);  // ホバーした際の回転処理
    }
    &:hover &__side--back{
        transform: rotateY(0);  // ホバーした際の回転処理
    }
}
::: messes
◎ページからユーザーに向かって出てきているようなもの(遠近法)
・変形や回転が起こる場所の親要素で、実際に遠近法を定義すること
※アニメーション確認
 // perspective:視点を定義する
    perspective: 150rem;
    -moz-perspective: 150rem; // Firefox用
:::

二つを重ね合わせる
◎絶対位置を決めて、使うだけ
最終的にこうなる
<section class="section-tours">
    <div class="u-center-text u-margin-bottom-big">
        <h2 class="heading-secondary">
            Most popular tours
        </h2>
    </div>

    <div class="row">
        <div class="col-1-of-3">
            <div class="card">
                <div class="card__side card__side--front">
                    front
                </div>
                <div class="card__side card__side--back card__side--back-1">
                    back
                </div>
            </div>
        </div>
        <div class="col-1-of-3">
            Col 1 of 3
        </div>
        <div class="col-1-of-3">
            Col 1 of 3
        </div>
    </div>
</section>
.card{
    // perspective:視点を定義する
    perspective: 150rem;
    -moz-perspective: 150rem; // Firefox用
    position: relative;
    height: 50rem; // floatの時と同じ、高さが崩れるので、再指定

    //↑カードの子要素にプロパティを設定する必要がある
    &__side{
        height: 50rem;
        transition: all .8s ease; // 回転のアニメーション
        position: absolute; // カードの位置決め
        top: 0;
        left: 0;
        width: 100%;

        // ◎hiddenに設定すると、基本的に要素の背面部分を非表示にする
        backface-visibility: hidden;
        box-shadow: 0 1.5rem 4rem rgba($color-black, .15);

        &--front{
            background-color: $color-white;
        }

        &--back{
            transform: rotateY(180deg); //カードを反転する前に、この裏面は基本的にすでに反転している
            &-1{
                background-image: linear-gradient(to right, $color-secondary-light ,$color-secondary-dark);
            }
        }

    }

    &:hover &__side--front{
        transform: rotateY(180deg);  // ホバーした際の回転処理
    }
    &:hover &__side--back{
        transform: rotateY(0);  // ホバーした際の回転処理
    }
}
上記続き
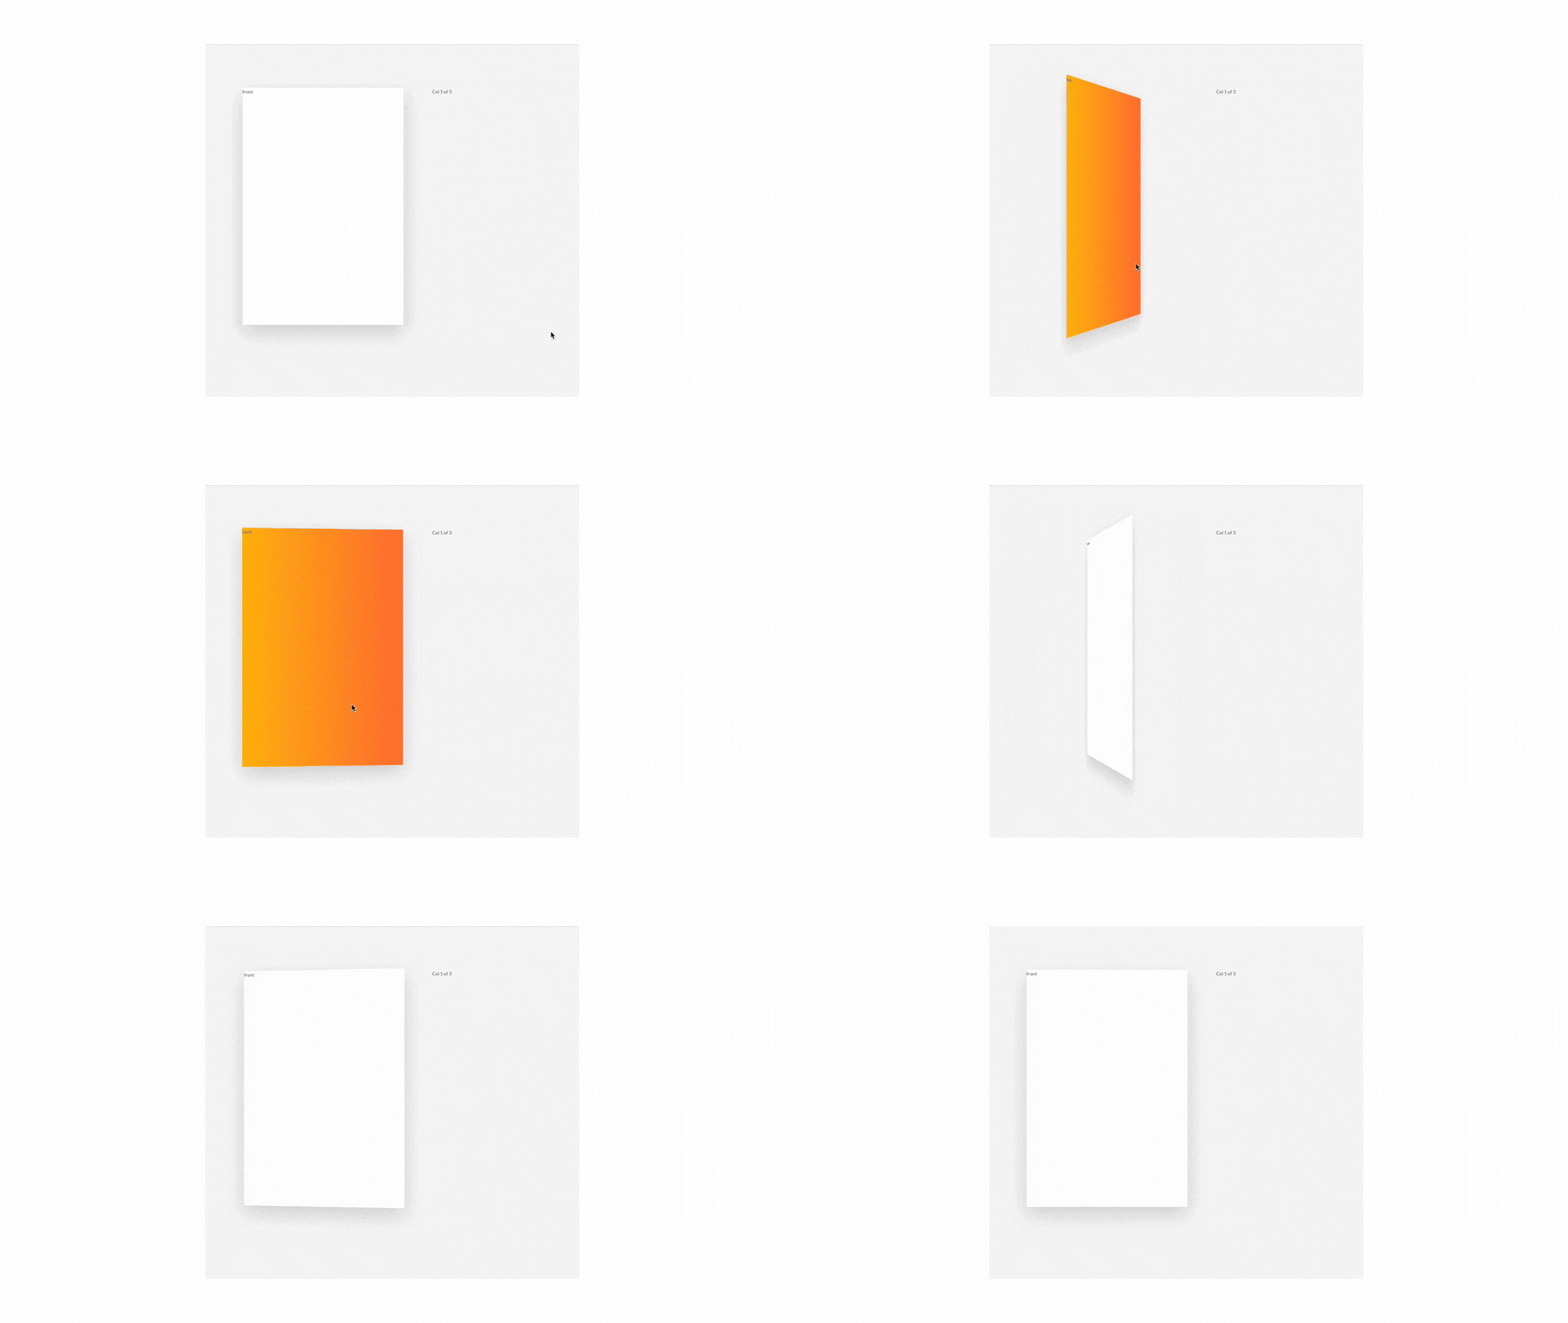
・回転が実は反対方向
180度に回転させるのではなく、-180度まで回転させる
&:hover &__side--front{
        transform: rotateY(180deg);  // ホバーした際の回転処理
}
↓

&:hover &__side--front{
        transform: rotateY(-180deg);  // 素子を反対方向に移動させる
    }
transform: rotateY(180deg);
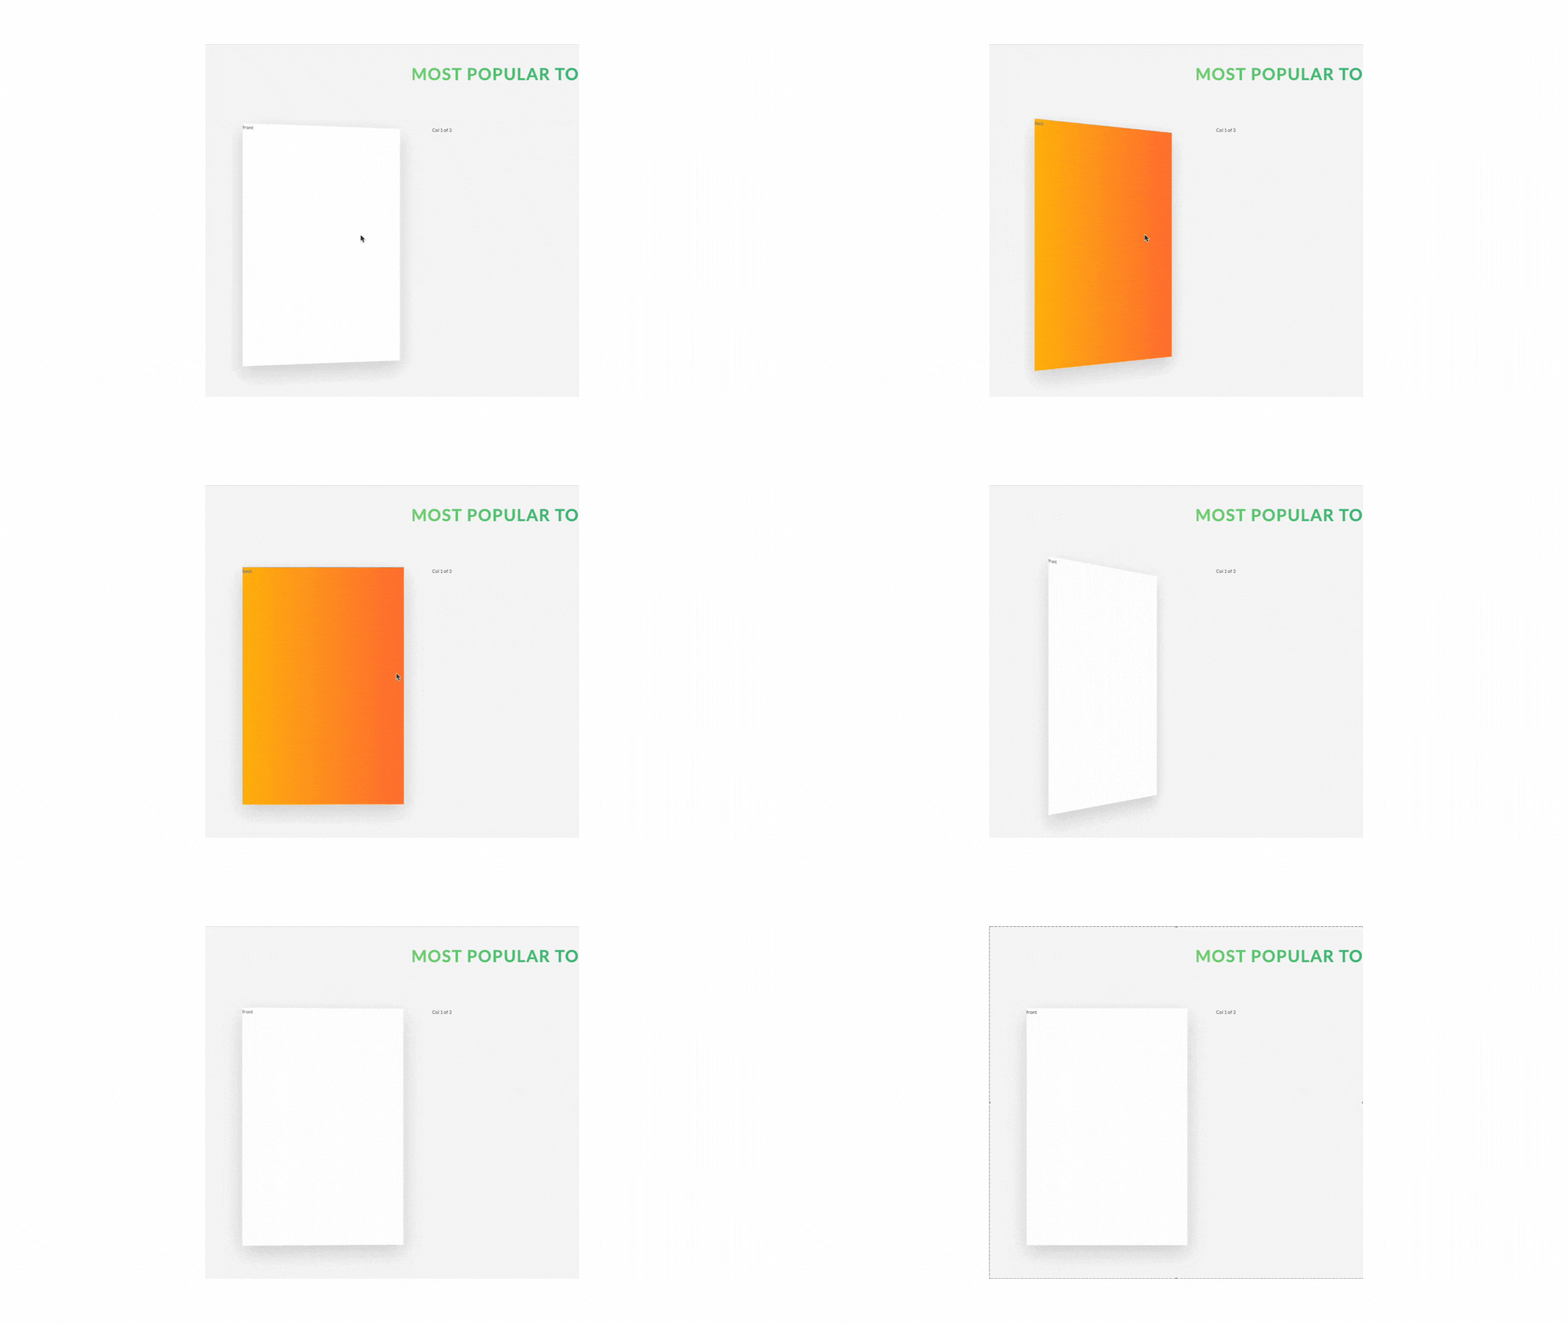
transform: rotateY(-180deg);
カードの中身制作
<div class="card__side card__side--front">
<!-- BEMの手法の特徴は、要素をネスト化しないこと -->
<div class="card__picture card__picture--1">
<!-- htmlが空白のようなものを意味する -->
</div>
<div class="card__heading">
Heading
</div>
<div class="card__details">
Details
</div>
</div>
// FRONT SIDE STYLING
    &__picture{
        &--1{
            // なぜ..をつけるか?
            background-image: url(../img/);
        }
    }
◎背景ブレンドモードプロパティは、要素である背景画像がどのようにブレンドされるべきかを記述するもの
// 写真の上にグラデをかける:,で区切ってそのまま書く
&--1{
            background-image: linear-gradient(to right, $color-secondary-light ,$color-secondary-dark),url(../img/nat-5.jpg);
        }
影の角丸と画像の角を整える (? : Udemy40)
&__side{
        height: 50rem;
        transition: all .8s ease; // 回転のアニメーション
        position: absolute; // カードの位置決め
        top: 0;
        left: 0;
        width: 100%;

        // ◎hiddenに設定すると、基本的に要素の背面部分を非表示にする
        backface-visibility: hidden;
        border-radius: 3px;
        overflow: hidden; //画像が親からはみ出ているため、
        box-shadow: 0 1.5rem 4rem rgba($color-black, .15);

◎カードの斜め形状
・clip-pathを使う
        -webkit-clip-path: polygon(0 0,100% 0 , 100% 85% , 0 100%);//全てのブラウザで見れるようにするため
        clip-path: polygon(0 0,100% 0 , 100% 85% , 0 100%);
 -webkit-box-decoration-break: clone; //グーグルクロームではwebkitのプレフィックスがないと動作しない
        box-decoration-break: clone;
エメット機能
◎ul>li*5
<ul>
    <li></li>
    <li></li>
    <li></li>
    <li></li>
    <li></li>
</ul>
続き
◎通常巨大なテキストがある場合、それをただ大きく太いテキストのままにしておくのではなく、本当に細くすることで、より見栄えが良くなる
背景動画の部分
・shape outsideとfloatプロパティを併用してテキストをシェイプの周りに流す方法
・画像にフィルタを適用する方法
・そのために、HTMLにvideo要素の使い方と、
・object-fitプロパティの使い方と、タイミング

shape-outside
◎要素の周囲でコンテンツが浮遊する場所を定義するだけ(この場合は円)
空の円を作るために、下記を用意
<div class="row">
    <div class="story">
        <figure class="story__shape">
        <!-- 空の円を作成 -->
        </figure>
        <div class="story__text">
            <h3 class="heading-tertiary u-margin-bottom-small">I had the best week ever with my family</h3>
            <p>Lorem ipsum dolor sit amet consectetur adipisicing elit. Placeat facilis, inventore totam numquam cumque expedita odio? Repellat dolor tenetur iusto sint commodi ab qui aliquam, animi, similique beatae ipsa minima.</p>
        </div>
    </div>
</div>
//ここでは円の大きさと縁の中心の位置を定義することができます
//最初に入力する数値は、実際には円の半径。
//safariではプレフィックス必要
-webkit-shape-outside: circle(50% at 50% 50%);
shape-outside: circle(50% at 50% 50%);

transformを使用すると、paddingを一部占領するので調整
    padding: 6rem;
    padding-left: 9rem; //padding: 6rem; + transform: translateX(-3rem);
平行四辺形の適用
.story{
    width: 75%;
    margin: 0 auto;
    box-shadow: 0 3rem 6rem rgba($color-black, .1);
    background-color: $color-white;
    border-radius: 3px;
    padding: 6rem;
    padding-left: 9rem; //padding: 6rem; + transform: translateX(-3rem);
    font-size: $default-font-size;

    // 長方形を平行四辺形へ
    transform: skewX(-12deg);

    &__shape{
        width: 15rem;
        height: 15rem;
        background-color: orangered;
        float: left;
        -webkit-shape-outside: circle(50% at 50% 50%);
        shape-outside: circle(50% at 50% 50%);
        -webkit-clip-path: circle(50% at 50% 50%);
        clip-path: circle(50% at 50% 50%);
        // 上のトランスフォームの変形調整(skew)
        transform: translateX(-3rem) skewX(12deg);
    }

    &__img{
        height: 100%;
    }
}
[hr]
続き ホバーエフェクト
&__caption{
        // hoverをする前の初期状態
        position: absolute;
        top: 50%;
        left: 50%;
        transform: translate(-50%,20%);
        color: $color-white;
        text-transform: uppercase;
        font-size: 1.7rem;
        text-align: center;
        opacity: 0;
        transition: all .5s;
        // 微妙なブレを治す
        backface-visibility: hidden;
    }
    &:hover &__caption{
        opacity: 1;
        transform: translate(-50%,-50%);
    }
画像の位置調整
&__img{
    height: 100%;
    // hover時画像画像縮小させるため、初期値をscale()で設定
    transform: translateX(-4rem) scale(1.4);
    transition: all .5s;
    backface-visibility: hidden;
}
&:hover &__img{
    transform: translateX(-4rem) scale(1);
}
ぼかしの処理
◎フィルターの処理(ポートフォリオでやったやつ)
&:hover &__img{
    transform: translateX(-4rem) scale(1);
    filter: blur(3px) brightness(80%);
}
背景のビデオ配置
◎背景にビデオを入れるにはvideoタグを使う
<div class="bg-video">
    <video class="bg-video__content" autoplay muted loop>
        <source src="img/video.mp4" type="video/mp4">
        <source src="img/video.webm" type="video/webm">
        Your browser is not supported!
    </video>
</div>
背景透過
要素にもopacityを当ててしまうと、要素自体も透過してしまう
横スクロールの発生、縦横比の維持
height: 100%、width: 100%を当てると少し小さくなってしまう
object-fit
┣ この場合、アスペクト比を維持したまま、親全体を埋めるということ
overflow: hidden
┣ 何かが要素の幅を超えた時に、非表示にする

bg-video{
    position: absolute;
    top: 0;
    left: 0;
    height: 100%;
    width: 100%;
    z-index: -1;
    opacity: .15;
    overflow: hidden; // 何かが要素の幅を超えた時に、非表示にする

    &__content{
        height: 100%;
        width: 100%;
        object-fit: cover; //この場合、アスペクト比を維持したまま、親全体を埋めるということ
    }
}
複雑なCSSを多用したフォーム作成
・ソリッドカラーのグラデーションと呼ばれるものを実装する方法
・一般セレクタと隣接セレクタの仕組みと必要性
・input-placeholder擬似要素の使い方
・フォームのスタイル付けに focus、invalid、placeholder-shownとchecked擬似クラスをいつ、どのように使用するかを学ぶ
・上記知識を全て使って、フォームに特別感を与えるカスタムラジオボタンを作成

htmlを組む
ここまで来ると類似のものが必ずあるので、再利用できるものがあれば使い回す
ソリッドカラーグラデーション
下記突然透明になっている = 実はこれもグラデーション

background-image: linear-gradient(90deg,
                                    rgba($color-white, .9) 0%,
                                    rgba($color-white, .9) 50%,
                                    orangered 50%),
                                    url(../img/nat-10.jpg);
◎オレンジ部分が必要ないので消す
┣ transparentを使用
background-image: linear-gradient(105deg,
                                   rgba($color-white, .9) 0%,
                                   rgba($color-white, .9) 50%,
                                   transparent 50%),
                                   url(../img/nat-10.jpg);
formを作成
<div class="book__form">
    <form action="#" class="form"></form>
</div>
:::messes
・フォームがあったらhtml要素のformを使用。クラス名にもformをつける
・actionは、具体的にはスクリプトまたはファイルで送信ボタンを押したらすぐにフォームを移動させたい場所
:::
1つのグループと捉える
inputにテキスト入力後、下にテキストが動くよう実装する

<form action="#" class="form">
    <div class="u-margin-bottom-medium">
        <h2 class="heading-secondary">
            Start booking now
        </h2>
    </div>
    <div class="form__group">
        <input type="text" class="form__input" placeholder="Full name" id="name" required>
        <label for="name" class="form__label">Full name</label>
    </div>

    <div class="form__group">
        <input type="email" class="form__input" placeholder="Email address" id="email" required>
        <label for="name" class="form__label">Email address</label>
    </div>
</form>
component/_form.scssを作成
・各種余白調整
◎フォーカスは、マウスを使わずにキーボードだけでwebページを操作する人にとって非常に重要
そのため、フォーカスされているフォームの要素は常に見えるようにする必要がある
&__input:focus{
    outline: none;
}
&__input{
    // デフォルトの幅などが小さいため、調整
    font-size: 1.5rem;
    font-family: inherit;
    padding: 1.5rem 2rem;
    border-radius: 2px;
    background-color: rgba($color-white, .5);
    border: none;

    // focusした際に表示させるため、初期設定は透明に
    border-bottom: 3px solid transparent;
    // 必ず追加し、ブロックとして表示するようにする
    width: 90%;
    display: block;
}

// フォーカスは、マウスを使わずにキーボードだけでwebページを操作する人にとって非常に重要
&__input:focus{
    outline: none;
    box-shadow: 0 1rem 2rem rgba($color-black, .1);
    border-bottom: 3px solid $color-primary;
}
-webkit-input-placeholder
◎placeholderは擬似要素であいり、擬似クラスではない、フォーカスなどの状態を表すもの。
:focus:invalid
◎無効な入力要素、フォーカスされた入力要素がある場合、このスタイルが適用される。
// 実際にこれを実現したいのはいつなのかを考える
&:focus:invalid{

}
プレースホルダーの文字を下に移動させる
::: messes
◎隣接セレクタ
・隣接兄弟セレクタで、最初の兄弟であるラベルを選択
<div class="form__group">
    <input type="email" class="form__input" placeholder="Email address" id="email" required> ◎ここ <!-- ◎ここ -->
    <label for="name" class="form__label">Email address</label> <!-- ◎ここ -->
</div>
// 兄弟が最初の要素のすぐ隣にあるから、隣接兄弟を使うことができるようになる
&__input:placeholder-shown + &__label{

}
選択する兄弟要素(この場合はラベル)は常に最初の要素の後になければならない
この順番だと動かない
<label for="name" class="form__label">Email address</label>

<input type="email" class="form__input" placeholder="Email address" id="email" required>
:::
ラジオボタンの実装
<div class="form__group">
    <div class="form__radio-group">
        <input type="radio" class="form__radio-input" id="large" name="size">
        <label for="large" class="form__radio-label" name="size">large tour group</label>
    </div>
</div>
CSSではラジオボタンにスタイルをつけることができない
そして、このデフォルトの入力要素を単純にここで非表示にする
<input type="radio" class="form__radio-input" id="small">
    <label for="small" class="form__radio-label">
        <span class="form__radio-button"></span>
        Small tour group
    </label>
:::messes
◎ここが肝
┣ ラベルと入力を結びつけたので、非表示になっても選択状態になる
このテキスト、このラベルをクリックすると選択されるのは入力。
しかし、このHTMLでは、このボタンが選択状態になり、元のボタンは非表示になっているように見せかけることができる。
<input type="radio" class="form__radio-input" id="small">
:::
ボタンの装飾
緑の点の内側と、線の要素は別々

&__radio-label{
        font-size: $default-font-size;
        cursor: pointer;
        position:relative;
        padding-left: 4.5rem;
    }

    &__radio-button{
        height: 3rem;
        width: 3rem;
        border: 5px solid $color-primary;
        border-radius: 50%;
        display: inline-block;
        position: absolute;
        left: 0;
        top: -.4rem;

        // ドットの内側
        // この緑色の円を中央に出現させる必要がある。その為、基本的にはafter擬似要素の不透明度を1にする
        &::after{
            content: "";
            display: block;
            height: 1.3rem;
            width: 1.3rem;
            border-radius: 50%;
            position: absolute;
            top: 50%;
            left: 50%;
            transform: translate(-50%,-50%);
            background-color: $color-primary;
            opacity: 0;
        }

    }

◎入力チェック
:::messes
◎もう一度兄弟セレクタ
・label要素を叩くと同時に、radio-inputがチェックされた状態になる。そこで、このチェック済みの擬似クラスを利用できるようにする。
そして、ラジオ入力が選択されるたびに変更したいのはこの兄弟であり、その子であるから。
<input type="radio" class="form__radio-input" id="large" name="size">
<label for="large" class="form__radio-label"> ← 選択されていまうのはここ
<span class="form__radio-button"></span> ← 選択したいのはここ
large tour group
</label>
:::
// 無線入力チェック
&__radio-input:checked{
}
CSSでのナビゲーション
・checkbox hackがこのナビゲーションの仕組み
・3次ベジェ曲線を使用してカスタムアニメーションタイミング関数を作成する方法を学ぶ
・ソリッドカラーのグラデーションをアニメーション化し、素敵なホバー効果を作り出す
・transform-originプロパティを使用する方法とその理由

仕組み
・ラジオボタンを除いて、チェックボックスを使うことにする。
・チェックボックス(フォームのように後ろに隠す)を用意し、次にそのチェックボックスにラベルを接続して、そこをクリックするという3ステップで動作させる
・チェックボックスがチェックされると同時に、このナビゲーション全体をバックグラウンドで表示させる。CSSのchecked擬似クラスを使って、これをスタイル付けすることができる
コーディング
<!-- ナビゲーションは全ての上に置く。つまり、web文章全体の最初の要素 -->
<!-- ラベルに接続する必要があるidは、navi-toggleと呼ばれている -->
<div class="navigation">
<input type="checkbox" class="navitation__checkbox">
<label for="navi-toggle" class="navigation__button">MENU</label>
<!-- この背景を空にして、その上にナビゲーションそのものを置くことができる -->
<div class="navigation__background"> </div>
<nav class="navigation__nav">
<li class="navigation__item"><a href="#" class="navigation__link">About Natous</a></li>
<li class="navigation__item"><a href="#" class="navigation__link">Your benfits</a></li>
<li class="navigation__item"><a href="#" class="navigation__link">Popular tours</a></li>
<li class="navigation__item"><a href="#" class="navigation__link">Stories</a></li>
<li class="navigation__item"><a href="#" class="navigation__link">Book now</a></li>
</nav>
</div>
ファイルはlayoutに(講師的にナビゲーションはレイアウトの一部らしい)
position: fixed;
◎要素をフローから外す
新しいグラデーションの適用方法
◎ここでは放射状のグラデーションを使用
┣ 仕組みとして、チェックボックスで判別()
&__background{
        height: 6rem;
        width: 6rem;
        border-radius: 50%;
        position: fixed;
        top: 6.5rem;
        right: 6.5rem;
        background-image: radial-gradient($color-primary-light, $color-primary-dark);
    }
この段階で、下記のようになっていればOK

ナビゲーションを開いたら、背景全体を拡大縮小する仕組み
&__background{
        height: 6rem;
        width: 6rem;
        border-radius: 50%;
        position: fixed;
        top: 6.5rem;
        right: 6.5rem;
        background-image: radial-gradient($color-primary-light, $color-primary-dark);
        z-index: 1000;

        transform: scale(50);
    }
ナビゲーション項目仕組み
&__link{
        font-size: 3rem;
        font-weight: 300;
        color: $color-white;
        text-decoration: none;
        text-transform: uppercase;
        background-image: linear-gradient(120deg, orangered 50%, $color-white 50%);
    }

最終的に、このセクションではこうなる
&__link{
        &:link,
        &:visited{
            display: inline-block;
            font-size: 3rem;
            font-weight: 300;
            padding: 1rem 2rem;
            color: $color-white;
            text-decoration: none;
            text-transform: uppercase;
            background-image: linear-gradient(120deg, transparent 0%, transparent 50%, $color-white 50%);
            background-size: 220%;
            transition: all .4s;

            span{
                margin-right: 1.5rem;
                display: inline-block;
            }
        }

        &:hover,
        &:active{
            background-position: 100%;
            color: $color-primary;
            transform: translateX(1rem);
        }
    }
ナビゲーションの隠し方
ナビゲーション非表示のため
&__nav{
        height: 100vh;
        position: fixed;
        top: 0;
        right: 0;
        z-index: 1500;

        // ナビゲーション非表示のため
        opacity: 0;
        width: 0;
    }
opacity: 0;では要素があるため、ボタンホバーが効かなくなる

チェックボックスハック
◎checked擬似要素クラスと兄弟要素 ~ を使う
<input type="checkbox" class="navigation__checkbox" id="navi-toggle">
&__checkbox:checked ~ &__background{
    transform: scale(80);
}
ボタンを押した際のメニュー表示
&__nav{
        height: 100vh;
        width: 100%;
        position: fixed;
        top: 0;
        right: 0;
        z-index: 1500;

        // ナビゲーション非表示のため
        opacity: 0;
        width: 0;
    }

&__checkbox:checked ~ &__nav{
        opacity: 1;
        width: 100%;
    }
アニメーション開閉時の動作
&__background{
        height: 6rem;
        width: 6rem;
        border-radius: 50%;
        position: fixed;
        top: 6.5rem;
        right: 6.5rem;
        background-image: radial-gradient($color-primary-light, $color-primary-dark);
        z-index: 1000;
        transition: transform .8s;

        // transform: scale(50);
    }

    &__nav{
        height: 100vh;
        width: 100%;
        position: fixed;
        top: 0;
        right: 0;
        z-index: 1500;

        // ナビゲーション非表示のため
        opacity: 0;
        width: 0;
        transition: opacity .8s;
    }
閉じる際に、微妙に右によってるから治す

幅が横から入ってくる
&__nav{
        height: 100vh;
        width: 100%;
        position: fixed;
        top: 0;
        left: 0;
        z-index: 1500;

        // ナビゲーション非表示のため
        opacity: 0;
        width: 0;
        transition: opacity .8s;
    }

    &__list{
        position: absolute;
        top: 50%;
        left: 50%; //左から入ってくる流れをつくりたい
        transform: translate(-50%, -50%);
        list-style: none;
        text-align: center;

        width: 100%; // リストの位置を開いたときに中心へ持っていく
    }
左から入ってくる流れを作りたい

◎カスタムトランジションの設定
イージング関数
・下記を活用して調整
&__background{
        height: 6rem;
        width: 6rem;
        border-radius: 50%;
        position: fixed;
        top: 6.5rem;
        right: 6.5rem;
        background-image: radial-gradient($color-primary-light, $color-primary-dark);
        z-index: 1000;
        transition: transform .8s cubic-bezier(0.86, 0, 0.07, 1);

        // transform: scale(50);
    }

    &__nav{
        height: 100vh;
        width: 100%;
        position: fixed;
        top: 0;
        left: 0;
        z-index: 1500;

        // ナビゲーション非表示のため
        opacity: 0;
        width: 0;
        transition: all .8s cubic-bezier(0.68, -0.6, 0.32, 1.6);
    }
ハンバーガーメニューの3本線
◎小さいspan要素で作成
<label for="navi-toggle" class="navigation__button">
<span class="navigation__icon"> </span>
</label>
// ICON
    &__icon{
        position: relative;
        margin-bottom: 3.5rem;

        &,
        &::before,
        &::after{
            width: 3rem;
            height: 2px;
            background-color: $color-grey-dark3;
            // ラインは全てブロック扱いにしたい
            display: inline-block;
        }

        &::before,
        &::after{
            content: "";
            // アイコンの位置調整
            position: absolute;
            left: 0;
        }

        &::before{ top: -.8rem; }
        &::after{ top: .8rem; }
    }
◎ボタンの子要素の指定方法
<label for="navi-toggle" class="navigation__button">
<span class="navigation__icon"> </span>
</label>
&__button:hover &__icon::before{
}
◎アイコンラインの動作
&__button:hover &__icon::before{
        top: -1rem;
    }
    &__button:hover &__icon::after{
        top: 1rem;
    }
    &__checkbox:checked + &__button &__icon{
        // 真ん中のラインを消す
        background-color: transparent;
    }
    // 回転させるかさせないかは、rotateを調整
    &__checkbox:checked + &__button &__icon::before{
        top: 0;
        transform: rotate(135deg);
    }
    &__checkbox:checked + &__button &__icon::after{
        top: 0;
        transform: rotate(-135deg);
    }
tranform-origin
◎回転となる軸の位置
◎何かを回転させる時に、正確に回転させるためにはとても需要。何も指定がなければ、基本的に中央

ポップアップ実装
・チェックボックスハックではなく、ターゲット擬似クラスを使って実装
・display: table-cell;を使って高さの等しいボックスを作成
・列のレイアウトを作成したり
・新しいハイフンプロパティを使用して単語の自動ハイフネーションを行う

このマークアップは、どのセクションにも縛られないので、マークアップの好きなところに置くことができる。
┣ ここではフッターの後に置くことにする
<div class="popup">
<div class="popup__content">
POPUP
<div class="popup__left">
<img src="img/nat-8.jpg" alt="Tour photo" class="popup__img">
<img src="img/nat-9.jpg" alt="Tour photo" class="popup__img">
</div>
<div class="popup__right">
<h2 class="heading-secondary">Strat booking now</h2>
<h3 class="heading-tertiary">Important – Please reed these terms before booking</h3>
<p class="popup__text">
Lorem ipsum dolor sit amet consectetur adipisicing elit. Facilis nobis adipisci odit ratione at nostrum accusantium dicta pariatur officiis ex neque dignissimos totam sapiente, quo eos repellat animi tempora modi.
</p>
<a href="#" class="btn btn--green">Book now</a>
</div>
</div>
</div>
.popup{
    height: 100vh;
    width: 100%;
    // ポップアップが表示されても、背景がスクロールされるように
    position: fixed;
    top: 0;
    left: 0;
    background-color: rgba($color-black, .8);
    // 一番上位で表示されるように
    z-index: 9999;

    // ポップアップの幅
    &__content{
        @include absCenter;
        width: 75%;
        background-color: $color-white;
        box-shadow: 0 2rem 4rem rgba($color-black, .2);
        border-radius: 3px;
    }

    &__left{
        // 幅を1/3になるようにしたい
        width: 33.33333%;
        float: left;
    }

    &__right{
        // 幅を2/3になるようにしたい
        width: 66.66667%;
        float: left;
    }

    &__img{
        // 写真をブロックとして扱い、親コンテナ全体の幅にを100%にしたい
        display: block;
        width: 100%;
    }
    &__text{

    }
}
この段階では、左右の高さがあっていない

floatを使わず、テーブルをシュミレートする
◎display: table; display: table-cell;を使う
┣ 親要素はコンテンツ、
// ポップアップの幅
    &__content{
        @include absCenter;
        width: 75%;
        background-color: $color-white;
        box-shadow: 0 2rem 4rem rgba($color-black, .2);
        border-radius: 3px;
        display: table;
    }

    &__left{
        // 幅を1/3になるようにしたい
        width: 33.33333%;
        display: table-cell;
    }

    &__right{
        // 幅を2/3になるようにしたい
        width: 66.66667%;
        display: table-cell;
        vertical-align: middle;
    }
textの列設定
&__text{
        font-size: 1.4rem;
        margin-bottom: 4rem;

        column-count: 2;
        column-gap: 4rem; //1em = 14px;
        column-rule: 1px solid $color-grey-light-2;
    }

hyphens: auto;
・雑誌や新聞のレイアウトのような伝統的な印刷デザインに近づけることができる。
基本的にはautoで使用する
ポップアップの動作設定
◎ポップアップを隠す
    opacity: 0;
    visibility: hidden;
◎上記ポップアップを表示させるには?
アンカーとターゲットを使う
<div class="card__cta">
    <div class="card__price-box">
        <p class="card__price-only">Only</p>
        <p class="card__price-value">$297</p>
    </div>
    <!-- ポップアップを開くため、アンカーを設置 -->
    <a href="#popup" class="btn btn--white">Book now!</a>
</div>
`
`
`
  <!-- 設置したアンカーのターゲット -->
 <div class="popup" id="popup">
◎ポップアップの表示・非表示
.popup{
    height: 100vh;
    width: 100%;
    position: fixed;
    top: 0;
    left: 0;
    background-color: rgba($color-black, .8);
    z-index: 9999;

    // ポップアップを隠す
    opacity: 0;
    visibility: hidden;
    transition: all .3;

    // ボタンをクリックした時、あるいは基本的にURLの中にtargetが含まれるようになった時、そのターゲットとなる要素に適用される。
    &:target{
        opacity: 1;
        visibility: visible;
    }
}
◎ポップアップの閉じるボタン
<div class="popup__right">
<a href="#section-tours" class="popup__close">×</a>
<h2 class="heading-secondary u-margin-bottom-small">Strat booking now</h2>
<h3 class="heading-tertiary u-margin-bottom-small">Important – Please reed these terms before booking</h3>
<p class="popup__text">
Lorem ipsum dolor sit amet consectetur adipisicing elit. Facilis nobis adipisci odit ratione at nostrum accusantium dicta pariatur officiis ex neque dignissimos totam sapiente, quo eos repellat animi tempora modi. Lorem ipsum dolor sit amet consectetur adipisicing elit. Facilis nobis adipisci odit ratione at nostrum accusantium dicta pariatur officiis ex neque dignissimos totam sapiente, quo eos repellat animi tempora modi.
</p>
<a href="#" class="btn btn--green">Book now</a>
</div>
◎ポップアップのズームイン
// ポップアップの幅
    &__content{
        @include absCenter;
        width: 75%;
        background-color: $color-white;
        box-shadow: 0 2rem 4rem rgba($color-black, .2);
        border-radius: 3px;
        display: table;
        overflow: hidden;

        // ポップアップが表示された時のズームイン:初期位置
        opacity: 0;
        transform: translate(-50%,-50%) scale(.5); // mixinで干渉しているため
    }
max-content
minmax関数
auto-fill (Udemy 104)
◎主にレスポンシブ
・8じゃなくてなぜ10なのか
1000 / 100 =10


:::Message
これを活用して、実績一覧つくれる?
:::