【WP化】カスタム投稿
使用プラグイン
【CPT UI】カスタム投稿
【ACF】カスタムフィールド
手順
1. カスタム投稿の作成
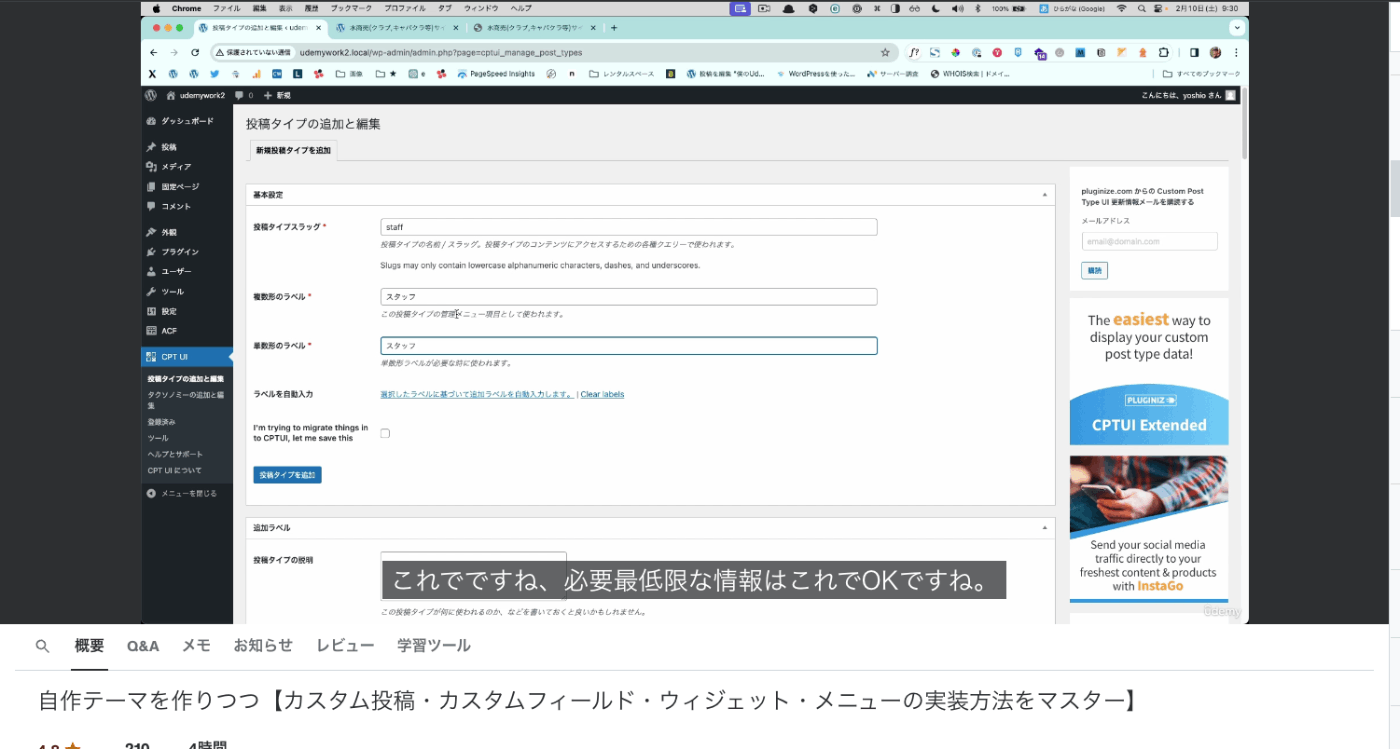
①CPT UIにて「投稿タイプの追加と編集」
②作成したい投稿名を「投稿タイプスラッグ」に入力 (コードで書いて使っていくところなので英語推奨)
③その下の複数形ラベル・単数系ラベルは日本語で (WP管理画面の左側項目メニューに出てくる名前になる)

◆補足
・アーカイブあり: Trueに変更
┣ 投稿の一覧ページみたいな感じ
┣ アーカイブありにしていくと、投稿一覧ページが作れるようになる
・画鋲アイコンの変更:投稿タイプの編集(一度作ったものを編集する際)
┣ 「ダッシュアイコンを選択」でアイコン変更
④最後に保存投稿タイプを追加
カスタムフィールド
-
フィードグループ隣の「新規追加」

-
下記に必要な項目を作っていく(年齢等、投稿したい内容)

┣ 名前:記事の投稿タイトルを名前にしたい -
項目の追加
┣ フィールドタイプ:その入力する項目が、どんなタイプか
┣ フィールドラベル:日本語
┣ フィールド名:実際にコードに打ち込んでいく名前になる為、英数字

◆補足:フィールドタイプ参考
・年齢:#番号(数字を入力)
・スリーサイズ:テキスト(90-90-90と、ハイフンが入る為)
・たばこ:選択(吸うか、吸わないかの2択のパターン)

- 設定 ※必ず
┣ どこの投稿にカスタムフィールドを表示しますか?を設定する
5. 保存
6. カスタム投稿確認
┣ 下記表示された項目が、カスタムフィールド

カスタム投稿のテンプレート準備(single-〇〇.php)
プレビューを押すとトップページになる
1. 前項目で作成したカスタム投稿をプレビューするとトップページになる
┣ この段階では、スタッフページに該当するPHPテンプレートファイルがない為、代わりにトップページになる。その為、テンプレートファイル(single-〇〇.php)が必要
┣ 今回の場合は、single-staff.php(single-「CPT UIでつけた該当スラッグ名」.php)

2. ヘッダー・フッターの共通化
3. スタッフ投稿ページの作成・処理
◎カスタムフィールドで設定した内容を表示させる
その他
・名前をスタッフ投稿のタイトル部分
・画像部分をアイキャッチ画像に
①WPの投稿タイトルを記事の見出しに連動させる(ループ処理を書く)
<?php
    if (have_posts()) :    //記事がありますか?ありませんか?(have_posts()),もしあれば続ける(if)
        while (have_posts()) :   //記事がある間(have_posts())、繰り返してね(while )
            the_post(); //何を繰り返すの? カスタム投稿など
?>
//
`
`
繰り返しの内容を入れる
`
`
//
<?php
        endwhile;
    endif;    //記事がなかったら終わりにしてね
?>
<article>
<?php
if (have_posts()) :
while (have_posts()) :
the_post();
?>
<h2><?php the_title(); ?></h2>
<div class="staff">
<div class="left">
<figure>
<?php the_post_thumbnail('medium'); ?>
</figure>
</div>
<!--/left-->
<div class="right">
<table class="ta1">
<tr>
<th>名前</th>
<td><?php the_title(); ?></td>
</tr>
<tr>
<th><?php the_field('age'); ?></th>
<td>20</td>
</tr>
<tr>
<th>スリーサイズ</th>
<td><?php the_field('size'); ?></td>
</tr>
<tr>
<th>趣味</th>
<td><?php the_field('hobby'); ?></td>
</tr>
<tr>
<th>タバコ</th>
<td><?php the_field('tabaco'); ?></td>
</tr>
</table>
</div>
<!--/right-->
<p class="c clear"><< <a href="javascript:history.back()">前のページに戻る</a></p>
</div>
<!--/staff-->
<?php
endwhile;
endif;
?>
</article>
②HTMLにWP処理を加えていく
- 固定ページ見出しタイトルを取得
<h2>サンプルページ</h2>
                ↓
<h2><?php the_title(); ?></h2>
- アイキャッチ画像の取得
<div class="left">
        <figure><img src="<?php echo get_theme_file_uri('images/photo1.png'); ?>" alt="sample name"></figure>
</div>

    ↓

<div class="left">
    <figure>
        <?php the_post_thumbnail('medium'); ?>
    </figure>
</div>
- カスタムフィールドの詳細取得
<table class="ta1">
                <tr>
                    <th>名前</th>
                    <td>Sample</td>
                </tr>
                <tr>
                    <th>年齢</th>
                    <td>20</td>
                </tr>
                <tr>
                    <th>スリーサイズ</th>
                    <td>???</td>
                </tr>
                <tr>
                    <th>趣味</th>
                    <td>映画鑑賞</td>
                </tr>
                <tr>
                    <th>タバコ</th>
                    <td>すいません</td>
                </tr>
</table>
     ↓

<table class="ta1">
                    <tr>
                        <th>名前</th>
                        <td><?php the_title(); ?></td>
                    </tr>
                    <tr>
                       <th><?php the_field('age'); ?></th>  <!-- <?php the_field('ACFで作成したフィールド名'); ?> -->
                        <td>20</td>
                    </tr>
                    <tr>
                        <th>スリーサイズ</th>
                        <td><?php the_field('size'); ?></td>
                    </tr>
                    <tr>
                        <th>趣味</th>
                        <td><?php the_field('hobby'); ?></td>
                    </tr>
                    <tr>
                        <th>タバコ</th>
                        <td><?php the_field('tabaco'); ?></td>
                    </tr>
</table>
スタッフ一覧の作成(archive.php)
ループ処理を書く(理屈はsingle.phpと一緒)
カスタム投稿スタッフの記事がある間だけループをして、出し続ける処理を書く
◎メインクエリ・サブクエリ
・メインクエリ = そのページを開いた時に、もうすでに持っている情報をそのまま出すと言った時に
現状:トップページのメインクエリはなんなの?(Udemy課題ベースで例える)
=デフォルトの投稿の情報をトップページへ持ってきている状態。トップページ上でメインクエリのループを組むとデフォルトの投稿のループになってしまう。
理想:カスタム投稿スタッフのループを組みたい。(サブクエリを使っていく)
◎サブクエリ記述例
<h2>本日出勤のキャスト</h2>

    <div class="list">
        <a href="staff.html">
        <figure><img src="<?php echo get_theme_file_uri('images/photo1.png'); ?>" alt="sample name"></figure>
            <h4>sample name</h4>
            <p>簡単な説明を入れます。</p>
            <span class="mark1">人気</span>
        </a>
    </div>
       ↓


<h2>本日出勤のキャスト</h2>

<?php
	// 取得する投稿の条件を指定する。 どんな投稿を持ってくるんですか?
	// 配列 = $argsという箱の中に、仕切りで区切った値を入れていくイメージ
	$args = array(
		'post_type' => 'staff', // post_typeという一つの仕切りに何入れるの? = staff投稿持ってきてね
	);

	// 上記の条件に基づいて投稿情報を取得する
	$query = new WP_Query($args);

	// ループ処理を行う(カスタム投稿:スタッフ)
	if ($query->have_posts()) :                         // スタッフ投稿の記事はありますか?
		while($query->have_posts()) :               // スタッフ投稿の記事がある間、ループしてね

	$query->the_post();                                   //スタッフ情報の記事を持ってきてね。 the_postだけだと、デフォルトの投稿の情報を持ってきてしまう。
?>

<?php
		endwhile;
	endif;
	wp_reset_postdata();
?>


<div class="list">
<a href="staff.html">
<figure><img src="<?php echo get_theme_file_uri('images/photo1.png'); ?>" alt="sample name"></figure>
<h4>sample name</h4>
<p>簡単な説明を入れます。</p>
<span class="mark1">人気</span>
</a>
</div>
実装
<h2>本日出勤のキャスト</h2>

	<?php
		$args = array(
			'post_type' => 'staff',
		);
		$query = new WP_Query($args);

		if ($query->have_posts()) :
			while($query->have_posts()) :
		$query->the_post();
	?>

<div class="list">
		<a href="<?php the_permalink(); ?>">
			<figure>
				<?php the_post_thumbnail('medium'); ?>
			</figure>
				<h4><?php the_title(); ?></h4>
				<!-- 投稿の本文を取得 、 テンプレートタグにpタグごと出力されるようになっている-->
				<?php the_content(); ?>
				<span class="mark1">人気</span>
		</a>
	</div>

	<?php
			endwhile;
		endif;
		wp_reset_postdata();
	?>


// ↓ 以降、静的サイトにて表示していた内容は削除
<div class="list">
<a href="staff.html">
<figure><img src="<?php echo get_theme_file_uri('images/photo1.png'); ?>" alt="sample name"></figure>
<h4>sample name</h4>
<p>簡単な説明を入れます。</p>
<span class="mark2">NEW</span>
</a>
</div>
`
`
`
削除
補足
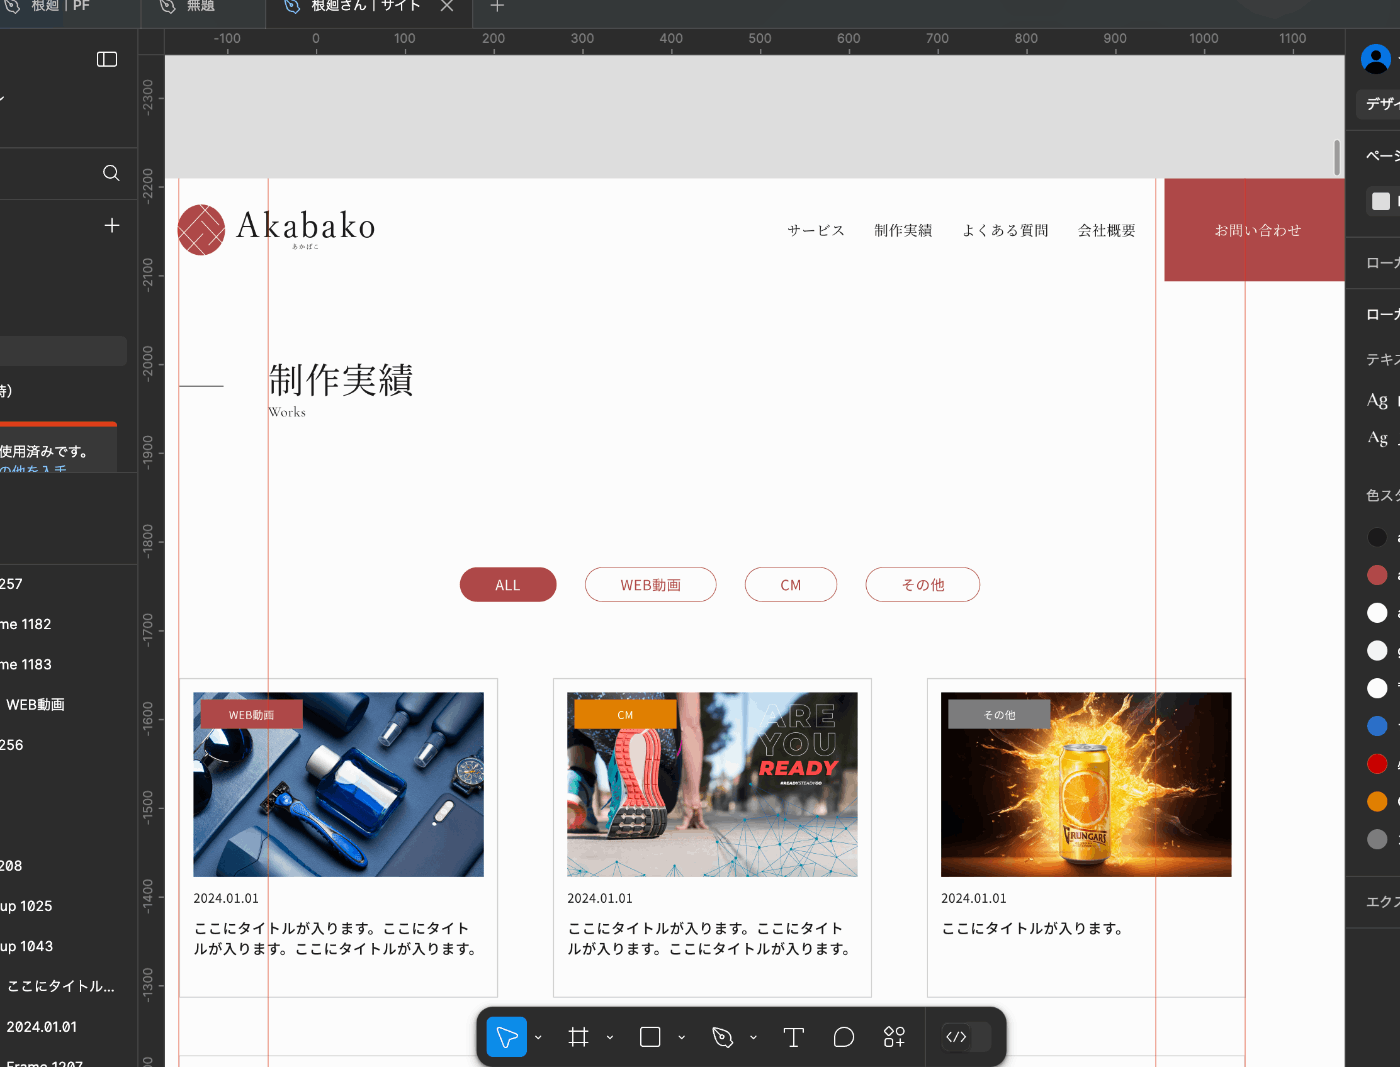
カテゴリータブの実装
ul、liで制作し、値を受け渡す
<!-- カテゴリフィルター -->
    <div class="filter-tabs">
		<ul class="tab-title-list">
			<div class="tab-group">
				<li class="filter-tab fs-16 selected" data-filter="all">ALL</li>
				<li class="filter-tab fs-16" data-filter="cm">CM</li>
			</div>
			<div class="tab-group">
				<li class="filter-tab filter-tab2 fs-16" data-filter="web_movie">WEB動画</li>
				<li class="filter-tab filter-tab2 fs-16" data-filter="other">その他</li>
			</div>
		</ul>
	</div>

お知らせ一覧
WPのデフォルトの投稿と関連づける
** dl、ddの投稿がある分だけ、繰り返し処理を書いてねという内容に書き換える**
※今回はトップページにデフォルトの投稿を表示するので、結論メインクエリのループを組む
<section id="new">
<h2>更新情報・お知らせ</h2>
<dl>
<dt>2021/12/14</dt>
<dd>tableを小さな端末で見た場合に、切れて見える場合がありました。既にご利用中のお客様で対応したい場合、style.cssの<br>
.ta1 {overflow-x: auto;min-width: 800px;}<br>
を、以下にして下さい。<br>
.ta-box .ta1 {overflow-x: auto;min-width: 800px;}</dd>
<dt>2019/02/21</dt>
<dd>全面リニューアル。</dd>
<dt>2014/09/12</dt>
<dd>tp_108配布開始。</dd>
<dt>20XX/00/00</dt>
<dd>サンプルテキスト。サンプルテキスト。サンプルテキスト。</dd>
<dt>20XX/00/00</dt>
<dd>サンプルテキスト。サンプルテキスト。サンプルテキスト。</dd>
<dt>20XX/00/00</dt>
<dd>サンプルテキスト。サンプルテキスト。サンプルテキスト。</dd>
<dt>20XX/00/00</dt>
<dd>サンプルテキスト。サンプルテキスト。サンプルテキスト。</dd>
<dt>20XX/00/00</dt>
<dd>サンプルテキスト。サンプルテキスト。サンプルテキスト。</dd>
<dt>20XX/00/00</dt>
<dd>サンプルテキスト。サンプルテキスト。サンプルテキスト。</dd>
</dl>
<p class="r">» <a href="#">過去ログ</a></p>
</section>
↓
<section id="new">
<h2>更新情報・お知らせ</h2>
<dl>
<?php
if (have_posts()) :
while (have_posts()) :
the_post();
?>
<dt><?php the_time('Y/m/d'); ?></dt>
<dd><?php the_excerpt(); ?></dd>
<?php
endwhile;
endif;
?>
</dl>
<p class="r">» <a href="#">過去ログ</a></p>
</section>
投稿の表示記事の文字数調整
※デフォルトは110文字
functions.php
// 本文の抜粋文字数を30文字にする
//function 任意の関数名(){
//    return 30;
// }
// add_filter('excerpt_length','上記任意の関数名');

function custom_excerpt_length(){
    return 30;
}
add_filter('excerpt_length','custom_excerpt_length');

投稿の表示記事リンクを(続きを読む)へ
※デフォルトは110文字
functions.php
//function 任意の関数名(){
//     return '<a href="' . get_permalink(get_the_ID()) . '">(続きを読む)</a>';
// }
// add_filter('excerpt_more','上記任意の関数名');


// 「続きを読む」リンク設定
function custom_excerpt_more(){
    // htmlでの出力イメージ <a href="http://xxxxxxxxxxx">(続きを見る)</a>
 // 「.」は文字列の連結。つなげてねという意味
 // 続きを読むで、記事の詳細ページに飛ばしたいのでパーマリンクを設置
   // get_permalinkを''で囲うと、文字列として出てきてしまう
    return '<a href="' . get_permalink(get_the_ID()) . '">(続きを読む)</a>';
}
add_filter('excerpt_more','custom_excerpt_more');
続きを読むリンク先をつくる(投稿詳細ページの作成、single.php)
single.phpの作成
・single-〇〇.phpがなかった状態で、このスタッフ投稿を開いた時もsingle.phpが表示される
・single-〇〇.phpがあれば、スタッフ投稿についてはsingle-〇〇.phpが適用される
// 超簡易的
<?php get_header(); ?>

    <div id="contents" class="inner">
        <h2><?php the_title(); ?></h2>
        <?php the_content(); ?>
    </div>

<?php get_footer(); ?>
下層ページのWP化(固定ページの作成)
下層ページのWP化
・page-〇〇.php
手順
1. header、footerの共通化
2. WP管理画面 / 固定ページへ
3. 新規固定ページを追加 ex) タイトル:cast
※一致していないといけない


ウィジェットの実装
ウィジェットを表記させる
◎オリジナルテーマのデフォルトでは、ダッシュボードにない
┣ ウィジェットを有効化するために、コードを書かないといけない

functions.php
//function 任意の関数名(){
// register_sidebar( array(
//    'name' => 'サイドバー',
//     'id' => 'sidebar',
//  ));
// }
// add_action('widgets_init','上記任意の関数名');      アクションフック


// ウィジェットの設定
function my_widget_init(){
    register_sidebar( array(
        'name' => 'サイドバー',
        'id' => 'sidebar',
    ));
}
add_action('widgets_init','my_widget_init');
そうすることで、なかったものが表示される


ウィジェットの表示
トップページのサイドバー、コンテンツというところをウィジェットと連動させていく。
┣ 固定ページの一覧を出す

簡単に追加できる。

このウィジェットをページに表示させるためのコードを追記
┣ サイドバー専用のテンプレートファイルを作成。理屈はheader/fotterの共通化と一緒(sidebar.php)
①sidebar.phpを作成
②上記ファイルに、下記内容を追加
sidebar.php
/<?php
    if (is_active_sidebar('sidebar')){  // functions.phpに書いている箇所がちゃんとあるか
        dynamic_sidebar('sidebar');
    };
?>
// functions.php
function my_widget_init(){
    register_sidebar( array(
        'name' => 'サイドバー',
        'id' => 'sidebar', // ここのサイドバー
    ));
}
add_action('widgets_init','my_widget_init');

index.phpに追記
◎ウィジェットの設定で、固定ページを表示すると言うふうに設定した


functions.php
//function 任意の関数名(){
// register_sidebar( array(
//    'name' => 'サイドバー',
//     'id' => 'sidebar',
//  ));
// }
// add_action('widgets_init','上記任意の関数名');      アクションフック


// ウィジェットの設定
function my_widget_init(){
    register_sidebar( array(
        'name' => 'サイドバー',
        'id' => 'sidebar',
        'before_widget' => '<nav class="box1">' // ウィジェットを出力する前に、nav .boxを出力してね
    ));
}
add_action('widgets_init','my_widget_init');