一般のルーターに満足できなくなったのでER-Xを導入する
導入した経緯
BUFFALOの普通のルーター兼APを使っていたが最近APの調子が悪い & RTX830などへの憧れがあった
RTX系はお高いので噂のER-Xを使ってみることにした
購入時はAmazonで16,800円
初めに
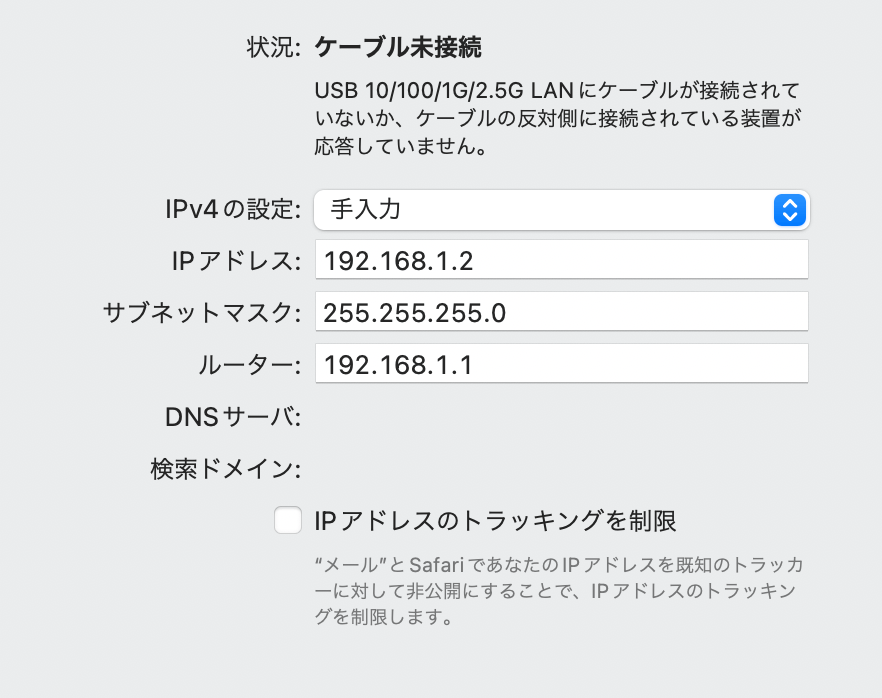
電源に挿したら、PCとER-Xのeth0をLANケーブルで繋ぐ
(どこでもいけると思ってeth2に差していて無理だった。やらかし1)
デフォルトだとDHCPがオフになっておりIPが配られないので、PC側でいい感じにする

次に http://192.168.1.1/ にアクセスしWeb UIから設定する
(http://192.168.11.1/ だと思って繋がらないをやった。やらかし2)
デフォルトのユーザー名とパスワードは ubnt
初期設定に関しては先人の方々が丁寧にまとめてくださっているので、そちらを参考にされた方が良いです
ファームウェアの更新
購入時には v1.10.11 だった
v1系として最新だったのでスキップ
v2系もあるらしいがまだ安定していないそうなので今回はv1系でいく
gitの導入
ルーターにsshでアクセスできるので、設定ファイルをgitで管理する
(WANを繋いだ時に速度が出なかったのでいろいろいじっていたらFirewallをオフにしてしまい、ER-Xが何も受け付けなくて死んだ。ファクトリーリセットした。設定が全て飛んだ。やらかし3)
を参考にした
上の記事に書かれている
EdgeOSにはGitが入っておらず、公式リポジトリにもないため、単純にapt-getしても入らない。
そのため、ここを参考にDebianのリポジトリを追加する。
ここで注意しないといけないのは、Debianリポジトリを追加した状態で"upgrade"すると、EdgeOSまでDebianでアップグレードされてしまい上書きされてしまいます。
が問題なので、記事中に挙げられている公式の通りにコマンドを打つ
# 1. Enter configuration mode.
configure

# 2. Add a Debian repository.
set system package repository wheezy components 'main contrib non-free'
set system package repository wheezy distribution wheezy
set system package repository wheezy url http://archive.debian.org/debian

# 3. Commit the changes and save the configuration.
commit ; save

# 4. Update the local cache.
sudo apt-get update
この時commit; saveの前にcompareをすることで変更差分が確認できる
今回だと下記の通りになった
ubnt@ubnt# compare
[edit system]
+package {
+    repository wheezy {
+        components "main contrib non-free"
+        distribution wheezy
+        password ""
+        url http://archive.debian.org/debian
+        username ""
+    }
+}
[edit]
ここまでくると普通にgitが入れられるのでaptで入れる
sudo apt-get install git
git --version
# git version 1.7.10.4
(最新じゃなさそうだけど頑張ってもこれ以上のgitが入らなかったので一旦これで行く。もし他の方法をご存知の方いらっしゃったら教えてください🙇)
よくよく考えたらwheezy時代のarchiveに最新のgitが転がっているわけがなかった
erxではpull/pushぐらいしかしないので古くても動けば良さそうです
gitで管理する
今回はGitHub上にer-xという名前でプライベートリポジトリを作成した
まずsshの設定を行い、リポジトリのクローンなどをする
configファイルのみであれば
save /path/to/config.boot
で任意のファイルに書き込むことができるのでこちらをgitで管理するようにした
他のファイルも管理した方が良さそうではあるが、現時点で何のファイルが何をしているか理解していないので今回はこれのみにした
ホスト名の変更
今回はrouterにする
set system host-name router
タイムゾーンの変更
set system time-zone Asia/Tokyo
NTPサーバーの変更
今回は独立行政法人情報通信研究機構(NICT)を利用させていただく
既存のntpを消しnictへ変更
delete system ntp server 0.ubnt.pool.ntp.org
delete system ntp server 1.ubnt.pool.ntp.org
delete system ntp server 2.ubnt.pool.ntp.org
delete system ntp server 3.ubnt.pool.ntp.org
set system ntp server ntp.nict.jp
SSHの設定
今更感あるけど
生成
いい感じに生成する
コメント必須!詳細は後述
ssh-keygen -t ed25519 -C erx
config
先にクライアント側のconfigを書く
書くとしたらこんな感じ
Host erx
  HostName 192.168.1.1
  IdentityFile ~/.ssh/id_ed25519
  User ubnt
authorized_keys
authorized_keysに直接追記するとER-X側で勝手に消してしまうことがあるらしい
また下記を参考にするとコメントがどうやら重要らしいので
記事通りに
configure
# loadkey <user> /path/to/id_rsa.pub
# commit
# save
とした
確認
クライアント側で
ssh erx
などとして接続できればオッケー
VPN
外出先からNASにアクセスしたいのでVPNを張る
CloudflareのZero Trustを使おうと思ったけど結構設定がめんどくさかったのでTailscaleを使う
基本はこちらを参考にさせていただいた
いくつか変更点
- アーキテクチャ
$ dpkg --print-architecture
mipsel
とのことなので から を使う
(このときはcurlのSSL周りでエラーが起きるのでめんどくさくて-kを使った)
- /config/scripts/firstboot.d/tailscale.sh
ファームウェアはv1系を使っているのでsystemctlがない
https://zenn.dev/link/comments/d473ef06d5a701
https://raspberrypi.stackexchange.com/questions/66235/sudo-systemctl-command-not-found
を参考に書き直す
cat << EOF > /config/scripts/firstboot.d/tailscale.sh
#!/bin/sh
ln -s /config/tailscale /usr/bin/tailscale
ln -s /config/tailscaled /usr/sbin/tailscaled
mkdir -p /var/lib/tailscale/
touch /config/auth/tailscaled.state
chmod 0400 /config/auth/tailscaled.state
ln -s /config/auth/tailscaled.state /var/lib/tailscale/tailscaled.state
sudo tailscaled > /dev/null 2>&1 &
disown
sudo tailscale up --advertise-routes=192.168.1.0/24 --accept-routes
EOF
最後の2行がいるかわからないので後で調べる
disownコマンドはsshなどでコマンドを実行後にsshで抜けてもいい感じに走り続けておいてくれる君っぽい
多分systemctlがないので必要
消して試したらダメだったので必要
ファームウェアの更新をする
何となく不安定なので
v2入れてみる
容量の確認
下手すると文鎮化するらしい
configの保存
gitで管理してるので最新をpushした
versionの確認
ubnt@router:~$ show version
Version:      v1.10.11
Build ID:     5274269
Build on:     02/21/20 10:28
Copyright:    2012-2018 Ubiquiti Networks, Inc.
HW model:     EdgeRouter X 5-Port
HW S/N:       ....
Uptime:       00:46:18 up 36 days,  1:42,  1 user,  load average: 1.32, 1.24, 1.13
CLI経由で更新
$ add system image https://dl.ui.com/firmwares/edgemax/v2.0.9-hotfix.5/ER-e50.v2.0.9-hotfix.5.5554172.tar
失敗する
ubnt@router:~$ add system image https://dl.ui.com/firmwares/edgemax/v2.0.9-hotfix.5/ER-e50.v2.0.9-hotfix.5.5554172.tar
Trying to get upgrade file from https://dl.ui.com/firmwares/edgemax/v2.0.9-hotfix.5/ER-e50.v2.0.9-hotfix.5.5554172.tar
  % Total    % Received % Xferd  Average Speed   Time    Time     Time  Current
                                 Dload  Upload   Total   Spent    Left  Speed
100 70.2M  100 70.2M    0     0  4934k      0  0:00:14  0:00:14 --:--:-- 5444k
Download succeeded
Checking upgrade image...Done
Preparing to upgrade...Done
Copying upgrade image...Done
Removing old image...Done
Checking upgrade image...Done
Copying config data...Failed to copy config
WebUIからやってみる
Download backup config file なるものがあるので一応ダウンロードしておいた
Uplaod a file から新しいファームウェアをアップロードする
ファームウェアのアップロードに失敗した
ネットで調べる
configがデカすぎるとのこと
ubnt@router:~$ du -h /config
0	/config/auth
0	/config/wizard/feature
0	/config/wizard
4.0K	/config/scripts/firstboot.d
0	/config/scripts/post-config.d
4.0K	/config/scripts
8.0K	/config/tailscale/systemd
38.4M	/config/tailscale
0	/config/support
0	/config/udapi-bridge
0	/config/url-filtering/squidguard/db
0	/config/url-filtering/squidguard
0	/config/url-filtering
0	/config/user-data
38.5M	/config

ubnt@router:~$ sudo rm -rf /config/tailscale/

ubnt@router:~$ du -h /config
0	/config/auth
0	/config/wizard/feature
0	/config/wizard
4.0K	/config/scripts/firstboot.d
0	/config/scripts/post-config.d
4.0K	/config/scripts
0	/config/support
0	/config/udapi-bridge
0	/config/url-filtering/squidguard/db
0	/config/url-filtering/squidguard
0	/config/url-filtering
0	/config/user-data
20.0K	/config

ubnt@router:~$ add system image https://dl.ui.com/firmwares/edgemax/v2.0.9-hotfix.5/ER-e50.v2.0.9-hotfix.5.5554172.tar
Trying to get upgrade file from https://dl.ui.com/firmwares/edgemax/v2.0.9-hotfix.5/ER-e50.v2.0.9-hotfix.5.5554172.tar
  % Total    % Received % Xferd  Average Speed   Time    Time     Time  Current
                                 Dload  Upload   Total   Spent    Left  Speed
100 70.2M  100 70.2M    0     0  4436k      0  0:00:16  0:00:16 --:--:-- 4585k
Download succeeded
Checking upgrade image...Done
Preparing to upgrade...Done
Copying upgrade image...Done
Removing old image...Done
Checking upgrade image...Done
Copying config data...Done
Finishing upgrade...Done
Upgrade completed
なるほど動いた
確認
ubnt@router:~$ show system image
The system currently has the following image(s) installed:

v2.0.9-hotfix.5.5554172.221020.0743 (default boot)
v1.10.11.5274269.200221.1028   (running image)

A reboot is needed to boot default image

ubnt@router:~$ reboot
再起動した
ubnt@router:~$ show version
Version:      v2.0.9-hotfix.5
Build ID:     5554172
Build on:     10/20/22 07:43
Copyright:    2012-2020 Ubiquiti Networks, Inc.
HW model:     EdgeRouter X 5-Port
HW S/N:       ....
Uptime:       01:10:52 up 2 min,  1 user,  load average: 1.93, 0.95, 0.37
ubnt@router:~$
更新できたっぽい
v1とv2の違い
- debianがjessieからstretchになった
- systemctlが使える
初期化
初期化でリセットボタン押しすぎると消えちゃいけないのまで消えるので気を付ける...
初期設定v2
ユーザ作成、パスワードの変更
$ configure
# set system login user [ユーザ名]
# set system login user [ユーザ名] authentication plaintext-password [パスワード]
# set system login user [ユーザ名] level admin
# commit; save
Saving configuration to '/config/config.boot'...
Done
# exit

$ reboot

...

$ configure
# delete system login user ubnt
# commit; save
Saving configuration to '/config/config.boot'...
Done
# 1. Enter configuration mode.
$ configure

# 2. Add a Debian repository.
$ set system package repository stretch components 'main contrib non-free'
$ set system package repository stretch distribution stretch
$ set system package repository stretch url http://http.us.debian.org/debian

# 3. Commit the changes and save the configuration.
commit ; save

# 4. Update the local cache.
sudo apt-get update

# WARNING: Do not use the apt-get upgrade

$ sudo apt-get install -y git

$ git --version
git version 2.11.0

$ ssh-keygen -t ed25519 -C erx

$ git clone ...
tailscale
Debian Stretch
# Add Tailscale's GPG key
curl -fsSL https://pkgs.tailscale.com/stable/debian/stretch.asc | sudo apt-key add -
# Add the tailscale repository
curl -fsSL https://pkgs.tailscale.com/stable/debian/stretch.list | sudo tee /etc/apt/sources.list.d/tailscale.list
# Install Tailscale
sudo apt-get update && sudo apt-get install tailscale
# Start Tailscale!
sudo tailscale up
これで入った
GUIのSSL
ログインにオートフィルが効かないのがめんどくさいので直す