【React Native × AR】アニメーションARを実装
はじめに
ReactVisionを使用してARの技術検証を行っています。その時のメモを残します。
expoSDKは古いものを使用しているため注意が必要です。
"@reactvision/react-viro": "^2.41.6",
"expo": "~50.0.4",
アニメーションARを実装
Viroでアニメーションを実装するのに必要なものです。
- ViroAnimations
トリガーとなる画像を設置
assets/ar/starbucks.jpgを設置しておきます。

トリガーとなる画像を登録
ViroARTrackingTargetsを使用し、ARを表示するトリガーとなる画像を指定します。
"targetOne"というキーで登録します。
  ViroARTrackingTargets.createTargets({
    targetOne: {
      source: require("../../assets/ar/starbucks.jpg"),
      orientation: "Up",
      physicalWidth: 0.15, // 画像の物理的な幅(m)
      type: "Image",
    },
  });
アニメーションの登録
ViroAnimationsを使って、必要なアニメーションを事前に登録します。
アニメーションのプロパティには以下を設定可能です。
| プロパティ | 説明 | 例 |
|---|---|---|
| scale | オブジェクトのスケーリング(X, Y, Z) |
scaleX: 0.5, scaleY: 0.5, scaleZ: 0.5
|
| rotate | オブジェクトの回転(X, Y, Z 軸での度数) |
rotateX: "+=90", rotateY: "-=180", rotateZ: "360"
|
| duration | アニメーションの持続時間(ミリ秒) | duration: 1000 |
| easing | アニメーションの動きの緩急 |
"Bounce", "EaseIn", "Linear"
|
アニメーションはscaleModel、rotateModel、loopModelの3段階に分けて登録しました。
  ViroAnimations.registerAnimations({
    scaleModel: {
      properties: { scaleX: 0.5, scaleY: 0.5, scaleZ: 0.5 },
      duration: 800,
    },
    rotateModel: {
      properties: { rotateX: "+=360" },
      duration: 300,
    },
    loopModel: {
      properties: { scaleX: 1, scaleY: 1, scaleZ: 1 },
      duration: 1000,
      easing: "Bounce",
    },
  });
アニメーションの実行
アニメーションの再生状態と3段階のアニメーションの状態をuseStateで管理します。
const [playAnim, setPlayAnim] = useState(false);
const [currentAnim, setCurrentAnim] = useState("scaleModel");
アニメーションを実行するために、animationプロパティをViroNodeに指定します。
以下のオプションも設定しています。
| オプション | 説明 | 例 |
|---|---|---|
| name | 登録したアニメーションの名前 | "scaleModel" |
| run | アニメーションを実行するかどうか | true |
| loop | アニメーションを繰り返すかどうか | false |
| onFinish | アニメーション終了時に呼び出されるコールバック関数 | () => console.log("Finished") |
        <ViroNode
          position={[0, -0.1, 0]}
          scale={[0, 0, 0]}
          rotation={[-90, 0, 0]}
          animation={{
            name: currentAnim,
            run: playAnim,
            loop: currentAnim === "loopModel",
            onFinish: () => {
              // Transition to next animation
              if (currentAnim === "scaleModel") {
                setCurrentAnim("rotateModel");
              } else if (currentAnim === "rotateModel") {
                setCurrentAnim("loopModel");
              } else {
                setCurrentAnim("scaleModel");
              }
            },
          }}
        >
          {/* 3D Object */}
        </ViroNode>
画像認識時に表示されるオブジェクトを登録
ViroARImageMarkerを使用し、画像認識した際に表示されるオブジェクトをラップします。
targetにトリガーとなるターゲットのキー(今回は"targetOne")を指定します。
画像が認識されたらsetPlayAnimでアニメーションを開始します。
      {/* AR Image Marker */}
      <ViroARImageMarker
        target={"targetOne"}
        onAnchorFound={() => {
          console.log("Image detected: targetOne");
          setPlayAnim(true); // Start animation when target is detected
        }}
        onAnchorRemoved={() => console.log("Image removed: targetOne")}
        onAnchorUpdated={() => console.log("Image updated: targetOne")}
      >
        {/* Node for 3D object */}
        <ViroNode
          position={[0, -0.1, 0]}
          scale={[0, 0, 0]} // Initial scale
          rotation={[-90, 0, 0]}
          animation={{
            name: currentAnim,
            run: playAnim,
            loop: currentAnim === "loopModel",
            onFinish: () => {
              // Transition to next animation
              if (currentAnim === "scaleModel") {
                setCurrentAnim("rotateModel");
              } else if (currentAnim === "rotateModel") {
                setCurrentAnim("loopModel");
              } else {
                setCurrentAnim("scaleModel");
              }
            },
          }}
        >
          {/* 3D Object */}
          <Viro3DObject
            source={require("../../assets/ar/poster/blackpanther/object_bpanther_anim.vrx")}
            resources={[
              require("../../assets/ar/poster/blackpanther/object_bpanther_Base_Color.png"),
              require("../../assets/ar/poster/blackpanther/object_bpanther_Metallic.png"),
              require("../../assets/ar/poster/blackpanther/object_bpanther_Mixed_AO.png"),
              require("../../assets/ar/poster/blackpanther/object_bpanther_Normal_OpenGL.png"),
              require("../../assets/ar/poster/blackpanther/object_bpanther_Roughness.png"),
            ]}
            position={[0, -1.45, 0]}
            scale={[0.5, 0.5, 0.5]}
            type="VRX"
          />
        </ViroNode>
      </ViroARImageMarker>
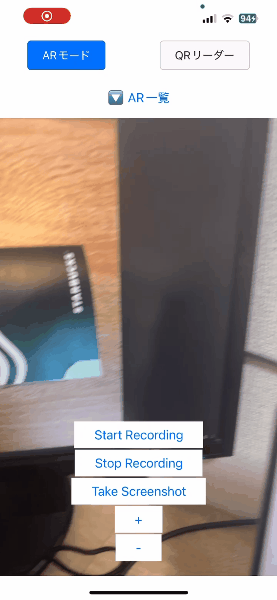
表示されたAR
アニメーション情報を持つ素材を利用する
.vrx、.glb、.fbxファイルはアニメーション情報を持つことができます。
.vrx
Viro Media専用の3Dファイル形式で、アニメーションや3Dモデル、マテリアル、テクスチャを含めることができます。
.glb(バイナリ形式).gltf(JSON形式)
軽量で汎用性の高いフォーマットです。モバイルアプリやWebアプリのAR/VR開発で広く使われています。
.fbx
Autodeskが開発したフォーマットで、アニメーション、モデル、カメラ、ライト情報を含むことができます。
FBX は、ほとんどの 3D ソフトウェアでサポートされている、拡張性と柔軟性に優れた 3D モデル形式です。FBX ファイルをviroで読み込むには、ViroFBX スクリプトを使用して FBX ファイルを VRX ファイルに変換します。
node_modules/react-viro/bin/ディレクトリにViroFBXスクリプトが含まれるのでそれを使用します。
ViroFBX [--compress-textures] [source FBX file] [destination VRX file]
実際のコマンド
$ node_modules/@reactvision/react-viro/bin/ViroFBX "assets/ar/indoor plant_02_+2.fbx" "assets/ar/indoor plant_02_+2.vrx"
FBX ファイルから VRX ファイルに変換されました。
まとめ
今後もReactVisionを使用したAR検証メモを残していきます!
Discussion