VueでAuth0について
ログインとログアウト
とりあえず、以下のサイトを参考に形になった。
全体の流れ
とりあえず全体の流れを記述する。Vue側の設定。
必要なIDとドメインを設定。
以下の設定はAuth0の管理画面でApplicationから新しくCreateApplicationをクリックして作成されたSettingsから確認できる。ファイル名はzaauth_config.jsonとする
{
    "domain": "アプリケーションのドメイン",
    "clientId": "クラアントID"
  }
main.jsでVueでAuth0を使えるようにする
まずはプラグインをインストール。今回は@auth0/auth0-vueというライブラリを使った。
npm install @auth0/auth0-vue
main.jsで設定する。*必要な設定のみ記載。
import { createAuth0 } from "@auth0/auth0-vue";
import authConfig from "../auth_config.json";

const app = createApp(App)

app.use(
        createAuth0({
            domain: authConfig.domain,
            clientId: authConfig.clientId,
            authorizationParams: {
                redirect_uri: window.location.origin,
            }
        })
    )

app.mount('#app')
ルーティングの設定
この設定でトップページに来た際にログインしていなければ表示させる。
createAuthGuardを利用してbeforeEnterで指定する。
この例では、createAuthGuard 関数を呼び出して authGuard を作成し、その authGuard を beforeEnter ガードに渡しています。これにより、ルートがナビゲートされる前に認証が行われます。ご注意ください、 authGuard の初期化はルーターの外で行われる必要があります。
import { createAuthGuard } from "@auth0/auth0-vue";

const authGuard = createAuthGuard(); // Auth0のcreateAuthGuardを呼び出してauthGuardを作成。

const routes = [
  {
    path: '/',
    name: 'home',
    component: HomeView,
    beforeEnter: authGuard // authGuardをbeforeEnterに渡す
  },
];

export default router;
参考サイトだと、createAuthGuard を利用しているもののappを引数に渡したりしているが、ちょっと違うっぽい。
ログイン・ログアウトのボタンについて
とりあえずログインボタンとログアウトとユーザーのメールアドレスが表示される例。
<template>
<div class="dropdown-header">{{ user.name }}</div>
<ul>
    <li v-if="!isAuthenticated && !isLoading" class="nav-item">
      <button @click.prevent="login">Login</button>
    </li>

    <li class="nav-item dropdown" v-if="isAuthenticated">
        <a href="#" @click.prevent="logout">Log out</a>
    </li>
</ul>
</template>
<script setup lang="ts">
import { useAuth0 } from '@auth0/auth0-vue';

const auth0 = useAuth0();

const isAuthenticated = auth0.isAuthenticated;
const isLoading = auth0.isLoading;
const user = auth0.user;

const login = () => {
  auth0.loginWithRedirect();
};

const logout = () => {
  auth0.logout({
    logoutParams: {
      returnTo: window.location.origin,
    },
  });
};
</script>
Auth0側の設定。
Auth0のアカウントを作成する必要がある。
アカウントを作成したら以下の流れ。
1:管理画面の左メニューのApplicatinをクリック。
2:Nameに適当に名前を入れる
3:Single Page Web Applicationsをクリック。
QuickstartというタブでVueを選択するとVueのサンプルダウンロードができる。
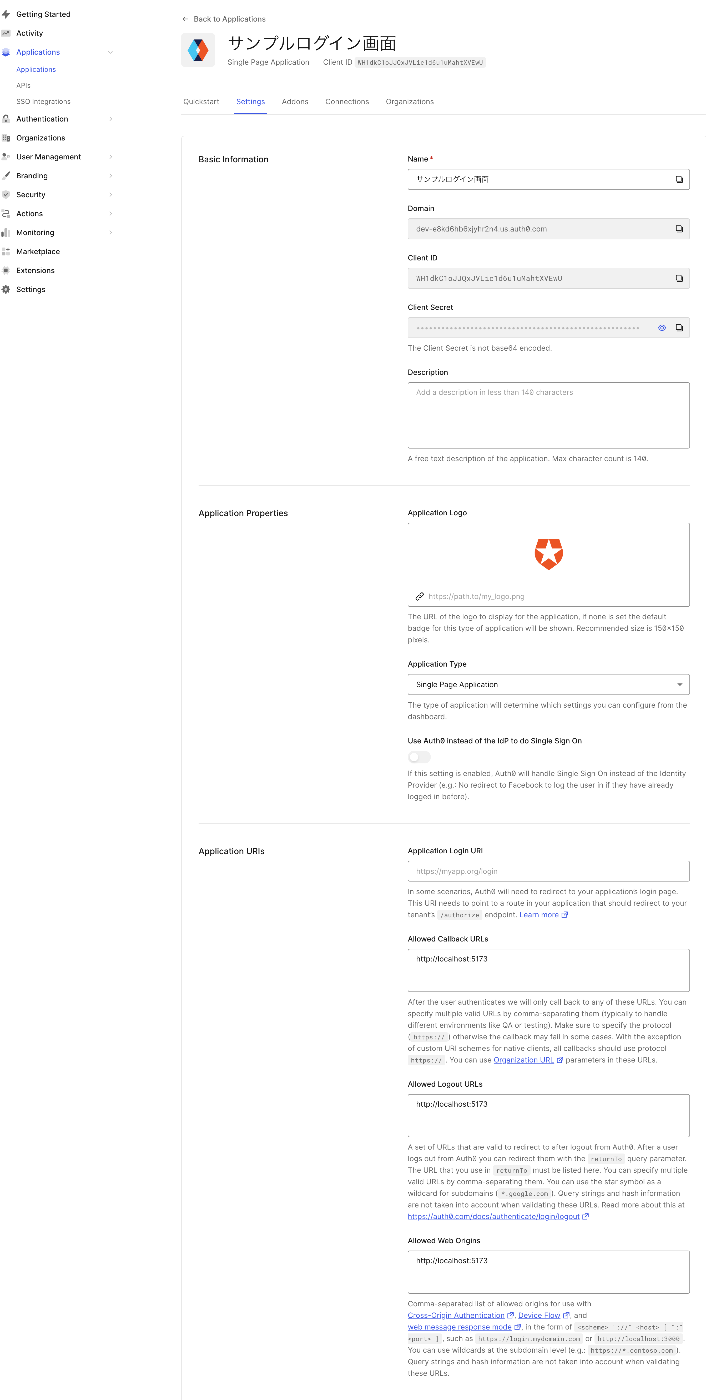
4:settingというタブをクリック。ここにあるDomainとClient IDをVueで必要になる。
5:Allowed Callbak URLs,、Allowed Logout URLs,Allowed Web OriginsにはアプリケーションのURLを入れる。例:localhost:3000など。その後Save Changesでセーブする。