Open1
メール配信サービスを使ってList-Unsubscribeに対応するGetting started
Amazon SES
Python SDKを使う。利用するメールアドレスの初期設定等は省略(ドメインの認証としてDKIMの設定のみある状態)。
A. SESの配信停止の仕組みを利用する方法
1. リストを作成する
まずリストを作成する必要がある。
import boto3
from botocore.exceptions import ClientError
AWS_REGION = "ap-northeast-1"
client = boto3.client('sesv2',region_name=AWS_REGION)

try:
  response = client.create_contact_list(
      ContactListName='contact-list-1',
      Topics=[
          {
              'TopicName': 'topic-1',
              'DisplayName': 'topic-1',
              'Description': 'topic-1',
              'DefaultSubscriptionStatus': 'OPT_IN'
          },
      ],
      Description='contact-list-1'
  )
except ClientError as e:
  print(e.response['Error']['Message'])
else:
  print("Success")
2. リストを指定してメール送信
- 本文内に
{{amazonSESUnsubscribeUrl}}を入れると配信停止用のリンクに変わる -
ListManagementOptionsでリストを指定
import boto3
from botocore.exceptions import ClientError

SENDER = "Sender Name <sender@example.com>" # 登録した送信元アドレス
RECIPIENT = "example@gmail.com"

AWS_REGION = "ap-northeast-1"

SUBJECT = "Amazon SES Unsub Test"

BODY_TEXT = ("Amazon SES Unsub Test (Python)\r\n"
             "This email was sent with Amazon SES using the "
             "AWS SDK for Python (Boto).\r\n{{amazonSESUnsubscribeUrl}}"
            )

# The HTML body of the email.
BODY_HTML = """<html>
<head></head>
<body>
  <h1>Amazon SES Unsub Test</h1>
  <p>This email was sent with
    <a href='https://aws.amazon.com/ses/'>Amazon SES</a> using the
    <a href='https://aws.amazon.com/sdk-for-python/'>
      AWS SDK for Python (Boto)</a>.
  </p>
  <p>{{amazonSESUnsubscribeUrl}}</p>
</body>
</html>
"""

# The character encoding for the email.
CHARSET = "UTF-8"

# Create a new SES resource and specify a region.
client = boto3.client('sesv2',region_name=AWS_REGION)

# Try to send the email.
try:
    #Provide the contents of the email.
    response = client.send_email(
      FromEmailAddress=SENDER,
        Destination={
            'ToAddresses': [
                RECIPIENT,
            ],
        },
        Content={
          'Simple': {
            'Body': {
                'Html': {
                    'Charset': CHARSET,
                    'Data': BODY_HTML,
                },
                'Text': {
                    'Charset': CHARSET,
                    'Data': BODY_TEXT,
                },
            },
            'Subject': {
                'Charset': CHARSET,
                'Data': SUBJECT,
            },
          }
        },
        # リストを指定
        ListManagementOptions={
            'ContactListName': 'contact-list-1',
            'TopicName': 'topic-1'
        }
    )
except ClientError as e:
    print(e.response['Error']['Message'])
else:
    print("Email sent! Message ID:"),
    print(response['MessageId'])
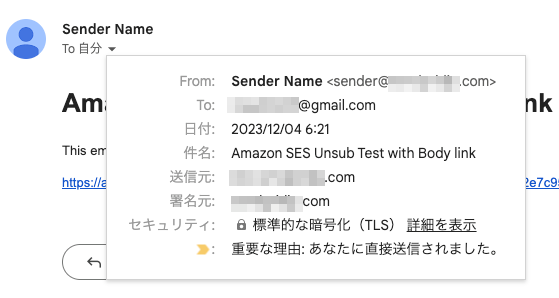
3. 届いたメールを確認
メールに「メーリングリストの登録解除」のリンクが表示される。
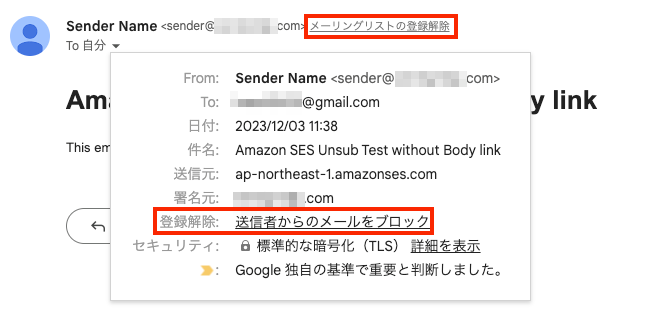
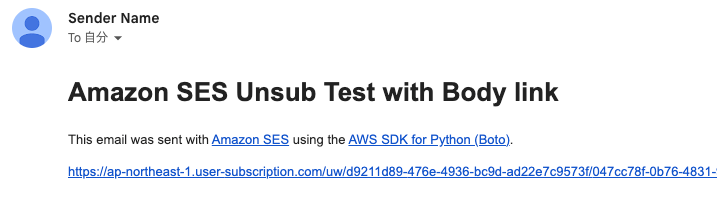
本文にもリンクが配置される。
メールソースを見ると、List-Unsubscribeヘッダがmailtoとhttpsで指定される。
List-Unsubscribe-Postヘッダもつく。

「メーリングリストの登録解除」のリンクから登録解除すると、mailtoに登録した宛先にメールが飛んで、しばらくしたら登録解除された。
B. SESの配信停止の仕組みを利用しない方法
Rawでメールを送り、そこにヘッダを指定する。
Pythonのemailライブラリを使った例
import os
import boto3
from botocore.exceptions import ClientError
from email.message import EmailMessage

AWS_REGION = "ap-northeast-1"

SENDER = "Sender Name <sender@example.com>"
RECIPIENT = "example@gmail.com"

# The subject line for the email.
SUBJECT = "Amazon SES Unsubscribe test by RAW"

# The email body for recipients with non-HTML email clients.
BODY_TEXT = "Hello"

# The HTML body of the email.
BODY_HTML = """\
<html>
<head></head>
<body>
<h1>Hello!</h1>
</body>
</html>
"""

# Create a new SES resource and specify a region.
client = boto3.client('ses', region_name=AWS_REGION)

msg = EmailMessage()
msg['Subject'] = SUBJECT
msg['From'] = SENDER
msg['To'] = RECIPIENT
msg['List-Unsubscribe'] = "<https://unsubscribe.example.com/?id=11111>"
msg['List-Unsubscribe-Post'] = "List-Unsubscribe=One-Click"

msg.set_content(BODY_TEXT)
msg.add_alternative(BODY_HTML, subtype='html')

# Try to send the email.
try:
    #Provide the contents of the email.
    response = client.send_raw_email(
        Source=SENDER,
        Destinations=[
            RECIPIENT
        ],
        RawMessage={
            'Data':msg.as_string(),
        },
    )
# Display an error if something goes wrong.
except ClientError as e:
    print(e.response['Error']['Message'])
else:
    print("Email sent! Message ID:"),
    print(response['MessageId'])
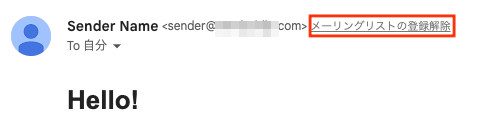
List-UnsubscribeとList-Unsubscribe-Postを直に指定する。
この例では、httpsのみを指定。
送信結果
- 「メーリングリストの登録解除」のリンクが表示される
- クリックすると指定したURLにPOSTリクエストがとぶ
注意
カスタムドメインの設定を行い、Return-Pathを独自ドメインにしたら「メーリングリストの登録解除」のリンクが表示されなくなった。適当なドメインを使って検証したので、送信元ドメインが大量送信者であるかとかレピュテーションとかもみてリンクを表示するかどうか判断してそう。
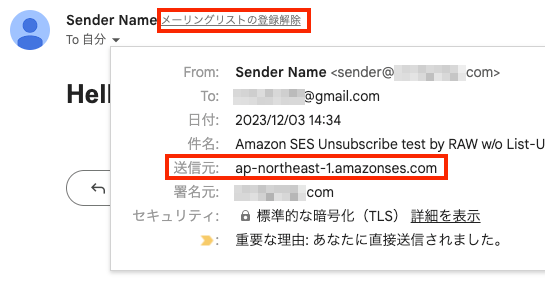
リンクが表示される例。Return-Pathのドメイン(「送信元」)がap-northeast-1.amazonses.com
リンクが表示されない例。Return-Pathのドメインが独自ドメイン