Next.js + VercelとSentryを連携させる
2024年6月5日 追記
この記事の内容はNext.jsの Pages Router を前提とした記事です。
この記事を書き直すのが結構大変なのでNext.js最新の App Router で作られたプロジェクトにSentryを導入しましたので、その時のPRのリンクをこちらに記載します。
この記事で紹介している生成されたファイルに多数変更が見られました。
-
sentry.client.config.js→sentry.client.config.ts -
sentry.server.config.js→sentry.server.config.ts -
sentry.edge.config.tsが新しく追加 -
src/instrumentation.tsが新しく追加 -
src/pages/_error.tsxの代わりにsrc/app/global-error.tsx
概要
Next.js + Vercelで運用しているアプリケーションにSentryを連携させる手順を説明します。
今回は実際に自分が 友人 と開発・運用しているサービス LGTMeow にこれらの設定を追加したので、実際の設定内容を踏まえて解説します。
対象読者
Next.jsのアプリケーションをVercelにデプロイしている人を対象読者としています。
事前準備
Sentryへサインアップ
以下のページからサインアップを行ないます。
自分はGitHubのアカウントを利用して作成しました。
Sentry organizationの作成
以下のページより作成します。
自分はGitHub Organizationと同じ名称で作成しました。
Sentry プロジェクトの作成
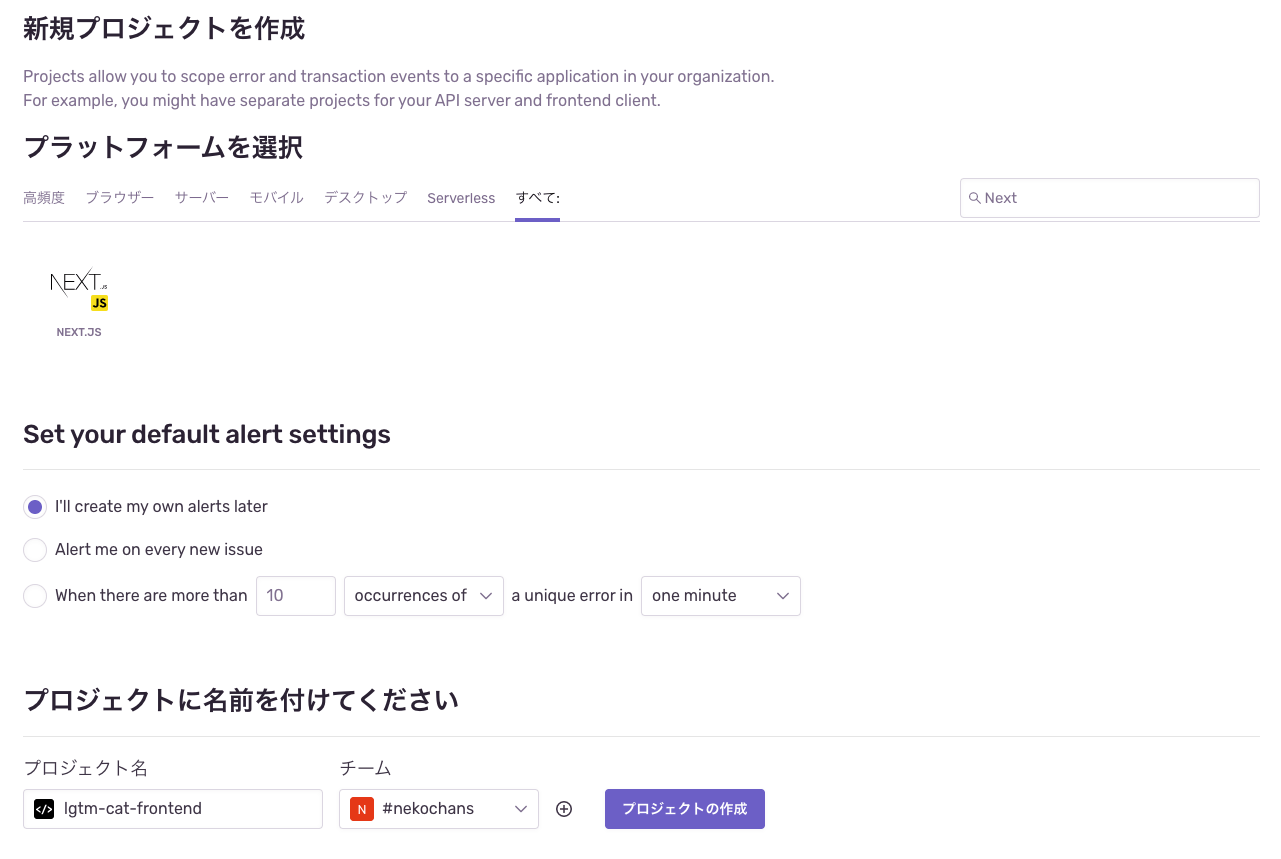
プロジェクトを作成します。

- プラットフォームを選択でNext.jsを選択
- Set your default alert settingsはとりあえず
I'll create my own alerts laterを選択 - プロジェクト名は何でも良いですが自分はGitHubリポジトリと同じ名前にしました
アプリケーションにSentryの設定をする
左側の「プロジェクト」から作成したプロジェクトを確認できるかと思います。
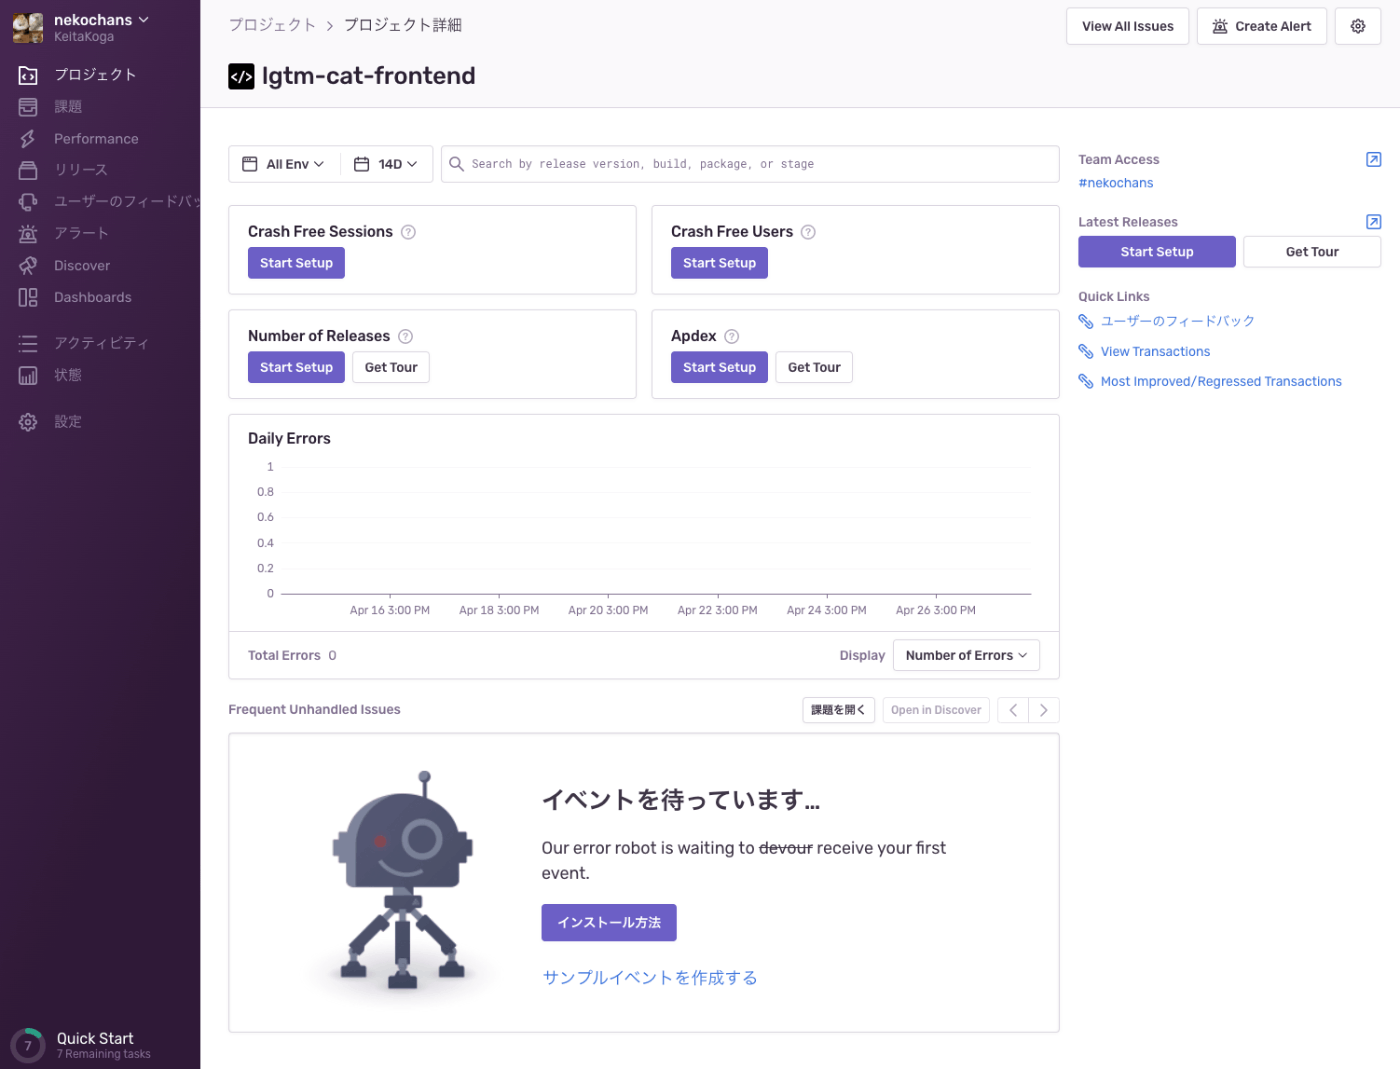
「インストール方法」を押下すると「あなたのアプリケーションを設定」という画面が出るのでNext.jsを選択します。
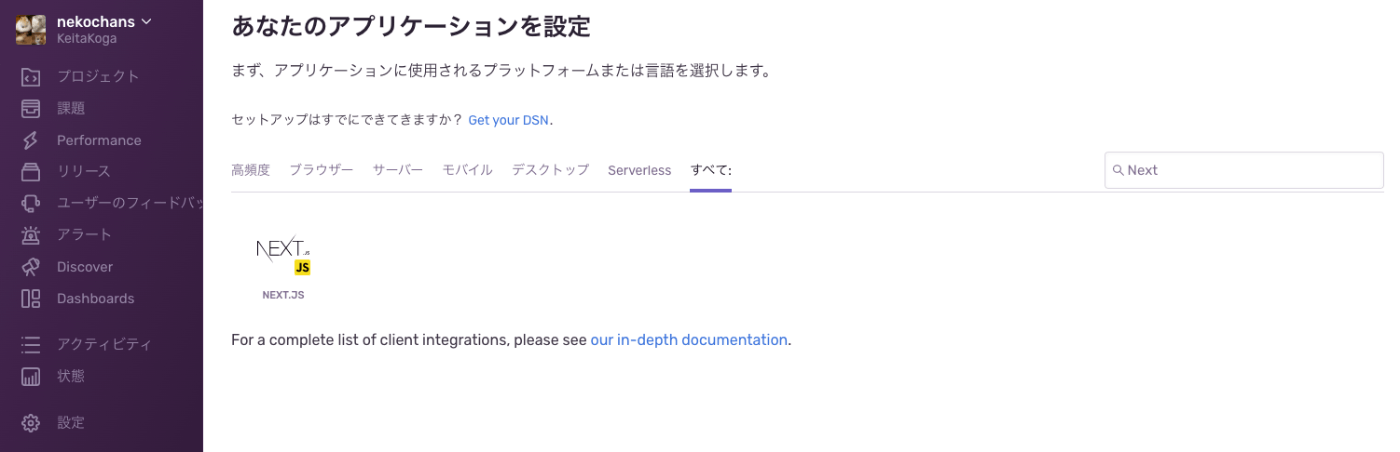
Next.jsを選択すると以下のようにインストール方法が表示されます。

ここに載っている内容に従いpackageのインストールや設定ファイルの修正などを行なっていきます。
@sentry/nextjs のインストールと設定
以下を実行します。
npm install --save @sentry/nextjs
Sentry wizardの実行
以下を実行します。
npx @sentry/wizard -i nextjs
この時にブラウザで以下のページが開かれます。
おそらくですがSentryの認証エンドポイントに移動してトークンを取得しているのではないかと思います。(未確認)
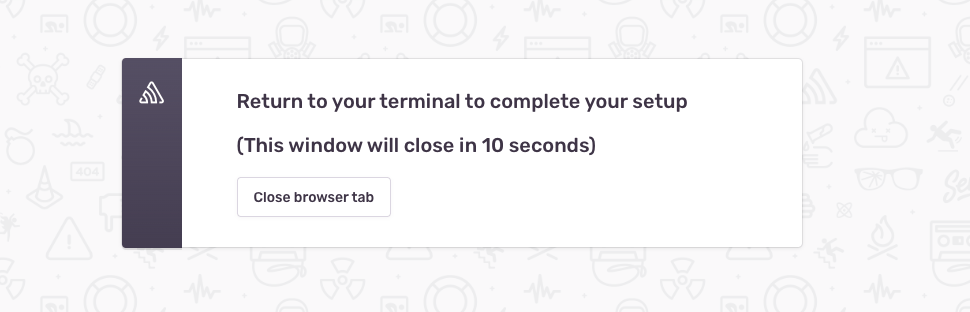
ターミナル上で以下のように利用したいプロジェクトを選択する画面になるので選択します。
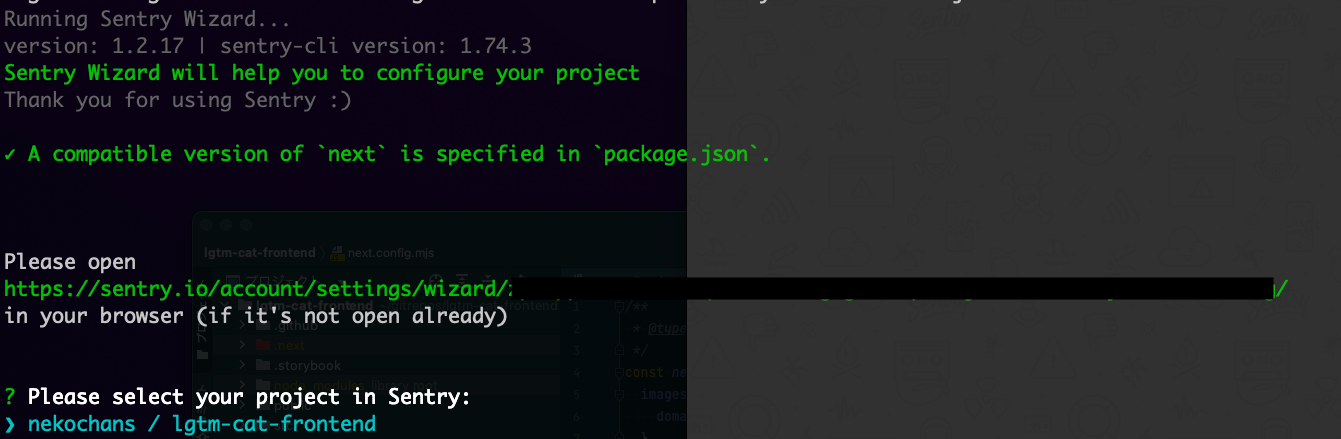
プロジェクトを選択するとSentry wizardは完了します。
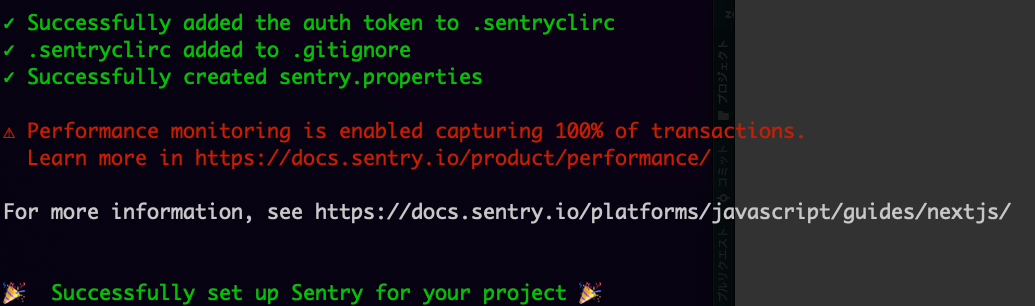
さまざまなファイルが生成・修正されます。
Sentry wizardによって追加されるファイル
// This file configures the initialization of Sentry on the browser.
// The config you add here will be used whenever a page is visited.
// https://docs.sentry.io/platforms/javascript/guides/nextjs/

import * as Sentry from '@sentry/nextjs';

const SENTRY_DSN = process.env.SENTRY_DSN || process.env.NEXT_PUBLIC_SENTRY_DSN;

Sentry.init({
  dsn: SENTRY_DSN || 'https://xxxxxxxxxxxxxxxxxxxxxxxxxxxxxxxx@o1111111.ingest.sentry.io/0000000',
  // Adjust this value in production, or use tracesSampler for greater control
  tracesSampleRate: 1.0,
  // ...
  // Note: if you want to override the automatic release value, do not set a
  // `release` value here - use the environment variable `SENTRY_RELEASE`, so
  // that it will also get attached to your source maps
});
// This file configures the initialization of Sentry on the server.
// The config you add here will be used whenever the server handles a request.
// https://docs.sentry.io/platforms/javascript/guides/nextjs/

import * as Sentry from '@sentry/nextjs';

const SENTRY_DSN = process.env.SENTRY_DSN || process.env.NEXT_PUBLIC_SENTRY_DSN;

Sentry.init({
  dsn: SENTRY_DSN || 'https://xxxxxxxxxxxxxxxxxxxxxxxxxxxxxxxx@o1111111.ingest.sentry.io/0000000',
  // Adjust this value in production, or use tracesSampler for greater control
  tracesSampleRate: 1.0,
  // ...
  // Note: if you want to override the automatic release value, do not set a
  // `release` value here - use the environment variable `SENTRY_RELEASE`, so
  // that it will also get attached to your source maps
});
defaults.url=https://sentry.io/
defaults.org=あなたのSentry organization名
defaults.project=あなたのSentryプロジェクト名
cli.executable=../../.npm/_npx/xxxxxxxxxxxxxxxx/node_modules/@sentry/cli/bin/sentry-cli
// This file sets a custom webpack configuration to use your Next.js app
// with Sentry.
// https://nextjs.org/docs/api-reference/next.config.js/introduction
// https://docs.sentry.io/platforms/javascript/guides/nextjs/

const { withSentryConfig } = require('@sentry/nextjs');

const moduleExports = {
  // Your existing module.exports
};

const sentryWebpackPluginOptions = {
  // Additional config options for the Sentry Webpack plugin. Keep in mind that
  // the following options are set automatically, and overriding them is not
  // recommended:
  //   release, url, org, project, authToken, configFile, stripPrefix,
  //   urlPrefix, include, ignore

  silent: true, // Suppresses all logs
  // For all available options, see:
  // https://github.com/getsentry/sentry-webpack-plugin#options.
};

// Make sure adding Sentry options is the last code to run before exporting, to
// ensure that your source maps include changes from all other Webpack plugins
module.exports = withSentryConfig(moduleExports, sentryWebpackPluginOptions);
import NextErrorComponent from 'next/error';

import * as Sentry from '@sentry/nextjs';

const MyError = ({ statusCode, hasGetInitialPropsRun, err }) => {
  if (!hasGetInitialPropsRun && err) {
    // getInitialProps is not called in case of
    // https://github.com/vercel/next.js/issues/8592. As a workaround, we pass
    // err via _app.js so it can be captured
    Sentry.captureException(err);
    // Flushing is not required in this case as it only happens on the client
  }

  return <NextErrorComponent statusCode={statusCode} />;
};

MyError.getInitialProps = async (context) => {
  const errorInitialProps = await NextErrorComponent.getInitialProps(context);

  const { res, err, asPath } = context;

  // Workaround for https://github.com/vercel/next.js/issues/8592, mark when
  // getInitialProps has run
  errorInitialProps.hasGetInitialPropsRun = true;

  // Returning early because we don't want to log 404 errors to Sentry.
  if (res?.statusCode === 404) {
    return errorInitialProps;
  }

  // Running on the server, the response object (`res`) is available.
  //
  // Next.js will pass an err on the server if a page's data fetching methods
  // threw or returned a Promise that rejected
  //
  // Running on the client (browser), Next.js will provide an err if:
  //
  //  - a page's `getInitialProps` threw or returned a Promise that rejected
  //  - an exception was thrown somewhere in the React lifecycle (render,
  //    componentDidMount, etc) that was caught by Next.js's React Error
  //    Boundary. Read more about what types of exceptions are caught by Error
  //    Boundaries: https://reactjs.org/docs/error-boundaries.html

  if (err) {
    Sentry.captureException(err);

    // Flushing before returning is necessary if deploying to Vercel, see
    // https://vercel.com/docs/platform/limits#streaming-responses
    await Sentry.flush(2000);

    return errorInitialProps;
  }

  // If this point is reached, getInitialProps was called without any
  // information about what the error might be. This is unexpected and may
  // indicate a bug introduced in Next.js, so record it in Sentry
  Sentry.captureException(
    new Error(`_error.js getInitialProps missing data at path: ${asPath}`),
  );
  await Sentry.flush(2000);

  return errorInitialProps;
};

export default MyError;
[auth]
token=xxxxxxxxxxxxxxxxxxxxxxxxxxxxxxxxxxxxxxxxxxxxxxxxxxxxxxxxxxxxxxxx
next.config.js について
プロジェクトルートにすでに next.config.js が存在する場合は next.config.wizardcopy.js という名前で生成されます。
ほとんどのプロジェクトでは next.config.js がすでに存在していると思いますので大抵の場合は next.config.wizardcopy.js が生成されます。
この場合は既存の next.config.js とマージしてあげる必要があります。
筆者の環境の場合 next.config.js は以下のようになりました。
const { withSentryConfig } = require('@sentry/nextjs');

/**
 * @type {import('next').NextConfig}
 */
const moduleExports = {
  images: {
    domains: ['lgtm-images.lgtmeow.com', 'stg-lgtm-images.lgtmeow.com'],
  },
  swcMinify: true,
};

const sentryWebpackPluginOptions = {
  silent: true,
};

module.exports = withSentryConfig(moduleExports, sentryWebpackPluginOptions);
筆者は未確認ですが withSentryConfig 以外に複数のプラグインを利用している場合は next-compose-plugins を利用すると良さそうです。
参考になりそうな記事を貼っておきます。
(参考記事)Next.js / Sentry / Vercel の連携が楽になっていた件
src/pages/_error.js について
筆者の環境だと src/pages/_error.tsx を作成していました。
その為生成された src/pages/_error.js の内容をマージしつつTypeScriptの対応も行なう必要がありました。
asを使って強引に型解決している部分がありますが、ひとまずこれで動作しました。
import * as Sentry from '@sentry/nextjs';
import { NextPage, NextPageContext } from 'next';
import NextErrorComponent from 'next/error';

import { httpStatusCode, HttpStatusCode } from '../constants/httpStatusCode';

type Props = {
  statusCode: HttpStatusCode;
  err?: Error;
  hasGetInitialPropsRun?: boolean;
};

const CustomErrorPage: NextPage<Props> = ({
  statusCode,
  hasGetInitialPropsRun,
  err,
}) => {
  if (!hasGetInitialPropsRun && err) {
    Sentry.captureException(err);
  }

  return <NextErrorComponent statusCode={statusCode} />;
};

const defaultTimeout = 2000;

CustomErrorPage.getInitialProps = async (
  context: NextPageContext,
): Promise<Props> => {
  const errorInitialProps = (await NextErrorComponent.getInitialProps(
    context,
  )) as Props;

  const { res, err, asPath } = context;

  errorInitialProps.hasGetInitialPropsRun = true;

  if (res?.statusCode === httpStatusCode.notFound) {
    return errorInitialProps;
  }

  if (err) {
    Sentry.captureException(err);

    await Sentry.flush(defaultTimeout);

    return errorInitialProps;
  }

  Sentry.captureException(
    new Error(`_error.tsx getInitialProps missing data at path: ${asPath}`),
  );
  await Sentry.flush(defaultTimeout);

  return errorInitialProps;
};

export default CustomErrorPage;
余談ですが import { httpStatusCode, HttpStatusCode } from '../constants/httpStatusCode'; の部分は以下のようにHTTPステータスコードを表す内容です。
// https://developer.mozilla.org/ja/docs/Web/HTTP/Status から必要なものを抜粋して定義
export const httpStatusCode = {
  ok: 200,
  created: 201,
  accepted: 202,
  noContent: 204,
  movedPermanently: 301,
  badRequest: 400,
  unauthorized: 401,
  forbidden: 403,
  notFound: 404,
  requestTimeout: 408,
  unprocessableEntity: 422,
  internalServerError: 500,
  serviceUnavailable: 503,
} as const;

export type HttpStatusCode = typeof httpStatusCode[keyof typeof httpStatusCode];
Sentry wizardによって更新されるファイル
.gitignore に以下が追加されます。
.sentryclirc には機密情報であるトークンが記載される事になるので、それをコミットしてしまわないような配慮だと思われます。
# Sentry
.sentryclirc
Next.js API Routeについて
Next.jsのAPI Routeを利用している場合は以下のように withSentry の引数に handler 関数を渡すように修正します。
これでAPI Route内で発生したErrorもSentryに通知されるようになります。
import type { NextApiRequest, NextApiResponse } from "next"
import { withSentry } from "@sentry/nextjs";

const handler = async (req: NextApiRequest, res: NextApiResponse) => {
  res.status(200).json({ name: "John Doe" });
};

export default withSentry(handler);
Sentryにエラーが送られているかローカルで動作確認
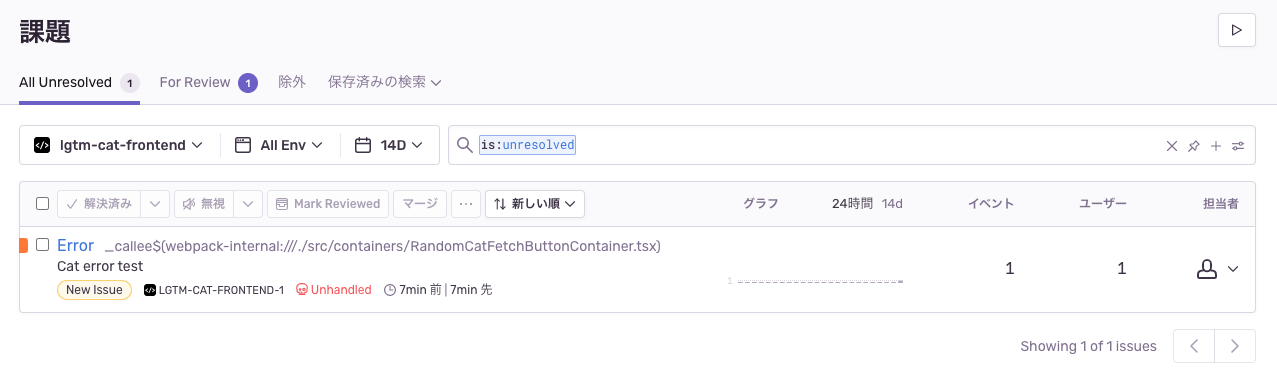
適当なボタンを押下した際に例外を発生するようにして、アプリケーションサーバーを起動します。
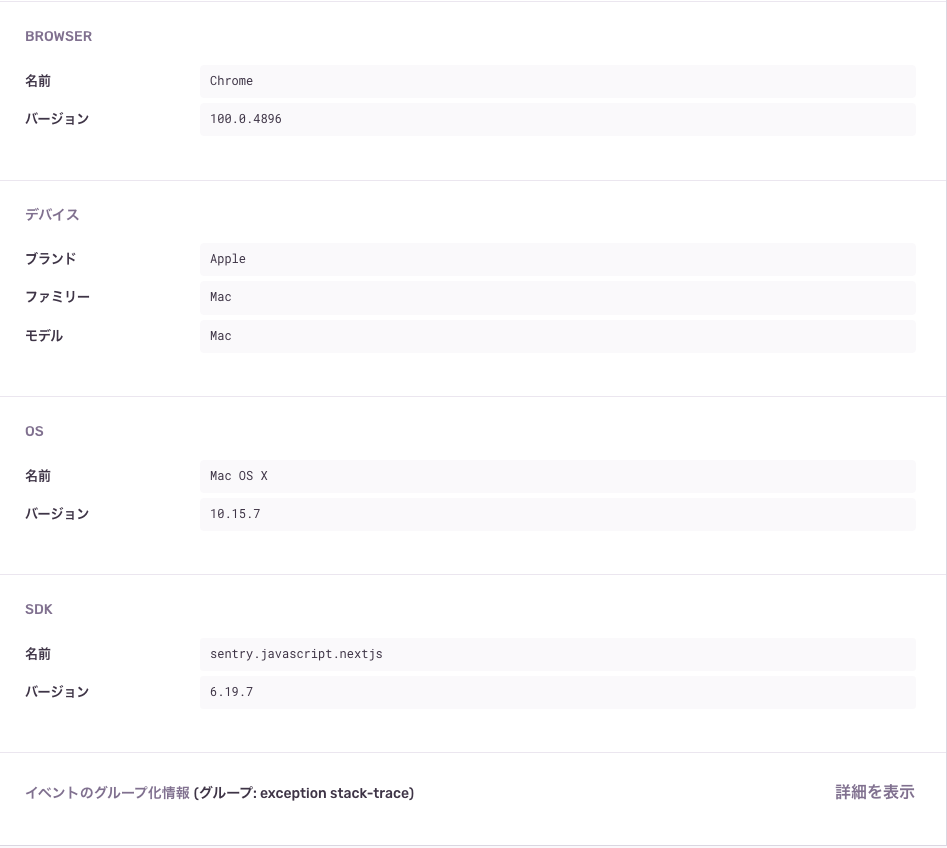
左メニューの「課題」を確認するとエラーが送信されていることが確認できます。
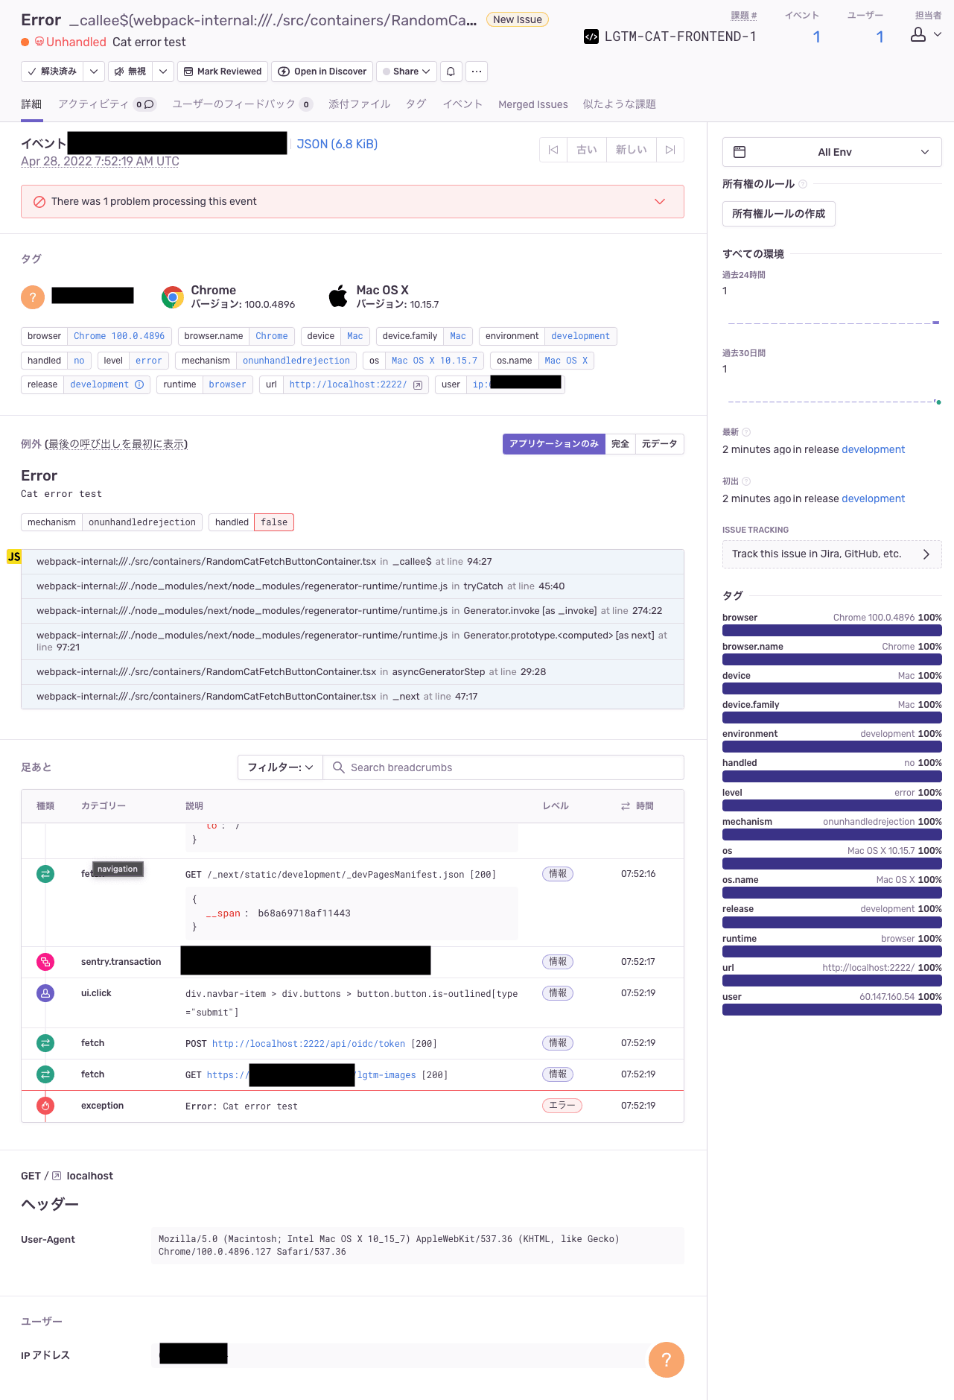
詳細を確認するとエラー発生時のブラウザの情報やIPアドレスなどが確認できます。
VercelとSentryの連携
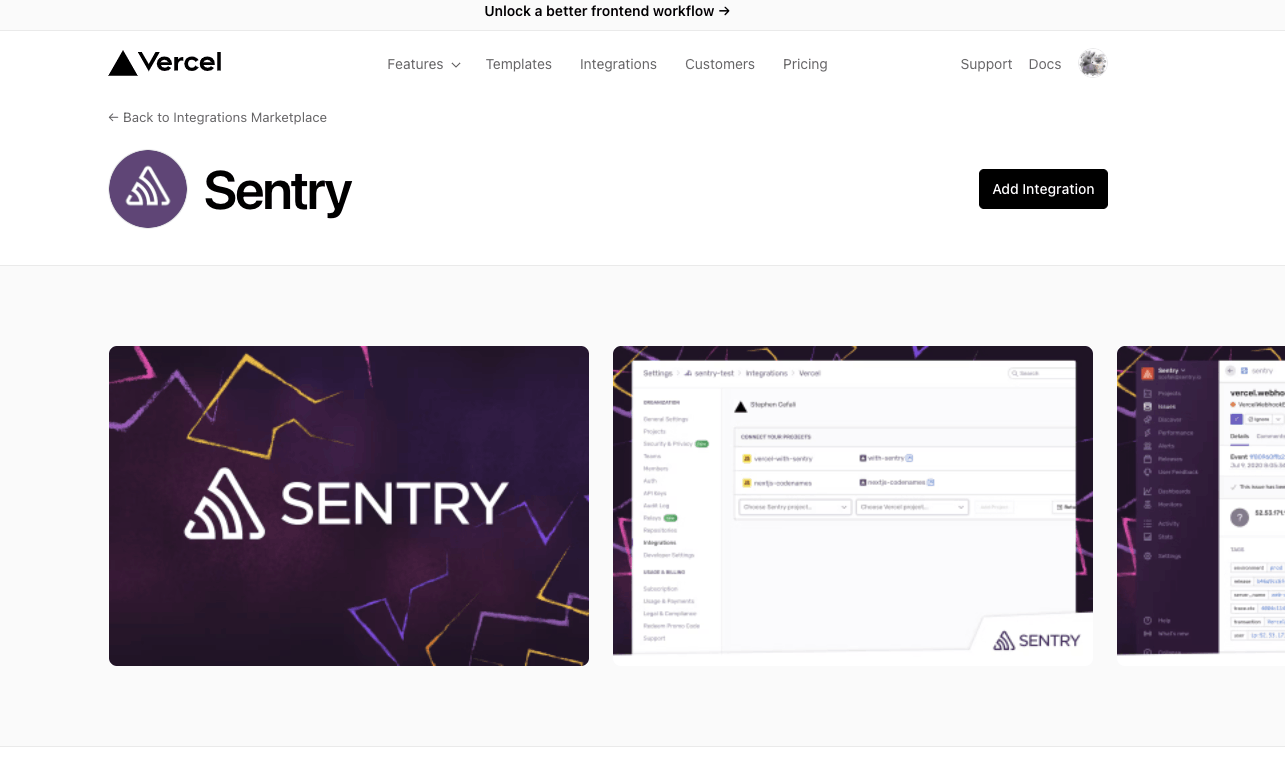
Sentry Integrationを利用するのがもっとも簡単なのでそも手順を実施します。
こちらに従い https://vercel.com/integrations/sentry/add に移動して「Add Integration」を押下します。
追加するVercelのTeamsを選択します。

ここでは必要なVercelプロジェクトだけを選択します。
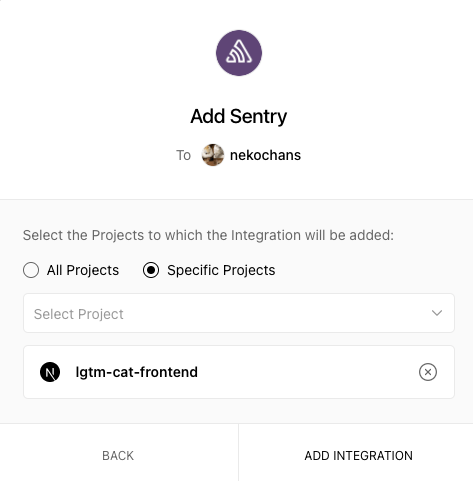
Install Vercelを押下します。
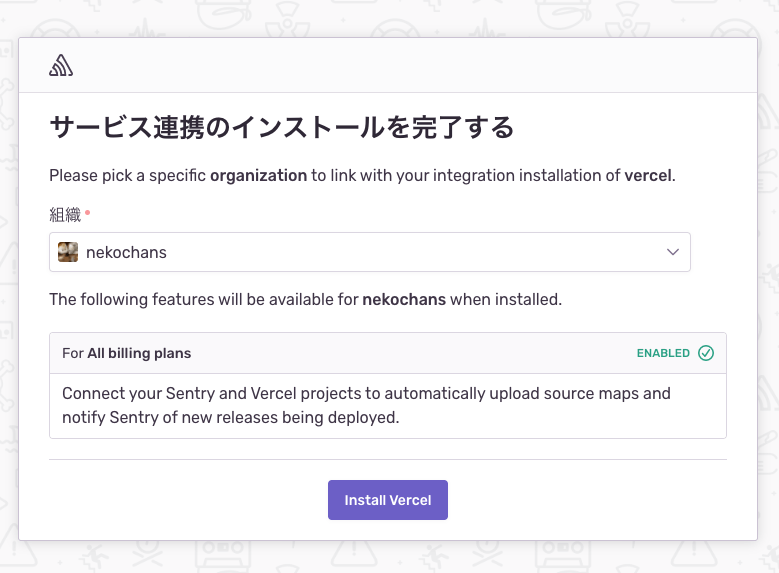
VercelのプロジェクトとSentryのプロジェクトを連携させて「Complete on Vercel」を押下します。
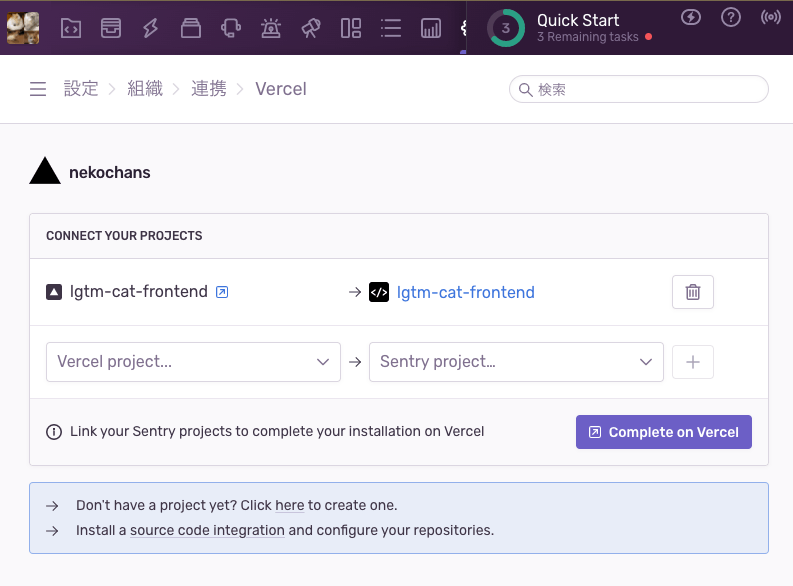
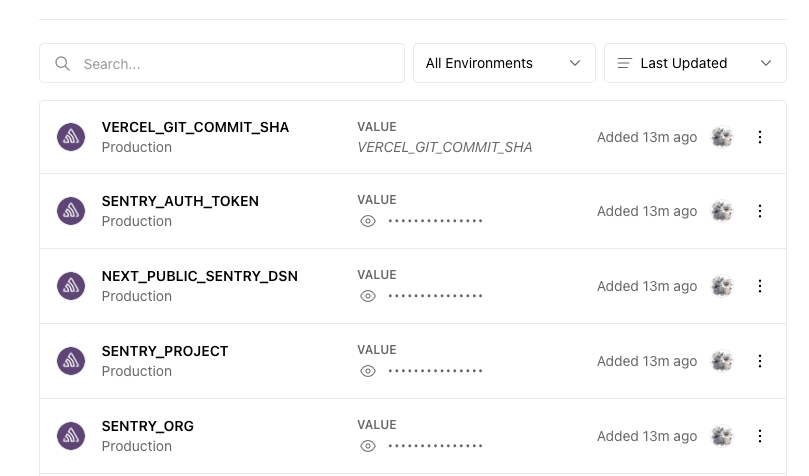
これで完了です。Vercel上の環境変数を確認するとSentryが追加した環境変数が確認できます。
必要な環境変数はこれで問題はないのですが Production でしか読めない設定になっています。
必要に応じて Preview, Development でも読めるように設定を変更しておきましょう。
Vercel上で動作確認
Sentryの動作に必要な環境変数をSentry Integrationによって追加したので各設定ファイルも環境変数から必要な値をロードするように変更します。
next.config.js の修正
authToken, org, project を環境変数からロードするように変更します。
const { withSentryConfig } = require('@sentry/nextjs');

/**
 * @type {import('next').NextConfig}
 */
const moduleExports = {
  // 任意の設定
};

const sentryWebpackPluginOptions = {
  silent: true,
  authToken: process.env.SENTRY_AUTH_TOKEN,
  org: process.env.SENTRY_ORG,
  project: process.env.SENTRY_PROJECT,
};

module.exports = withSentryConfig(moduleExports, sentryWebpackPluginOptions);
sentry.client.config.js, sentry.server.config.js
内容はどちらも同じです。
dsn をVercelに登録されている NEXT_PUBLIC_SENTRY_DSN から参照するように変更します。
それから environment を設定しておきます。
これを設定しておくとSentry上からどの環境で起こったかわかりやすくなるのでオススメです。
筆者は NEXT_PUBLIC_APP_ENV という環境変数を以下のように定義しています。
- Vercel上でDevelopmentの場合は
localを指定、ローカル環境で発生したErrorと認識するため - Vercel上でPreviewの場合は
developmentを指定、Vercel上の開発環境で発生したErrorと認識するため - Vercel上でProductionの場合は
productionを指定、Vercel上の本番環境で発生したErrorと認識するため
↓のようにフィルターが可能になったり通知の際に本番環境で起こったものだけを通知するなどの対応が可能になるので便利です。

import * as Sentry from '@sentry/nextjs';

Sentry.init({
  dsn: process.env.NEXT_PUBLIC_SENTRY_DSN,
  environment: process.env.NEXT_PUBLIC_APP_ENV,
  tracesSampleRate: 1.0,
});
import * as Sentry from '@sentry/nextjs';

Sentry.init({
  dsn: process.env.NEXT_PUBLIC_SENTRY_DSN,
  environment: process.env.NEXT_PUBLIC_APP_ENV,
  tracesSampleRate: 1.0,
});
sentry.properties を削除する
authToken, org, project を環境変数からロードするようにしたので、このファイルに関しては削除してしまって問題ありません。
Vercel上にデプロイ後に動作確認
以下のようにVercel上で発生したErrorも通知されていることが確認できます。

おわりに
@sentry/nextjs を利用したSentryの設定を説明しました。
環境変数の追加を忘れて動作しなかったりハマった部分もあったので記事にまとめてみました。
この記事は入門向きですが、さらに実践的な内容を解説した Next.jsにSentryを導入した際の課題と解決策について という記事を教えてもらったので参考リンクとして載せておきます。
この記事でSentryを導入した後に読むのがオススメです。
以上になります。最後まで読んでいただきありがとうございました。
Discussion