Cloudflare Workers で直接 Cloudflare Images の画像変換・最適化機能が使えるようになった!
朗報ですね。
2月24日からの新機能で、binding を使い R2 や D1 のように直接画像変換などを扱えるようになりました。
今までの Cloudflare Images は Cloudflare に乗せてるドメインでしか使えなかった(pages.dev や workers.dev は駄目)はずです。
Cloudflare 公式のアナウンス記事はこちら。
ドキュメントページはこちら。
というわけで、試してみました。
出来上がったもののレポジトリはこれです。
今回は React Router の cloudflare template を使います。
Cloudflare Workers から Cloudflare R2 に画像を保存し、また Workers で R2 から画像を取り出して Images で変換する、という感じでやっていきます。
まず準備から始めますので、Images の使い方だけを読みたい人は # レッツトライ まで飛ばしちゃってください。
準備
とりあえず npm install した後、@cloudflare/workers-types だけ latest で再インストールします。
この記事を書いている今日(2025/03/02)の時点では 4.20250224.0 が最新版のようです。
そして Cloudflare R2 から画像を読み込んで Images で使えるように、準備をしておきます。
まず R2 のドキュメントを参考に wrangler.toml に書き足します。
[[r2_buckets]]
binding = "R2" # <~ valid JavaScript variable name
bucket_name = "images_bucket"
既存の bucket を使いたい訳でなければどちらも適当に設定して構いません。
とりあえず今回は binding = "R2" でいきます。
wrangler.toml を編集した後、npm wrangler types を実行すると自動で worker-configuration.d.ts を作成・更新してくれます。
// Generated by Wrangler by running `wrangler types`

interface Env {
	VALUE_FROM_CLOUDFLARE: "Hello from Cloudflare";
	R2: R2Bucket;
}
これで R2 の型推論が効いてくれるようになります。
ではさっそく画像を保存できるように React Router の方をやっていきましょう。
Route の型エラーを解消するために npm react-router typegen を実行した後、とりあえず home.tsx に適当にこんな感じの action を生やします。
export async function action({ request, context }: Route.ActionArgs) {
  const formData = await request.formData()

  const r2Objects: R2Object[] = []

  for (let [ formDataEntryKey, formDataEntryValue ] of formData) {
    if (formDataEntryKey === "image" && formDataEntryValue instanceof File) {
      const result = await context.cloudflare.env.R2.put(formDataEntryValue.name, formDataEntryValue)

      if (result !== null) {
        r2Objects.push(result)
      }
    }
  }

  return {
    keys: r2Objects.map(r2Obj => r2Obj.key)
  }
}
そしてページコンポーネント Home の方も適当に。スタイリングは省略しています。
export default function Home({ actionData }: Route.ComponentProps) {
  return (
    <div>
      <Form method="POST" encType="multipart/form-data">
        <input type="file" name="image" accept="image/*" multiple />
        <button>Submit</button>
      </Form>
      <div>
        {actionData?.keys.map(imageKey => (
          <Link to={`/images/${imageKey}`} target="_blank" key={imageKey}>{imageKey}</Link>
        ))}
      </div>
    </div>
  )
}
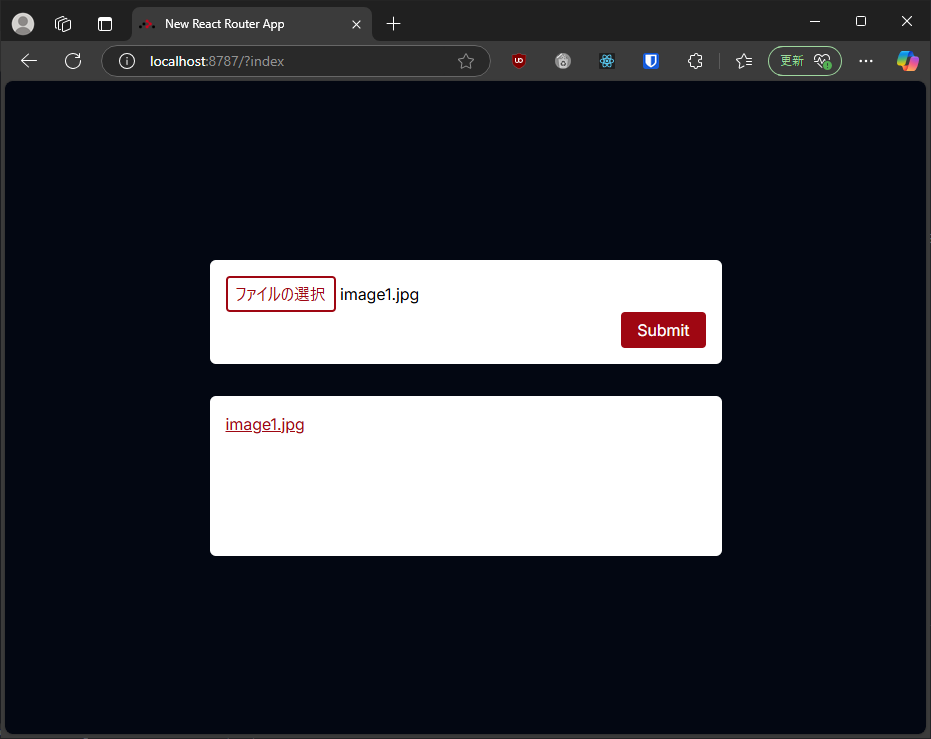
これで画像をアップロードできたら準備は完了です。さっそく Images を試してみましょう。
レッツトライ
まず下記のドキュメントを参考に wrangler.toml に Images 用の binding を設定します。
[images]
binding = "IMAGES" # i.e. available in your Worker on env.IMAGES
次に wrangler types を実行することで型が自動で…と思ったのですが、この記事を書いている今日(2025/03/02)の時点では Images の型を自動で設定してもらえませんでした。なので worker-configuration.d.ts に手動で設定します。
interface Env {
	VALUE_FROM_CLOUDFLARE: "Hello from Cloudflare";
	R2: R2Bucket;
	// binding に設定した値を key にする
	IMAGES: ImagesBinding;
}
ImagesBinding というのが今回の Cloudflare Images の型となります。注意点として、この型 ImagesBinding を import してはいけません。import せずにそのまま書いてください。でないと型がバグります。
では早速画像を変換して返す為の route を実装しましょう。
こんな感じで。とりあえずサイズを 500 までにして、拡張子を avif に変更させてみます。
export async function loader({ params, context }: Route.LoaderArgs) {
  const { imageKey } = params
  const bucket = context.cloudflare.env.R2
  const images = context.cloudflare.env.IMAGES

  const imageFile = await bucket.get(imageKey)

  if (imageFile === null) {
    throw data(null, { status: 404 })
  }

  // imageFile.body の型 R2ObjectBody.body が ReadableStream<any> なのに対し、
  // input() の引数の型が ReadableStream<Uint8Array> なので型エラーが出たりしますが、
  // これで問題なく動くのでここではとりあえず無視してください
  const result = await images
    .input(imageFile.body)
    .transform({ width: 500, height: 500 })
    .output({ format: "image/avif" })

  return result.response()
}
export default [
  index("routes/home.tsx"),
  route("images/:imageKey", "routes/images.tsx")
] satisfies RouteConfig;
詳しい使い方は下記のドキュメントに書いてありますが、一部載っていない情報を補足すると、result (output() の返り値) の型は ImageTransformationResult で、こんなインターフェイスになっていました。
interface ImageTransformationResult {
  /**
   * The image as a response, ready to store in cache or return to users
   */
  response(): Response;
  /**
   * The content type of the returned image
   */
  contentType(): string;
  /**
   * The bytes of the response
   */
  image(): ReadableStream<Uint8Array>;
}
Response を直接返してくれるのが便利でありがたいですね。
また、transform({...}) についても、一部型に載っていないパラメータ(anim や dpr とか)(実際に使えないっぽい? dpr は効果がないみたいだった)があるようです。
ドキュメント: https://developers.cloudflare.com/images/transform-images/bindings/#methods
というわけで、dev サーバを起動して早速確認してみましょう…と行きたいところですが、この記事を書い(略)2025/03/02 の時点では react-router dev でも使える R2 とは違い、wrangler dev でないと使えないようでした。
wrangler dev をする前に一度ビルドしないといけません。というわけで npm react-router build 。
そして今度こそ npm wrangler dev !
(Images は通常開発サーバからの利用であっても画像の変換・最適化処理を Cloudflare のサーバで行うみたいです。完全にローカルで試したい時は --experimental-images-local-mode をつけてください)
(https://developers.cloudflare.com/images/transform-images/bindings/#interact-with-your-images-binding-locally)
起動時に以下のように表示されるはずです。
Your worker has access to the following bindings:
- R2 Buckets:
  - R2: image_bucket [simulated locally]
- Images:
  - Name: IMAGES
...
さあ準備段階で取得した画像リンクにアクセスしてみましょう。
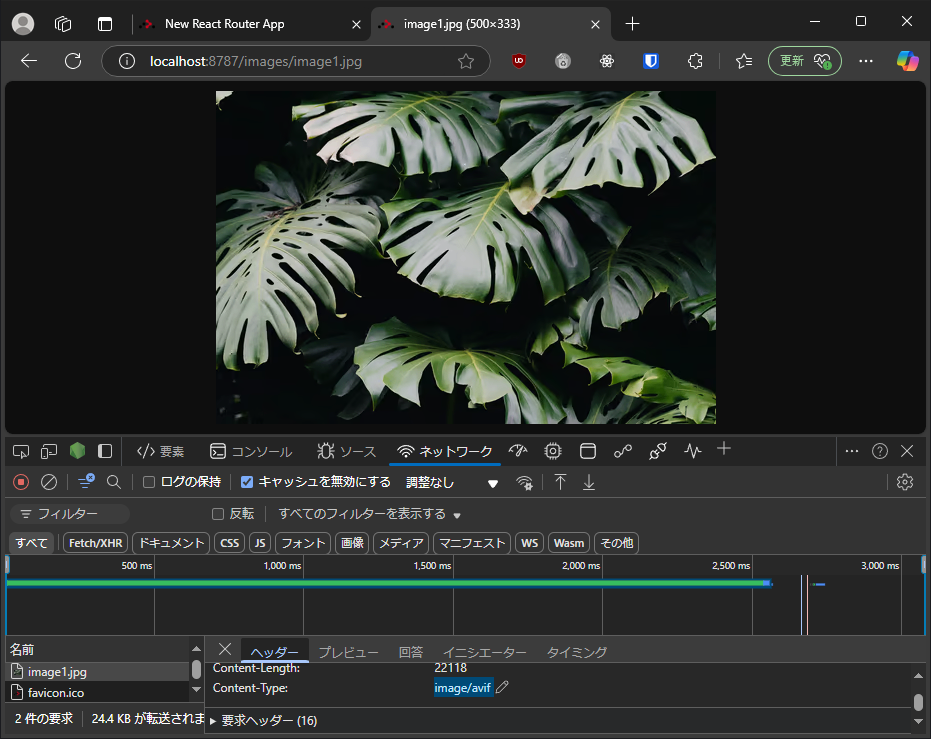
(この画像は Unsplash から: https://unsplash.com/photos/a-close-up-of-a-large-green-leafy-plant-b2bjYXaVvL4)
画像が表示されましたね?おめでとう!やったね!
おしまい。
Discussion