TypeScript(Node.js)で文字コード別にファイルを作成する


この記事はベースのファイルを起点に文字コード別でファイルを複製するような要件で活用できそうな内容です。そんな要件は滅多にないかもですが、備忘録的に残しておきたいと思います。
この記事で行うこと
TypeScript(Node.js)で文字コード別のファイルを複製、作成するタスクを構築します。
# イメージ例
index.html: UTF-8の元ファイル
↓
index_sjis.html: Shift_JISでエンコードされている
index_euc.html: EUC-JPでエンコードされている
前提条件
- Node.js v14 以上をインストール済み
- Yarnをインストール済み(使いたいくない場合は npm に読み替えてください)
環境の準備
サンプル用リポジトリを以下に用意しています。
パッケージの初期化を行います。
yarn init -y
利用パッケージのインストールを行います。
yarn add -D typescript ts-node @types/node iconv-lite
yarn add -D cpx rimraf npm-run-all
tscコマンドが利用できるか確認します。
yarn tsc --version
以下コマンドでtsconfig.jsonを作成します。
yarn tsc --init
tsconfigのtargetは利用するNode.jsのバージョンに応じて設定します。
ここではNode16系を利用するためES2021を指定します。
ここでは以下のような設定にしました。
{
  "compilerOptions": {
    "module": "commonjs",
    "target": "ES2021",
    "sourceMap": true,
    "strict": true,
    "types": ["node"]
  },
  "exclude": ["node_modules"]
}
変換用ファイルの作成
プロジェクトルートに src フォルダーを作成し、index.htmlファイルを準備します。
次に Node.js のプログラムを記述するファイルを用意します。
プロジェクトルートにencode.tsというファイルを作成してください。
最終的なプロジェクトのディレクトリ構成は以下のようになります。
root
 ├── encode.ts
 ├── node_modules
 ├── package.json
 ├── src
 │    └── index.html
 ├── tsconfig.json
 └── yarn.lock
npm-scripts でタスクの作成
package.jsonに必要なタスクを記述します。
- copy: html ファイルを dist フォルダーにコピー
- clean: dist フォルダーを削除
- encode:
ts-nodeでencode.tsを実行 - build: copy, clean, encode コマンドを順次実行
{
  "scripts": {
    "copy": "cpx './src/**/*.html' './dist'",
    "clean": "rimraf ./dist",
    "encode": "ts-node encode.ts",
    "build": "npm-run-all clean copy encode"
  }
}
文字コード変換プログラムの作成
作成したencode.tsを開き、fsとiconv-liteを読み込みます。
ファイルの入出力操作には Node.js 標準ライブラリのfsを利用します。また、文字コードの変換にiconv-liteというモジュールを用います。
import * as fs from "fs";
import * as iconv from "iconv-lite";
次に文字コード変換用の関数を作成します。
/**
 * 文字コード変換ヘルパー
 * @param { String } distPath - 出力先のパス
 * @param { String } charCode - 文字コード
 * @param { any } data - 読み込みファイルデータ
 */
function convertHelper(distPath: string, charCode: string, data: any) {
  const fd = fs.openSync(distPath, "w");
  const buf = iconv.encode(data, charCode);
  fs.write(fd, buf, 0, buf.length, (error, _written, _buffer) => {
    if (error) {
      throw error;
    }
    console.log(`${distPath} の書き出しに成功しました`);
  });
}
-
fs.openSync(path[, flags[, mode]]): オプションで
wを指定することで空ファイルを作成 - fs.write(fd, buffer[, offset[, length[, position]]], callback): 非同期でファイルの書き込みを行う
書き出し元になるファイルの読み込み処理を記述します。
// 取り込み先
const targetPath = "./src/index.html";

// 出力内容
const distPath = {
  sjis: "./dist/index_sjis.html",
  euc: "./dist/index_euc.html",
};

// HTMLファイルを文字コード別に変換
fs.readFile(targetPath, (error, data) => {
  if (error) {
    throw error;
  }

  // Shift_JIS変換
  convertHelper(distPath.sjis, "Shift_JIS", data);
  // EUC-JP変換
  convertHelper(distPath.euc, "EUC-JP", data);
});
- filehandle.readFile(options): 非同期でファイルの読み込みを行う
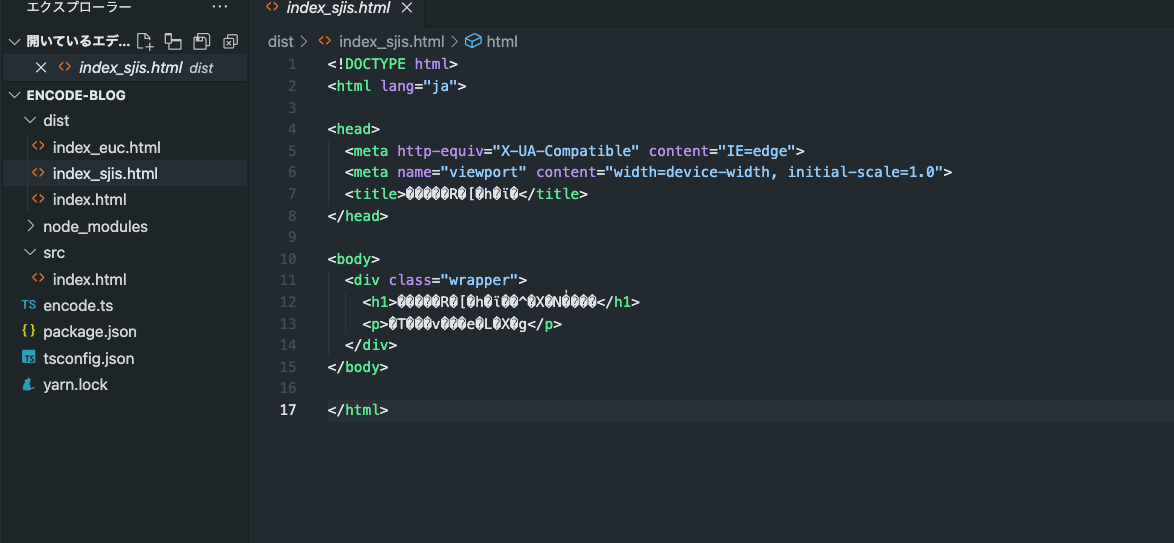
タスクの実行と確認
以下コマンドを実行すると dist フォルダーにファイルが作成されるはずです。
yarn build
Shift_JIS などでエンコードされたファイルを UTF-8 で開いた際、以下のように問題なく文字化けされていれば OK です(笑)
まとめ
今回はじめてiconv-liteを利用したのですが、Node.js での文字コード変換ではiconv-liteの利用が一般的なようでした。CSV のエンコードなどさまざまなデータの変換シーンで活用できそうです。
Discussion