BLIP2 / Google Colab


BLIP2概要
SalesforceのBLIP2を使用して、画像から説明キャプションを生成する。
ちなみにBLIP2はSalesforceのLAVISライブラリにも組み込まれている。
モデルはblip2-opt-2.7bやblip2-flan-t5-xlの他、COCOを使用してFine-tuningしたモデルblip2-opt-6.7b-cocoなど、複数種類が用意されている。
COCO Captions contains over one and a half million captions describing over 330,000 images. For the training and validation images, five independent human generated captions are be provided for each image.
BLIP2は質問に対して回答するVQA(visual question answering)の使用を想定したモデルだが、質問のプロンプトを設定しなかった場合は、画像のキャプションを生成してくれる。
個人的にはVQAのプロンプトは少し分からなかった。
例えば、"Question: Are there cats? Answer:"と問いかけた場合、ほとんどの画像に対して"Yes"と答えた。
Google Colab
from PIL import Image
import requests
from transformers import Blip2Processor, Blip2ForConditionalGeneration, BitsAndBytesConfig
import torch

device = "cuda" if torch.cuda.is_available() else "cpu"
quantization_config = BitsAndBytesConfig(load_in_8bit=True)

processor = Blip2Processor.from_pretrained("Salesforce/blip2-opt-2.7b")
model = Blip2ForConditionalGeneration.from_pretrained(
    "Salesforce/blip2-opt-2.7b",
    quantization_config=quantization_config,
    device_map={"": 0},
    torch_dtype=torch.float16
)

def generate_caption(image_url):
  raw_image = Image.open(requests.get(image_url, stream=True).raw).convert("RGB")
  w,h = raw_image.size
  display(raw_image.resize((w//5,h//5)))

  # prompt = "Question:What is in the image? Describe in detail. Answer:"
  # inputs = processor(images=raw_image, text=prompt, return_tensors="pt").to(device, torch.float16)
  inputs = processor(images=raw_image, return_tensors="pt").to(device, torch.float16)
  generated_ids = model.generate(**inputs, max_new_tokens=50)
  generated_text = processor.batch_decode(generated_ids, skip_special_tokens=True)[0].strip()
  print(generated_text)
注意として、Blip2Modelクラスはgenerate()メソッドに対応していないため、Blip2ForConditionalGenerationクラスを代わりに用いる。
モデルを読み込む際のメモリ使用量を削減する(量子化/quantization)ため、Blip2ForConditionalGenerationに直接load_in_8bit=Trueオプションを設定しようとすると下記の警告が出る。
load_in_8bit=Trueを設定するためには、ラッパークラスであるBitsAndBytesConfigを使用して設定する。
The `load_in_4bit` and `load_in_8bit` arguments are deprecated and will be removed in the future versions. Please, pass a `BitsAndBytesConfig` object in `quantization_config` argument instead.
下記のようにしてBitsAndBytesConfigをオプションとして渡す。
quantization_config = BitsAndBytesConfig(load_in_8bit=True)

model = Blip2ForConditionalGeneration.from_pretrained(
...
    quantization_config=quantization_config,
)
また、下記のパッケージが必要となるためあらかじめインストールしておく。bitsandbytesはaccelerateパッケージも必要とするため両方インストールする。
!pip install accelerate bitsandbytes
generate()メソッドを使用する場合、max_lengthまたはmax_new_tokensを設定しなければ下記のエラーが出る。
ValueError: Input length of input_ids is 0, but `max_length` is set to -41. This can lead to unexpected behavior. You should consider increasing `max_length` or, better yet, setting `max_new_tokens`.
推奨されている方のmax_new_tokenは以下のように設定する。
generated_ids = model.generate(**inputs, max_new_tokens=50)
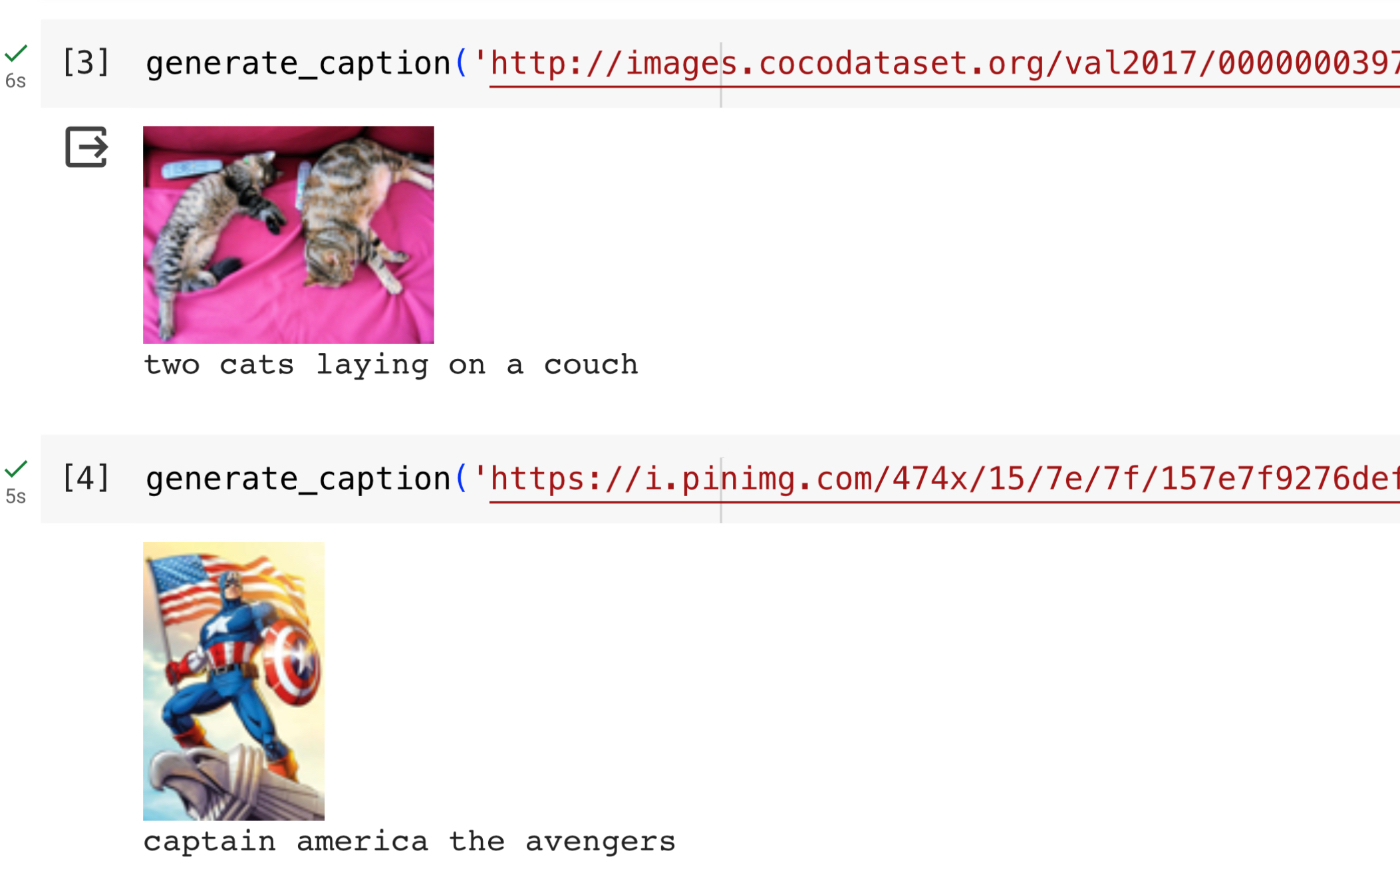
実行結果
以上を実行すれば下記のようにキャプションが生成される。
Discussion