SharePoint Framework を使ってメール送信フォームを作ってみる


はじめに
かなり以前の記事になりますが、SharePoint の Web パーツを使ってメール送信フォームを作ったことがありました。
今回はこの記事のアップデート版となります。現在の SharePoint 開発のスタンダードである SharePoint Framework を使って Web パーツを作成し、Microsoft Graph でメールを送るというものになります。
サンプル コード
実行手順
今回はフレームワークとして React を使用します。React を使用した場合、Office UI Fablic および PnP SPFx Controls が使えますので、開発生産性が格段に上がります。
SampleApplicationWebPart.ts
React を使った SharePoint Framework 開発の定番として、Component の props に context を渡すというのがあります。これをやっておかないと、Component 側で Microsoft Graph の呼び出しなど、いろいろなことができなくなってしまいます。テンプレートからプロジェクトを作ったときにはこのロジックは入っていませんので、はじめにやっておくようにします。
export default class SampleApplicationWebPart extends BaseClientSideWebPart<ISampleApplicationWebPartProps> {

  public render(): void {
    const element: React.ReactElement<IMailFormProps> = React.createElement(
      MailForm,
      {
        context: this.context,
      }
    );

    ReactDom.render(element, this.domElement);
  }

}
MailForm.tsx
PnP SPFx Controls には PeoplePicker という便利なコントロールが用意されているので宛先フィールドにはこれを利用します。それ以外は Office UI Fabric の TextField を使いました。入力された値は state に入れるようにします。送信ボタンがクリックされたときに、state の値を使って Microsoft Graph の sendMail メソッドを使ってメールを送るようにします。
import * as React from 'react';
import { MSGraphClient } from '@microsoft/sp-http';
import { IMailFormProps } from './IMailFormProps';
import { IMailFormState } from './IMailFormState';
import styles from './MailForm.module.scss';
import * as strings from 'SampleApplicationWebPartStrings';
import { PeoplePicker, PrincipalType } from '@pnp/spfx-controls-react/lib/PeoplePicker';
import { TextField } from 'office-ui-fabric-react/lib/TextField';
import { PrimaryButton } from 'office-ui-fabric-react/lib/Button';

export default class SampleApplication extends React.Component<IMailFormProps, IMailFormState> {

  constructor(props) {
    super(props);
    this.state = {
      to: [],
      subject: "",
      body: ""
    };
  }

  public render(): React.ReactElement<IMailFormProps> {
    return (
      <div className={styles.mailform}>
        <div className={styles.container}>
          <PeoplePicker
            context={this.props.context}
            titleText="宛先"
            personSelectionLimit={99}
            principalTypes={[PrincipalType.User]}
            selectedItems={value => this.setState({ to: value })} />
          <TextField
            label="件名"
            value={this.state.subject}
            onChanged={value => this.setState({ subject: value })} />
          <TextField
            label="本文"
            multiline
            rows={10}
            onChanged={value => this.setState({ body: value })} />
          <div className={styles.buttons}>
          <PrimaryButton
              text="送信"
              onClick={this._onSendButtonClick.bind(this)} />
          </div>
        </div>
      </div>
    );
  }

  private _onSendButtonClick(): void {
    this.props.context.msGraphClientFactory
      .getClient()
      .then((client: MSGraphClient) => {
        client.api('/me/sendMail').post(
          {
            message: {
              toRecipients: this.state.to.map(value => { return { emailAddress: { address: value.secondaryText } }; }),
              subject: this.state.subject,
              body: {
                content: this.state.body,
                contentType: 'text'
              }
            }
          },
          (error: any, response: any, rawResponse: any) => {
            if (error) {
              window.alert("メールを送信できませんでした。");
            } else {
              window.alert("メールを送信しました。");
            }
          });
      });
  }

}
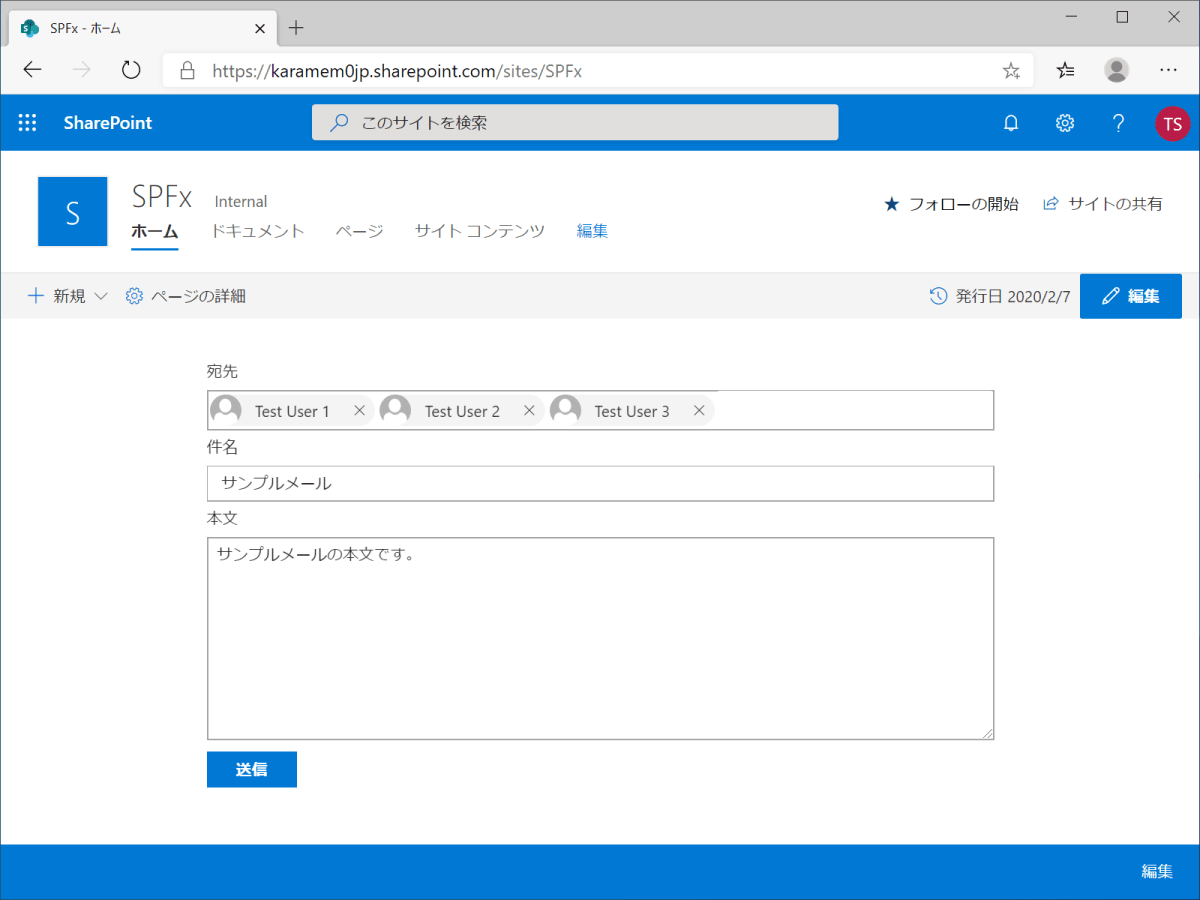
実行結果
実行してみます。モダン UI と調和性の取れたレイアウトで表示されているのがわかると思います。
Office UI Fablic と PnP SPFx Controls の恩恵を受けられるのは非常に大きいので、ぜひ React を使って SPFx 開発を楽しんでいただけたらと思います。
Discussion