Remixのチュートリアルをやっていく
ずっと興味があったRemixのチュートリアルをやっていく。Zennのスクラップ機能も初めて使うので楽しみ。
head内のMetaとLinksコンポーネントが設定されている。
    <html lang="en">
      <head>
        <meta charSet="utf-8" />
        <meta name="viewport" content="width=device-width, initial-scale=1" />
        <Meta />
        <Links />
      </head>
これでメタタグやリンクタグを管理するのか。
import { LinksFunction } from "@remix-run/node";
import appStylesHref from "./app.css?url";
export const links: LinksFunction = () => [
  { rel: "stylesheet", href: appStylesHref },
];
ここでの links は、スタイルシートのリンクタグを定義している。このリンクタグが Links コンポーネント内で動的に挿入されるのか。なんかすごいな。Meta タグも同様の方法でできるみたいだ。
import { LinksFunction, MetaFunction } from "@remix-run/node";
export const meta: MetaFunction = () => {
  return {
    title: "Remix Contacts",
    description: "Manage your contacts with Remix",
  };
};
面白いなぁ
というか
import appStylesHref from "./app.css?url";
このインポート方法を初めて見た。
?urlでインポートすることで、このファイルをURL文字列として扱うと。URLとしてインポートする。
ViteやWebpack、esbuild、Next.jsとかのビルドツールではサポートされてる記法とのこと。
知らなかった、、、。
メリットとしては、
- コード分割、遅延ローディングが容易になる
- ビルドプロセスでCSSファイルを最適化できる
など。
よく見られるこのような import は、
import '@/app/ui/global.css';
- CSSが直接バンドルに含まれる
- グローバルスタイルになる
- CSSがJSバンドルに含まれる
URLをimportするほうは
- CSSファイルへの参照(URL)が得られる
- 動的にローディングする
- CSSは別ファイルとして扱われる
routeを作っていく。まずなんだこのファイル名
mkdir app/routes
touch app/routes/contacts.\$contactId.tsx
-
.が/を意味する -
$が segment dynamic をつくる
つまり、
/contacts/123
/contacts/abc
のような動的なルーティングを作ると。
app/routes/contacts.$contactId.tsx
import { Form } from "@remix-run/react";
import type { FunctionComponent } from "react";

import type { ContactRecord } from "../data";

export default function Contact() {
  const contact = {
    first: "Your",
    last: "Name",
    avatar: "https://placekitten.com/200/200",
    twitter: "your_handle",
    notes: "Some notes",
    favorite: true,
  };

  return (
    <div id="contact">
      <div>
        <img
          alt={`${contact.first} ${contact.last} avatar`}
          key={contact.avatar}
          src={contact.avatar}
        />
      </div>

      <div>
        <h1>
          {contact.first || contact.last ? (
            <>
              {contact.first} {contact.last}
            </>
          ) : (
            <i>No Name</i>
          )}{" "}
          <Favorite contact={contact} />
        </h1>

        {contact.twitter ? (
          <p>
            <a
              href={`https://twitter.com/${contact.twitter}`}
            >
              {contact.twitter}
            </a>
          </p>
        ) : null}

        {contact.notes ? <p>{contact.notes}</p> : null}

        <div>
          <Form action="edit">
            <button type="submit">Edit</button>
          </Form>

          <Form
            action="destroy"
            method="post"
            onSubmit={(event) => {
              const response = confirm(
                "Please confirm you want to delete this record."
              );
              if (!response) {
                event.preventDefault();
              }
            }}
          >
            <button type="submit">Delete</button>
          </Form>
        </div>
      </div>
    </div>
  );
}

const Favorite: FunctionComponent<{
  contact: Pick<ContactRecord, "favorite">;
}> = ({ contact }) => {
  const favorite = contact.favorite;

  return (
    <Form method="post">
      <button
        aria-label={
          favorite
            ? "Remove from favorites"
            : "Add to favorites"
        }
        name="favorite"
        value={favorite ? "false" : "true"}
      >
        {favorite ? "★" : "☆"}
      </button>
    </Form>
  );
};
- アバター写真、名前、Twitterへのリンクなどを表示している
-
FormコンポーネントでEditやDeleteのアクションを実装している -
Favoriteというお気に入り機能のコンポーネントを実装している
Outletってなんだ。
Renders the matching child route of a parent route.
https://remix.run/docs/en/main/components/outlet
Since Remix is built on top of React Router, it supports nested routing. In order for child routes to render inside of parent layouts, we need to render an Outlet in the parent
ということらしい。
React Routerをそんなに使ったことがないのだけど、ひとまず親ルートコンポーネント内に子ルートのコンテンツが<Outlet />内に動的に表示される仕組みとのこと。
これでネストされたルーティング構造を実現できると。ほぇ〜
<Link>を使うことで、ページ全体のリロードを避け、クライアントサイドでURLを変更する。
Loading Data
// existing imports
import { json } from "@remix-run/node";

import {
  // ~
  useLoaderData,
} from "@remix-run/react";

// existing imports
import { getContacts } from "./data";

export const loader = async () => {
  const contacts = await getContacts();
  return json({ contacts });
};

export default function App() {
  const { contacts } = useLoaderData();
-
loader関数を export する- 関数の中では Remix の機能である
jsonメソッドを使ってデータを json 形式に変換している
- 関数の中では Remix の機能である
-
useLoaderData()でその loader 関数がゲットするデータを引っ張っているのかな
There are two APIs we'll be using to load data, loader and useLoaderData.
なるほど。
<typeof loader>をつけることで型情報を設定できる。これは便利かも。
const { contacts } = useLoaderData<typeof loader>()
loader関数は params を受け取れる。ここらへんは Next.js とかと同じ。
その params には
import type { LoaderFunctionArgs } from "@remix-run/node";
でimportしたLoaderFunctionArgsという型情報を付与できる。
export const loader = async ({ params }: LoaderFunctionArgs) => {
  invariant(params.contactId, "Missing contactId parameter");
  const contact = await getContact(params.contactId);
  if (!contact) {
    throw new Response("Not Found", { status: 404 });
  }
  return json({ contact });
};
invariant(params.contactId, "Missing contactId parameter");はtiny-invariantというライブラリを使っていて、条件が満たされていないときにエラーを投げる。この場合、params.contactIdが存在しないときにエラーを発生する。
  if (!contact) {
    throw new Response("Not Found", { status: 404 });
  }
でエラー処理をしている。
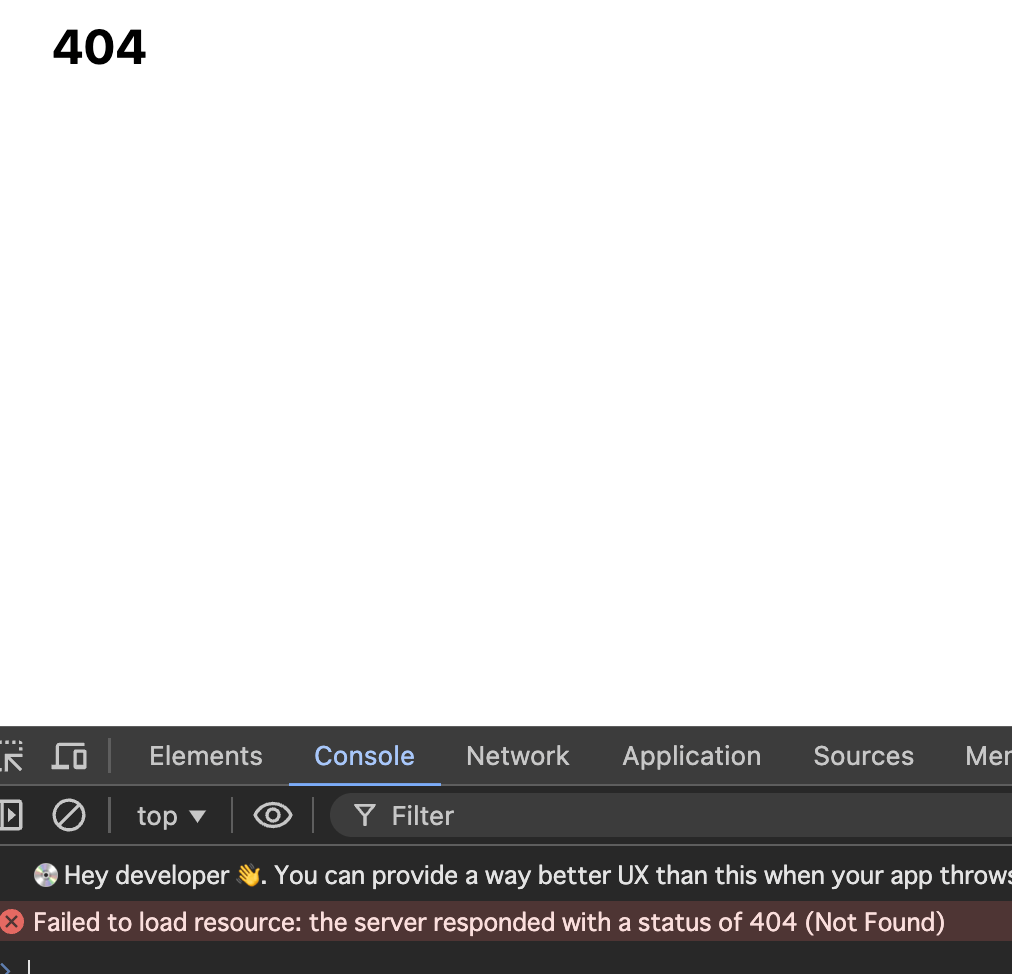
試しにhttp://localhost:XXXX/contacts/testという存在しないURLにリクエストを投げてみると、

しっかり404が返る。
Data mutations
フォームの送信処理をしたいときは、action関数を定義する。
export const action = async () => {
  const contact = await createEmptyContact();
  return json({ contact });
};
こうすることで、フォームが送信されたときのPOSTリクエストをRemixが感知して、action関数が呼び出される。
データを取得したいときはloader関数を定義するし、Remixって規約的なのかな。
Updating Data:Editページを作る
touch app/routes/contacts.\$contactId_.edit.tsx
いやすごいねこの書き方…。Railsから来てる自分からすると異文化だ。チュートリアルにも「weird」って表現しちゃってるやん。
これは結局
http://localhost:5173/contacts/sxfw4v4/edit
みたいなルーティングを動的に作る。
そして、action属性にeditが設定されているFormコンポーネントの箇所がクリックされたら、Remixが自動で/contacts/sxfw4v4/editといったURLへリダイレクトする。
<Form action="edit">
  <button type="submit">Edit</button>
</Form>
Note the weird _ in
contactId.tsx contactId_. By default, routes will automatically nest inside routes with the same prefixed name. Adding a trailing _ tells the route to not nest inside app/routes/contacts.
とあるので、試しに
app/routes/contacts.\$contactId.edit.tsx
と_を抜いてみると、Editボタンを押してもこのコンポーネントが表示されないことがわかった。
Github Copilotに聞いてみると、
contactId.tsxのコンポーネントが表示されず、直接$contactId_.edit.tsxのコンポーネントが表示されます。 contactId_の末尾にアンダースコア(_)を付けることで、ルートが自動的にネストされないようにすることができます。これにより、/contacts/:contactId/editにアクセスしたときに、contacts.tsxや
と返ってきた。わかったようなわかってないような。
FormData を使って Update する
先ほど作った Edit 系コンポーネントに action 関数を追加して、UPDATE 処理をする。
import type {
  ActionFunctionArgs,
  LoaderFunctionArgs,
} from "@remix-run/node";
import { json, redirect } from "@remix-run/node";
// existing imports

import { getContact, updateContact } from "../data";

export const action = async ({
  params,
  request,
}: ActionFunctionArgs) => {
  invariant(params.contactId, "Missing contactId param"); // パラメータをチェック
  const formData = await request.formData(); // ユーザーからのリクエスト内容を取得
  const updates = Object.fromEntries(formData); //
  await updateContact(params.contactId, updates);
  return redirect(`/contacts/${params.contactId}`);
};

// existing code
-
ActionFunctionArgsを import する -
redirectを import する -
updateContact関数を import する -
action関数を作る- Remix が自動で Form コンポーネント内の POST 処理を検知して、action 関数内の処理を実行する
formDataの中身を見てみる
console.log(formData);を追加して、中身を見てみる。
export const action = async ({
  params,
  request,
}: ActionFunctionArgs) => {
  invariant(params.contactId, "Missing contactId param");
  const formData = await request.formData();
  console.log(formData);
  const updates = Object.fromEntries(formData);
  await updateContact(params.contactId, updates);
  return redirect(`/contacts/${params.contactId}`);
}
こんな感じのデータが取れる。HTMLフォームから送信されたユーザーからのリクエスト内容だ。
FormData {
  first: 'BB',
  last: 'Anderson',
  twitter: '@ralex1993',
  avatar: 'https://sessionize.com/image/df38-400o400o2-JwbChVUj6V7DwZMc9vJEHc.jpg',
  notes: ''
}
updatesの中身を見てみる
const updates = Object.fromEntries(formData); の箇所。updatesには何が入っている?
同様にコンソールに表示してみる。
{
  first: 'AA',
  last: 'Anderson',
  twitter: '@ralex1993',
  avatar: 'https://sessionize.com/image/df38-400o400o2-JwbChVUj6V7DwZMc9vJEHc.jpg',
  notes: ''
}
JavaScriptのオブジェクトリテラルが返っている。
formDataをオブジェクトに変換する。
Object.fronEntriesを使い、formData のキーとバリューをJSのオブジェクトにしている。
そしてupdateContactをして、最後にredirectをしていると。
Active Link Styling
サイドバーでユーザーの名前をクリックしても、自分がどのユーザーを見ているのかわかりづらい。そこで、NavLink コンポーネントを使ってスタイルを動的に付与する。
// existing imports
import {
  Form,
  Links,
  Meta,
  NavLink,
  Outlet,
  Scripts,
  ScrollRestoration,
  useLoaderData,
} from "@remix-run/react";

// existing imports and exports

export default function App() {
  const { contacts } = useLoaderData<typeof loader>();

  return (
    <html lang="en">
      {/* existing elements */}
      <body>
        <div id="sidebar">
          {/* existing elements */}
          <ul>
            {contacts.map((contact) => (
              <li key={contact.id}>
                <NavLink
                  className={({ isActive, isPending }) =>
                    isActive
                      ? "active"
                      : isPending
                      ? "pending"
                      : ""
                  }
                  to={`contacts/${contact.id}`}
                >
                  {/* existing elements */}
                </NavLink>
              </li>
            ))}
          </ul>
          {/* existing elements */}
        </div>
        {/* existing elements */}
      </body>
    </html>
  );
}
to={contacts/${contact.id}}に設定しているリンクにマッチしたURLにユーザーがいる場合、isActiveはtrueを返す。
データがペンディングのときはisPendingがtrueになる。
これでユーザーがどのURLにいるのかわかる。そしてデータがまだペンディングだとしても、リンクがクリックされたらすぐにユーザーへフィードバックすることができる。
これは便利!
Global Pending UI
// existing imports
import {
  Form,
  Links,
  Meta,
  NavLink,
  Outlet,
  Scripts,
  ScrollRestoration,
  useLoaderData,
  useNavigation,
} from "@remix-run/react";

// existing imports & exports

export default function App() {
  const { contacts } = useLoaderData<typeof loader>();
  const navigation = useNavigation();

  return (
    <html lang="en">
      {/* existing elements */}
      <body>
        {/* existing elements */}
        <div
          className={
            navigation.state === "loading" ? "loading" : ""
          }
          id="detail"
        >
          <Outlet />
        </div>
        {/* existing elements */}
      </body>
    </html>
  );
}
ペンディング中のデザインをつけたいとき。
useNavigationを使って上記のように書ける。
useNavigationは現在のナビゲーションの状態を返す。次のうちどれかになる。
idleloadingsubmitting
それぞれの状態の細かい違いは https://remix.run/docs/en/main/hooks/use-navigation に記載がある。
レコードを削除する
touch app/routes/contacts.\$contactId.destroy.tsx
というファイルを作る。
import type { ActionFunctionArgs } from "@remix-run/node";
import { redirect } from "@remix-run/node";
import invariant from "tiny-invariant";
import { deleteContact } from "~/data";

export const action = async ({ params }: ActionFunctionArgs) => {
  invariant(params.contactId, "Missing contactId param");
  await deleteContact(params.contactId);
  return redirect("/");
}
app/routes/contacts.$contactId.tsxにある、action='destroy'が書かれている場所がポイント。ここからdestroyアクションを持つフォームが送信され、POSTリクエストが上記ファイルに送られる。
          <Form
            action="destroy"
            method="post"
            onSubmit={(event) => {
              const response = confirm(
                "Please confirm you want to delete this record."
              );
              if (!response) {
                event.preventDefault();
              }
            }}
          >
- そして
actionが発火する -
destoryアクションを含むFormコンポーネントを用意して、別ファイルを~.destoryみたいなファイル名にする -
action用意して、中身に削除処理を書く。
最後の redirects が終わったあと、Remix はページ上のすべてのloader関数を呼び出し、最新の値を取得する。この挙動を revalidation と呼ぶ。
具体的には、useLoaderDataがそれをやってくれる。
つまるところ、開発者がやることはFormコンポーネントとaction関数を定義することだけで、あとはRemixがやってくれると。
Index Routes
app/routes/_index.tsxというファイルを追加することで、これがrootのトップレベルにアクセスしたときに表示されるデフォルトのページになる。
touch app/routes/_index.tsx
-
app/root.tsx→ アプリケーション全体のルートコンポーネント。全体のレイアウトや、グローバルな設定を管理する。全ページで共通する要素を含めるファイル -
app/routes/_index.tsx→ 特定の親ルートのインデックスページとして機能する。親ルートに他の子ルートがない場合に表示される。/にアクセスしたときに表示されるコンテンツを定義するためのファイル
Cancel button
useNavigateを使ってキャンセル処理を実装する。
// existing imports
import {
  Form,
  useLoaderData,
  useNavigate,
} from "@remix-run/react";
// existing imports & exports

export default function EditContact() {
  const { contact } = useLoaderData<typeof loader>();
  const navigate = useNavigate();

  return (
    <Form key={contact.id} id="contact-form" method="post">
      {/* existing elements */}
      <p>
        <button type="submit">Save</button>
        <button onClick={() => navigate(-1)} type="button">
          Cancel
        </button>
      </p>
    </Form>
  );
}
<button onClick={() => navigate(-1)} type="button">と書くことで、ブラウザ履歴の1つ前のエントリーに戻ることができる。
URLSearchParams and GET Submissions
検索フォームから人名を探す機能の実装。
import type {
  LinksFunction,
  LoaderFunctionArgs,
} from "@remix-run/node";

// existing imports & exports

export const loader = async ({
  request,
}: LoaderFunctionArgs) => {
  const url = new URL(request.url);
  const q = url.searchParams.get("q");
  const contacts = await getContacts(q);
  return json({ contacts });
};

// existing code
-
loader関数はrequestオブジェクトを通じてパラメータにアクセスできる - これはPOSTではなくGETなので、
loader関数が呼ばれる- つまり、GET FormをSubmitするということは、リンクをクリックするのと同じ
Search Form
            <Form id="search-form" role="search">
              <input
                id="q"
                aria-label="Search contacts"
                placeholder="Search"
                type="search"
                name="q"
              />
              <div id="search-spinner" aria-hidden hidden={true} />
            </Form>
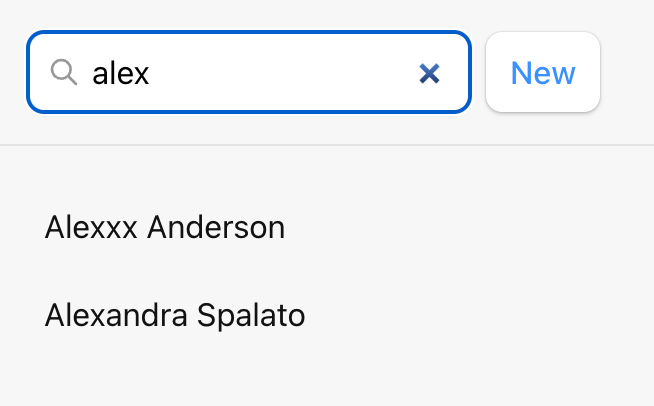
const url = new URL(request.url)のurlはこんなオブジェクト。
URL {
  href: 'http://localhost:5173/?q=alex',
  origin: 'http://localhost:5173',
  protocol: 'http:',
  username: '',
  password: '',
  host: 'localhost:5173',
  hostname: 'localhost',
  port: '5173',
  pathname: '/',
  search: '?q=alex',
  searchParams: URLSearchParams { 'q' => 'alex' },
  hash: ''
}
今回の場合、const query = url.searchParams.get("q")のquery→alexになる。

Synchronizing URLs to Form State
ここまでチュートリアルをやっていると、以下の2つのUXのIssuesがある。
- 1、サーチ後にバックボタンを押すと、フォームのフィールドにはまだ値(クエリ)が存在するが、リストはフィルターされる前の状態に戻る
- 2、サーチ後にページをリフレッシュすると、フォームのフィールドから値はなくなるが、リストはフィルターされたままの状態になっている
つまり、URLとインプットの状態が同期されていない。
2のほうから解決していく。
サーチ後にページをリフレッシュすると、フォームのフィールドから値はなくなるが、リストはフィルターされたままの状態になっている
// existing imports & exports

export const loader = async ({
  request,
}: LoaderFunctionArgs) => {
  const url = new URL(request.url);
  const q = url.searchParams.get("q");
  const contacts = await getContacts(q);
  return json({ contacts, q }); // 返すJSONにqも含める
};

export default function App() {
  const { contacts, q } = useLoaderData<typeof loader>(); // qを受け取る
  const navigation = useNavigation();

  return (
    <html lang="en">
      {/* existing elements */}
      <body>
        <div id="sidebar">
          {/* existing elements */}
          <div>
            <Form id="search-form" role="search">
              <input
                aria-label="Search contacts"
                defaultValue={q || ""} // 受け取ったqをデフォルト値として設定しておく
                id="q"
                name="q"
                placeholder="Search"
                type="search"
              />
              {/* existing elements */}
            </Form>
            {/* existing elements */}
          </div>
          {/* existing elements */}
        </div>
        {/* existing elements */}
      </body>
    </html>
  );
}
サーチ後にバックボタンを押すと、フォームのフィールドにはまだ値(クエリ)が存在するが、リストはフィルターされる前の状態に戻る
// existing imports
import { useEffect } from "react";

// existing imports & exports

export default function App() {
  const { contacts, q } = useLoaderData<typeof loader>();
  const navigation = useNavigation();

  // 追加
  useEffect(() => {
    // inputのidにはqが指定されているので取得する
    const searchField = document.getElementById("q");

    // searchField 変数が HTMLInputElement のインスタンスであるかどうかをチェックしている
    if (searchField instanceof HTMLInputElement) {
      searchField.value = q || "";
    }
  }, [q]);

  // existing code
}
こうすることで、サーチ後にバックボタンを押すとインプットからクエリが削除され、リストもフィルターされずもとに戻る。
Submitting Form's onChange
ユーザーが検索フォームを1文字ずつタイプするたびに検索をする、よくあるやつを実装する。
// existing imports
import {
  Form,
  Links,
  Meta,
  NavLink,
  Outlet,
  Scripts,
  ScrollRestoration,
  useLoaderData,
  useNavigation,
  useSubmit, // 追加
} from "@remix-run/react";
// existing imports & exports

export default function App() {
  const { contacts, q } = useLoaderData<typeof loader>();
  const navigation = useNavigation();
  const submit = useSubmit(); // 追加

  // existing code

  return (
    <html lang="en">
      {/* existing elements */}
      <body>
        <div id="sidebar">
          {/* existing elements */}
          <div>
            <Form
              id="search-form"
              onChange={(event) =>
                submit(event.currentTarget)
              } // 追加
              role="search"
            >
              {/* existing elements */}
            </Form>
            {/* existing elements */}
          </div>
          {/* existing elements */}
        </div>
        {/* existing elements */}
      </body>
    </html>
  );
}
useSubmitを使っている。これで form が自動でSubmitされていく。
Adding search spinner
// existing imports & exports

export default function App() {
  const { contacts, q } = useLoaderData<typeof loader>();
  const navigation = useNavigation();
  const submit = useSubmit();

  <!-- 追加 -->
  const searching =
    navigation.location &&
    new URLSearchParams(navigation.location.search).has(
      "q"
    );

  // existing code
}
Managing the History Stack
現状だと一文字タイプするごとにsubmitsされるため、無駄な履歴がhistory stackに残ってしまう。
submitフックにreplace
            <Form
              id="search-form"
              role="search"
              onChange={(event) => {
                const isFirstSearch = q === null;
                submit(event.currentTarget, {
                  replace: !isFirstSearch,
                });
qがnullならtrueが返り、そうでないならfalseが返る。
Forms without navigation
loader,actionが呼ばれた後にURLを変えたくない場合、Remixが提供するuseFetcherフックが使える。
const Favorite: FunctionComponent<{
  contact: Pick<ContactRecord, "favorite">;
}> = ({ contact }) => {
  const favorite = contact.favorite;
  const fetcher = useFetcher();

  return (
    <fetcher.Form method="post">
      <button
        aria-label={
          favorite
            ? "Remove from favorites"
            : "Add to favorites"
        }
        name="favorite"
        value={favorite ? "false" : "true"}
      >
        {favorite ? "★" : "☆"}
      </button>
    </fetcher.Form>
  );
};
fetcher.Formと書くことでそれが実現できる。
Our new <fetcher.Form method="post"> works almost exactly like the <Form> we've been using: it calls the action and then all data is revalidated automatically — even your errors will be caught the same way.
There is one key difference though, it's not a navigation, so the URL doesn't change and the history stack is unaffected.
Optimistic UI
現状では、星マークを押すと一瞬遅く星が反映される。チュートリアルなのでわざとレイテンシを高くしている。
これを改善するため、fetcherを使ってfavoriteのステート変化をすぐにユーザーへフィードバックする。裏ではactionが動いてて、まだ終わってない状態でもそれを実現する。いわゆるOptimistic UIだ。
const Favorite: FunctionComponent<{
  contact: Pick<ContactRecord, "favorite">;
}> = ({ contact }) => {
  const fetcher = useFetcher();
  const favorite = fetcher.formData ? fetcher.formData.get("favorite") === "true" : contact.favorite;
ユーザーがPOSTしたとき(星マークをクリックしたとき)、ユーザーが送信したデータがformDataへ格納されている。
それをRemixが提供するfetcherでアクセスできて、fetcher.formData.get("favorite") === "true"のときにtrueが返る。
fetcher.formDataがなければfalseが返り、既存データ(contact.favorite)が返る。
地味にボリュームたっぷりなチュートリアルだった。自分はNext.jsはブログを作ったくらいで比較はあまりできないけど、ZennやSNSを見ていると最近はRemixのほうが勢いがある気がする。
チュートリアルをやった限りでは状態管理をあまり意識しなくて良さそうなのはいい感じ。普通のWebアプリケーションの規模になるとどうなるのか気になった。
普段はRailsやReactを触っているので、こういった新しいフレームワークを触ると新しい刺激があって楽しい。