Cloudflare へ外部証明書の組み込み手順 (Custom SSL)
前回Cloudflareの4つの証明書のまとめ記事をアップロードしたところ、同僚から"Keyless SSL"もあるよ!と指摘を受け動作検証中ですがその前に、外部で作成した証明書をCloudflareに組み込むCustom SSL試しました。
Cloudflareでは基本自動でDV証明書を作成してくれます(設定によりデフォルトはUniversal、より高度な制御が可能なのがAdvanced)が、より認証が高いOVやEV証明書を使いたい際に用いる機能です。
Custom証明書はUniversalやCustomと異なり自動更新されない点は運用上の注意点です。
やってみる
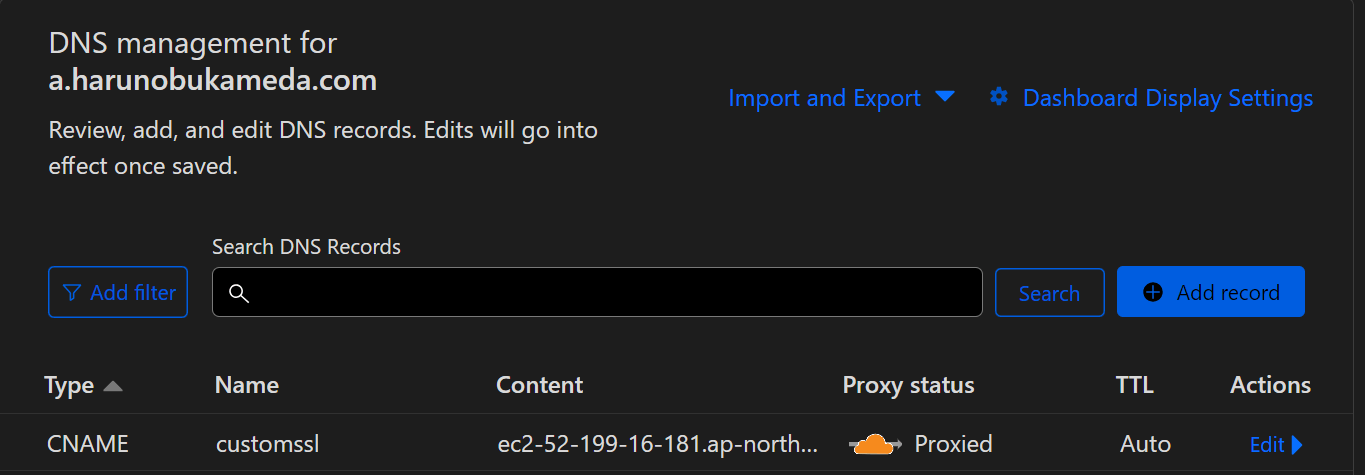
では早速やっていきます。オリジンはEC2を用います。まずは何でも良いのでいつも通りDNS ProxyモードでCDNをセットアップします。


この設定の場合、customssl.a.harunobukameda.comへのアクセスがCloudflareが発行したUniversal証明書により保護されていることがわかります。CloudflareからオリジンEC2へのアクセスはSSL化されていません。
用いられている証明書は以下になります。

ではここにCustom SSL組み込む電子証明書を作っていきます。認証局はLet's Encryptを用いますが、ここで使っているEC2を作業環境として流用いたします。
ツールはcertbotを用います。
まず以下の手順でAmazon Linux2023にインストールします。
sudo dnf install -y augeas-libs
sudo python3 -m venv /opt/certbot/
sudo /opt/certbot/bin/pip install --upgrade pip
sudo /opt/certbot/bin/pip install certbot
注意:AWSの手順書にあるamazon-linux-extras installはAmazon Linux 2023では利用できないため、dnfでインストールしています。
その後以下の手順で証明書を発行します。
cd /opt/certbot/bin/
sudo ./certbot certonly -d certssl.a.harunobukameda.com
そうすると以下の内容が出てきます。
Saving debug log to /var/log/letsencrypt/letsencrypt.log

How would you like to authenticate with the ACME CA?
- - - - - - - - - - - - - - - - - - - - - - - - - - - - - - - - - - - - - - - -
1: Runs an HTTP server locally which serves the necessary validation files under
the /.well-known/acme-challenge/ request path. Suitable if there is no HTTP
server already running. HTTP challenge only (wildcards not supported).
(standalone)
2: Saves the necessary validation files to a .well-known/acme-challenge/
directory within the nominated webroot path. A seperate HTTP server must be
running and serving files from the webroot path. HTTP challenge only (wildcards
not supported). (webroot)
- - - - - - - - - - - - - - - - - - - - - - - - - - - - - - - - - - - - - - - -
Select the appropriate number [1-2] then [enter] (press 'c' to cancel):
certbotでは証明書を発行する際にドメイン名の認証が必要となります。(DVモデル)この際デフォルトでは認証情報を含んだHTTPサーバを要求しますが、それ専用にHTTPサーバを準備するのは手間です。このためDNS認証モードで証明書を発行します。(一度cを押してコマンドを停止します)
--preferred-challenges dnsオプションを付けて再度コマンドを実行します。
sudo ./certbot certonly --manual -d customssl.a.harunobukameda.com --preferred-challenges dns
以下のようにEmail Addressが求められますので入力しEnterを押します。
Saving debug log to /var/log/letsencrypt/letsencrypt.log
Enter email address (used for urgent renewal and security notices)
規約への同意が求められますのでYを入力します。
- - - - - - - - - - - - - - - - - - - - - - - - - - - - - - - - - - - - - - - -
Please read the Terms of Service at
https://letsencrypt.org/documents/LE-SA-v1.3-September-21-2022.pdf. You must
agree in order to register with the ACME server. Do you agree?
- - - - - - - - - - - - - - - - - - - - - - - - - - - - - - - - - - - - - - - -
- - - - - - - - - - - - - - - - - - - - - - - - - - - - - - - - - - - - - - - -
Would you be willing, once your first certificate is successfully issued, to
share your email address with the Electronic Frontier Foundation, a founding
partner of the Let's Encrypt project and the non-profit organization that
develops Certbot? We'd like to send you email about our work encrypting the web,
EFF news, campaigns, and ways to support digital freedom.
- - - - - - - - - - - - - - - - - - - - - - - - - - - - - - - - - - - - - - - -
以下のようなメッセージが表示されます。
Please deploy a DNS TXT record under the name:
_acme-challenge.customssl.a.harunobukameda.com.
with the following value:
dN3tkX_dkl6bYEFRvqqvRvL1vM7d6QDAeIaL-lWowOk
画面をそのままにしてCloudflareのDNS設定画面を開きます。

Add recordを押します。

先ほど表示された内容を以下のように入力しSaveを押します。
Certbotが表示したものは_acme-challenge.customssl.a.harunobukameda.com.と一番最後に.がついていますが入力時には削除してください。
TXTレコードの登録が完了したら、certbot画面に戻りEnterを押します。
登録が問題なければ以下の通り表示されます。
Successfully received certificate.
Certificate is saved at: /etc/letsencrypt/live/customssl.a.harunobukameda.com/fullchain.pem
Key is saved at:         /etc/letsencrypt/live/customssl.a.harunobukameda.com/privkey.pem
This certificate expires on 2023-11-15.
These files will be updated when the certificate renews.
エラーが出ている場合TXTレコードの登録ミスが疑われますので確認してください。
/etc/letsencrypt/live/customssl.a.harunobukameda.com/fullchain.pemが証明書、/etc/letsencrypt/live/customssl.a.harunobukameda.com/privkey.pemが鍵です。
証明書の組み込み
それではできた証明書をCloudflareに組み込んでいきます。
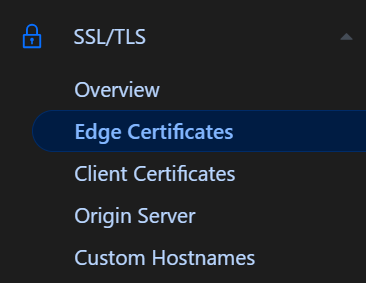
マネージメントコンソールの左ペインからSSL/TLS→Edge Certificatesをクリックします。

Upload Custom SSL Certificateを押します。


ここに先ほど作成された証明書ファイルの中身をコピペします。fullchain.pemには発行された証明書だけではなく、証明書を発行している認証局の情報も含まれるため、複数の証明書が一つのファイルにはいっています。-----BEGIN CERTIFICATE-----と-----END CERTIFICATE-----で囲まれたブロックが複数回ありますが、1個目のブロックが今回発行された証明書です。-----BEGIN CERTIFICATE-----と-----END CERTIFICATE-----を含んだ情報をコピペします。
貼り付けた情報が崩れてなければ以下の様なメッセージが表示されます。

同様に鍵の内容もコピぺしUpload Custom Certificateのボタンを押します。

以下の通り証明書ができていれば完了です。

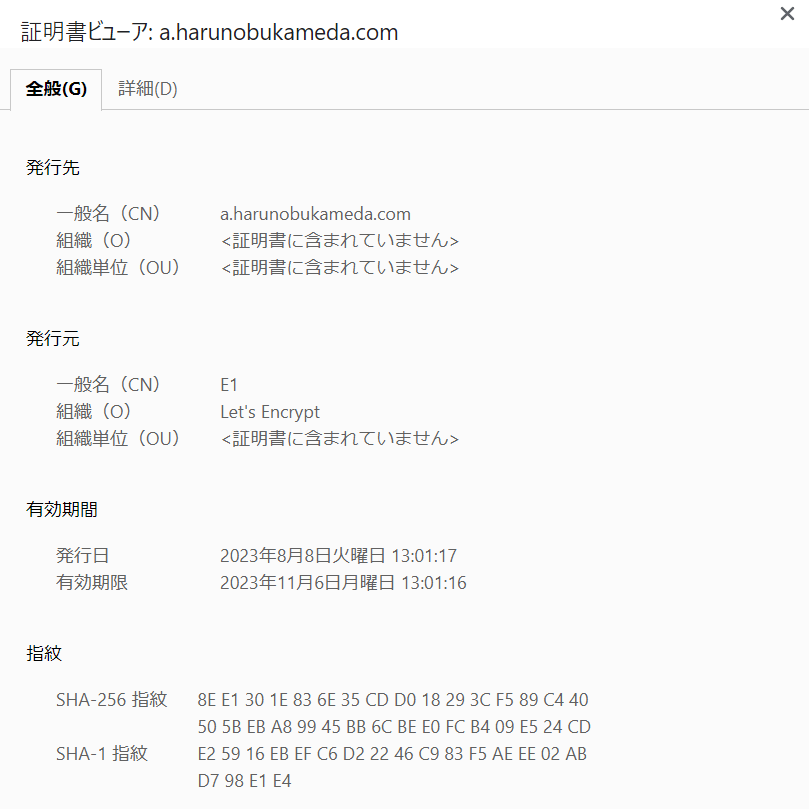
サイトに再度アクセスし利用されているSSL証明書を確認すると認証局がLet's Encryptに代わっているのがわかります。

Discussion