【Flutter】custom_lintを使ったパッケージを作ってみた
はじめに
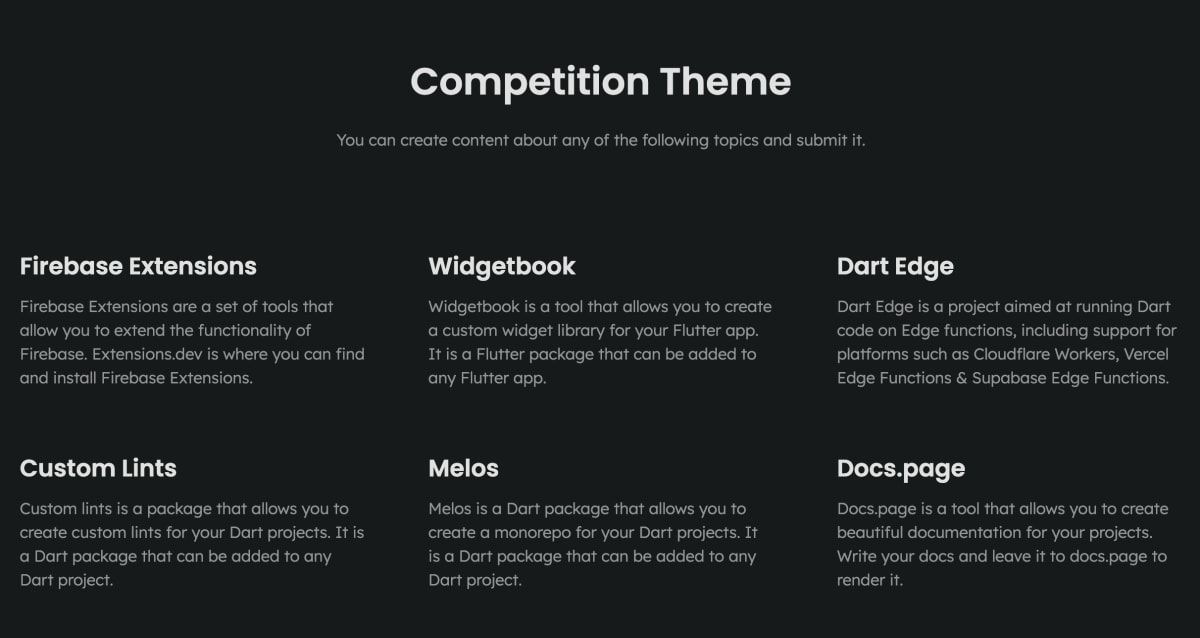
現在FlutterFireなどで有名なInvertaseがContent Creation Competition 2023というコンペを開催しています。
コンペに参加するには文書、動画、音声いずれかのコンテンツを作って5/24までに応募すればOKです。
https://twitter.com/invertaseio/status/1650532933210439681?s=20
コンペはInvertaseが関わってる以下のOSSに題材にすれば良いみたいです。
今回Custom Lintsを使ったパッケージをコンペ向けに作ってみたので、この記事では作成したパッケージについて紹介します。
作成したパッケージの紹介
Material DesignのCommon buttonsを使いやすくするmaterial_button_assistというパッケージを作成しました。
https://pub.dev/packages/material_button_assist
Common buttonsというのは以下の5つのボタンです。

Flutterの場合以下のようなコードになります。
ElevatedButton(
onPressed: () {},
child: const Text('Hello World!'),
),
FilledButton(
onPressed: () {},
child: const Text('Hello World!'),
),
FilledButton.tonal(
onPressed: () {},
child: const Text('Hello World!'),
),
OutlinedButton(
onPressed: () {},
child: const Text('Hello World!'),
),
TextButton(
onPressed: () {},
child: const Text('Hello World!'),
),
```text
アイコンがある場合はこうです。
```dart:アイコン有り
ElevatedButton.icon(
onPressed: () {},
label: const Text('Hello World!'),
icon: const Icon(Icons.abc),
),
FilledButton.icon(
onPressed: () {},
label: const Text('Hello World!'),
icon: const Icon(Icons.abc),
),
FilledButton.tonalIcon(
onPressed: () {},
label: const Text('Hello World!'),
icon: const Icon(Icons.abc),
),
OutlinedButton.icon(
onPressed: () {},
label: const Text('Hello World!'),
icon: const Icon(Icons.abc),
),
TextButton.icon(
onPressed: () {},
label: const Text('Hello World!'),
icon: const Icon(Icons.abc),
),
```text
今回作ったパッケージは、自分が感じた以下の課題感を解決するものです。
- ボタン名前を忘れがち
- Filled tonal buttonだけ書き方が違う
- iconの有無で、引数名がchildかlabelか変わる
### material_button_assistの提供するアシスト
material_button_assistは、先程述べた課題を解決する3つのアシストを提供します。
#### Convert to other button
Common buttonsのいずれかのボタンを他のボタンに変換するアシストです。
VS CodeならボタンWidgetのカーソルが合った状態でCommand + .を押すとConvert to 〇〇Buttonという項目が表示され変換できます。
このアシストを使うことで、5つのボタン名をうろ覚えでも選べるようになるほか、Filled tonal buttonの書き方の違いにも柔軟に対応できます。

#### Add icon
ボタンをアイコン有りに変換します。
変換時にchildをlabelに変換し、iconがない場合は仮の値を設定します。

#### Remove icon
Add iconの逆の変換です。

## material_button_assistのようなパッケージの作り方
custom_lintを使って独自のアシストを作るにはcustom_lint_builderパッケージを使います。custom_lintが利用側のパッケージ、custom_lint_builderが作成側のパッケージといった感じです。
<https://pub.dev/packages/custom_lint_builder>
使い方の説明はcustom_lint_builderではなく、custom_lintのReadmeに書いてあります。
<https://pub.dev/packages/custom_lint#creating-a-custom-lint-package>
### Lintルールとアシスト
custom_lintは大雑把に説明するとLintルールとアシストの2種類を機能を提供します。
Lintルールは好ましくない実装に警告を出して、実装次第でQuick Fixを提供する機能です。

アシストはコードの選択箇所に対してリファクタリングを提供する機能です。
今回使うのはアシストの方です。
### custom_lint_builderの始め方
custom_lintのReadmeに書いてあるように、以下の手順でcustom_lint_builderを使えます。
パッケージのpubspec.yamlにanalyzerとcustom_lint_builderの依存を追加します。
```yaml:pubspec.yaml
dependencies:
analyzer:
custom_lint_builder:
```text
lib直下のパッケージ名.dartにエントリーポイントを定義します。
material_button_assistの場合は以下のように書きました。
```dart:lib/material_button_assist.dart
library material_button_assist;
import 'package:custom_lint_builder/custom_lint_builder.dart';
import 'package:material_button_assist/src/assists/add_icon.dart';
import 'package:material_button_assist/src/assists/convert_to_other_button.dart';
import 'package:material_button_assist/src/assists/utils.dart';
import 'package:material_button_assist/src/assists/remove_icon.dart';
// エントリーポイント
PluginBase createPlugin() => _MaterialButtonAssist();
class _MaterialButtonAssist extends PluginBase {
// Lintルールは今回なし
List<LintRule> getLintRules(CustomLintConfigs configs) => const [];
// アシストの定義
List<Assist> getAssists() => [
...MaterialButtonType.values
.map((buttonType) => ConvertToOtherButton(targetType: buttonType))
.toList(),
AddIcon(),
RemoveIcon(),
];
}
```text
### custom_lint_builderの動作確認
動作確認には適当なFlutterプロジェクトを作るのが早いです。
以下のexampleディレクトリは具体例です。
<https://github.com/K9i-0/material_widget_lint/tree/main/packages/material_button_assist/example>
pubspec.yamlとanalysis_options.yamlに作成したパッケージを使うための記述をします。
```yaml:example/pubspec.yaml
dev_dependencies:
custom_lint: ^0.3.4
material_button_assist:
path: ../
```text
analysis_options.yamlは忘れがちなので、気をつけましょう。
```yaml:example/analysis_options.yaml
analyzer:
plugins:
- custom_lint
```text
この状態でFlutterプロジェクト開くとcustom_lint.logというファイルが生成されます。
そこにDart VMのURIが吐かされるので最新のものを探しましょう。
今回なら `http://127.0.0.1:49685/nL2dLv6Kh6U=/` です
```text:example/custom_lint.log
The Dart VM service is listening on http://127.0.0.1:49685/nL2dLv6Kh6U=/
The Dart DevTools debugger and profiler is available at: http://127.0.0.1:49685/nL2dLv6Kh6U=/devtools/#/?uri=ws%3A%2F%2F127.0.0.1%3A49685%2FnL2dLv6Kh6U%3D%2Fws
```text
VS Codeの場合CommandパレットでDebug: Attach to Dart Processを探して、先程のURIを入力しましょう。
こうすることでブレークポイントでのデバックが出来るようになります。
ちなみにブレークポイントの動作が安定しないときがあるので、Reload Windowすると直る傾向にありました👀

### custom_lint_builderの書き方
具体的なLintルールやアシストの実装はriverpod_lintを参考にするのがおすすめです。
現状riverpod_lintが一番実装が充実していると思います。
<https://github.com/rrousselGit/riverpod/tree/master/packages/riverpod_lint>
以下はmaterial_button_assistのConvert to other buttonの実装を、コメント形式で解説したものです。
このような実装をすることで、gifで紹介したアシストが実現できます。
```dart:convert_to_other_button.dart
import 'package:analyzer/source/source_range.dart';
import 'package:custom_lint_builder/custom_lint_builder.dart';
import 'package:material_button_assist/src/assists/utils.dart';
// DartAssistを継承したクラスを定義
class ConvertToOtherButton extends DartAssist {
ConvertToOtherButton({
required this.targetType,
});
// 変換先のボタン(5種類のいずれか)
final MaterialButtonType targetType;
// 変換元のボタン
late final baseType = getBaseType(
exclude: targetType,
);
// runをoverrideする
void run(
CustomLintResolver resolver,
ChangeReporter reporter,
CustomLintContext context,
SourceRange target,
) {
context.registry.addInstanceCreationExpression((node) {
if (!target.intersects(node.constructorName.sourceRange)) return;
// カーソルがあたってるのが変換対象のボタンか判定
final createdType = node.constructorName.type.type;
if (createdType == null || !baseType.isExactlyType(createdType)) {
return;
}
// iconやtonalの部分
final simpleIdentifier = node.constructorName.name;
final isFilledButton = filledButtonType.isExactlyType(createdType);
final supportedIdentifier = getSupportedIdentifier(simpleIdentifier);
// Filledはtonalとそうでない2種があるので特別扱い
if (isFilledButton) {
if (supportedIdentifier.isTonal) {
if (targetType == MaterialButtonType.filledTonal) return;
} else {
if (targetType == MaterialButtonType.filled) return;
}
}
// IDEに表示するメッセージや優先度を登録
final changeBuilder = reporter.createChangeBuilder(
message: 'Convert to ${targetType.buttonName}',
priority: targetType.priority,
);
// 変換時の処理を登録
changeBuilder.addDartFileEdit(
(builder) {
// ボタン名を新しいものに置き換える変換
builder.addSimpleReplacement(
node.constructorName.sourceRange,
targetType.className +
_getReplacementIdentifier(supportedIdentifier, targetType),
);
},
);
});
}
String _getReplacementIdentifier(
SupportedIdentifier? identifier, MaterialButtonType targetType) {
if (identifier.hasIcon) {
if (targetType == MaterialButtonType.filledTonal) {
return '.tonalIcon';
} else {
return '.icon';
}
} else {
if (targetType == MaterialButtonType.filledTonal) {
return '.tonal';
} else {
return '';
}
}
}
}
まとめ
custom_lintを使ったmaterial_button_assistパッケージを作った話でした。
パッケージが気になった方はぜひ使ってみてください。
https://pub.dev/packages/material_button_assist
また、material_button_assistのソースコードは以下のリポジトリで管理しています。気に入った方はスターしてもらえると嬉しいです。
https://github.com/K9i-0/material_widget_lint/tree/main/packages/material_button_assist
Discussion