Selenium+Selenium IDEでちゃちゃっとブラウザを自動操作する[Docker・Python]
Seleniumはプログラムからブラウザを自動操作するためのツールです。Seleniumが用意しているWebDriverを各言語(Python, Ruby, JavaScriptなど)から呼び出し利用します。主にフロントエンドのテストやクローリング・スクレイピングなどに使われます。この記事では、SeleniumをPythonベースで動かす環境をDockerで作成する方法と、Seleniumを動かすPythonプログラムをSelenium IDEをつかって自動生成する方法を解説します。
Selenium IDEを使って自動操作コードを出力
Selenium IDEとはブラウザの拡張として(Chrome・Firefoxで)提供され、ブラウザ上で行った操作の記録・再生やSeleniumドライバを動かすコードとして出力できるツールです。今回はChromeのSelenium IDE(https://chrome.google.com/webstore/detail/selenium-ide/mooikfkahbdckldjjndioackbalphokd?hl=ja)を使います。
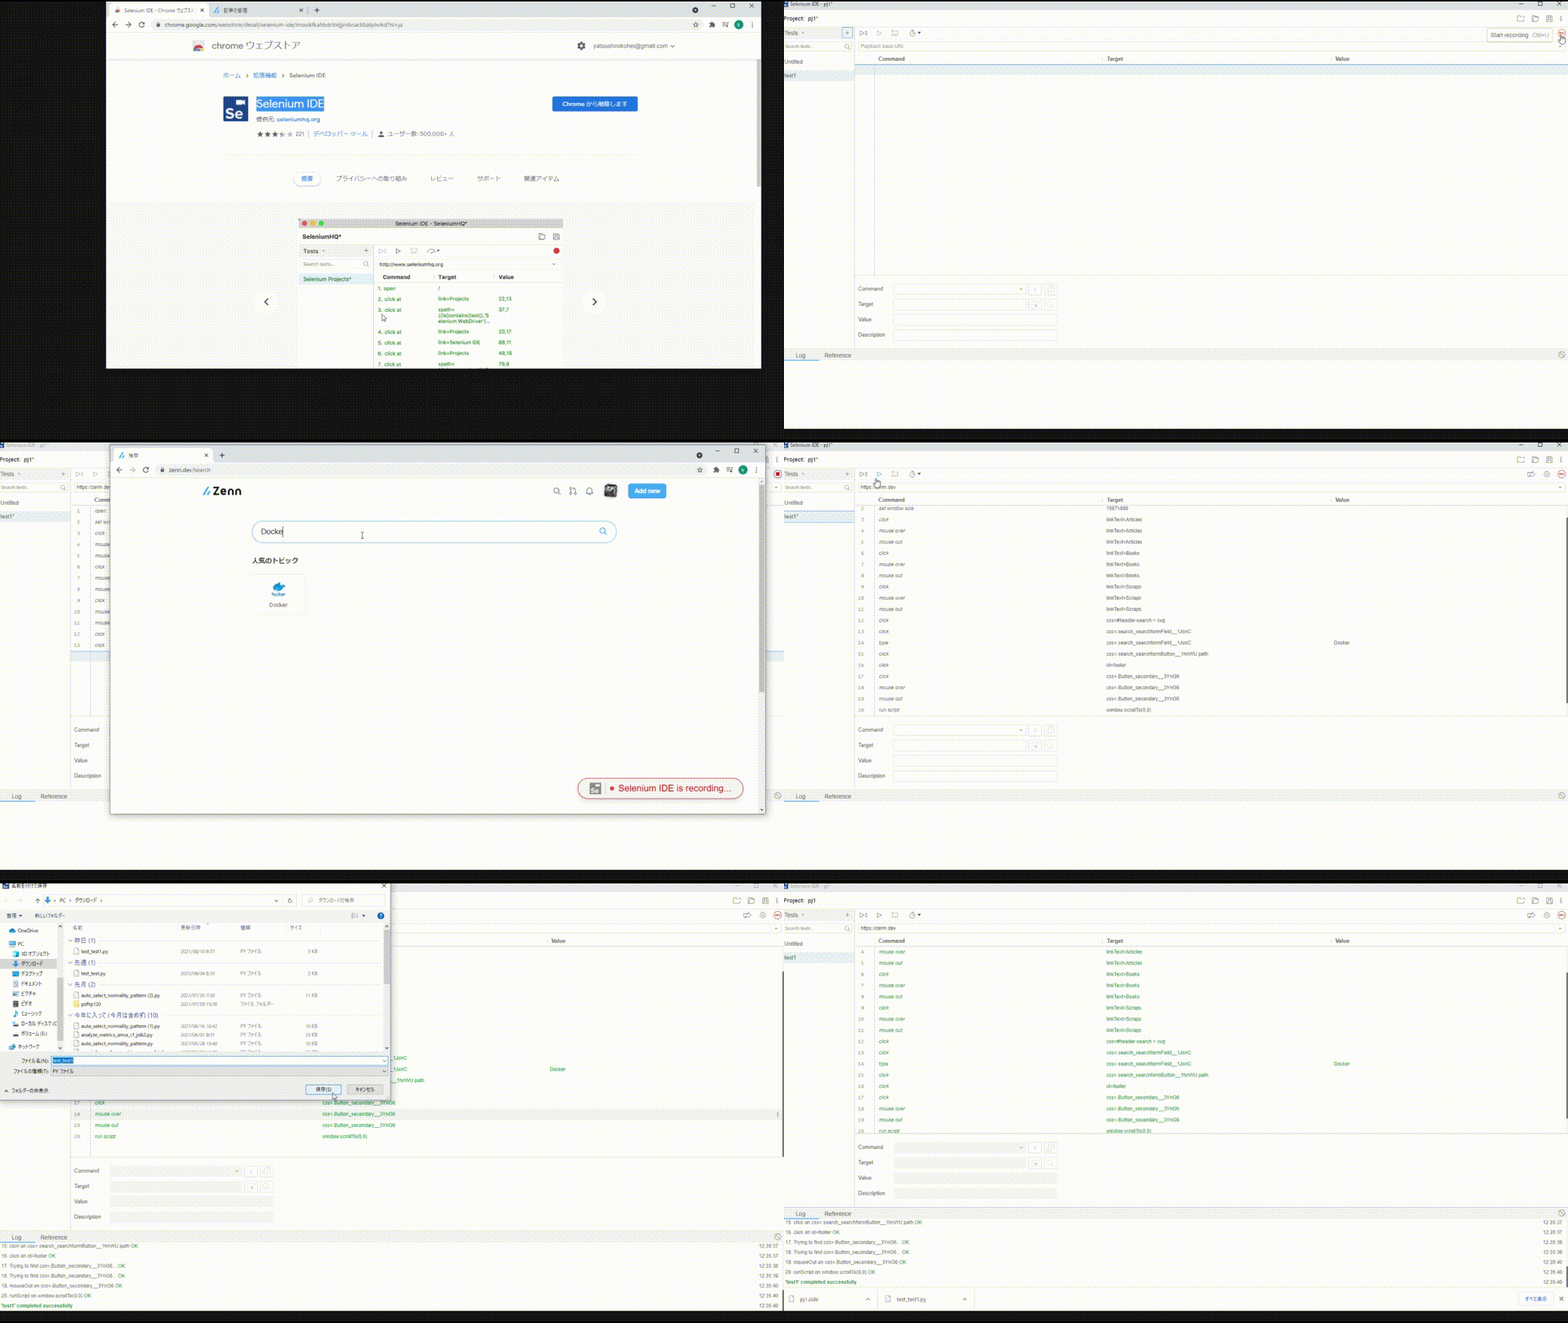
Selenium IDEを使ってhttps://zenn.dev/を自動操作するコードを出力してみます。手順は以下のgifを参照してください。
- gifの内容
- Selenium IDE起動
- Create a new project(プロジェクトの作成)
- テストの作成
- レコーディングの開始
- base URL(自動操作を始めたいURL)の入力
-
https://zenn.dev/を入力
-
- ブラウザを自動操作
- レコーディング停止
- レコーディング内容の確認
- Export
- PythonでExport
- Save Project

Exportしたpythonコードはselenium_tset.pyという名前に変更して後で使います。
Seleniumを動かす環境をDockerで作る
以下の図のように2つのDockerコンテナで動作環境を作ります。

必要なものは、docker-compose.ymlとDockerfile、先ほどExportしたpythonコードのselenium_tset.pyで以下のように配置していきます。完成したものがこちらのリポジトリにおいてあるので参照してください。
.
├── docker-compose.yml
└── python
    ├── Dockerfile
    └── selenium_test.py
まずはdocker-compose.ymlですが、以下のようになります。
version: "3"
services:
  chrome:
    image: selenium/standalone-chrome:4.0.0-rc-1-prerelease-20210804
    shm_size: 2gb
    ports:
      - "4444:4444"
      - "7900:7900"
  python:
    build: ./python
    volumes:
      - ./python:/python
    tty: true
まずchromeコンテナですが、selenium/standalone-chrome:4.0.0-rc-1-prerelease-20210804 を使います。Selenium関連の公式Docker imageはいろいろな種類があるのですが、このimageはdocker-seleniumgithubのREADME.mdで説明されているimageでseleniumのWebDriver、chromeブラウザ、noVNCが入っています。4444ポートはWebDriver用で、pythonコンテナから4444ポート向けにseleniumコードを実行します。7900ポートはnoVNCサーバが立ち上がってます。コンテナ外のブラウザからhttp://<localhost or dockerのホスト>:7900/のようにアクセスするとnoVNCにつながり、seleniumを実行したときにコンテナ内でブラウザが自動祖刺される様子を見ることができます。noVNCにアクセスするときのパスワードはsecretです(README.md参照)。
そして、pythonコンテナはSelenium IDEで作成したselenium_tset.pyを実行するためのコンテナです。selenium_tset.pyが入っているpython/ディレクトリをマウントしていて、また、落ちないようにtty: trueが設定してあります。Pythonとselenium、pytestが必要なので以下のようにDockerfileを作成します。
FROM python:3.9-buster

RUN pip install pip install selenium==4.0.0b4 pytest
最後にselenium_tset.pyをpython/ディレクトリに配置すれば、以下のように実行できるのですが、先にselenium_tset.pyを少し修正する必要があります。
docker-compose up -d
docker-compose exec python pytest /python/selenium_test.py
docker-compose down
selenium_tset.pyの修正
修正差分は以下かリポジトリのdiffを参照してください。重要なのはsetup_methodの変更でWebDriverをwebdriver.Remoteでchromeコンテナの4444ポートに向かうようにしています。操作コード部分の変更は実際に実行しながら引っかかった場所を修正します。このコードは自動生成されたものなので微妙に動かないところを修正しています。多くの場合は操作速度が速すぎてブラウザの描画が追い付かないことが問題になるのでtime.sleepを入れています。これ以外でもseleniumやchromeのバージョン違い等でエラーになる個所もあるので都度修正します。
 class TestTest1():
   def setup_method(self, method):
-    self.driver = webdriver.Chrome()
+    #self.driver = webdriver.Chrome()
+    options = webdriver.ChromeOptions()
+    self.driver = webdriver.Remote(
+        command_executor='http://chrome:4444/wd/hub',
+        options = webdriver.ChromeOptions()
+    )
     self.vars = {}

     ~~略~~

     actions.move_to_element(element).perform()
     element = self.driver.find_element(By.CSS_SELECTOR, "body")
     actions = ActionChains(self.driver)
-    actions.move_to_element(element, 0, 0).perform()
+    actions.move_to_element(element).perform()
     self.driver.find_element(By.LINK_TEXT, "Books").click()
     element = self.driver.find_element(By.LINK_TEXT, "Books")
     actions = ActionChains(self.driver)
     actions.move_to_element(element).perform()
     element = self.driver.find_element(By.CSS_SELECTOR, "body")
     actions = ActionChains(self.driver)
-    actions.move_to_element(element, 0, 0).perform()
+    actions.move_to_element(element).perform()
     self.driver.find_element(By.LINK_TEXT, "Scraps").click()
     element = self.driver.find_element(By.LINK_TEXT, "Scraps")
     actions = ActionChains(self.driver)
     actions.move_to_element(element).perform()
     element = self.driver.find_element(By.CSS_SELECTOR, "body")
     actions = ActionChains(self.driver)
-    actions.move_to_element(element, 0, 0).perform()
+    actions.move_to_element(element).perform()
     self.driver.find_element(By.CSS_SELECTOR, "#header-search > svg").click()
+    time.sleep(1)
+    from selenium.webdriver.support.ui import WebDriverWait
     self.driver.find_element(By.CSS_SELECTOR, ".search_searchformField__1JsnC").click()
     self.driver.find_element(By.CSS_SELECTOR, ".search_searchformField__1JsnC").send_keys("Docker")
-    self.driver.find_element(By.CSS_SELECTOR, ".search_searchformButton__1hnWU path").click()
+    time.sleep(3)
+    self.driver.find_element(By.CSS_SELECTOR, ".search_searchformButton__1hnWU").click()
     self.driver.find_element(By.ID, "footer").click()
+    time.sleep(3)
     self.driver.find_element(By.CSS_SELECTOR, ".Button_secondary__3YnG6").click()
     element = self.driver.find_element(By.CSS_SELECTOR, ".Button_secondary__3YnG6")
     actions = ActionChains(self.driver)
     actions.move_to_element(element).perform()
     element = self.driver.find_element(By.CSS_SELECTOR, "body")
     actions = ActionChains(self.driver)
-    actions.move_to_element(element, 0, 0).perform()
+    actions.move_to_element(element).perform()
     self.driver.execute_script("window.scrollTo(0,0)")
実行して以下のようになれば成功です。
# docker-compose exec python pytest /python/selenium_test.py
================================ test session starts =================================
platform linux -- Python 3.9.6, pytest-6.2.4, py-1.10.0, pluggy-0.13.1
rootdir: /python
collected 1 item

python/selenium_test.py .                                                      [100%]

================================= 1 passed in 15.64s =================================
あとは必要に応じてテストやHTMLの解析コードを追加すればよいです。例えばhtmlをprintしてtitleをテストするなら以下のようなコードを追加してあげればできます。
print(self.driver.page_source)
assert "検索" in self.driver.title
まとめ
Selenium IDEでブラウザの自動操作コードを生成し、実行環境をdocker・pythonベースで用意する方法を解説しました。ブラウザの自動テストを作るのにはSelenium IDEを使えばだいぶ楽できるのではないかと思います。一方でクローリング・スクレイピング等に使うには多くの場合は、urlを直接指定できるので普通にhttp client(pythonならurllib.request)でよいかと思いますが、formから認証が必要な場合やブラウザのキャッシュが必要な場合などはSeleniumを使ってしまった方が簡単かもしれません。
Discussion