【Markdoc】Markdownベースの文書作成フレームワークを触ってみた
Markdocとは
オンライン決済サービスのStripeがドキュメント作成に使っているフレームワークです。
Markdownを使って柔軟かつパワフルにドキュメントを作ることができるようです。
少し前にStripeがこのフレームワークをOSS化し、HackerNews上で話題になっていました。
今回試したのはチュートリアル程度の内容ですが、機能がシンプルにまとまっており、Markdownを簡単に拡張できて面白かったです。ドキュメントをしっかり書きたい人にはおすすめです。
Markdocの公式ドキュメントにGetting Startedがあり、GitHubの方にも分かりやすいサンプルリポジトリがあるので、基本的にはそちらを参考にしてください。
また、サンプルリポジトリではWebpackを使用してビルドしていますが、本記事ではViteを使用しております。(著者がViteを使ってみたかっただけです。)
ちなみに、私はStripeを使ったことがありませんが、ドキュメントが非常に良く整備されていて評判が良いようです。
Hacker Newsのコメントから抜粋。
Stripe's Docs have been best-in-class for a long time. [...] As someone that has used their Docs for hours and hours and hours I'm thankful to their team for how good their Docs are.
試してみる
Markdoc用語
Tag
{% %}という記号で表される。所謂HTMLタグ< >のマークダウン版
これを使うことで、本来Markdownには無い記法を作ることができる。
Node
説明が難しいが、Markdownの構成要素みたいなもの。これを使えば既存の構文をカスタマイズできるので、新しい構文を増やさずにMarkdownを拡張できる。
その他にも公式ドキュメントには Attributes, Variables, Functions, Rendering, Validationなどの項目があるが、ここでは上記二つを主に扱う。
プロジェクトの作成
使用したもの
| 材料 | 説明 |
|---|---|
| yarn | パッケージマネージャ、もちろんnpmでも良い |
| vite | ビルドツール、とても良いらしい |
| lit | Web Componentsライブラリ、バニラで開発しても良いが、コンポーネントベースで開発した方が良いとドキュメントにありました。もちろんReactでも良い |
| express | 言わずと知れたWebアプリケーションのフレームワーク |
| markdoc | メインディッシュ |
| js-yaml, glob,fs | ユーティリティ系ライブラリ、主にマークダウンファイルを読み込む用 |
yarn create vite markdoc-vite --template lit
cd markdoc-vite
yarn add express @markdoc/markdoc js-yaml glob fs
設定ファイル
vite.config.jsファイルを編集する。
エントリポイントと出力のファイル名を設定します。
また、viteでtemplateにlitを指定した場合、rollupOptionsにexternal:/^lit/とあるので、ここを削除する必要がある。
ここをちゃんと設定せずに少し詰まった。
vite.config.js
import { defineConfig } from "vite";

// https://vitejs.dev/config/
export default defineConfig({
  build: {
    lib: {
      entry: "src/index.js", // ここを変更した
      formats: ["es"],
      fileName: "main", // ここを追加した
    },
    rollupOptions: {
    },
  },
});
Markdownファイル
contentフォルダを作成し、そこにマークダウンファイルhome.mdを保存する。
頭にあるハイフンで囲まれたエリアはフロントマター(メタ情報)です。
route: "/"はルーティングを表す。/にアクセスするとこのマークダウンが表示され、/testにアクセスするroute: "/test"と書いてあるマークダウンにルーティングするように作っていく。
content/home.md
---
route: "/"
---

# Home
Hello world!!

```js
const x = "test";
``
テンプレートファイル
publicフォルダを作成し、そこにテンプレート用のHTMLファイルtemplate.htmlを作る。
<script src="./main.es.js"></script>でvite.confi.jsで設定した出力ファイル名を指定する。
public/template.html
<!DOCTYPE html>
<html lang="en">
  <head>
    <meta charset="utf-8" />
    <meta name="viewport" content="width=device-width, initial-scale=1" />
    <meta
      name="description"
      content="Web site created using Markdoc"
    />
    <title>Markdoc: Create HTML Example</title>
  </head>
  <body>
    {{ CONTENT }}
    <script src="./main.es.js"></script>
  </body>
</html>
マークダウン読み込み用JS
ルートディレクトリにcreateContentManifest.jsを作成する。
コンテンツフォルダにあるmdファイルを、fsとglobを使って全て読み込みます。
また、それぞれのマークダウンファイルに記述されているフロントマターをjs-yamlを使って解析します。
全てのファイルを読み込んだら、それぞれの文書を抽象構文木(ast)とフロントマターのペアとしてオブジェクト化し、フロントマターのrouteを元に連想配列にまとめて返します。
createContentManifest.js
const fs = require("fs");
const yaml = require("js-yaml");
const glob = require("glob");
const Markdoc = require("@markdoc/markdoc");

const parseMarkdocFrontmatter = (ast) => {
  return ast.attributes.frontmatter
    ? yaml.load(ast.attributes.frontmatter)
    : {};
};

// This creates a mapping between route and parsed Markdoc content.
exports.createContentManifest = (ROOT_DIR) => {
  const files = glob.sync(`${ROOT_DIR}/**/*.md`);

  const contentManifest = {};

  files.forEach((file) => {
    const rawText = fs.readFileSync(file, "utf-8");
    const ast = Markdoc.parse(rawText);
    const frontmatter = parseMarkdocFrontmatter(ast);

    contentManifest[frontmatter.route] = {
      ast,
      frontmatter,
    };
  });

  return contentManifest;
};
Express
ルートディレクトリにserver.jsを作成する。
受け取ったリクエストをもとに、表示するマークダウンファイルを切り替えるために、contentManifestを使ってレスポンスを作成している。
server.js
const express = require("express");
const app = express();
const path = require("path");
const fs = require("fs");
const Markdoc = require("@markdoc/markdoc");

const PORT = 3000;
const CONTENT_DIR = path.join(__dirname, "content");
const TEMPLATE = fs.readFileSync("./public/template.html", "utf-8");

const { createContentManifest } = require("./createContentManifest");

// The content manifest maps routes to Markdoc documents.
const contentManifest = createContentManifest(CONTENT_DIR);
// Loads the built JS
app.use(express.static("dist"));

app.get("*", (req, res) => {
  const path = req.params[0];
  const document = contentManifest[path];

  if (!document) {
    return res.sendStatus(404);
  }
  const { ast } = document;
  const config = {
    // 後で追加 //
  };

  const content = Markdoc.transform(ast, config);
  const rendered = Markdoc.renderers.html(content) || "";
  const html = TEMPLATE.replace(/{{ CONTENT }}/, rendered);
  return res.send(html);
});

app.listen(PORT, () => {
  console.log(`Example app listening on port ${PORT}`);
});
package.jsonでexpressを動かすように編集する。
package.json
  [...]
  "scripts": {
    "dev": "node server",
    "build": "vite build"
  },
  [...]
ここまでで、通常のマークダウンが表示されるようになりました。
マークダウンを拡張する
独自のタグを作る
calloutタグ。zennのメッセージと同じ役割を持つタグを新たに作る↓
schemaフォルダを作成し、新しいタグのスキーマを定義する。
schema/Callout.markdoc.js
module.exports = {
  render: "markdoc-callout",
  description: "Display the enclosed content in a callout box",
  children: ["paragraph"],
  attributes: {
    type: {
      type: String,
      default: "caution",
      matches: ["caution", "warning"],
      description:
        'Controls the color and icon of the callout. Can be: "caution", "warning"',
    },
    title: {
      type: String,
      description: "The title displayed at the top of the callout",
    },
  },
};
新しく作成したタグをレンダリングするための、コンポーネントをlitで作成する。もし、Reactを使っている場合は、Reactのコンポーネントで作成できる。
src/Callout.js
import { html, css, LitElement } from "lit";

export class MarkdocCallout extends LitElement {
  static styles = css`
    .callout {
      color: white;
    }
    .caution {
      background-color: #d97917;
    }
    .warning {
      background-color: #ed5f74;
    }
  `;

  static properties = {
    type: { type: String },
  };

  constructor() {
    super();
    this.type = "note";
  }

  render() {
    return html`<p class="callout ${this.type}"><slot></slot></p>`;
  }
}
srcフォルダにindex.jsを作成し、Calloutコンポーネントを読み出して、customElementsを使って定義する。
src/index.js
import { MarkdocCallout } from "./Callout";

// Define your components below
customElements.define("markdoc-callout", MarkdocCallout);
最後にserver.jsで./schema/Callout.markdocを読み込み、configに追記する。
server.js
[...]
const callout = require("./schema/Callout.markdoc");
[...]
  const config = {
    tags: {
      callout,
    },
  }
[...]
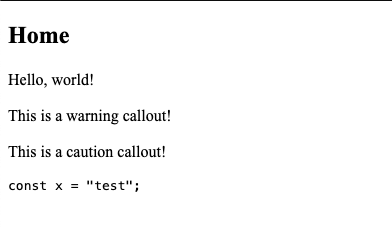
マークダウンファイルに新しいタグを試してみる。
{% callout type="warning" %}
This is a warning callout!
{% /callout %}

{% callout type="caution" %}
This is a caution callout!
{% /callout %}

Headingを編集する
markdocのnodeを使って、既存のマークダウンからHTMLへの変換を拡張する。
ここでは、
# Hello→<h1>Hello</h1>だったのを,
# Hello→<h1 id="hello">Hello</h1>
となるように、タグに自動的にidがつくように拡張している。
Calloutと違い見た目に変化はないので、schemaの定義だけで完結する。
schema/heading.markdoc.js
const { nodes } = require("@markdoc/markdoc");

function generateID(children, attributes) {
  if (attributes.id && typeof attributes.id === "string") {
    return attributes.id;
  }
  return children
    .filter((child) => typeof child === "string")
    .join(" ")
    .replace(/[?]/g, "")
    .replace(/\s+/g, "-")
    .toLowerCase();
}

module.exports = {
  ...nodes.heading,
  transform(node, config) {
    const base = nodes.heading.transform(node, config);
    base.attributes.id = generateID(base.children, base.attributes);
    return base;
  },
};
Calloutと同様にserver.jsで./schema/heading.markdocを読み込み、configに追記する。
server.js
[...]
const heading = require("./schema/heading.markdoc");

[...]
  const config = {
    tags: {
      callout,
    },
    nodes: {
      heading,
    },
  }
[...]
これで見出しタグに自動的にidを付与することができるようになりました。

終わりに
Markdocには、variableやfunctionといった本記事では触れなかった面白そうな機能が用意されています。マークダウンを使ったドキュメント作成に興味がある方は是非これらも試してみてください。私もこれを使ってドキュメントを作成した暁にはもう少し踏み込んだ記事を書かせて頂こうかと思います。ここまでお読みいただきありがとうございました。
Discussion