Flutter + macOS + VS Codeで環境構築 Flutter 3.0.5
前提
- Homebrewがインストールされていること
- VS Codeがインストールされていること
- (macの場合) gemがインストールされていること
IDEなどをインストール&セットアップ
asdf
-
brew install asdf
実行後にpathを通す指示があるので、その通りにpathを通す brew install jqasdf plugin-add flutter-
asdf reshim flutter
reshimは忘れがちです。 asdf list all flutterasdf install flutter your_version- リポジトリに移動
-
asdf local flutter your_version
.tool-versionというファイルが作成され、リポジトリ内のflutterのバージョンが指定されます。 -
asdf global flutter your_version
Flutterアプリを作成する際にはディレクトリが無い状態(つまりlocalバージョンを指定できない)なので、そこで用いられるFlutterバージョンを設定しておきます。
Xcode
AppStoreからダウンロードしてもいいですが、めちゃくちゃ時間がかかるので以下の方法がおすすめです。
flutter doctor すると
以下のように表示されるはずなので、指示に従ってコマンドを実行してください。
[✗] Xcode - develop for iOS and macOS
    ✗ Xcode installation is incomplete; a full installation is necessary for iOS development.
      Download at: https://developer.apple.com/xcode/download/
      Or install Xcode via the App Store.
      Once installed, run:
        sudo xcode-select --switch /Applications/Xcode.app/Contents/Developer
        sudo xcodebuild -runFirstLaunch
    ✗ CocoaPods not installed.
        CocoaPods is used to retrieve the iOS and macOS platform side's plugin code that responds to your plugin usage on the Dart side.
        Without CocoaPods, plugins will not work on iOS or macOS.
        For more info, see https://flutter.dev/platform-plugins
      To install see https://guides.cocoapods.org/using/getting-started.html#installation for instructions.
sudo xcode-select --switch /Applications/Xcode.app/Contents/Developer
sudo xcodebuild -runFirstLaunch
sudo gem install cocoapods
Android Studio
brew install --cask android-studio
インストール後、Android Studioを開くとセットアップウィザードが立ち上がるはずなので、指示に従って進めてください。
その後 flutter doctor すると
以下のように表示されるはずなので、Android StudioのPreferencesを開いてください。
[!] Android toolchain - develop for Android devices (Android SDK version 33.0.0)
    ✗ cmdline-tools component is missing
      Run `path/to/sdkmanager --install "cmdline-tools;latest"`
      See https://developer.android.com/studio/command-line for more details.
    ✗ Android license status unknown.
      Run `flutter doctor --android-licenses` to accept the SDK licenses.
      See https://flutter.dev/docs/get-started/install/macos#android-setup for more details.
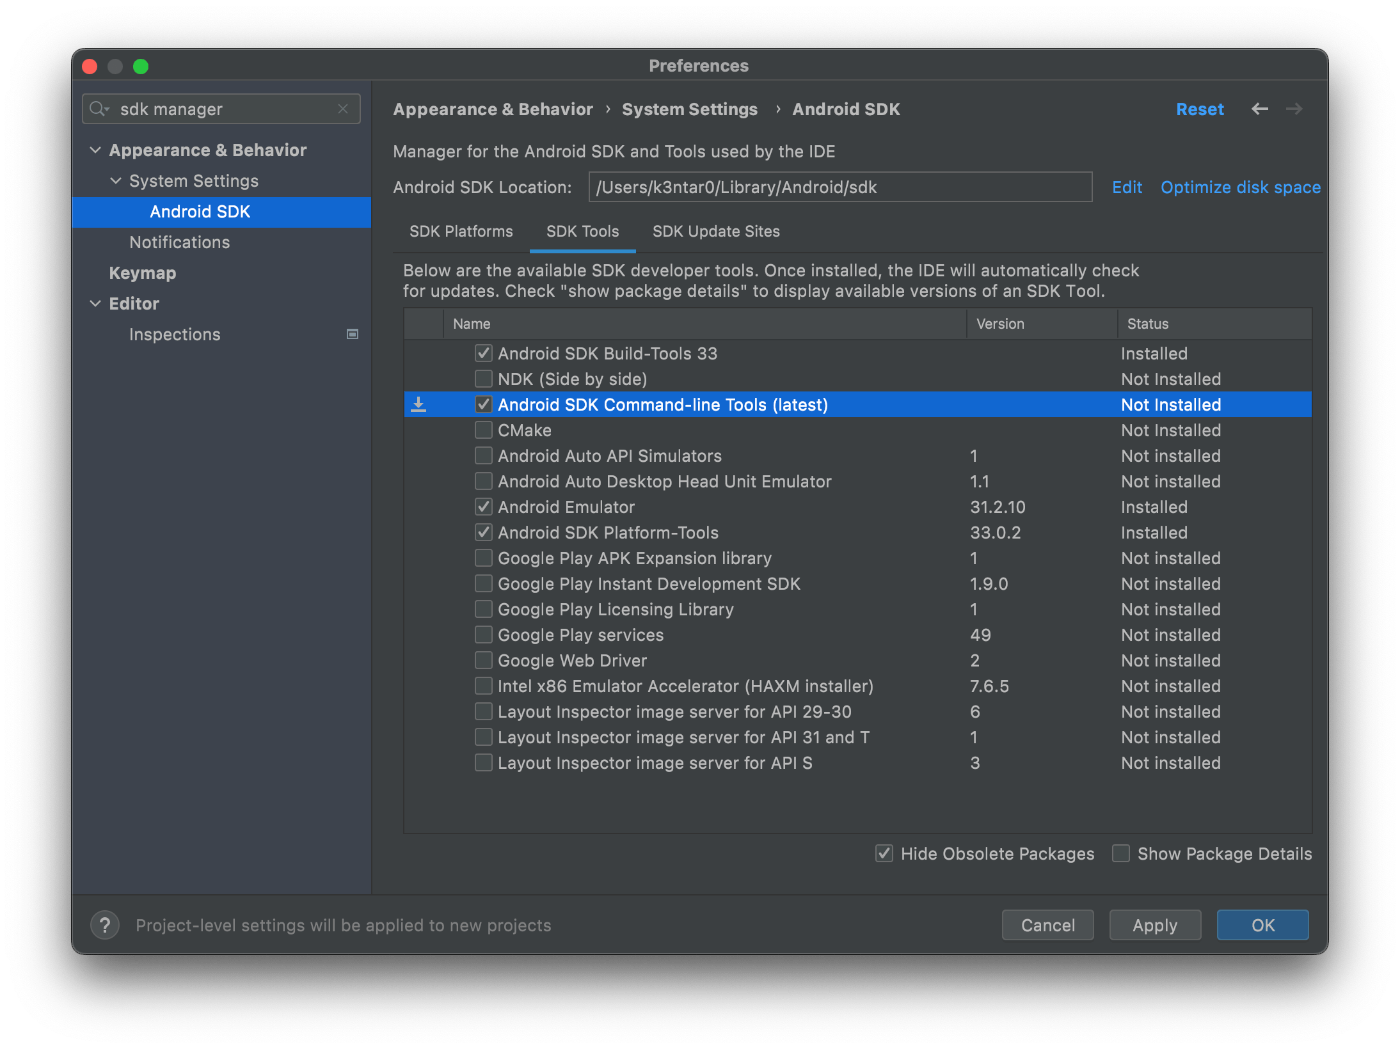
検索バーに sdk manager と入れるとAndroid SDKがサジェストされるので、SDK ToolsというタブのAndroid SDK Command-line Toolsにチェックを入れてApplyしてください。
次にAndroid Licenseに同意していきます。
flutter doctor --android-licenses
上のコマンドを実行すると、何度か Accept? (y/N): と聞かれるので、全て y を入力してください。
基本的なセットアップ完了
改めて flutter doctor を実行し、以下のように全てチェックが付いていれば完了です。
XcodeやVS Codeを使用しない場合はそれぞれにチェックが付いていなくても問題ありません。
flutter doctor                                                                                                                             ─╯
Doctor summary (to see all details, run flutter doctor -v):
[✓] Flutter (Channel stable, 3.0.5, on macOS 12.5 21G72 darwin-arm, locale en-JP)
[✓] Android toolchain - develop for Android devices (Android SDK version 33.0.0)
[✓] Xcode - develop for iOS and macOS (Xcode 13.4.1)
[✓] Chrome - develop for the web
[✓] Android Studio (version 2021.2)
[✓] VS Code (version 1.68.1)
[✓] Connected device (2 available)
[✓] HTTP Host Availability

• No issues found!
Flutterアプリの作成と実行
作成
次のコマンドを実行するとアプリのベースとなるディレクトリが作成されます。
--platforms を指定しない場合はlinux,windows,macos,webなどのプラットフォームも生成されてしまうので、今回は明示的にiosとandroidのみを生成するようオプションを指定しました。
flutter create yourapp --platforms=ios,android
このような構成でディレクトリが作成されていれば成功です。
VS Codeの設定
まずはFlutterのExtensionをインストールしてください。
ターミナルで当該のディレクトリを開きasdfが管理するFlutterのpathを特定します。
which flutter
/Users/k3ntar0/.asdf/shims/flutter
次にVS CodeのPreferencesを開き、 flutter sdk などと入力すると Dart: Flutter Sdk Path という項目があるので Edit in settings.json を開いてください。
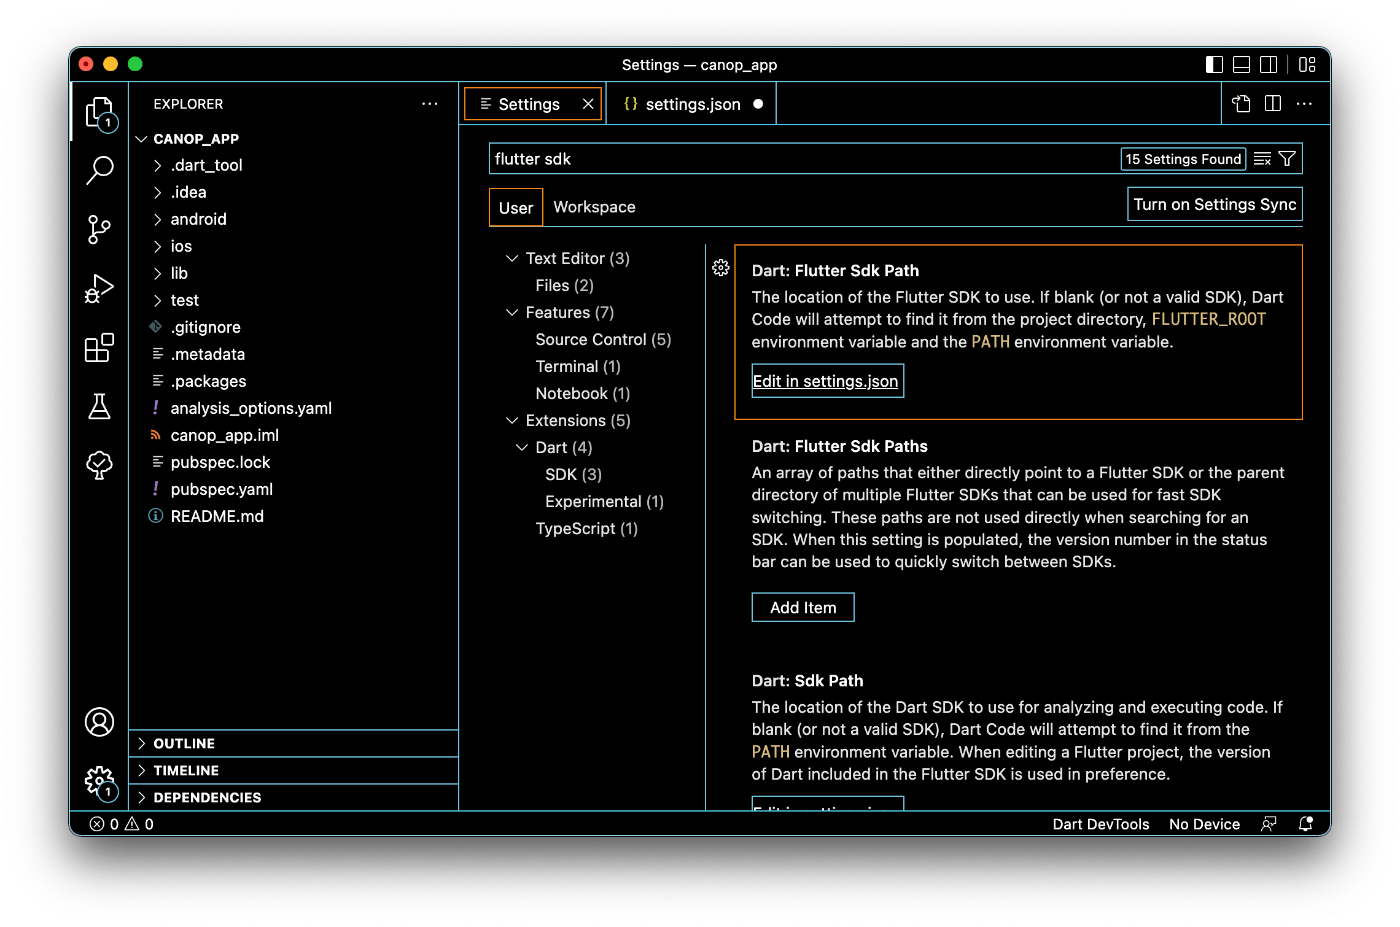
whichコマンドで判明したpathをここに入力します。
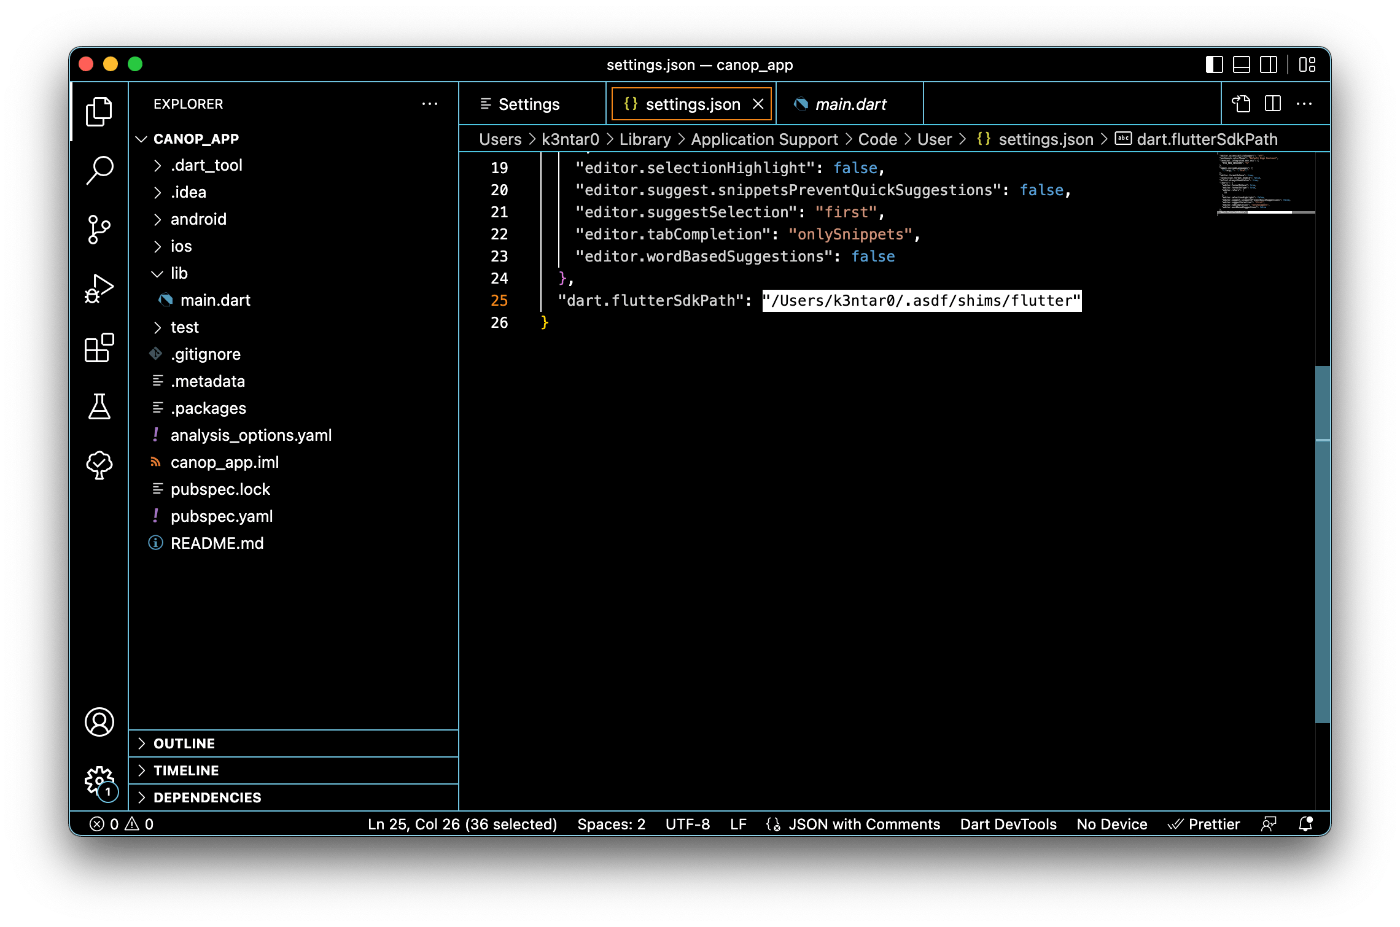
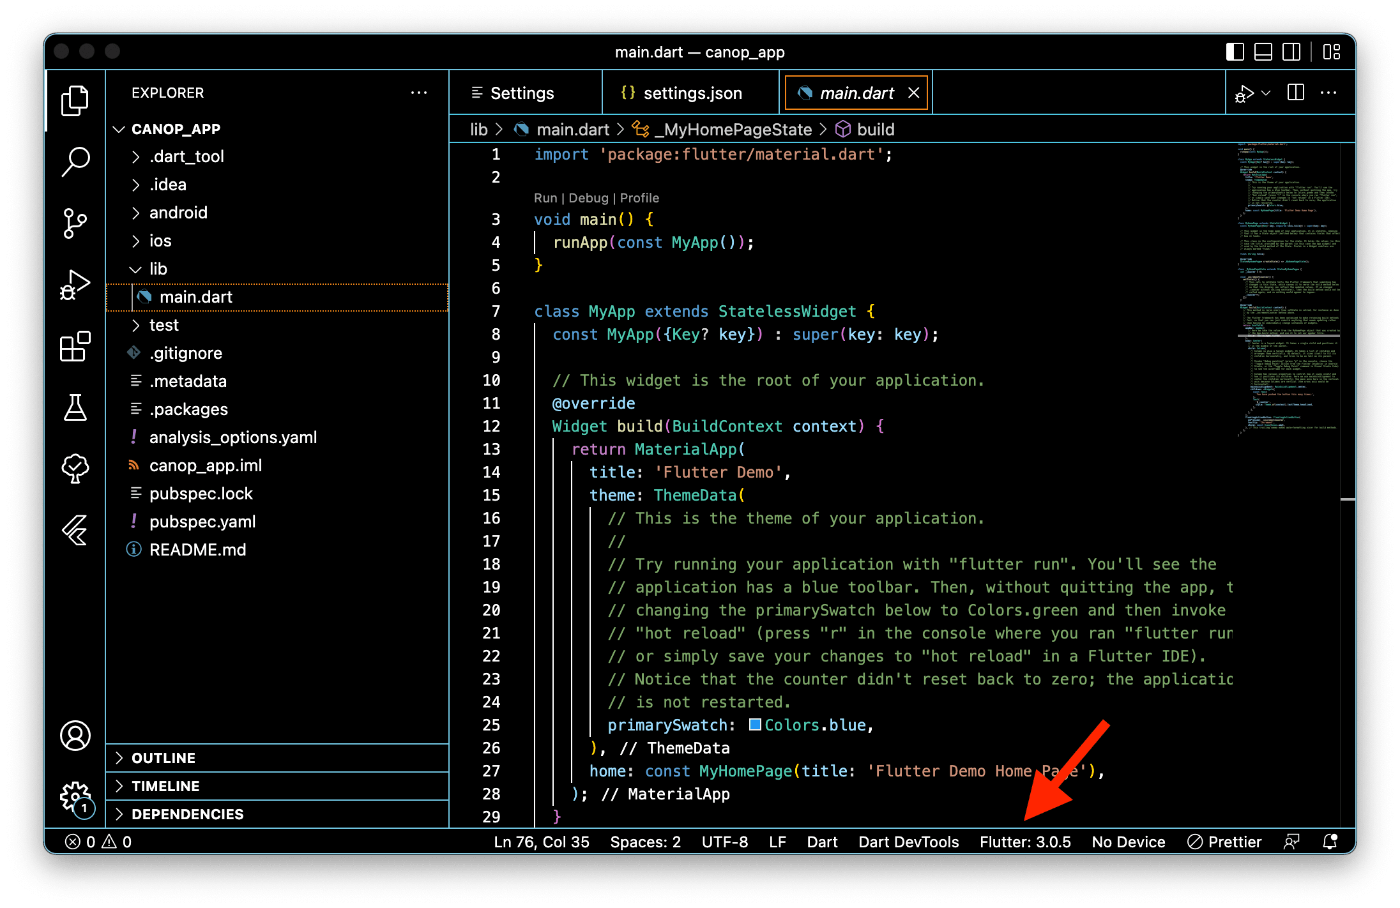
lib/main.dart を開くと、画面最下部に Flutter: 3.0.5 のように任意のバージョンが表示されていれば成功です。
実行
画面右上の🐞▶️マークを押すとiOSのSimulatorかAndroidのEmulatorを選択できるので、いずれかを押下して待ちます。
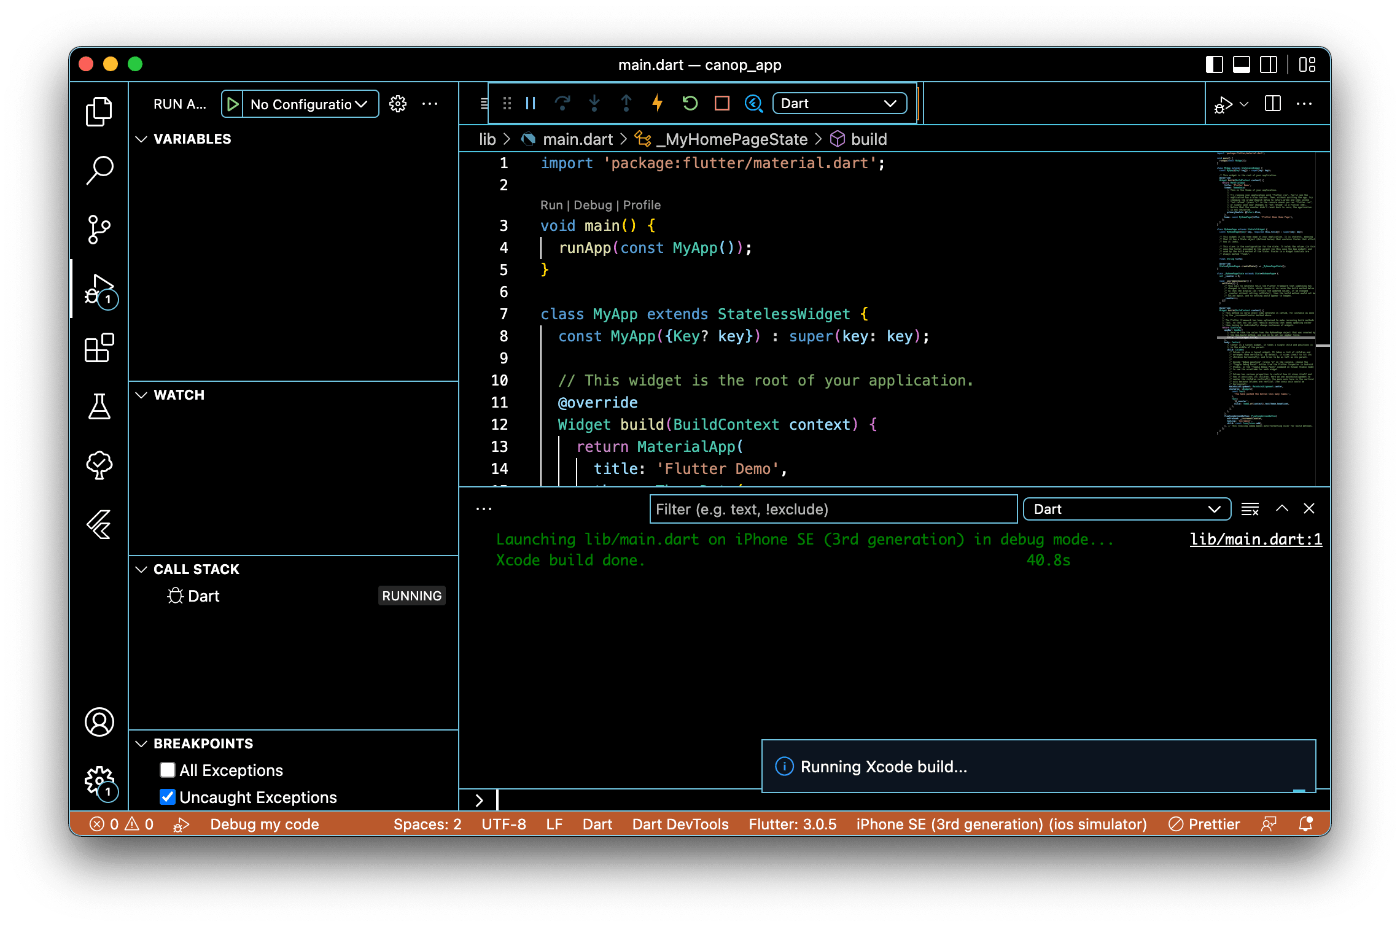
Debugモードでのビルドが完了されると、このようにアプリが立ち上がります。

完了
最後に、ファイルやディレクトリについて簡単に説明をしておきます。
-
lib
本体部分とも言えるディレクトリ。 -
pubspec.yaml
nodeでいうところのpackage.jsonで、主にパッケージのバージョン管理とアプリのビルドバージョンの管理を行います。 -
ios,android
ネイティブコードを実装する際に触ります。特にiosについては設定周りでめちゃめちゃ触ります。基本的にはそれぞれのIDE(Xcode or Android Studio)で開きます。
Discussion