地域コードから天気予報を表示するサイトを作成する
概要
TypeScript で日本の地域を選択すると天気予報を表示するサイトを作成します。
- 天気予報の取得で非同期処理を使用する
- TypeScript のコードを JavaScript のコードに変換する
- Node.js(npm)を使用する
完成画像
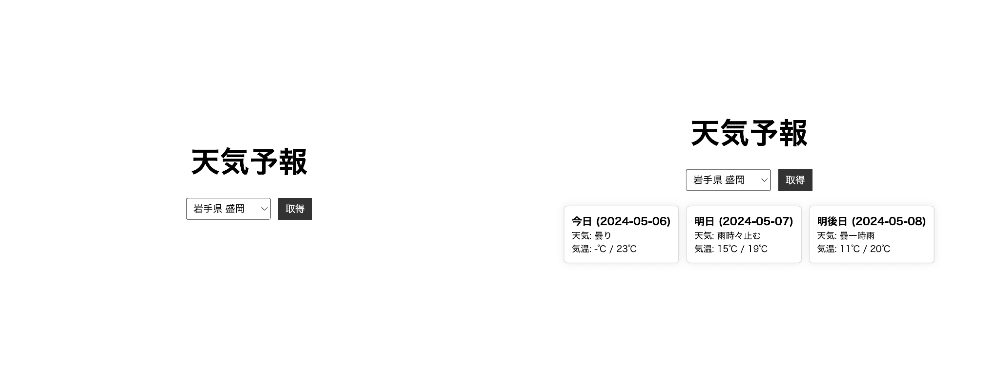
完成画像
実装
環境構築
1. プロジェクトを作成する
プロジェクトのディレクトリを任意の場所に作成し、Visual Studio Code でプロジェクトを開いてください。
2. package.json を生成する
下記のコマンドで、package.json を生成します。
npm init -y
3. TypeScript をインストールする
下記のコマンドで、プロジェクトに TypeScript をインストールします。
npm i -D typescript@latest
4. tsconfig.json を生成する
下記のコマンドで、tsconfig.json を生成します。
npx tsc --init
5. tsconfig.json を編集する
target と module を ECMAScript に指定します。
outDir にコンパイルで出力するディレクトリを指定します。
include にコンパイルする対象ディレクトリを指定します。
{
  "compilerOptions": {
    "target": "ES2022",
    "module": "ESNext",
    "outDir": "./dist",
    "esModuleInterop": true,
    "forceConsistentCasingInFileNames": true,
    "strict": true,
    "skipLibCheck": true
  },
  "include": ["./src"]
}
6. serve をインストールする
下記のコマンドで、プロジェクトに serve をインストールします。
npm i -D serve@latest
7. index.html を作成する
プロジェクト直下に index.html を作成します。
<!DOCTYPE html>
<html lang="ja">
  <head>
    <meta charset="UTF-8" />
    <meta name="viewport" content="width=device-width, initial-scale=1.0" />
    <title>天気予報</title>
    <link rel="stylesheet" href="css/style.css" />
  </head>
  <body>
    <h1>天気予報</h1>

    <script type="module" src="dist/main.js"></script>
  </body>
</html>
8. style.css を作成する
プロジェクト内に css ディレクトリを作成し、その中に style.css を作成します。
9. main.ts を作成する
プロジェクト内に src ディレクトリを作成し、その中に main.ts を作成します。
10. package.json を編集する
scripts の中を編集します。
{
  "name": "site-weather-by-ts",
  "version": "1.0.0",
  "description": "",
  "main": "index.js",
  "scripts": {
    "start": "npx tsc && serve",
    "watch": "npx tsc -w"
  },
  "keywords": [],
  "author": "",
  "license": "ISC",
  "devDependencies": {
    "serve": "^14.2.3",
    "typescript": "^5.4.5"
  }
}
11. 2つのコマンドを実行する
Visual Studio Codo の 1 つ目のターミナルで下記のコマンドを実行します。
TypeScript のファイルをコンパイルし、dist ディレクトリに出力します。その後にローカルサーバを起動します。
npm run start
Visual Studio Codo の 2 つ目のターミナルで下記のコマンドを実行します。
TypeScript のファイルを監視し、ファイルが変更されたたびにコンパイルを実施します。
npm run watch
12. ブラウザで動作確認する
ブラウザでサイトを開き、コンソールにエラーが出力されていないか確認してください。
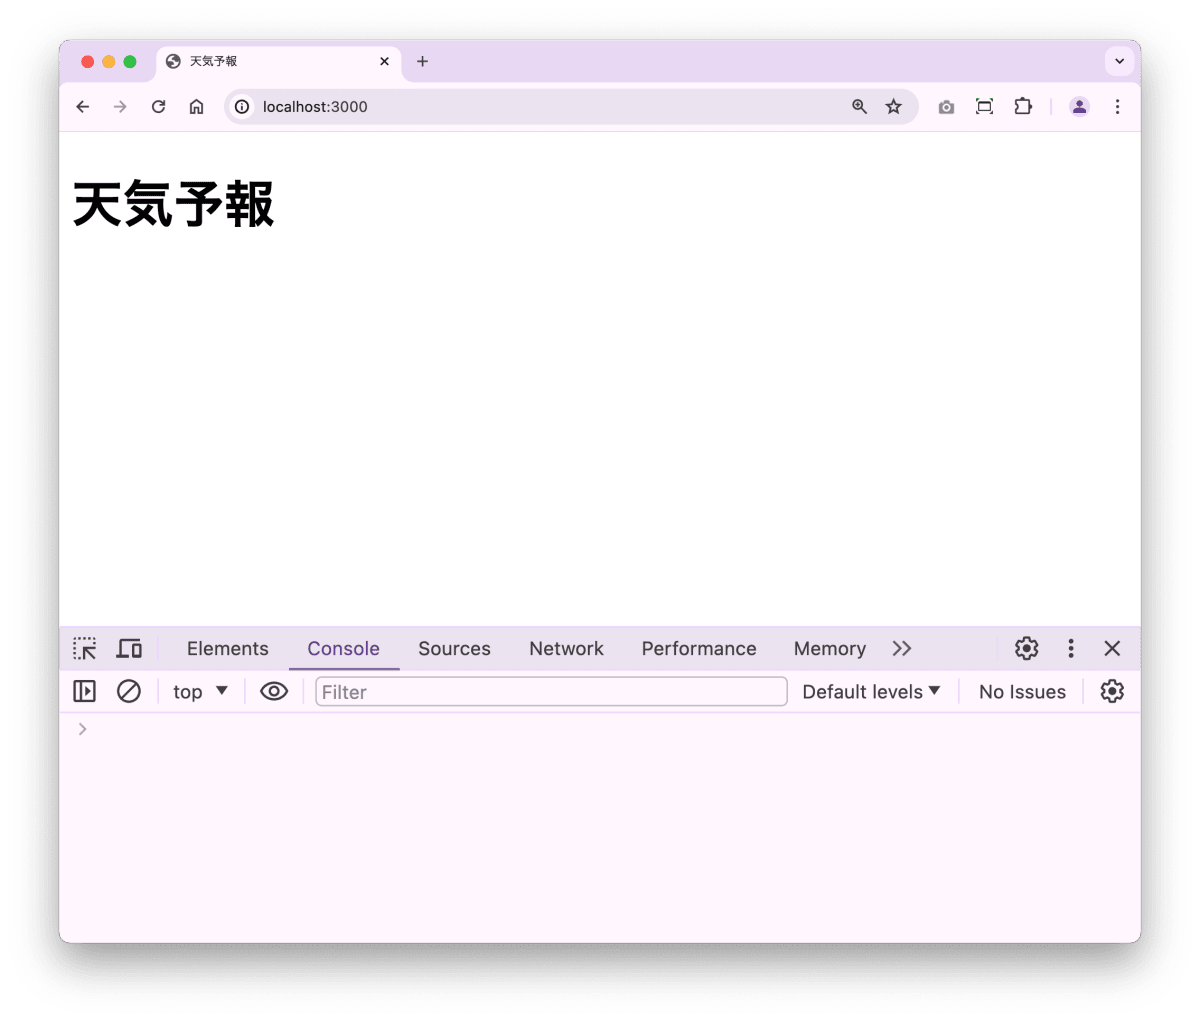
コンソールにエラーが出力されていないか確認する
天気予報を取得する
1. 天気予報を取得する WebAPI を確認する
天気予報を取得する方法と取得するデータの構造を確認します。
2. ウェブサイトを編集する
天気予報を取得・表示する要素を追加します。
<!DOCTYPE html>
<html lang="ja">
  <head>
    <meta charset="UTF-8" />
    <meta name="viewport" content="width=device-width, initial-scale=1.0" />
    <title>天気予報</title>
    <link rel="stylesheet" href="css/style.css" />
  </head>
  <body>
    <div class="container">
      <h1>天気予報</h1>
      <form id="form">
        <select id="city">
          <option value="030010">岩手県 盛岡</option>
          <option value="030020">岩手県 宮古</option>
          <option value="030030">岩手県 大船渡</option>
        </select>
        <input type="submit" value="取得" />
      </form>
      <div id="weather"></div>
    </div>

    <script type="module" src="dist/main.js"></script>
  </body>
</html>
3. ウェブサイトのデザインを記述する
ウェブサイトのデザインを記述します。
* {
  margin: 0;
  padding: 0;
}

.container {
  display: flex;
  flex-direction: column;
  justify-content: center;
  align-items: center;
  height: 100vh;
}

h1 {
  font-size: 2.5em;
  margin-bottom: 20px;
}

form {
  display: flex;
  margin-bottom: 20px;
}

select {
  flex: 1;
  margin-right: 10px;
  padding: 5px;
}

input[type="submit"] {
  background-color: #333;
  color: #fff;
  border: none;
  padding: 5px 10px;
  cursor: pointer;
}

input[type="submit"]:hover {
  background-color: #555;
}
4. 型を定義する
天気予報を取得するデータから「必要なデータ」もしくは「将来的に必要になりそうなデータ」を抽出し、抽出したデータ構造で型定義を行います。
/* ****************************************
  型定義
**************************************** */

type WeatherType = {
  // 予報日ごとの天気情報
  forecasts: {
    // 予報日(日付)
    date: string;
    // 予報日(今日・明日・明後日)
    dateLabel: string;
    // 天気
    telop: string;
    // 最高気温と最低気温
    temperature: {
      max: { celsius: string; fahrenheit: string };
      min: { celsius: string; fahrenheit: string };
    };
    // 6時間ごとの降水確率
    chanceOfRain: {
      T00_06: string;
      T06_12: string;
      T12_18: string;
      T18_24: string;
    };
  }[];
};
5. 天気予報を取得する
form の submit イベントで、天気予報を取得する処理を実装します。
/* ****************************************
  要素一覧
**************************************** */

const form = document.getElementById("form") as HTMLFormElement;
const city = document.getElementById("city") as HTMLInputElement;

/* ****************************************
  処理
**************************************** */

if (form) {
  form.addEventListener("submit", onSubmit);
}

/* ****************************************
  イベントの関数一覧
**************************************** */

async function onSubmit(event: SubmitEvent) {
  // イベントをキャンセルする
  event.preventDefault();

  // 地域コードを取得する
  const cityCode = city.value;

  // 天気情報を取得するURLを作成する
  const URL = `https://weather.tsukumijima.net/api/forecast?city=${cityCode}`;

  try {
    // 天気情報を取得する
    const response = await fetch(URL);
    // JSONデータをJavaScriptのオブジェクトに変換する
    const data: WeatherType = await response.json();
    console.log(data);
  } catch (error) {
    console.error(error);
  }
}
6. ブラウザで動作を確認する
天気予報が取得できているかブラウザで確認してください。
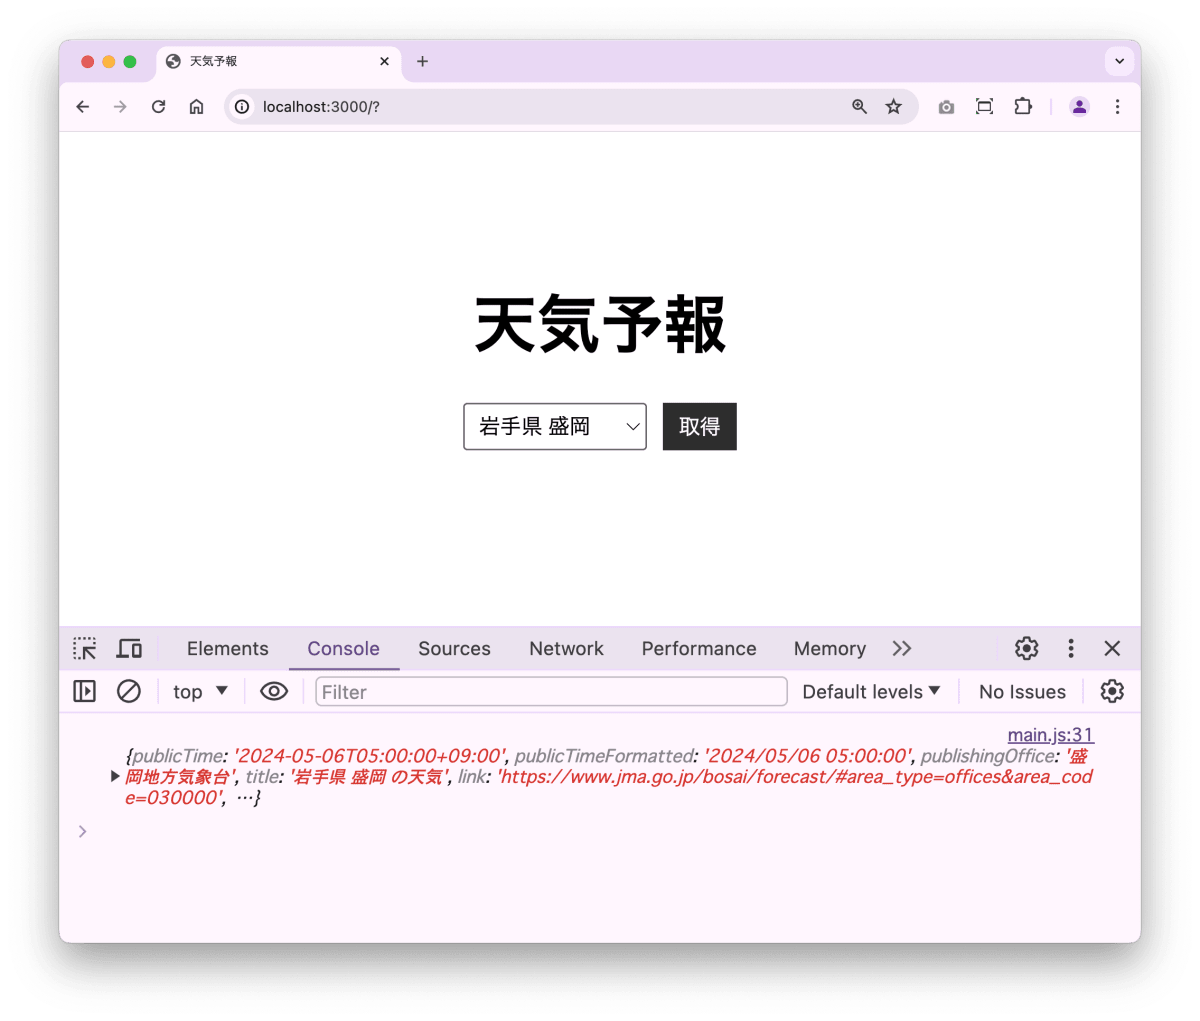
天気予報が取得ができているか確認する
天気予報を表示する
1. 天気予報を表示する
取得した天気予報のデータを整形して、天気予報を表示します。
/* ****************************************
  要素一覧
**************************************** */

const weather = document.getElementById("weather") as HTMLDivElement;

/* ****************************************
  イベントの関数一覧
**************************************** */

async function onSubmit(event: SubmitEvent) {
  // イベントをキャンセルする
  event.preventDefault();

  // 地域コードを取得する
  const cityCode = city.value;

  // 天気情報を取得するURLを作成する
  const URL = `https://weather.tsukumijima.net/api/forecast?city=${cityCode}`;
  try {
    // 天気情報を取得する
    const response = await fetch(URL);
    // JSONデータをJavaScriptのオブジェクトに変換する
    const data: WeatherType = await response.json();
    // 天気情報を表示するHTMLを作成する
    const weatherHTML = data.forecasts
      .map((forecast) => {
        const max = forecast.temperature.max.celsius ?? "-";
        const min = forecast.temperature.min.celsius ?? "-";
        return `
        <div>
          <h2>${forecast.dateLabel} (${forecast.date})</h2>
          <p>天気: ${forecast.telop}</p>
          <p>気温: ${min}℃ / ${max}℃</p>
        </div>
      `;
      })
      .join("");
    // 天気情報を表示する
    weather.innerHTML = weatherHTML;
  } catch (error) {
    console.error(error);
  }
}
2. 天気予報を表示するデザインを記述する
天気予報を表示するデザインを記述します。
#weather {
  display: flex;
  flex-direction: row;
  align-items: center;
  gap: 10px;
}

#weather > div {
  border: 1px solid #ddd;
  border-radius: 5px;
  padding: 10px;
  background-color: #fff;
  box-shadow: 0px 0px 10px rgba(0, 0, 0, 0.1);
}

#weather h2 {
  font-size: 14px;
}

#weather p {
  font-size: 12px;
}
3. ブラウザで動作を確認する
天気予報が表示できているかブラウザで確認してください。
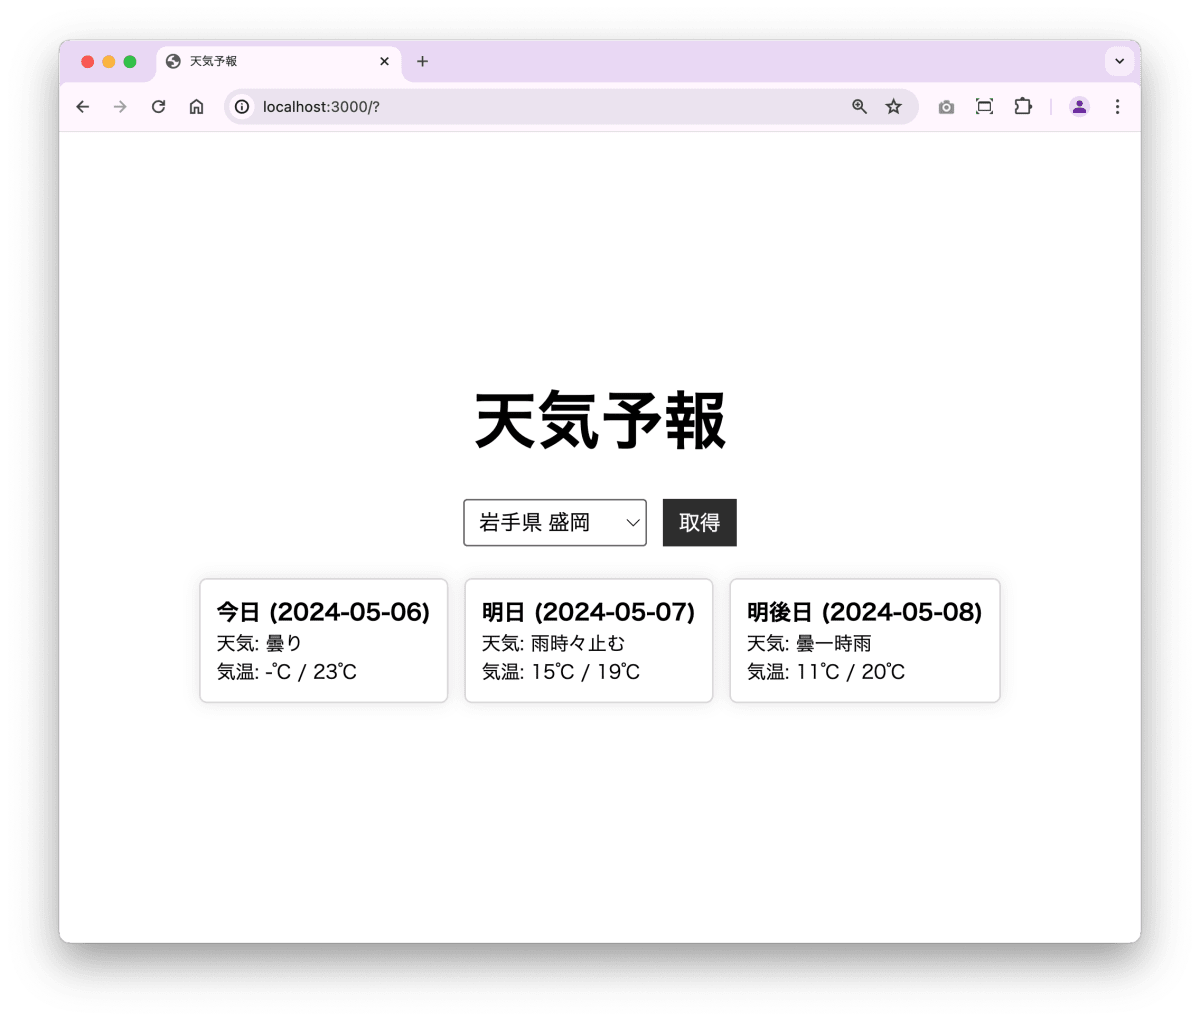
天気予報が表示できているか確認する
Discussion