Open10
ExpoでReact Native Firebase
プロジェクト作成


iOS設定
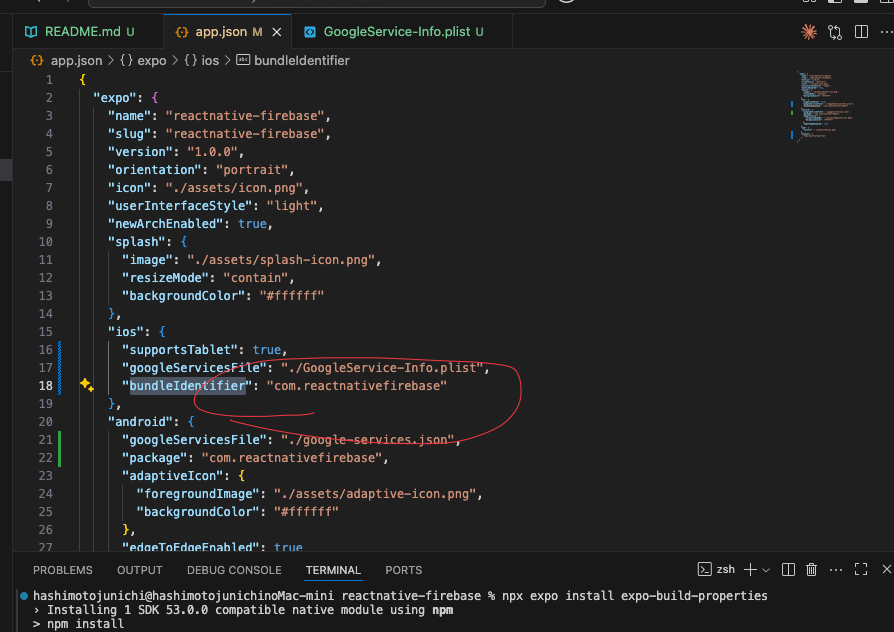
app.jsonのbundleIdentifierをコピーする。


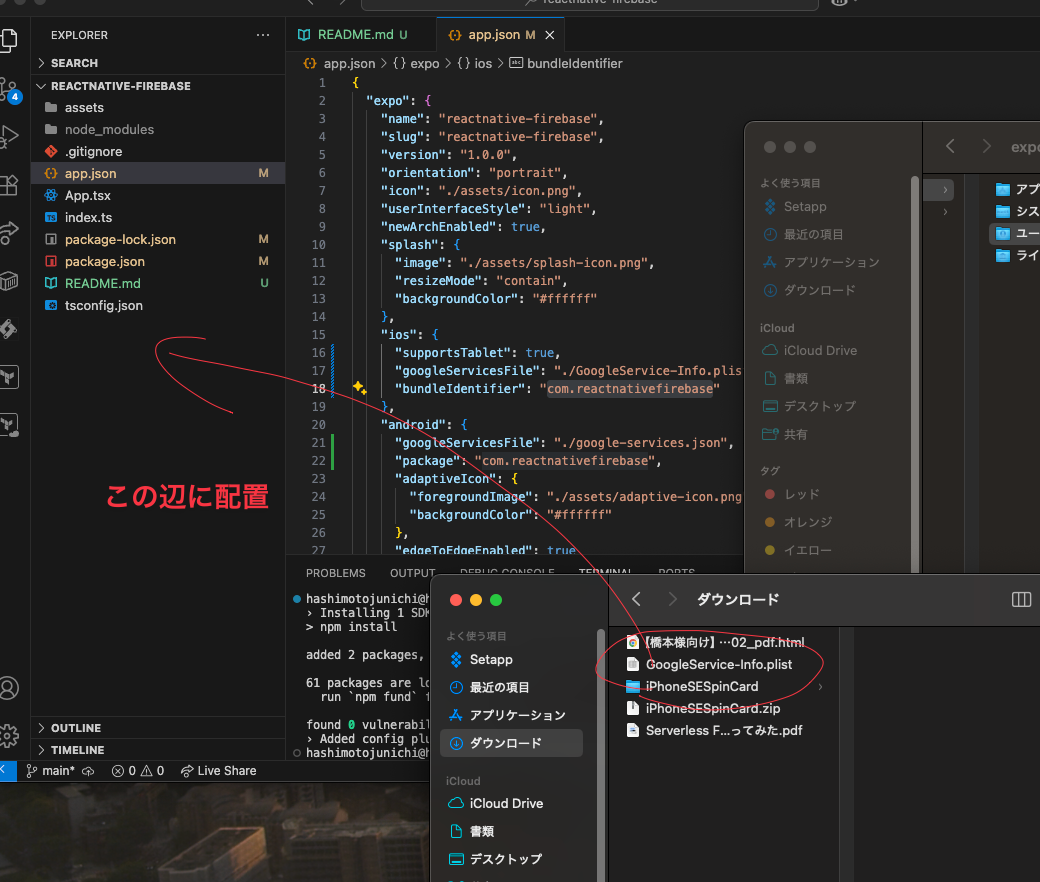


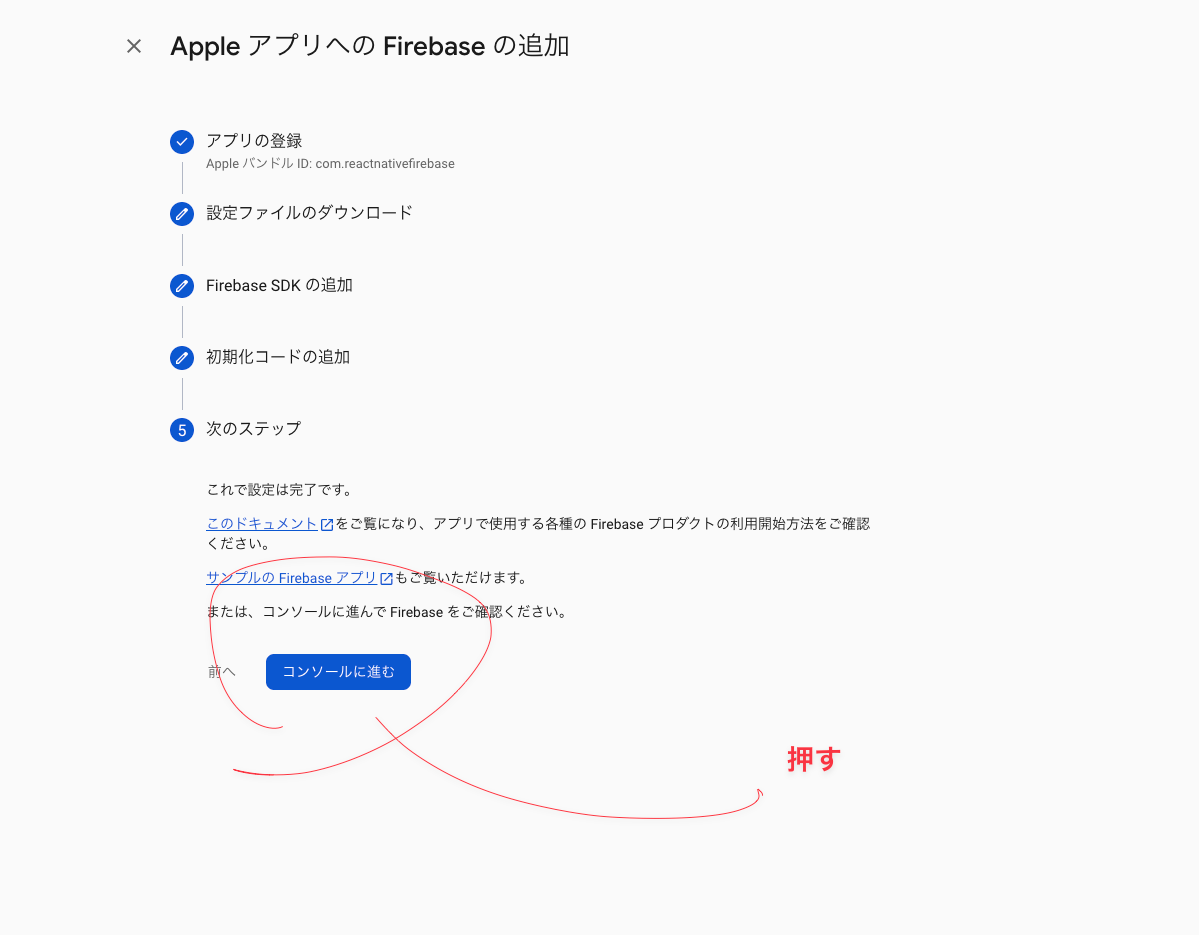
iOSで動作検証する。
npx expo install @react-native-firebase/auth @react-native-firebase/crashlytics
package.json
{
  "name": "reactnative-firebase",
  "version": "1.0.0",
  "main": "index.ts",
  "scripts": {
    "start": "expo start",
    "android": "expo run:android",
    "ios": "expo run:ios",
    "web": "expo start --web"
  },
  "dependencies": {
    "@react-native-firebase/app": "^22.4.0",
    "@react-native-firebase/auth": "^22.4.0",
    "@react-native-firebase/crashlytics": "^22.4.0",
    "expo": "~53.0.17",
    "expo-build-properties": "^0.14.8",
    "expo-status-bar": "~2.2.3",
    "react": "19.0.0",
    "react-native": "0.79.5"
  },
  "devDependencies": {
    "@babel/core": "^7.25.2",
    "@types/react": "~19.0.10",
    "typescript": "~5.8.3"
  },
  "private": true
}
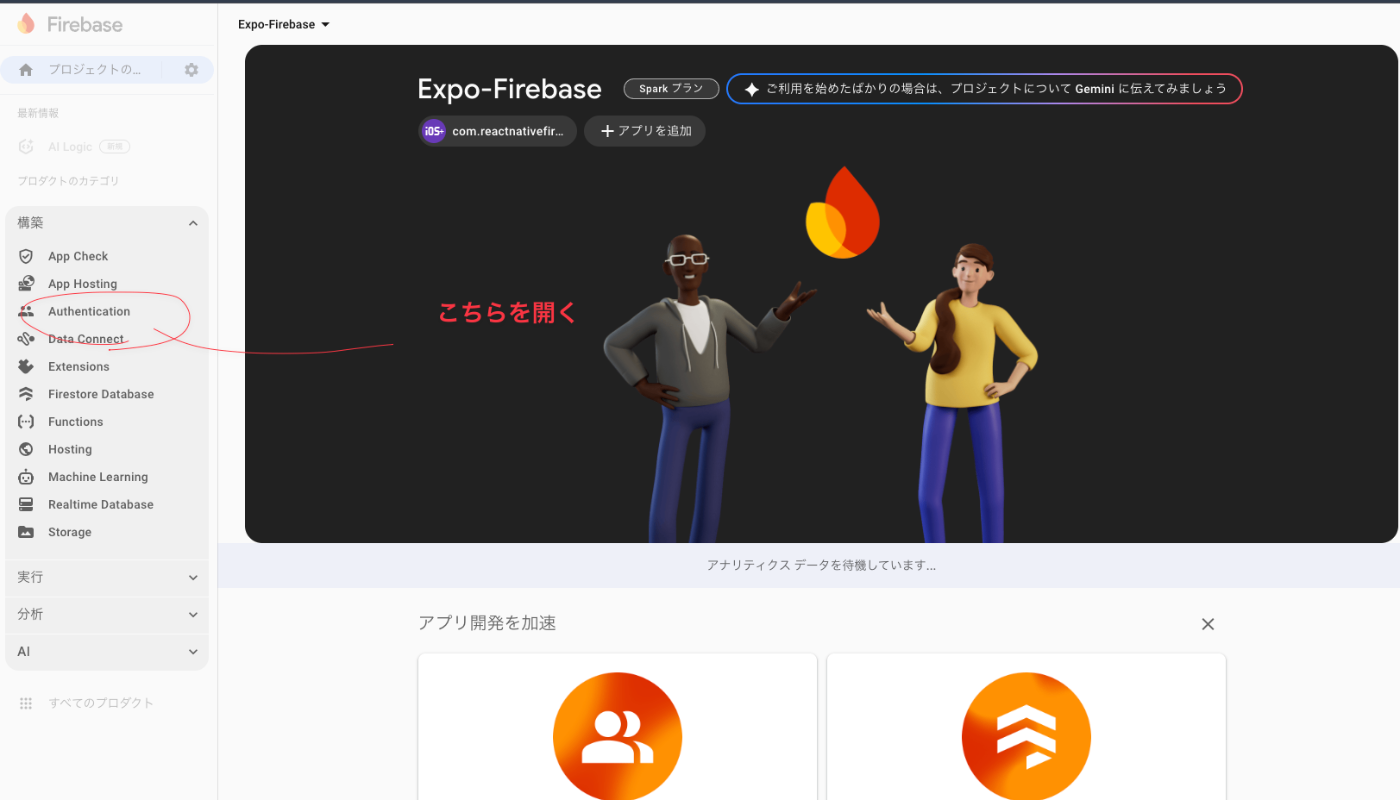

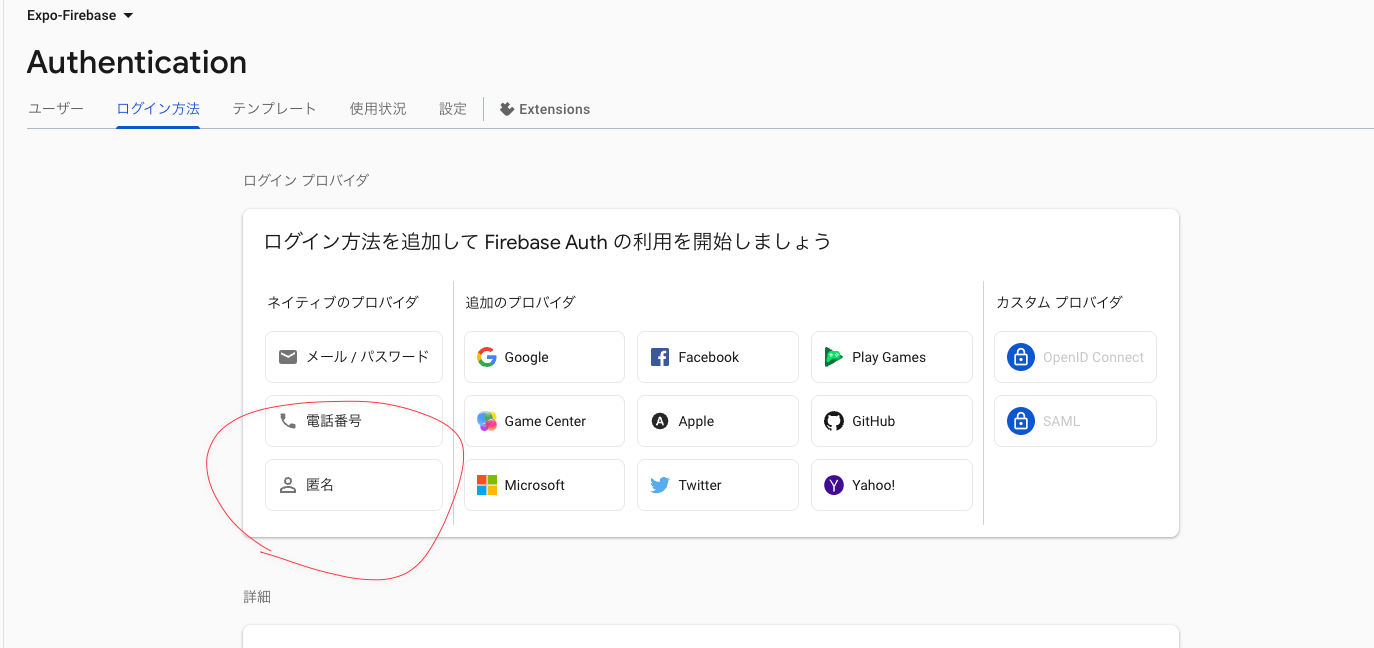
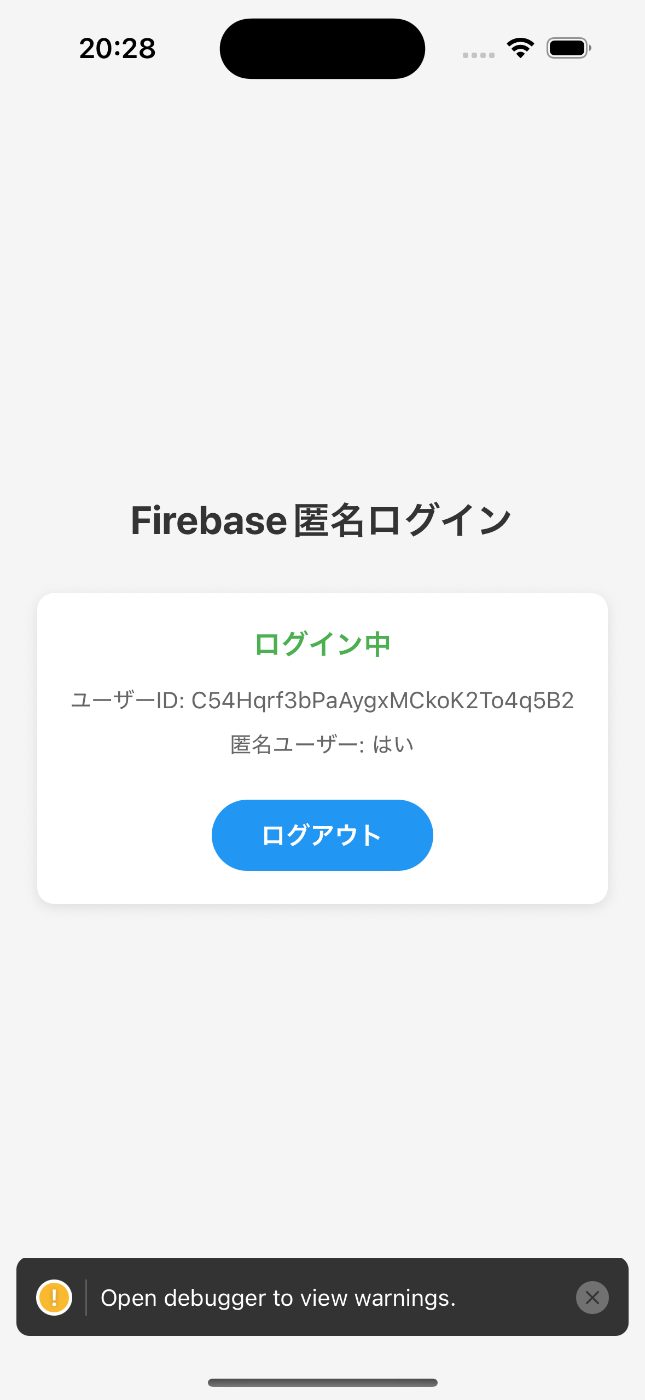
npx expo run:ios



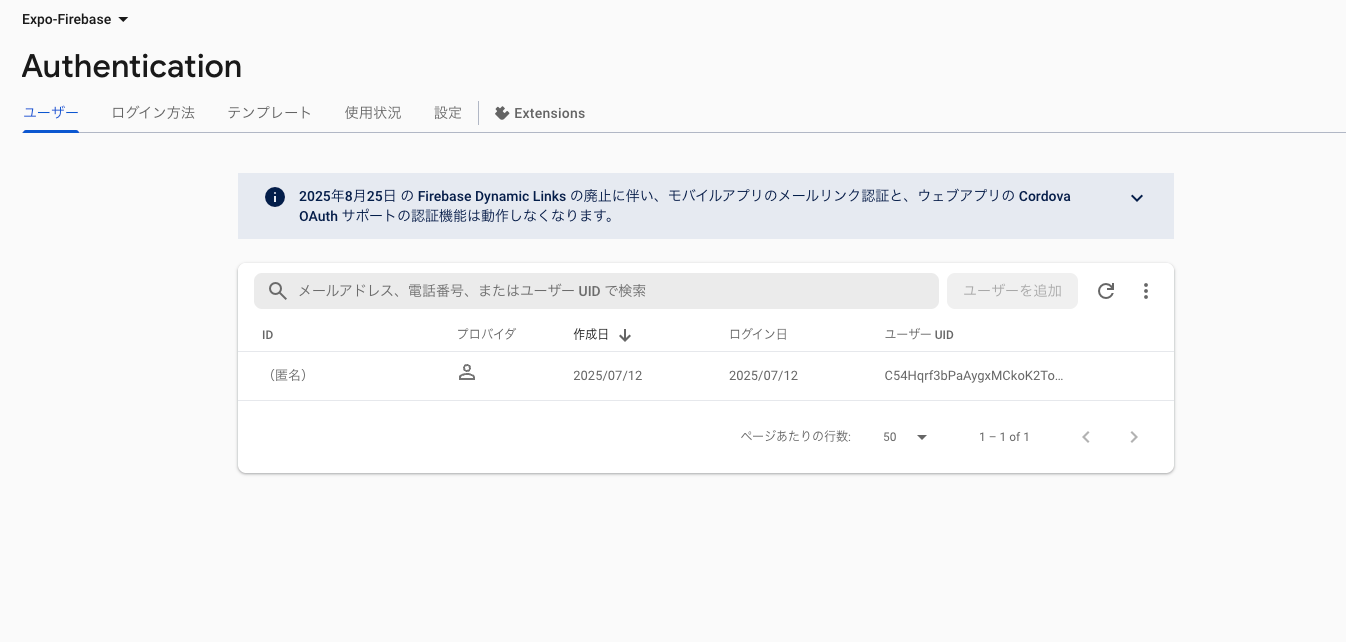
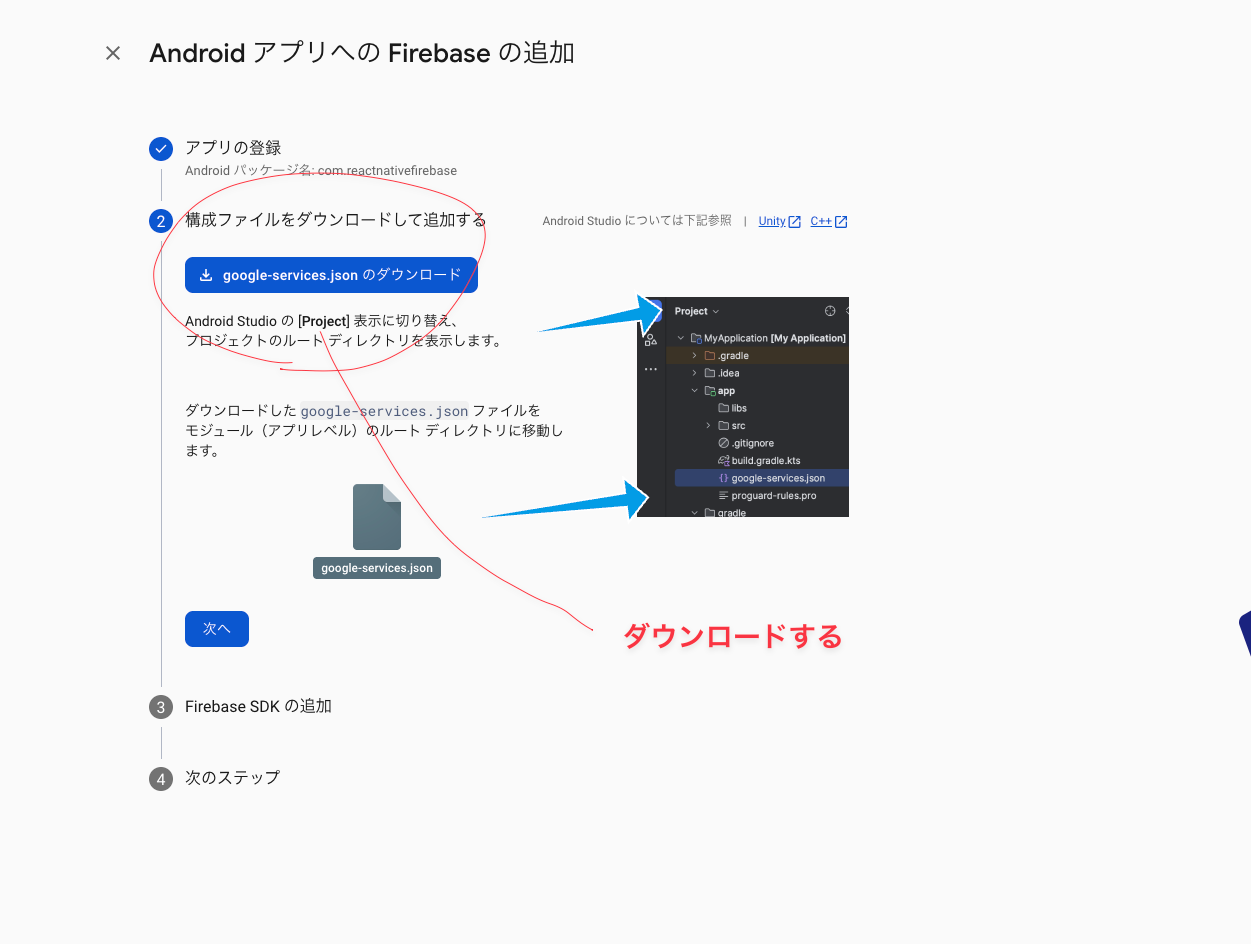
Android
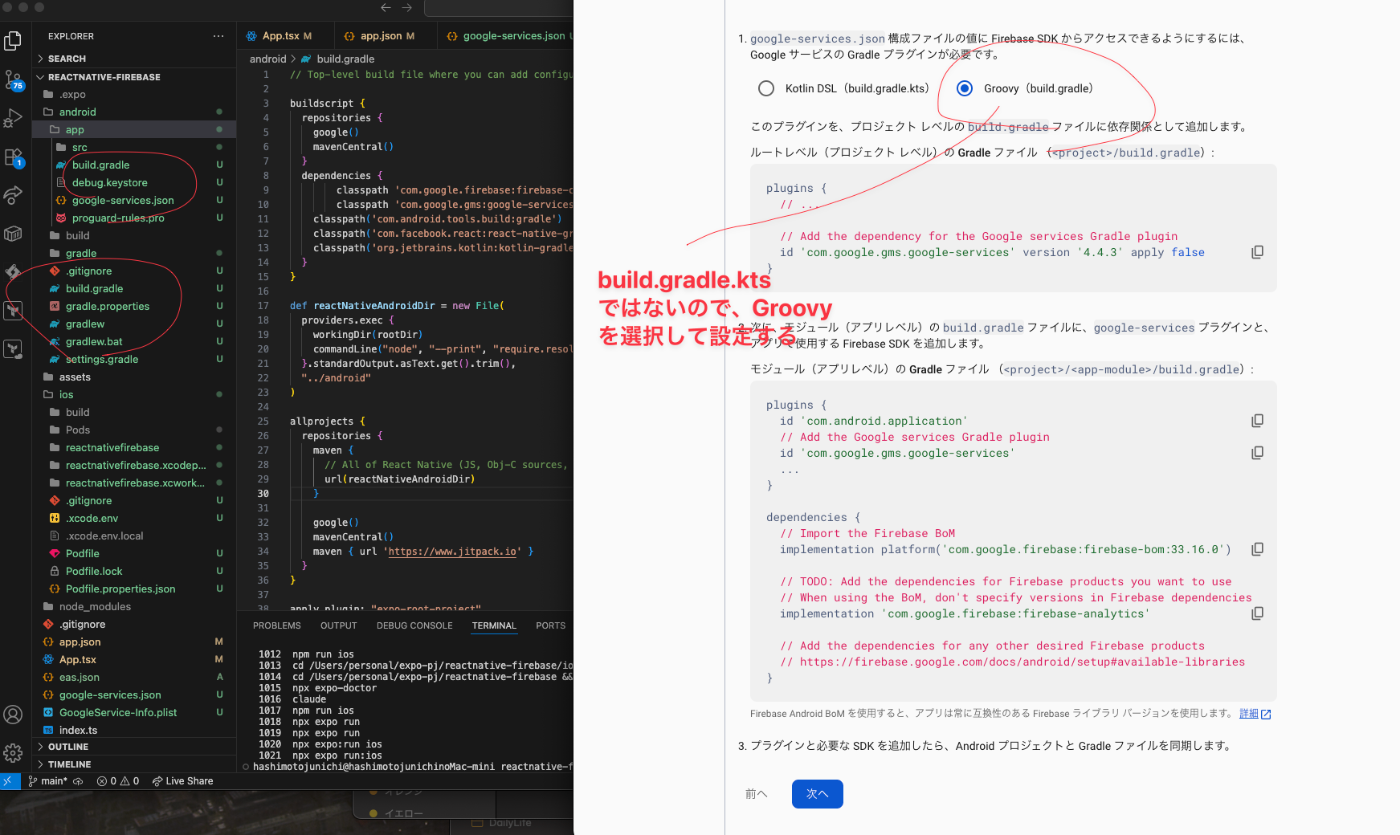
build.gradle.ktsではないようだ???
AIに修正任せたのでよくわからず。。。

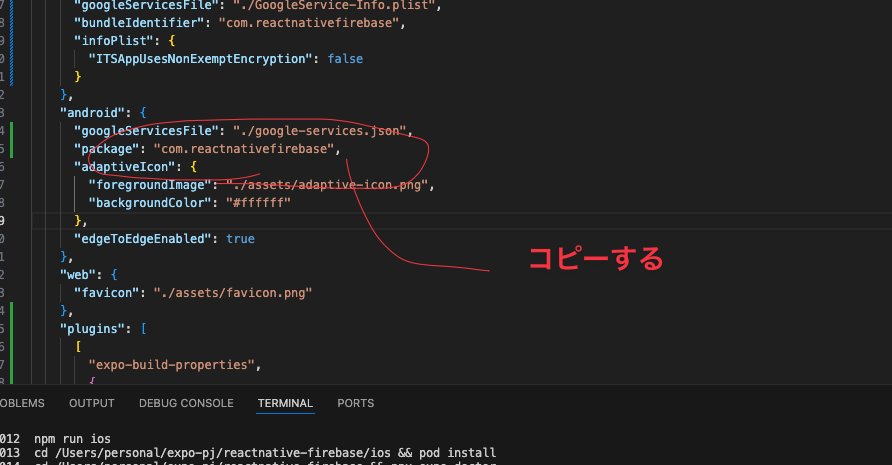

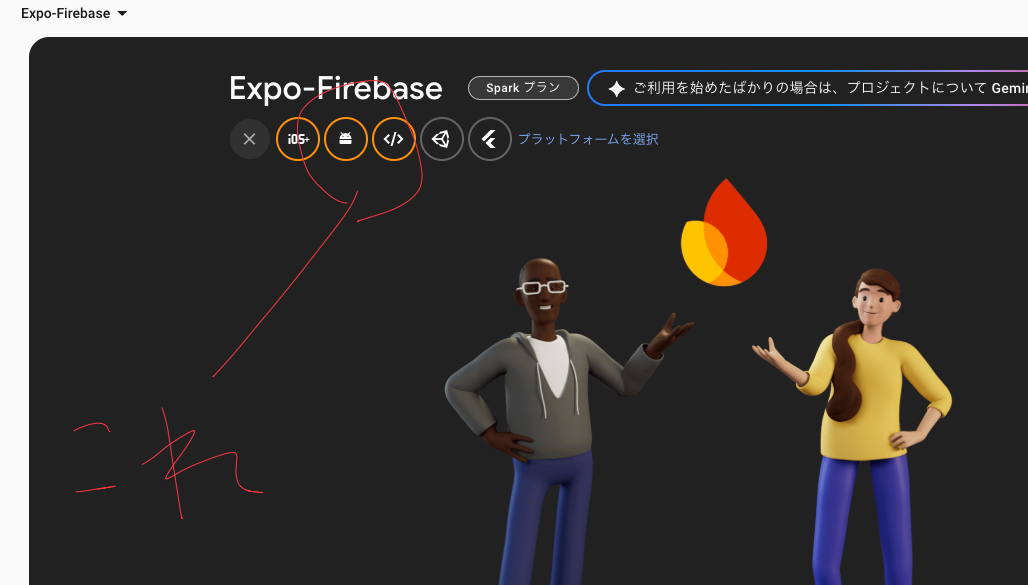
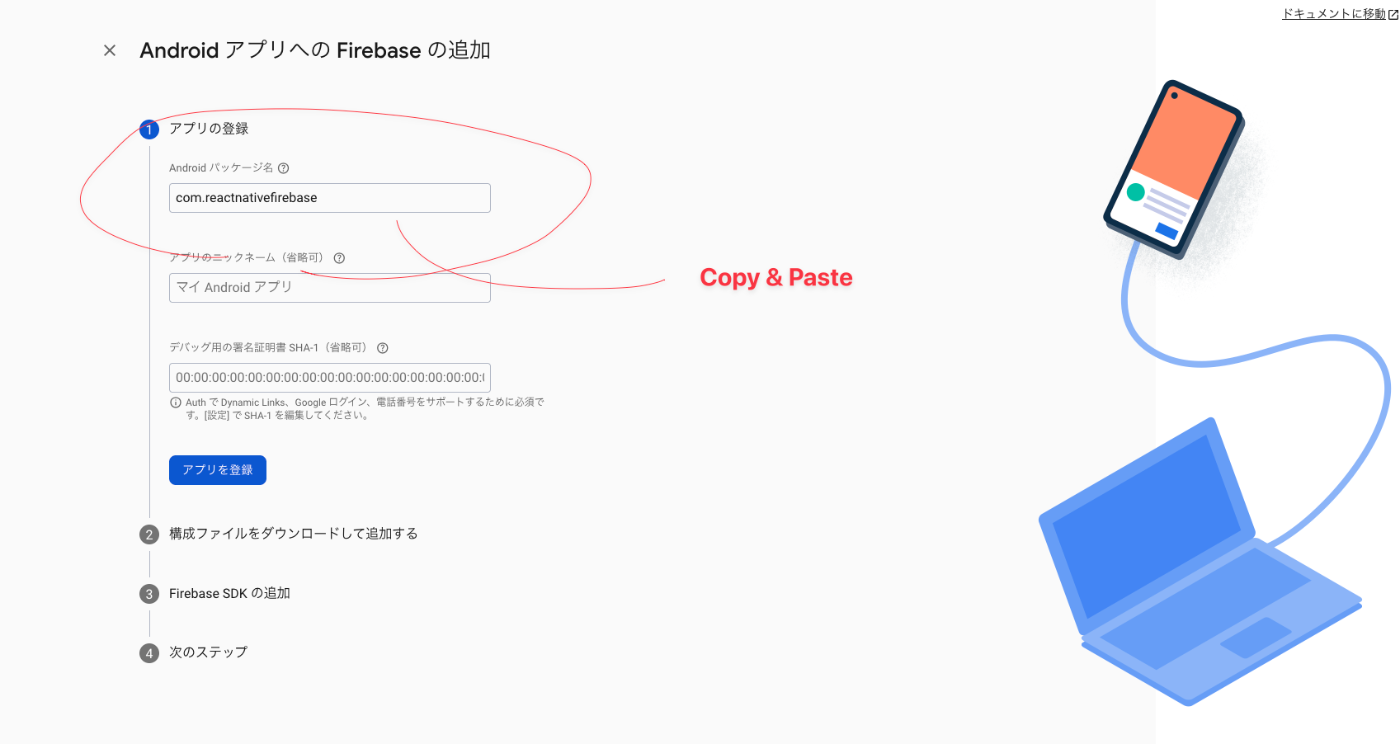



React Native Firebase プロジェクト設定手順
このプロジェクトは Expo と React Native Firebase を使用しています。以下は Firebase 設定時のエラー解消手順です。
ネイティブプロジェクトの生成
iOS と Android のネイティブフォルダは以下のコマンドで生成しました:
npx expo prebuild
このコマンドにより、Expo プロジェクトから iOS と Android のネイティブプロジェクトが自動生成されます。
プロジェクト構成
- Expo SDK: 53.0.17
- React Native: 0.79.5
- Firebase SDK: 22.4.0
Android 設定
特徴的な設定ファイル構成
Android の設定は .kts (Kotlin Script) ファイルではなく、従来の Groovy 形式の設定ファイルを使用しています。
必要な設定ファイル
-
google-services.json
- 場所:
/android/app/google-services.json - Firebase Console からダウンロードしたファイルを配置
- 場所:
-
android/build.gradle
buildscript { dependencies { classpath 'com.google.firebase:firebase-crashlytics-gradle:3.0.4' classpath 'com.google.gms:google-services:4.4.1' } } -
android/app/build.gradle
// プラグインの適用
apply plugin: "com.google.gms.google-services"
apply plugin: "com.google.firebase.crashlytics"

// 依存関係
dependencies {
  implementation platform('com.google.firebase:firebase-bom:33.16.0')
  implementation 'com.google.firebase:firebase-analytics'
  implementation 'com.google.firebase:firebase-auth'
  implementation 'com.google.firebase:firebase-crashlytics'
}
設定の特徴
- Expo プロジェクトのため、
settings.gradleは React Native の自動リンク設定を含む - build.gradle ファイルは従来の Groovy 形式を使用(.kts ではない)
- Firebase プラグインは
apply plugin構文で適用
iOS 設定
必要な設定ファイル
-
GoogleService-Info.plist
- 場所:
/ios/reactnativefirebase/GoogleService-Info.plist - Firebase Console からダウンロードしたファイルを Xcode プロジェクトに追加
- 場所:
-
Podfile
- Expo の自動設定により、Firebase ポッドは自動的にインストールされる
-
pod installは Expo のビルドプロセスで自動実行
設定手順
- Firebase Console でプロジェクトを作成
- iOS アプリを追加(Bundle ID:
com.reactnativefirebase) -
GoogleService-Info.plistをダウンロード - Xcode でプロジェクトに追加(ファイルをドラッグ&ドロップ)
-
expo run:iosでビルド
エラー解消のポイント
Android
-
google-services.json は必ず
/android/app/ディレクトリに配置 - プラグインの適用順序に注意(google-services と crashlytics)
- Firebase BoM を使用することで、各ライブラリのバージョン管理を簡素化
iOS
- GoogleService-Info.plist は Xcode プロジェクトのターゲットに含める必要がある
- Expo の自動リンク機能により、手動での設定は最小限
-
pod installは自動実行されるため、手動実行は不要
ビルドコマンド
# 開発ビルド
npm start

# iOS ビルド
npm run ios

# Android ビルド
npm run android
トラブルシューティング
Android ビルドエラー
-
./gradlew cleanでキャッシュをクリア -
google-services.jsonのパッケージ名がcom.reactnativefirebaseと一致しているか確認
iOS ビルドエラー
-
cd ios && pod deintegrate && pod installで Pod を再インストール - Xcode でクリーンビルド(Cmd+Shift+K)を実行
参考リンク
サンプルコード忘れてた。
App.tsx
import React, { useState, useEffect } from 'react';
import { View, Text, TouchableOpacity, StyleSheet, Alert } from 'react-native';
import { StatusBar } from 'expo-status-bar';
import auth, { FirebaseAuthTypes } from '@react-native-firebase/auth';

export default function App() {
  const [initializing, setInitializing] = useState(true);
  const [user, setUser] = useState<FirebaseAuthTypes.User | null>(null);

  // Firebase認証状態の変更を監視
  function onAuthStateChanged(user: FirebaseAuthTypes.User | null) {
    setUser(user);
    if (initializing) setInitializing(false);
  }

  useEffect(() => {
    const subscriber = auth().onAuthStateChanged(onAuthStateChanged);
    return subscriber; // unsubscribe on unmount
  }, [initializing]);

  // 匿名ログイン
  const signInAnonymously = async () => {
    try {
      await auth().signInAnonymously();
      Alert.alert('成功', '匿名ログインに成功しました');
    } catch (error) {
      console.error('匿名ログインエラー:', error);
      Alert.alert('エラー', '匿名ログインに失敗しました');
    }
  };

  // ログアウト
  const signOut = async () => {
    try {
      await auth().signOut();
      Alert.alert('成功', 'ログアウトしました');
    } catch (error) {
      console.error('ログアウトエラー:', error);
      Alert.alert('エラー', 'ログアウトに失敗しました');
    }
  };

  if (initializing) {
    return (
      <View style={styles.container}>
        <Text style={styles.loadingText}>Firebase初期化中...</Text>
        <StatusBar style="auto" />
      </View>
    );
  }

  return (
    <View style={styles.container}>
      <Text style={styles.title}>Firebase匿名ログイン</Text>

      {user ? (
        <View style={styles.userContainer}>
          <Text style={styles.welcomeText}>ログイン中</Text>
          <Text style={styles.userInfo}>ユーザーID: {user.uid}</Text>
          <Text style={styles.userInfo}>匿名ユーザー: {user.isAnonymous ? 'はい' : 'いいえ'}</Text>

          <TouchableOpacity style={styles.button} onPress={signOut}>
            <Text style={styles.buttonText}>ログアウト</Text>
          </TouchableOpacity>
        </View>
      ) : (
        <View style={styles.loginContainer}>
          <Text style={styles.description}>
            匿名ログインを使用して、アカウントを作成せずにアプリを試すことができます。
          </Text>

          <TouchableOpacity style={styles.button} onPress={signInAnonymously}>
            <Text style={styles.buttonText}>匿名ログイン</Text>
          </TouchableOpacity>
        </View>
      )}

      <StatusBar style="auto" />
    </View>
  );
}

const styles = StyleSheet.create({
  container: {
    flex: 1,
    backgroundColor: '#f5f5f5',
    alignItems: 'center',
    justifyContent: 'center',
    padding: 20,
  },
  title: {
    fontSize: 24,
    fontWeight: 'bold',
    marginBottom: 30,
    color: '#333',
  },
  loadingText: {
    fontSize: 16,
    color: '#666',
  },
  userContainer: {
    alignItems: 'center',
    backgroundColor: '#fff',
    padding: 20,
    borderRadius: 10,
    shadowColor: '#000',
    shadowOffset: {
      width: 0,
      height: 2,
    },
    shadowOpacity: 0.1,
    shadowRadius: 3.84,
    elevation: 5,
  },
  loginContainer: {
    alignItems: 'center',
    backgroundColor: '#fff',
    padding: 20,
    borderRadius: 10,
    shadowColor: '#000',
    shadowOffset: {
      width: 0,
      height: 2,
    },
    shadowOpacity: 0.1,
    shadowRadius: 3.84,
    elevation: 5,
  },
  welcomeText: {
    fontSize: 18,
    fontWeight: 'bold',
    marginBottom: 15,
    color: '#4CAF50',
  },
  userInfo: {
    fontSize: 14,
    color: '#666',
    marginBottom: 10,
    textAlign: 'center',
  },
  description: {
    fontSize: 16,
    color: '#666',
    textAlign: 'center',
    marginBottom: 20,
    lineHeight: 22,
  },
  button: {
    backgroundColor: '#2196F3',
    paddingHorizontal: 30,
    paddingVertical: 12,
    borderRadius: 25,
    marginTop: 15,
  },
  buttonText: {
    color: 'white',
    fontSize: 16,
    fontWeight: 'bold',
    textAlign: 'center',
  },
});
iOSはこれが必要だった!
npm install @react-native-firebase/app
cd ios && pod install
設定手順
npx expo install @react-native-firebase/app

npx expo install @react-native-firebase/auth

npx expo install expo-build-properties
generate iOS & Android
npx expo prebuild
iOS Build
npx expo run:ios
2回目からはこれでOK
npm run ios
Andriod Build
cd android/ && ./gradlew signingReport
JetaBrains ToolBoxを仕様している場合の設定。
android/local.propertiesに配置する。
sdk.dir=/Users/hashimotojunichi/Library/Android/sdk
cd androidで実行する。
./android/gradlew -p android app:assembleDebug
