🌐
Flutter WebをGithub Pagesに公開する
読んでほしい人
Github Pagesを使うと、Flutter Webで作成した WebPage をインターネットで公開することができます。Firebase Hostingしか使ったことないのですが以前から気になってついつい試してみました。
補足情報
Flutter WebやGithub Pagesを使ったことあるひと向けの記事です。
公開するのはなんでも良いです。私は画像をカウンターアプリに追加したものをホスティングしてみました。
こちらのサイトが参考になりました。Github Actionsを使うと簡単にホスティングできます。ボタンを押すだけで設定できますね。
ymlファイルの設定が必要ですが...
こちらのファイルをテンプレートとして使います。ご自身のFlutterのバージョンを指定するだけで使えると思います。私は、 3.19.0を指定します。
設定ファイル
# Simple workflow for deploying static content to GitHub Pages
name: Deploy static content to Pages

on:
  # Runs on pushes targeting the default branch
  push:
    branches: ["main"]

  # Allows you to run this workflow manually from the Actions tab
  workflow_dispatch:

# Sets permissions of the GITHUB_TOKEN to allow deployment to GitHub Pages
permissions:
  contents: read
  pages: write
  id-token: write

# Allow only one concurrent deployment, skipping runs queued between the run in-progress and latest queued.
# However, do NOT cancel in-progress runs as we want to allow these production deployments to complete.
concurrency:
  group: "pages"
  cancel-in-progress: false

jobs:
  # Single deploy job since we're just deploying
  deploy:
    environment:
      name: github-pages
      url: ${{ steps.deployment.outputs.page_url }}
    runs-on: ubuntu-latest
    steps:
      - name: Checkout
        uses: actions/checkout@v4
      - name: Repository
        id: version
        run: |
          REPOSITORY=$(echo ${{ github.repository }} | sed -e "s#.*/##")
          echo "repository=$REPOSITORY" >> $GITHUB_OUTPUT
      - name: Flutter
        uses: subosito/flutter-action@v2
        with:
          flutter-version: '3.19.0'
          channel: 'stable'
          cache: true
      - run: flutter --version
      - run: flutter pub get
      - run: flutter build web --web-renderer html --base-href /${{ steps.version.outputs.repository }}/
      - name: Setup Pages
        uses: actions/configure-pages@v5
      - name: Upload artifact
        uses: actions/upload-pages-artifact@v3
        with:
          # Upload entire repository
          path: './build/web'
      - name: Deploy to GitHub Pages
        id: deployment
        uses: actions/deploy-pages@v4
記事の内容
ねこ様の画像を用意しました。

ソースコードはなんでも良いです。私のはこんな感じです。
公開するコード
main.dart
import 'package:flutter/material.dart';
void main() {
runApp(const MyApp());
}
class MyApp extends StatelessWidget {
const MyApp({super.key});
Widget build(BuildContext context) {
return MaterialApp(
debugShowCheckedModeBanner: false,
title: 'Flutter Demo',
theme: ThemeData(
colorScheme: ColorScheme.fromSeed(seedColor: Colors.deepPurple),
useMaterial3: true,
),
home: const MyHomePage(title: 'Flutter Web Page'),
);
}
}
class MyHomePage extends StatefulWidget {
const MyHomePage({super.key, required this.title});
final String title;
State<MyHomePage> createState() => _MyHomePageState();
}
class _MyHomePageState extends State<MyHomePage> {
int _counter = 0;
void _incrementCounter() {
setState(() {
_counter++;
});
}
Widget build(BuildContext context) {
return Scaffold(
appBar: AppBar(
backgroundColor: Colors.blueGrey,
title: Text(widget.title),
),
floatingActionButton: FloatingActionButton(
onPressed: _incrementCounter,
tooltip: 'Increment',
child: const Icon(Icons.add),
),
body: Center(
child: Column(
mainAxisAlignment: MainAxisAlignment.center,
children: <Widget>[
Image.asset('assets/cat.png'),
const SizedBox(height: 16),
const Text(
'お世話になっておりますネコ様',
style: TextStyle(fontSize: 24),
),
const SizedBox(height: 16),
Text(
'count: $_counter',
),
],
),
),
);
}
}
Flutter Webのファイルを生成する。
flutter build web
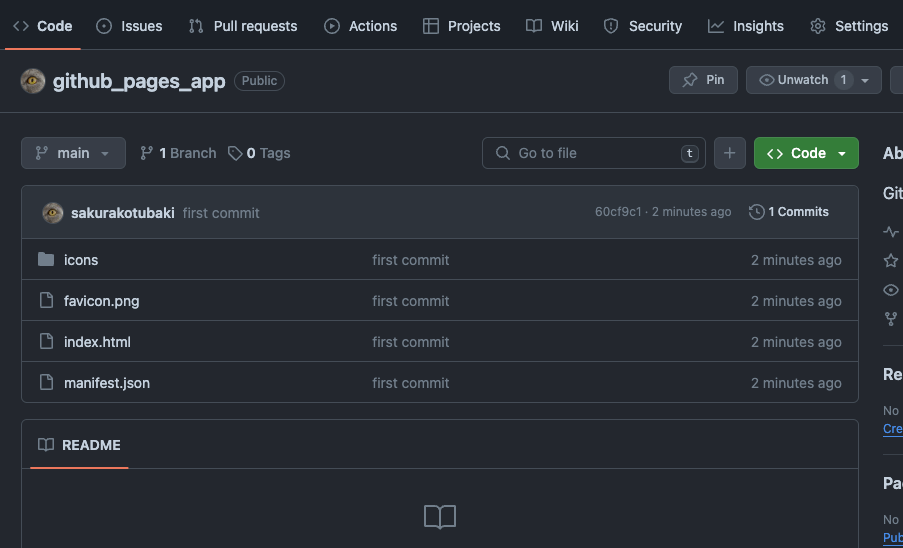
コミットした後にプッシュしてください。
git init
git add .
git commit -m "first commit"
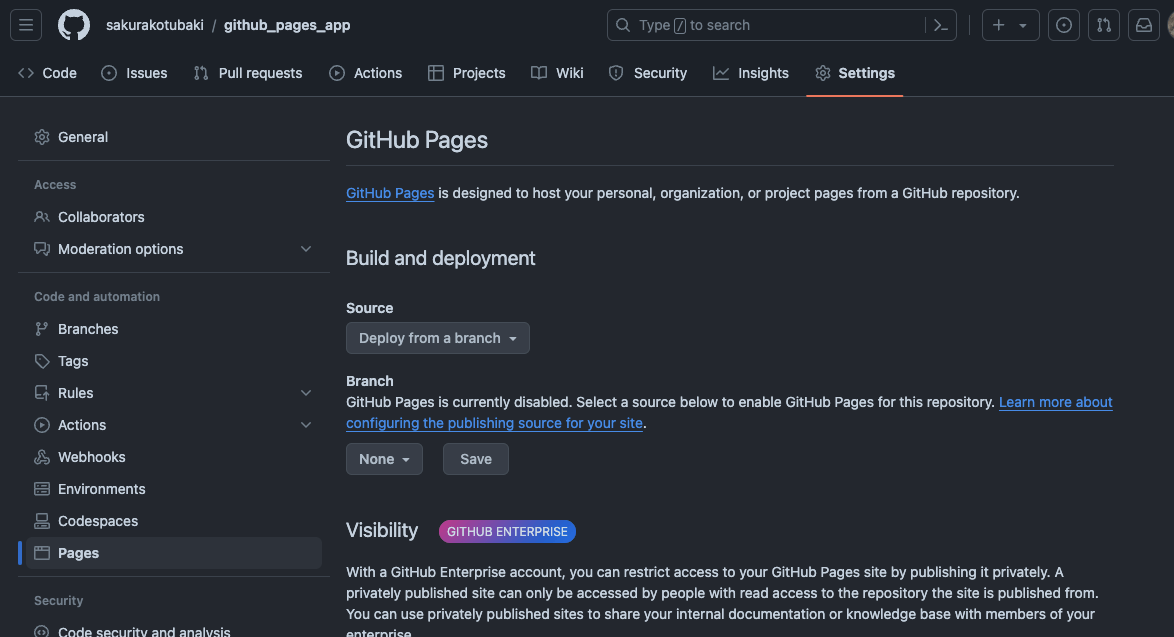
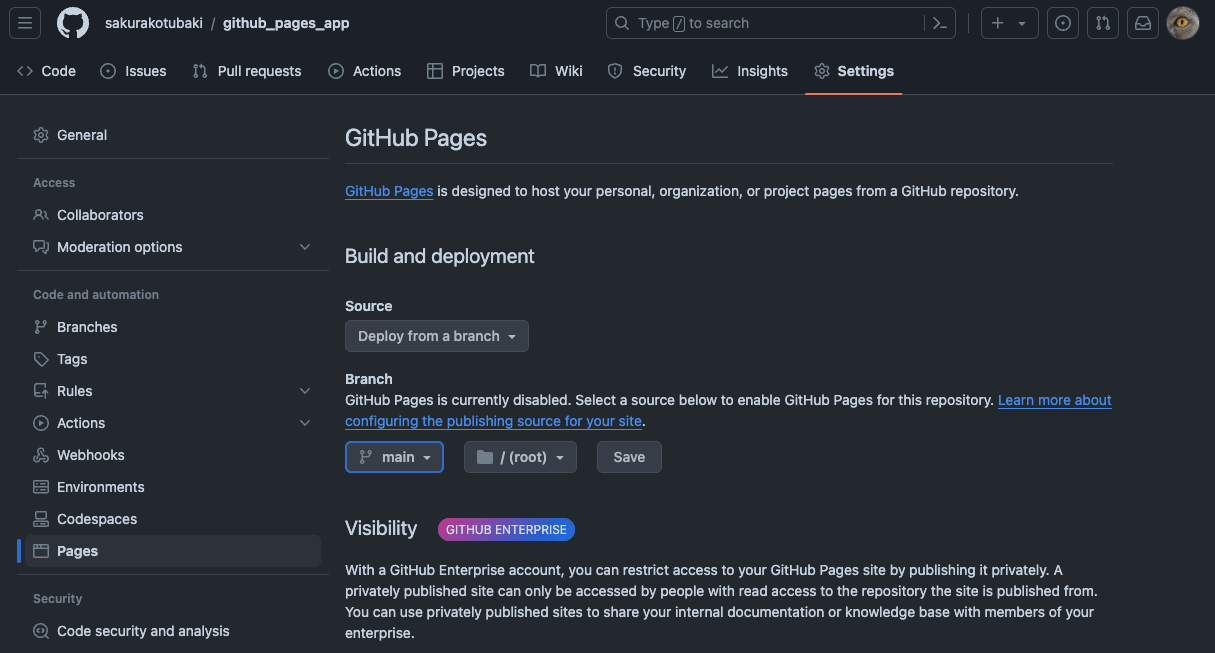
こんな感じで設定していってください。


成功するとこんな感じで表示されると思います。リンク貼っておきます。
最後に
どうでしたか。今回は、Github Pagesを使用して、Flutter Webをホスティングしてインターネットで世界に公開するのをやってみました。慣れれば簡単ですね。お試しあれ。
Discussion