AndroidViewとWebViewを使ってみる
#🔍 AndroidViewとは?
参考になりそうな情報が見つからないので、内部実装を見ることにした😇
このコードの内部を理解したい💡
@Composable
fun Greeting() {
    val url = "https://zenn.dev/"
    AndroidView(factory = {
        android.webkit.WebView(it).apply {
            webViewClient = WebViewClient()
            loadUrl(url)
        }
    })
}
Composes an Android View obtained from factory. The factory block will be called exactly once to obtain the View being composed, and it is also guaranteed to be invoked on the UI thread. Therefore, in addition to creating the View, the factory block can also be used to perform one-off initializations and View constant properties' setting. The update block can run multiple times (on the UI thread as well) due to recomposition, and it is the right place to set the new properties. Note that the block will also run once right after the factory block completes.
ファクトリーから取得したAndroid Viewを合成する。ファクトリーブロックは、構成するビューを取得するために一度だけ呼び出されます。そのため、ファクトリーブロックは、Viewの作成だけでなく、1回限りの初期化やViewの定数プロパティの設定にも使用できます。updateブロックは、再コンポジションにより(UIスレッド上でも)複数回実行される可能性があり、新しいプロパティを設定するのに適した場所です。このブロックは、ファクトリーブロックが完了した直後にも一度だけ実行されることに注意してください。
AndroidView is commonly needed for using Views that are infeasible to be reimplemented in Compose and there is no corresponding Compose API. Common examples for the moment are WebView, SurfaceView, AdView, etc.
AndroidViewは、Composeで再実装することが不可能で、対応するCompose APIが存在しないViewを使用するために一般的に必要とされます。一般的な例としては、WebView、SurfaceView、AdViewなどがあります。
This overload of AndroidView does not automatically pool or reuse Views. If placed inside of a reusable container (including inside a LazyRow or LazyColumn), the View instances will always be discarded and recreated if the composition hierarchy containing the AndroidView changes, even if its group structure did not change and the View could have conceivably been reused.
AndroidViewのこのオーバーロードは、Viewを自動的にプールしたり再利用したりしません。再利用可能なコンテナ内(LazyRowやLazyColumn内を含む)に配置された場合、AndroidViewを含むコンポジション階層が変更されると、グループ構造が変更されず、Viewが再利用される可能性があったとしても、Viewインスタンスは常に破棄され、再作成されます。
To opt-in for View reuse, call the overload of AndroidView that accepts an onReset callback, and provide a non-null implementation for this callback. Since it is expensive to discard and recreate View instances, reusing Views can lead to noticeable performance improvements — especially when building a scrolling list of AndroidViews. It is highly recommended to opt-in to View reuse when possible.
Viewの再利用を選択するには、onResetコールバックを受け付けるAndroidViewのオーバーロードを呼び出し、このコールバックのNULLでない実装を提供します。Viewインスタンスを破棄して再作成するにはコストがかかるため、Viewを再利用することで、特にAndroidViewのスクロールリストを作成する際に、パフォーマンスが顕著に向上します。可能であれば、Viewの再利用を選択することを強くお勧めします。
AndroidView will not clip its content to the layout bounds. Use View.setClipToOutline on the child View to clip the contents, if desired. Developers will likely want to do this with all subclasses of SurfaceView to keep its contents contained.
AndroidViewはコンテンツをレイアウト境界にクリップしません。必要であれば、子ViewでView.setClipToOutlineを使用してコンテンツをクリップします。開発者は、SurfaceViewのすべてのサブクラスでこれを行い、コンテンツを保持したいと思うでしょう。
AndroidView has nested scroll interop capabilities if the containing view has nested scroll enabled. This means this Composable can dispatch scroll deltas if it is placed inside a container that participates in nested scroll. For more information on how to enable nested scroll interop:
Params:
factory - The block creating the View to be composed.
modifier - The modifier to be applied to the layout.
update - A callback to be invoked after the layout is inflated and upon recomposition to update the information and state of the view.
Samples:
androidx.compose.ui.samples.ViewInComposeNestedScrollInteropSample
// Unresolved
androidx.compose.ui.samples.AndroidViewSample
// Unresolved
AndroidViewは、内包するビューが入れ子スクロールを有効にしていれば、入れ子スクロールの相互運用が可能です。つまり、このコンポーザブルは、入れ子スクロールに参加するコンテナの中に置かれた場合、スクロールデルタをディスパッチすることができます。入れ子スクロールを有効にする方法の詳細については、こちらを参照してください:
Params:
factory - 構成されるビューを作成するブロック。
modifier - レイアウトに適用されるモディファイア。
update - レイアウトが膨張した後、再コンポジション時に呼び出されるコールバックで、ビューの情報と状態を更新します。
サンプルです:
androidx.compose.ui.samples.ViewInComposeNestedScrollInteropSample
// 未解決
androidx.compose.ui.samples.AndroidViewSample
// 未解決
@Composable
@UiComposable
fun <T : View> AndroidView(
    factory: (Context) -> T,
    modifier: Modifier = Modifier,
    update: (T) -> Unit = NoOpUpdate
) {
    AndroidView(
        factory = factory,
        modifier = modifier,
        update = update,
        onRelease = NoOpUpdate
    )
}
Constructs a new WebView with an Activity Context object.
Note: WebView should always be instantiated with an Activity Context. If instantiated with an Application Context, WebView will be unable to provide several features, such as JavaScript dialogs and autofill.
Params:
context – an Activity Context to access application assets
アクティビティコンテキストオブジェクトで新しいWebViewを構築します。
注: WebViewは常にアクティビティコンテキストでインスタンス化する必要があります。Application Contextでインスタンス化された場合、WebViewはJavaScriptダイアログやオートフィルなどのいくつかの機能を提供できなくなります。
パラメータ
context - アプリケーションアセットにアクセスするためのアクティビティコンテキスト
public WebView(@NonNull Context context) {
        this(context, null);
    }
Calls the specified function block with this value as its receiver and returns this value.
For detailed usage information see the documentation for scope functions .
指定された関数ブロックをこの値をレシーバーとして呼び出し、この値を返します。
詳細な使用法については、スコープ関数のドキュメントを参照してください。
@kotlin.internal.InlineOnly
public inline fun <T> T.apply(block: T.() -> Unit): T {
    contract {
        callsInPlace(block, InvocationKind.EXACTLY_ONCE)
    }
    block()
    return this
}
Sets the WebViewClient that will receive various notifications and requests. This will replace the current handler.
Params:
client – an implementation of WebViewClient
See Also:
getWebViewClient
様々な通知やリクエストを受け取る WebViewClient を設定します。これは現在のハンドラを置き換えます。
パラメータ
client - WebViewClient の実装
こちらも参照:
getWebViewClient
public void setWebViewClient(@NonNull WebViewClient client) {
        checkThread();
        mProvider.setWebViewClient(client);
    }
Loads the given URL.
Also see compatibility note on evaluateJavascript.
Params:
url – the URL of the resource to load
指定された URL をロードします。
evaluateJavascript の互換性についての注意も参照ください。
パラメータ
url - 読み込むリソースのURL
public void loadUrl(@NonNull String url) {
        checkThread();
        mProvider.loadUrl(url);
    }
全体のコード:
package com.example.helloapp

import android.os.Bundle
import android.webkit.WebViewClient
import androidx.activity.ComponentActivity
import androidx.activity.compose.setContent
import androidx.compose.foundation.layout.fillMaxSize
import androidx.compose.material3.MaterialTheme
import androidx.compose.material3.Surface
import androidx.compose.runtime.Composable
import androidx.compose.ui.Modifier
import androidx.compose.ui.tooling.preview.Preview
import androidx.compose.ui.viewinterop.AndroidView
import com.example.helloapp.ui.theme.HelloAppTheme

class MainActivity : ComponentActivity() {
    override fun onCreate(savedInstanceState: Bundle?) {
        super.onCreate(savedInstanceState)
        setContent {
            HelloAppTheme {
                // A surface container using the 'background' color from the theme
                Surface(modifier = Modifier.fillMaxSize(), color = MaterialTheme.colorScheme.background) {
                    Greeting()
                }
            }
        }
    }
}

@Composable
fun Greeting() {
    // 表示したいページのurlを指定
    val url = "https://zenn.dev/"
    AndroidView(factory = {
        android.webkit.WebView(it).apply {
            webViewClient = WebViewClient()
            loadUrl(url)
        }
    })
}

@Preview(showBackground = true)
@Composable
fun GreetingPreview() {
    HelloAppTheme {
        Greeting()
    }
}
パーミッションの許可をするためにこのコードを追加する。
<uses-permission android:name="android.permission.INTERNET" />

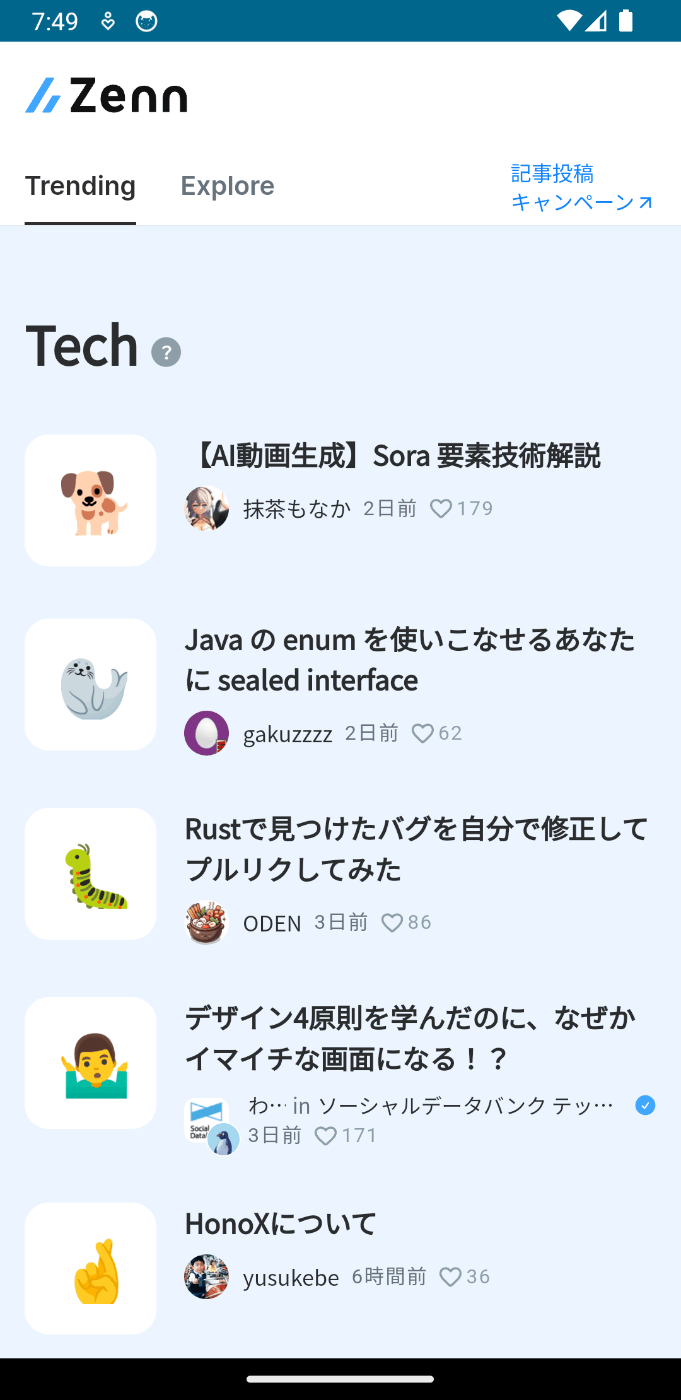
ビルドすると、Webページが表示される:

まとめ
今回は、webページのリンクを表示する機能について調べてみました。解説が長すぎて、私も理解しきれておりません。何か役立つかな。


Discussion