FlutterでOpenAPIを使う
Overview
APIの設計書をYAMLで作ってくれるのが、Swaggerというツールみたいなんですが、今はOPEN APIに名前が変わったみたいです。
今回は、Flutterでローカル環境にモックサーバーを構築して、YAMLファイルにAPIとのやりとりをする設定を書いて、OPEN APIを使用して、通信するアプリを作ってみました。
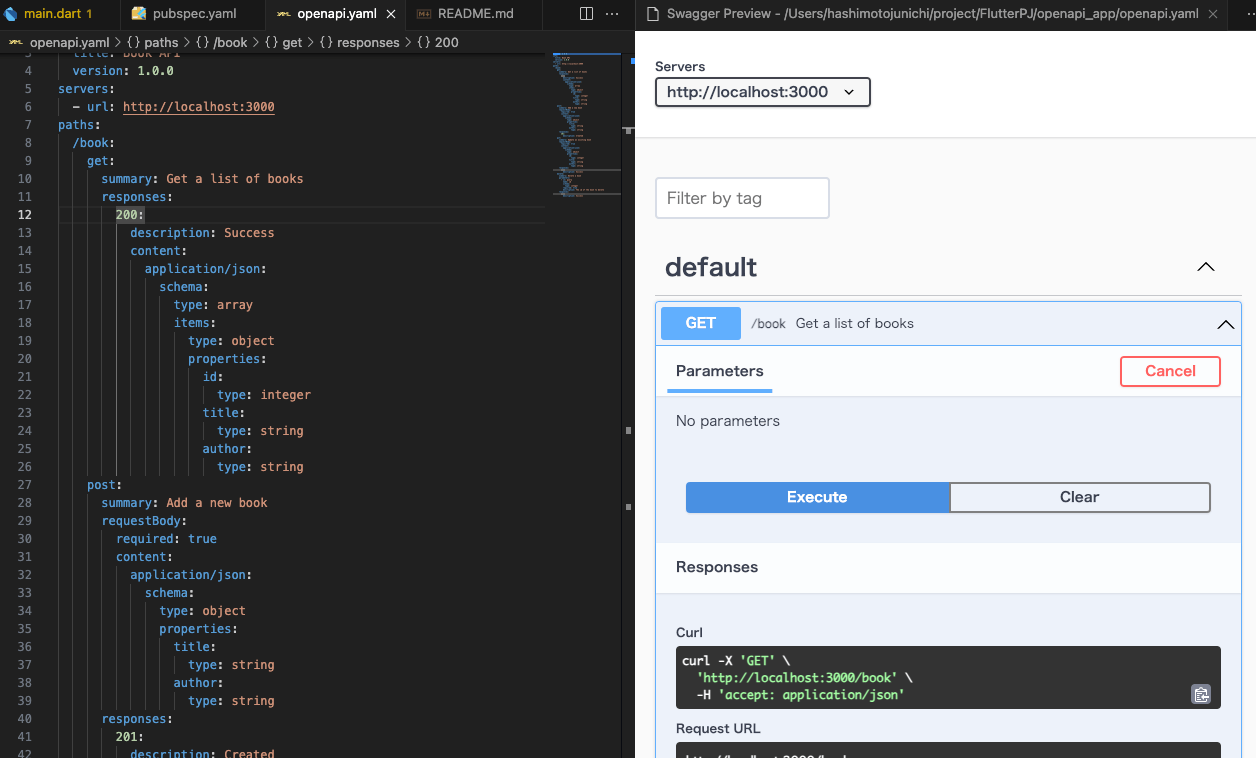
Swagger Viewerという拡張機能があると、ブラウザを開かなくもSwaggerをエディタで操作することができます。
yamlファイルの中で、コマンドパレットを実行すると確認できます。
私は、DartのパッケージではなくOpen APIのCLIを使いました。
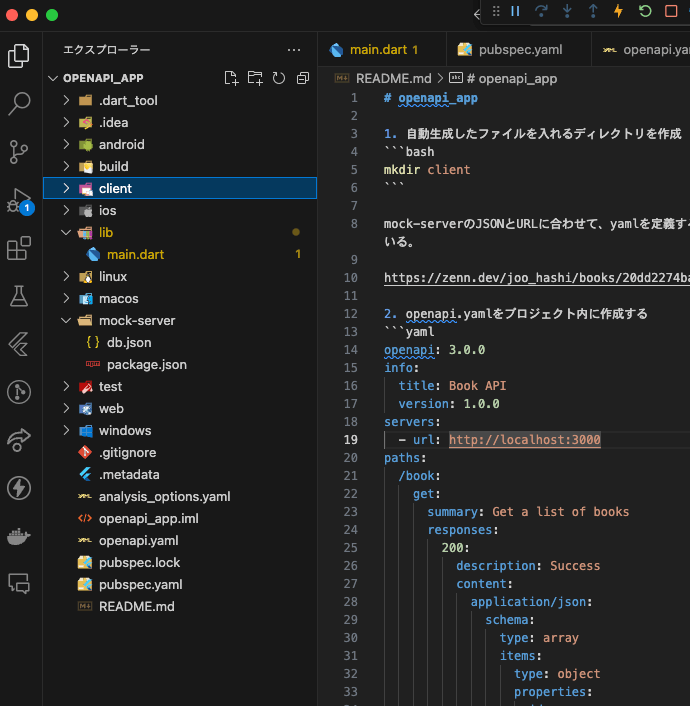
clientというディレクトリを作成して、コマンドを打つと自動生成したファイルがその中に作られることになります。CLIのコマンドでは、ディレクトリ名を指定してください。
YAMLを定義しただけでは使えないので、ローカルで使うモックのサーバーを使ってます。JSONのデータ構造とURLをYAMLで書き直して、設定してる感じです。
PUTとDELETEはできたりできなかったりします???、curlでしかできてないような???
README
openapi_app
- 自動生成したファイルを入れるディレクトリを作成
mkdir client
mock-serverのJSONとURLに合わせて、yamlを定義する。URLと配列の名前は変わっている。
- openapi.yamlをプロジェクト内に作成する
openapi: 3.0.0
info:
  title: Book API
  version: 1.0.0
servers:
  - url: http://localhost:3000
paths:
  /book:
    get:
      summary: Get a list of books
      responses:
        200:
          description: Success
          content:
            application/json:
              schema:
                type: array
                items:
                  type: object
                  properties:
                    id:
                      type: integer
                    title:
                      type: string
                    author:
                      type: string
    post:
      summary: Add a new book
      requestBody:
        required: true
        content:
          application/json:
            schema:
              type: object
              properties:
                title:
                  type: string
                author:
                  type: string
      responses:
        201:
          description: Created
    put:
      summary: Update an existing book
      requestBody:
        required: true
        content:
          application/json:
            schema:
              type: object
              properties:
                id:
                  type: integer
                title:
                  type: string
                author:
                  type: string
      responses:
        200:
          description: Success
    delete:
      summary: Delete a book
      parameters:
        - in: query
          name: id
          schema:
            type: integer
          required: true
          description: The id of the book to delete
      responses:
        200:
          description: Success
- 自動生成のコマンドを実行する
openapi-generator generate -i ./openapi.yaml -g dart -o ./client
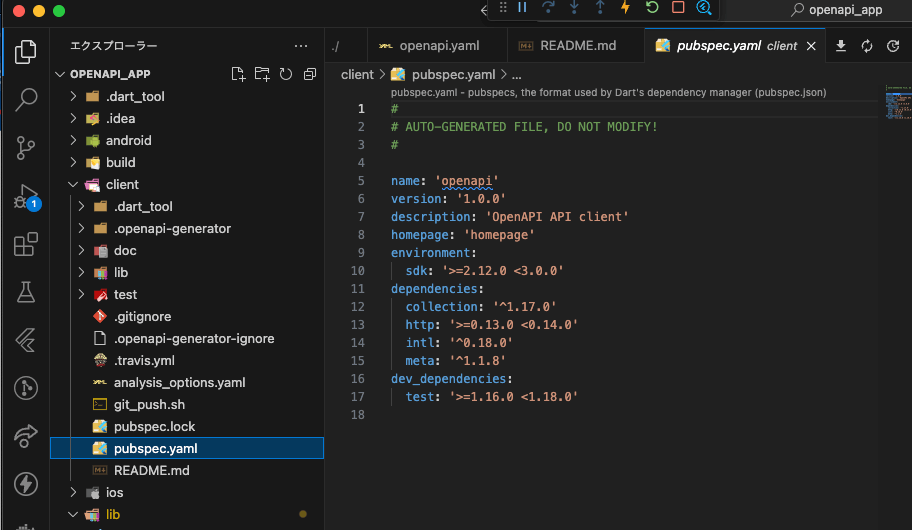
ファイルを自動生成したら、読み込めるようにpubspec.yamlでimportできるようにする。
name: openapi_app
description: A new Flutter project.
# The following line prevents the package from being accidentally published to
# pub.dev using `flutter pub publish`. This is preferred for private packages.
publish_to: 'none' # Remove this line if you wish to publish to pub.dev

# The following defines the version and build number for your application.
# A version number is three numbers separated by dots, like 1.2.43
# followed by an optional build number separated by a +.
# Both the version and the builder number may be overridden in flutter
# build by specifying --build-name and --build-number, respectively.
# In Android, build-name is used as versionName while build-number used as versionCode.
# Read more about Android versioning at https://developer.android.com/studio/publish/versioning
# In iOS, build-name is used as CFBundleShortVersionString while build-number is used as CFBundleVersion.
# Read more about iOS versioning at
# https://developer.apple.com/library/archive/documentation/General/Reference/InfoPlistKeyReference/Articles/CoreFoundationKeys.html
# In Windows, build-name is used as the major, minor, and patch parts
# of the product and file versions while build-number is used as the build suffix.
version: 1.0.0+1

environment:
  sdk: '>=3.1.3 <4.0.0'

# Dependencies specify other packages that your package needs in order to work.
# To automatically upgrade your package dependencies to the latest versions
# consider running `flutter pub upgrade --major-versions`. Alternatively,
# dependencies can be manually updated by changing the version numbers below to
# the latest version available on pub.dev. To see which dependencies have newer
# versions available, run `flutter pub outdated`.
dependencies:
  flutter:
    sdk: flutter
  # 自動生成したOpenAPIクライアントを利用するためのパッケージをimportできるように設定を追加
  openapi:
    path: ./client

  openapi_generator_annotations: ^4.11.0
  dio: ^5.4.0

  # The following adds the Cupertino Icons font to your application.
  # Use with the CupertinoIcons class for iOS style icons.
  cupertino_icons: ^1.0.2

dev_dependencies:
  flutter_test:
    sdk: flutter
  openapi_generator: ^4.11.0
  build_runner: ^2.4.7

  # The "flutter_lints" package below contains a set of recommended lints to
  # encourage good coding practices. The lint set provided by the package is
  # activated in the `analysis_options.yaml` file located at the root of your
  # package. See that file for information about deactivating specific lint
  # rules and activating additional ones.
  flutter_lints: ^2.0.0

# For information on the generic Dart part of this file, see the
# following page: https://dart.dev/tools/pub/pubspec

# The following section is specific to Flutter packages.
flutter:

  # The following line ensures that the Material Icons font is
  # included with your application, so that you can use the icons in
  # the material Icons class.
  uses-material-design: true

  # To add assets to your application, add an assets section, like this:
  # assets:
  #   - images/a_dot_burr.jpeg
  #   - images/a_dot_ham.jpeg

  # An image asset can refer to one or more resolution-specific "variants", see
  # https://flutter.dev/assets-and-images/#resolution-aware

  # For details regarding adding assets from package dependencies, see
  # https://flutter.dev/assets-and-images/#from-packages

  # To add custom fonts to your application, add a fonts section here,
  # in this "flutter" section. Each entry in this list should have a
  # "family" key with the font family name, and a "fonts" key with a
  # list giving the asset and other descriptors for the font. For
  # example:
  # fonts:
  #   - family: Schyler
  #     fonts:
  #       - asset: fonts/Schyler-Regular.ttf
  #       - asset: fonts/Schyler-Italic.ttf
  #         style: italic
  #   - family: Trajan Pro
  #     fonts:
  #       - asset: fonts/TrajanPro.ttf
  #       - asset: fonts/TrajanPro_Bold.ttf
  #         weight: 700
  #
  # For details regarding fonts from package dependencies,
  # see https://flutter.dev/custom-fonts/#from-packages
summary
私の作った本を参考に、mock-serverを構築したら、db.jsonを作成してその中にbookという配列を作ってください。Swagger Viewerを使えばモックにデータをPOSTできます。
{
  "book": [
    {
      "id": 1,
      "title": "独裁者",
      "author": "Jboy"
    },
    {
      "id": 2,
      "title": "大学院生",
      "author": "イセリュー"
    },
    {
      "id": 3,
      "title": "何でも屋",
      "author": "mogumogu"
    },
    {
      "title": "人生とは?",
      "author": "Jboy",
      "id": 4
    }
  ],
  "comments": [
    {
      "id": 1,
      "body": "some comment",
      "postId": 1
    }
  ],
  "profile": {
    "name": "typicode"
  }
}
パッケージは、yamlファイルからimportしている自動生成されたコードの中にあるようで、dioなどのパッケージをFlutterに追加する必要はないようです?
自動生成されたコードがたくさんあるので、こちらかコードを読み込んで作ったサンプルをmain.dartに書いてみました。URLの/bookは自動生成されたコードの中に書いてあるので、正しい処理がかけていれば自動で読み込んでくれます。
サンプルコード
import 'package:flutter/material.dart';
import 'package:openapi/api.dart';
class Book {
String title;
String author;
Book({required this.title, required this.author});
factory Book.fromJson(Map<String, dynamic> json) {
return Book(
title: json['title'],
author: json['author'],
);
}
Map<String, dynamic> toJson() {
return {
'title': title,
'author': author,
};
}
}
void main() {
runApp(const MyApp());
}
class MyApp extends StatelessWidget {
const MyApp({Key? key}) : super(key: key);
Widget build(BuildContext context) {
return MaterialApp(
title: 'Flutter Demo',
theme: ThemeData(
primarySwatch: Colors.blue,
),
home: const MyHomePage(title: 'OpenAPI Demo'),
);
}
}
class MyHomePage extends StatefulWidget {
const MyHomePage({Key? key, required this.title}) : super(key: key);
final String title;
State<MyHomePage> createState() => _MyHomePageState();
}
class _MyHomePageState extends State<MyHomePage> {
final List<Book> bookList = [];
Future<List<Book>> fetchBooks() async {
try {
final ApiClient apiClient =
ApiClient(basePath: 'http://localhost:3000'); // mock-serverのURLを指定します
final DefaultApi api = DefaultApi(apiClient);
final response = await api.bookGet();
print('responseを出す $response');
final List<Book> books = [];
if (response != null) {
print('logを出す');
for (final book in response) {
books.add(Book.fromJson(book.toJson()));
}
}
return books; // responseがnullでも空のリストを返す
} catch (e, stackTrace) {
print('Exception occurred: $e');
print('Stack trace: $stackTrace');
return []; // エラーが発生した場合も空のリストを返す
}
}
void initState() {
fetchBooks();
super.initState();
}
int _counter = 0;
void _incrementCounter() {
setState(() {
_counter++;
});
}
Widget build(BuildContext context) {
return Scaffold(
appBar: AppBar(
title: Text(widget.title),
),
body: FutureBuilder<List<Book>?>(
future: fetchBooks(),
builder: (context, snapshot) {
if (snapshot.hasData) {
return ListView.builder(
itemCount: snapshot.data!.length,
itemBuilder: (context, index) {
final book = snapshot.data![index];
return ListTile(
title: Text(book.title),
subtitle: Text(book.author),
);
},
);
} else if (snapshot.hasError) {
return Text('${snapshot.error}');
}
// データがまだ取得できていない場合はローディングを表示します
return const CircularProgressIndicator();
},
),
floatingActionButton: FloatingActionButton(
onPressed: _incrementCounter,
tooltip: 'Increment',
child: const Icon(Icons.add),
),
);
}
}
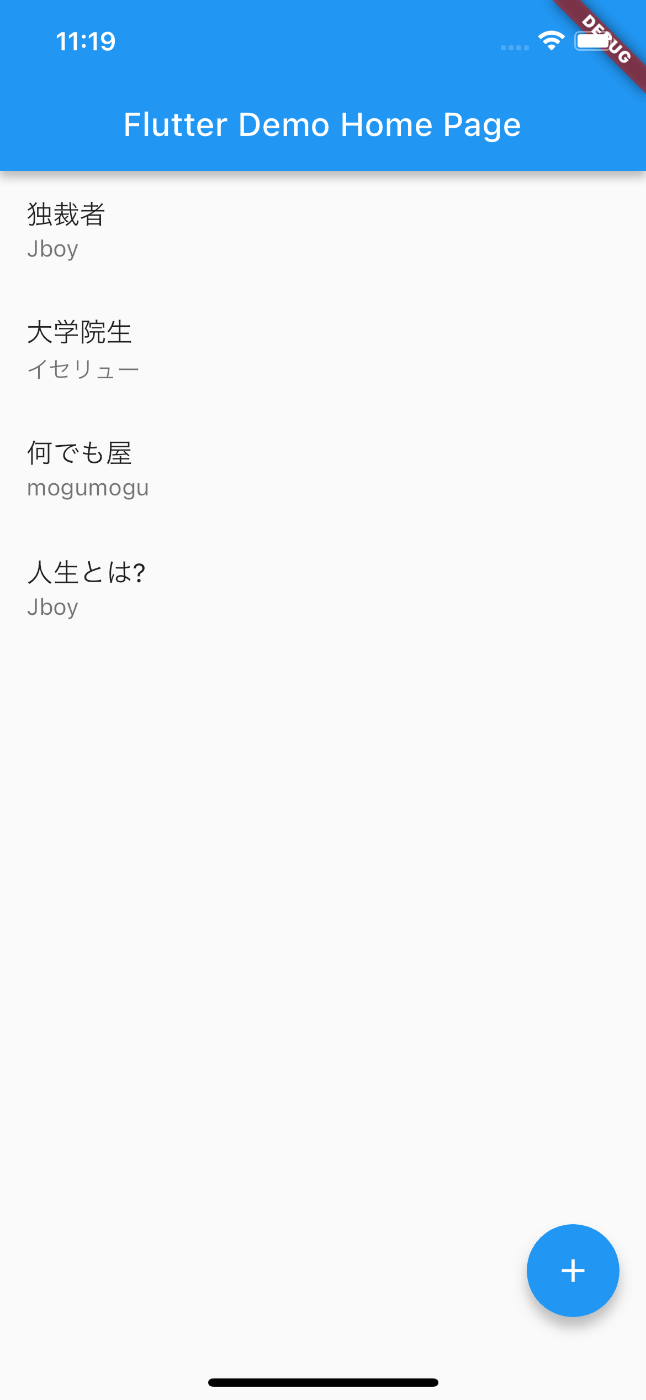
通信に成功すればこんな感じで、UIにデータが表示されます。
thoughts
こちらが今回使用したサンプルコードです。自動生成されたOPEN APIのコードもこれを見れば確認できます。たくさんあるから、ブラックBOXみたいでしたね。これが自動生成されたとは...
Retrofitも似たようなものですけどね。
Discussion