GetXに入門してみた!
GetXとはなんですか?
日本語に翻訳されていたドキュメントがあったのでリンクを貼っておきます。
詳しく知りたい方はこちらをご覧ください。
Githubに書かれている文章を一部抜粋
GetXはFlutterのための超軽量でパワフルなソリューションです。高パフォーマンスな状態管理機能、インテリジェントな依存オブジェクト管理機能、そしてRoute管理機能の三本柱を軽量かつ実用的な形で組み合わせています。
GetXは3つの基本原則を念頭に開発されています。 【生産性、パフォーマンス、コードの分離性】 これらはライブラリ内のすべてのリソースに優先適用されている原則です。
ソリューションとは?
カタカナ語に弱いので調べました😅
参考にした記事
こちらのサイトによれば「問題を解決する」という表現で使われています。
GetXは、Providerやriverpodと何が違う?
contextを書かなくても値を渡すことができる。デモアプリを作ってみたので試しに動かしてみます。
pubspec.yaml
name: get_tutorial
description: A new Flutter project.

# The following line prevents the package from being accidentally published to
# pub.dev using `flutter pub publish`. This is preferred for private packages.
publish_to: 'none' # Remove this line if you wish to publish to pub.dev

# The following defines the version and build number for your application.
# A version number is three numbers separated by dots, like 1.2.43
# followed by an optional build number separated by a +.
# Both the version and the builder number may be overridden in flutter
# build by specifying --build-name and --build-number, respectively.
# In Android, build-name is used as versionName while build-number used as versionCode.
# Read more about Android versioning at https://developer.android.com/studio/publish/versioning
# In iOS, build-name is used as CFBundleShortVersionString while build-number used as CFBundleVersion.
# Read more about iOS versioning at
# https://developer.apple.com/library/archive/documentation/General/Reference/InfoPlistKeyReference/Articles/CoreFoundationKeys.html
version: 1.0.0+1

environment:
  sdk: ">=2.17.1 <3.0.0"

# Dependencies specify other packages that your package needs in order to work.
# To automatically upgrade your package dependencies to the latest versions
# consider running `flutter pub upgrade --major-versions`. Alternatively,
# dependencies can be manually updated by changing the version numbers below to
# the latest version available on pub.dev. To see which dependencies have newer
# versions available, run `flutter pub outdated`.
dependencies:
  flutter:
    sdk: flutter


  # The following adds the Cupertino Icons font to your application.
  # Use with the CupertinoIcons class for iOS style icons.
  cupertino_icons: ^1.0.2
  get: # ここにGetXのパッケージを配置する


dev_dependencies:
  flutter_test:
    sdk: flutter

  # The "flutter_lints" package below contains a set of recommended lints to
  # encourage good coding practices. The lint set provided by the package is
  # activated in the `analysis_options.yaml` file located at the root of your
  # package. See that file for information about deactivating specific lint
  # rules and activating additional ones.
  flutter_lints: ^2.0.0

# For information on the generic Dart part of this file, see the
# following page: https://dart.dev/tools/pub/pubspec

# The following section is specific to Flutter packages.
flutter:

  # The following line ensures that the Material Icons font is
  # included with your application, so that you can use the icons in
  # the material Icons class.
  uses-material-design: true

  # To add assets to your application, add an assets section, like this:
  # assets:
  #   - images/a_dot_burr.jpeg
  #   - images/a_dot_ham.jpeg

  # An image asset can refer to one or more resolution-specific "variants", see
  # https://flutter.dev/assets-and-images/#resolution-aware

  # For details regarding adding assets from package dependencies, see
  # https://flutter.dev/assets-and-images/#from-packages

  # To add custom fonts to your application, add a fonts section here,
  # in this "flutter" section. Each entry in this list should have a
  # "family" key with the font family name, and a "fonts" key with a
  # list giving the asset and other descriptors for the font. For
  # example:
  # fonts:
  #   - family: Schyler
  #     fonts:
  #       - asset: fonts/Schyler-Regular.ttf
  #       - asset: fonts/Schyler-Italic.ttf
  #         style: italic
  #   - family: Trajan Pro
  #     fonts:
  #       - asset: fonts/TrajanPro.ttf
  #       - asset: fonts/TrajanPro_Bold.ttf
  #         weight: 700
  #
  # For details regarding fonts from package dependencies,
  # see https://flutter.dev/custom-fonts/#from-packages
main.dart
import 'package:flutter/material.dart';
import 'package:get/get.dart';
import 'package:get_tutorial/other.dart';
void main() {
runApp(const MyApp());
}
class MyApp extends StatelessWidget {
const MyApp({Key? key}) : super(key: key);
// This widget is the root of your application.
Widget build(BuildContext context) {
// MaterialAppをGetMaterialAppに書き換える
return GetMaterialApp(
title: 'Flutter Demo',
theme: ThemeData(
primarySwatch: Colors.blue,
),
home: Home(),
);
}
}
class Home extends StatelessWidget {
Widget build(context) {
// Get.put()を使ってクラスをインスタンス化することですべての子Routeで利用できるようになります。
final Controller c = Get.put(Controller());
return Scaffold(
// countが変わるたびにTextを更新するにはObx(()=>)を使ってください。
appBar: AppBar(title: Obx(() => Text("Clicks: ${c.count}"))),
// 8行使っていたNavigator.pushの代わりに短い Get.to()を使ってください。context不要です。
body: Center(child: ElevatedButton(
child: Text("Go to Other"), onPressed: () => Get.to(Other()))),
floatingActionButton:
FloatingActionButton(child: Icon(Icons.add), onPressed: c.increment));
}
}
// コントローラーを作成してプロパティとメソッドを書く
class Controller extends GetxController{
var count = 0.obs;
var name = 'Jonatas Borges';
increment() => count++;
}
other.dart
import 'package:flutter/material.dart';
import 'package:get/get.dart';
import 'package:get/get_core/src/get_main.dart';
import 'package:get_tutorial/main.dart';
class Other extends StatelessWidget {
// 他のページで使われているコントローラーを見つけてきてくれます。
final Controller c = Get.find();
Widget build(context) {
// 最新のcount変数の値にアクセス
return Scaffold(
appBar: AppBar(
backgroundColor: Colors.amber,
title: Text("Other Page"),
),
body: Center(
child: Column(
mainAxisAlignment: MainAxisAlignment.center,
children: [Text("${c.count}"), Text("${c.name}")],
)));
}
}
今回は画面遷移と数値が増えるだけとシンプルなものですが、Providerやriverpodを使ったことがある方みると短くコードが書けるのがわかります。
buildする
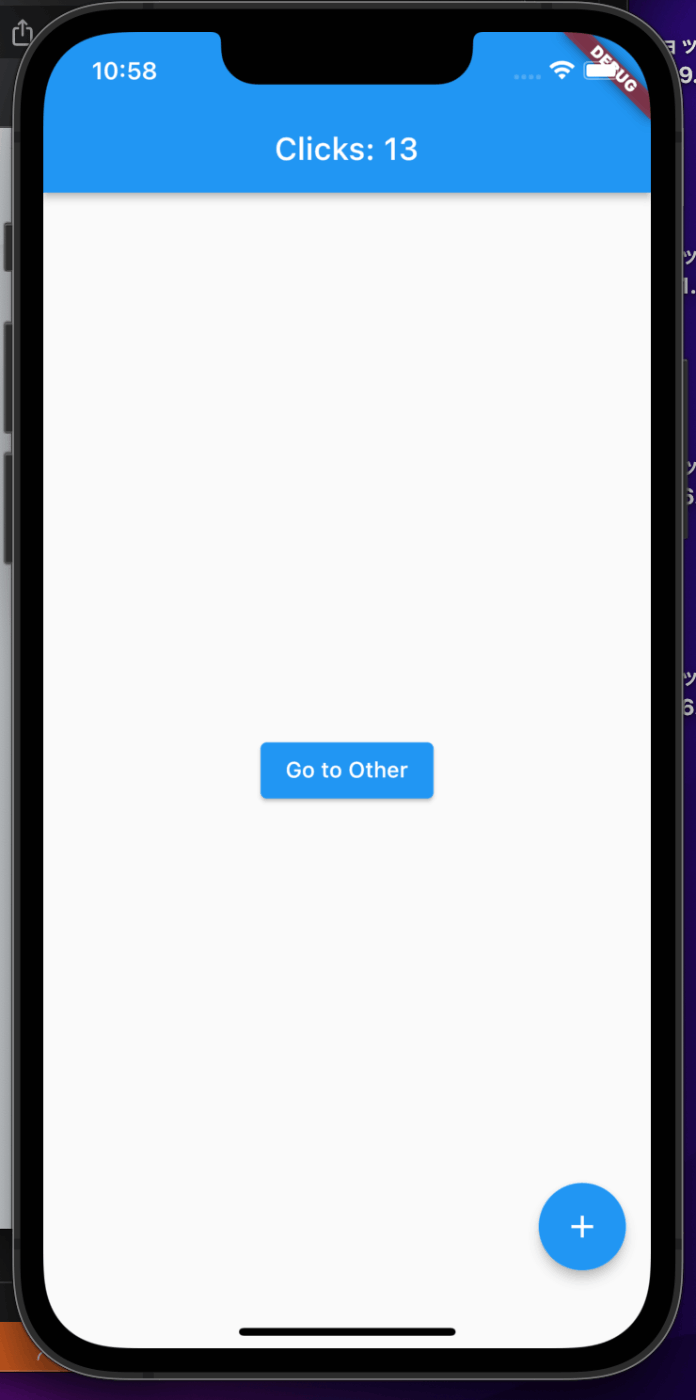
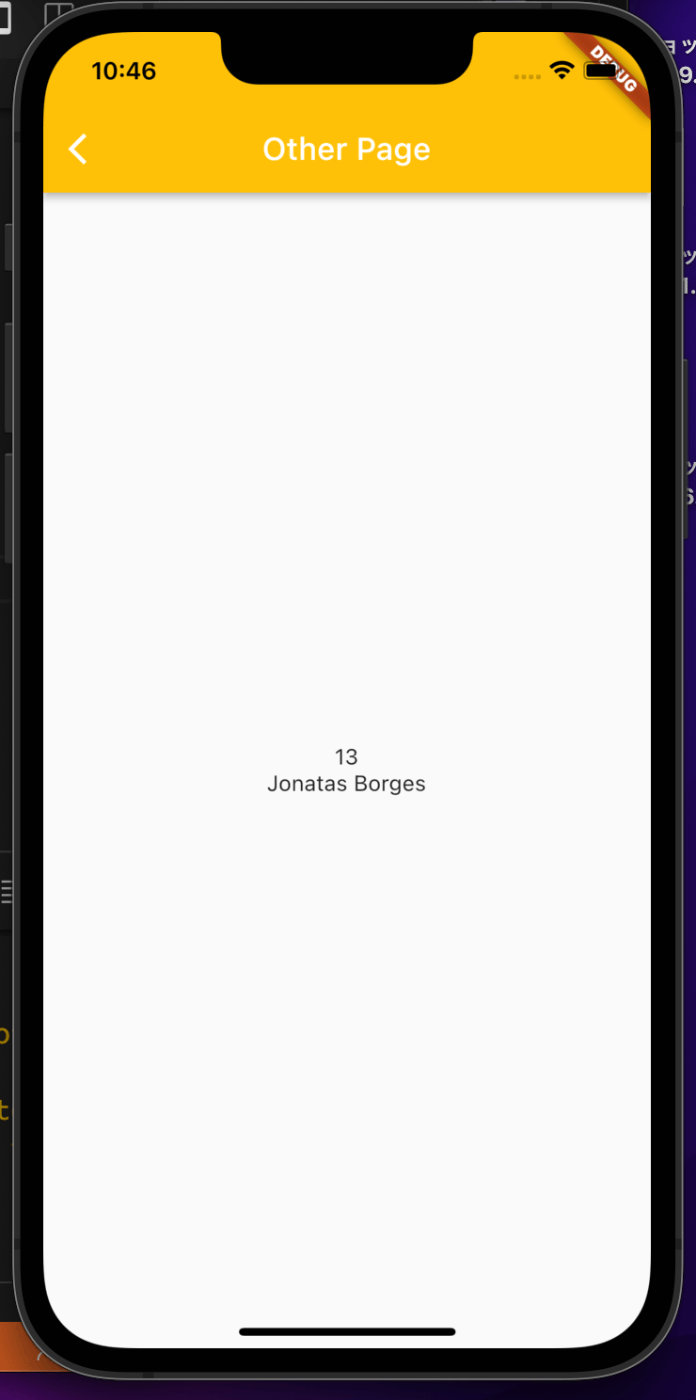
画面遷移先のページに値を渡すことができていますね。Providerやriverpodと異なるのは、contextと書く処理がないことです。ゲッターを書いたりもしていません。
変数の中の値を監視するには、".obs"をつけるだけです。
使ってみた感想
ドキュメントに書いてあったのですが、シンタックスシュガー(簡単にかけるという意味)でコードを書けるので、書き方の種類が多いProviderをや流行っているけど難しいriverpodよりは、とっつきやすいかなと思いました。これから、GetXの記事を増やしていこうと思います。
コマンドを使って新規のプロジェクトを作成したり、ファイルやフォルダを追加していくことができて、テンプレートがあらかじめ用意されているので、便利ですが、内部が複雑な気もするので、自分で設計を考えないと、カオスな状態になってしまうからなのか、批判する意見も見かけます。
Udemyで講座が多い気がしますけどね😅
Discussion