Flexibleとは?
Flexibleウィジェット
Row、Column、Flexの子がどのようにフレックスするかを制御するウィジェット。
Flexibleウィジェットを使用すると、Row、Column、またはFlexの子ウィジェットは、主軸の利用可能なスペースを埋めるように(例えば、Rowの場合は水平方向に、Columnの場合は垂直方向に)柔軟に拡張できますが、Expandedとは異なり、Flexibleでは子ウィジェットが利用可能なスペースを埋める必要はありません。
Flexibleウィジェットは、Row、Column、またはFlexの子孫でなければなりません。また、Flexibleウィジェットからそれを囲むRow、Column、またはFlexへのパスには、StatelessWidgetsまたはStatefulWidgetsのみが含まれていなければなりません(RenderObjectWidgetsなどの他の種類のウィジェットは含まれません)。
色付きの箱を並べるレイアウトを作ってみました。

こちらは、色がついた箱を横に並べてFlexibleウィジェットとflexパラーメーターを使用して、コンテナコンポーネントのサイズ調整を行う。
import 'package:flutter/material.dart';
class ContainerObject extends StatelessWidget {
const ContainerObject({Key? key}) : super(key: key);
Widget build(BuildContext context) {
return Scaffold(
appBar: AppBar(title: const Text("Widget")),
body: Column(
children: [
Row(
children: [
Flexible(
flex: 1,
child: BoxObject(
title: 'hogehoge',
color: Colors.indigo,
width: double.infinity,
height: 50)),
Flexible(
flex: 2,
child: BoxObject(
title: 'hogehoge',
color: Colors.pink,
width: double.infinity,
height: 50)),
Flexible(
flex: 3,
child: BoxObject(
title: 'hogehoge',
color: Colors.yellow,
width: double.infinity,
height: 50)),
],
),
Row(
children: [
Flexible(
flex: 2,
child: BoxObject(
title: 'hogehoge',
color: Colors.blue,
width: double.infinity,
height: 50)),
Flexible(
flex: 3,
child: BoxObject(
title: 'hogehoge',
color: Colors.green,
width: double.infinity,
height: 50)),
Flexible(
flex: 1,
child: BoxObject(
title: 'hogehoge',
color: Colors.orange,
width: double.infinity,
height: 50)),
],
),
],
));
}
}
// 色がついたコンテナのコンポーネント
class BoxObject extends StatelessWidget {
const BoxObject(
{Key? key,
required this.width,
required this.height,
required this.color,
required this.title})
: super(key: key);
final double width;
final double height;
final Color color;
final String title;
Widget build(BuildContext context) {
return Container(
color: color,
width: width,
height: height,
child: Text(title),
);
}
}
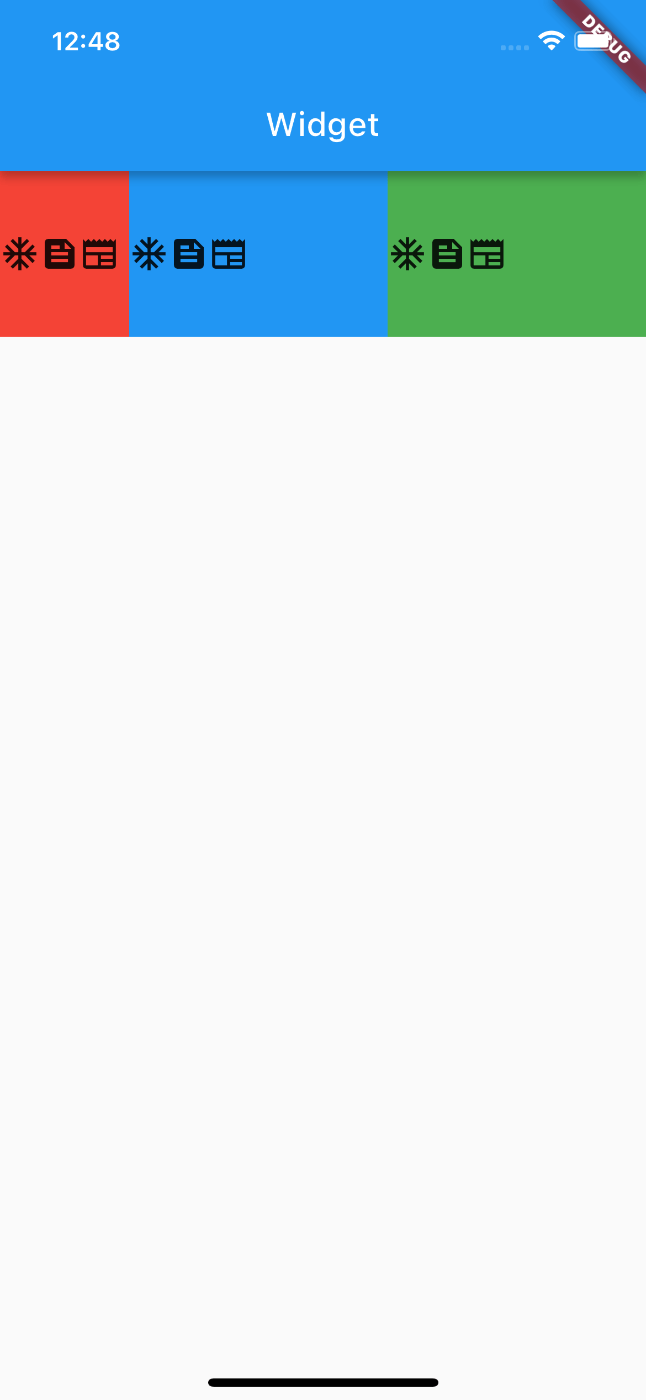
色をつけるだけだと分かりにくいので,iconを追加しました
こんな感じで、自由にレイアウトを調整することができます。double.infinityだと横幅がいっぱい広がるのですが、Flexibleでラップして、flexというパラメーターに、1, 2, 3と渡して、今のUIを再現できました。

import 'package:flutter/material.dart';
class ContainerObject extends StatelessWidget {
const ContainerObject({Key? key}) : super(key: key);
Widget build(BuildContext context) {
return Scaffold(
appBar: AppBar(title: const Text("Widget")),
body: Column(
children: [
Row(
children: [
Flexible(
flex: 1,
child: Container(
width: double.infinity,
height: 100,
color: Colors.red,
child: Row(children: [
Icon(Icons.ac_unit),
Icon(Icons.feed),
Icon(Icons.newspaper),
]),
)),
Flexible(
flex: 2,
child: Container(
width: double.infinity,
height: 100,
color: Colors.blue,
child: Row(children: [
Icon(Icons.ac_unit),
Icon(Icons.feed),
Icon(Icons.newspaper),
]),
)),
Flexible(
flex: 2,
child: Container(
width: double.infinity,
height: 100,
color: Colors.green,
child: Row(children: [
Icon(Icons.ac_unit),
Icon(Icons.feed),
Icon(Icons.newspaper),
]),
)),
],
),
],
));
}
}
// 色がついたコンテナのコンポーネント
class BoxObject extends StatelessWidget {
const BoxObject(
{Key? key,
required this.width,
required this.height,
required this.color,
required this.title,
required this.child})
: super(key: key);
final double width;
final double height;
final Color color;
final String title;
final Widget child;
Widget build(BuildContext context) {
return Container(
color: color,
width: width,
height: height,
child: child,
);
}
}
まとめ
レイアウトの変更をしていて、Flexibleを使う方法があって試したことがあるのですが、その時はどんなものかわかっていませんでした。
これが、どんなものかというと、Row, Columの中で横並びに並べたウイジェットが画面いっぱいに広がったとしてもFlexibleとflexパラメーターで、位置を調整してくれるという単純なものでした。
Flexibleについて使い方を紹介した記事があったのでこちらにリンクを載せておきます。
昔読んだ本の解説だと、親ウイジェットのサイズの変更に応じて自身のサイズも変化するウイジェットです。
Discussion