😇
AutoRouteを使ってみた
_$AppRouterと書かないとエラー消えない?
auto routeなるものがあって使ってみました。普段はgo_router使ってるんですけど、画面遷移のパッケージが他にあるなら試してみたいと思って使ってみました。
色々ハマったのでメモします。
参考にした動画
🎁必要なパッケージを追加
pubspec.yaml
name: auto_route_tutorial
description: A new Flutter project.
# The following line prevents the package from being accidentally published to
# pub.dev using `flutter pub publish`. This is preferred for private packages.
publish_to: 'none' # Remove this line if you wish to publish to pub.dev

# The following defines the version and build number for your application.
# A version number is three numbers separated by dots, like 1.2.43
# followed by an optional build number separated by a +.
# Both the version and the builder number may be overridden in flutter
# build by specifying --build-name and --build-number, respectively.
# In Android, build-name is used as versionName while build-number used as versionCode.
# Read more about Android versioning at https://developer.android.com/studio/publish/versioning
# In iOS, build-name is used as CFBundleShortVersionString while build-number is used as CFBundleVersion.
# Read more about iOS versioning at
# https://developer.apple.com/library/archive/documentation/General/Reference/InfoPlistKeyReference/Articles/CoreFoundationKeys.html
# In Windows, build-name is used as the major, minor, and patch parts
# of the product and file versions while build-number is used as the build suffix.
version: 1.0.0+1

environment:
  sdk: '>=3.0.5 <4.0.0'

# Dependencies specify other packages that your package needs in order to work.
# To automatically upgrade your package dependencies to the latest versions
# consider running `flutter pub upgrade --major-versions`. Alternatively,
# dependencies can be manually updated by changing the version numbers below to
# the latest version available on pub.dev. To see which dependencies have newer
# versions available, run `flutter pub outdated`.
dependencies:
  flutter:
    sdk: flutter


  # The following adds the Cupertino Icons font to your application.
  # Use with the CupertinoIcons class for iOS style icons.
  cupertino_icons: ^1.0.2
  auto_route: ^7.7.1

dev_dependencies:
  flutter_test:
    sdk: flutter

  # The "flutter_lints" package below contains a set of recommended lints to
  # encourage good coding practices. The lint set provided by the package is
  # activated in the `analysis_options.yaml` file located at the root of your
  # package. See that file for information about deactivating specific lint
  # rules and activating additional ones.
  flutter_lints: ^2.0.0
  auto_route_generator: ^7.2.0
  build_runner: ^2.4.6

# For information on the generic Dart part of this file, see the
# following page: https://dart.dev/tools/pub/pubspec

# The following section is specific to Flutter packages.
flutter:

  # The following line ensures that the Material Icons font is
  # included with your application, so that you can use the icons in
  # the material Icons class.
  uses-material-design: true

  # To add assets to your application, add an assets section, like this:
  # assets:
  #   - images/a_dot_burr.jpeg
  #   - images/a_dot_ham.jpeg

  # An image asset can refer to one or more resolution-specific "variants", see
  # https://flutter.dev/assets-and-images/#resolution-aware

  # For details regarding adding assets from package dependencies, see
  # https://flutter.dev/assets-and-images/#from-packages

  # To add custom fonts to your application, add a fonts section here,
  # in this "flutter" section. Each entry in this list should have a
  # "family" key with the font family name, and a "fonts" key with a
  # list giving the asset and other descriptors for the font. For
  # example:
  # fonts:
  #   - family: Schyler
  #     fonts:
  #       - asset: fonts/Schyler-Regular.ttf
  #       - asset: fonts/Schyler-Italic.ttf
  #         style: italic
  #   - family: Trajan Pro
  #     fonts:
  #       - asset: fonts/TrajanPro.ttf
  #       - asset: fonts/TrajanPro_Bold.ttf
  #         weight: 700
  #
  # For details regarding fonts from package dependencies,
  # see https://flutter.dev/custom-fonts/#from-packages
ページを作る
ページを作らないと、先に設定ファイル作れないので作っておきます。名前はなんでもいいです。
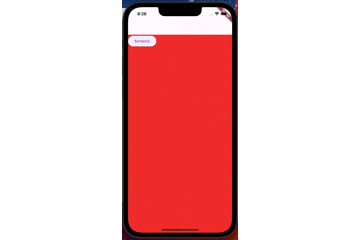
ページA
screen/
import 'package:auto_route/auto_route.dart';
import 'package:auto_route_tutorial/route/app_router.dart';
import 'package:flutter/material.dart';
// このアノテーションをつけることで、
// このクラスが自動生成されたルーティングクラスの一部であることを示す
()
class ScreenA extends StatelessWidget {
const ScreenA({Key? key}) : super(key: key);
Widget build(BuildContext context) {
return Scaffold(
appBar: AppBar(),
backgroundColor: Colors.red,
body: Column(
children: [
ElevatedButton(
onPressed: () {
AutoRouter.of(context).push(const RouteB());
},
child: const Text('ScreenB'))
],
),
);
}
}
ページB
screen/
import 'package:auto_route/auto_route.dart';
import 'package:auto_route_tutorial/route/app_router.dart';
import 'package:flutter/material.dart';
()
class ScreenB extends StatelessWidget {
const ScreenB({Key? key}) : super(key: key);
Widget build(BuildContext context) {
return Scaffold(
appBar: AppBar(),
backgroundColor: Colors.blue,
body: Column(
children: [
ElevatedButton(
onPressed: () {
AutoRouter.of(context).push(const RouteC());
},
child: const Text('ScreenC'))
],
),
);
}
}
ページC
screen/
import 'package:auto_route/auto_route.dart';
import 'package:flutter/material.dart';
()
class ScreenC extends StatelessWidget {
const ScreenC({Key? key}) : super(key: key);
Widget build(BuildContext context) {
return Scaffold(
appBar: AppBar(),
backgroundColor: Colors.green,
body: Column(
children: [
ElevatedButton(
onPressed: () {
AutoRouter.of(context).pop();
},
child: const Text('ScreenA'))
],
)
);
}
}
🔧設定ファイルを作成する
参考にした動画や公式では、$AppRouterと書いていた _ をつけないとエラーになりましたね。この辺が厄介です。「公式ドキュメントを見る」とかいう人いるけど、「いや、のってね〜よ」ってこともあります。厄介ですね😅
route/app_routet.dart
import 'package:auto_route/auto_route.dart';
part 'app_router.gr.dart';
()
class AppRouter extends _$AppRouter {// _をつけないと怒られる!
List<AutoRoute> get routes => [
];
}
ビルドランナーを実行して、ルートのファイルを自動生成する。watchつけてた方が良い。
flutter pub run build_runner build
ファイルが自動生成される。ページをimportするところがエラーになってるので、補完機能を使ってimportする。

route/app_routet.gr.dart
// GENERATED CODE - DO NOT MODIFY BY HAND
// **************************************************************************
// AutoRouterGenerator
// **************************************************************************
// ignore_for_file: type=lint
// coverage:ignore-file
part of 'app_router.dart';
abstract class _$AppRouter extends RootStackRouter {
// ignore: unused_element
_$AppRouter({super.navigatorKey});
final Map<String, PageFactory> pagesMap = {
RouteA.name: (routeData) {
return AutoRoutePage<dynamic>(
routeData: routeData,
child: const ScreenA(),
);
},
RouteC.name: (routeData) {
return AutoRoutePage<dynamic>(
routeData: routeData,
child: const ScreenC(),
);
},
RouteB.name: (routeData) {
return AutoRoutePage<dynamic>(
routeData: routeData,
child: const ScreenB(),
);
},
};
}
/// generated route for
/// [ScreenA]
class RouteA extends PageRouteInfo<void> {
const RouteA({List<PageRouteInfo>? children})
: super(
RouteA.name,
initialChildren: children,
);
static const String name = 'RouteA';
static const PageInfo<void> page = PageInfo<void>(name);
}
/// generated route for
/// [ScreenC]
class RouteC extends PageRouteInfo<void> {
const RouteC({List<PageRouteInfo>? children})
: super(
RouteC.name,
initialChildren: children,
);
static const String name = 'RouteC';
static const PageInfo<void> page = PageInfo<void>(name);
}
/// generated route for
/// [ScreenB]
class RouteB extends PageRouteInfo<void> {
const RouteB({List<PageRouteInfo>? children})
: super(
RouteB.name,
initialChildren: children,
);
static const String name = 'RouteB';
static const PageInfo<void> page = PageInfo<void>(name);
}
importすると、設定ファイルの方で自動でimport文がつく。あとは、Routeを追加するだけ
import 'package:auto_route/auto_route.dart';
import 'package:auto_route_tutorial/screen/screen_a.dart';
import 'package:auto_route_tutorial/screen/screen_b.dart';
import 'package:auto_route_tutorial/screen/screen_c.dart';
part 'app_router.gr.dart';
()
class AppRouter extends _$AppRouter {// _をつけないと怒られる!
List<AutoRoute> get routes => [
// ここにルーティングを追加していく
AutoRoute(page: RouteA.page, initial: true),// initial: trueで初期画面を指定
AutoRoute(page: RouteB.page),
AutoRoute(page: RouteC.page),
];
}
main.dartに設定を追加して、ビルドする
main.dart
import 'package:auto_route_tutorial/route/app_router.dart';
import 'package:flutter/material.dart';
void main() {
runApp(const MyApp());
}
class MyApp extends StatelessWidget {
const MyApp({super.key});
Widget build(BuildContext context) {
// AppRouterクラスをインスタンス化
AppRouter appRouter = AppRouter();
return MaterialApp.router(// MaterialApp.routerを使用
routerConfig: appRouter.config(),
title: 'Flutter Demo',
theme: ThemeData(
colorScheme: ColorScheme.fromSeed(seedColor: Colors.deepPurple),
useMaterial3: true,
),
);
}
}
📺動作確認
gif画像を用意しました
まとめ
auto_routeを使ってみましたが、チュートリアル通りにやっても上手くいきません。使いこなせたら個人開発でも使いたいなと思いました。
go_routerと比較して良かったところは、パスを指定しなくて良かったところですね。
完成品
Discussion
この
go_routetが間違っていそうなので、細かいですがコメントさせていただきました🙇修正いたしました🙇
ご指摘ありがとうございます。