GoogleMapに入門してみた!
結構沼りました!
FlutterでMapアプリ作ったことなかったので、やってみたくて遂にやりました!
- 設定が結構大変だった!
- OS毎の設定が面倒くさい!
- これでいいのか疑問?
- 動画とドキュメントを見ながら環境構築から始めた!
まずは公式チュートリアルで勉強
設定の仕方について学べた!
その前に、GCPの設定が必要なのでお忘れなく!
Codelab
GoogleMapAPIの設定
こちらのドキュメントや技術記事、YouTubeでGCPでGoogleMapAPIの設定の仕方を覚えました。 こちらのサイトもスクリーンショットがあってわかりやすい!
現在地を表示するアプリを作ってみた!
こちらの記事を参考に、自分の現在位置を取得するアプリを作ってみたのですが設定周りでつまづきました😇
私が、packageについて理解がないのが、原因ですね。権限のエラーで躓きました😱
buildしたときのerror

iOSとAndroidの設定したのに、なぜだろう?
他のチュートリアルのアプリは動いていた....
main.dartに問題があるようですね。
GPSアプリのチュートリアル
これは動く!
今回使用したpackage
私がやった設定
Androidの設定
まずは、android/app/src/main/AndroidManifest.xmlに設定を追加.
<manifest xmlns:android="http://schemas.android.com/apk/res/android"
    package="com.example.google_map_tutorial">
<!-- geolocatorの設定 ここから-->
    <uses-permission android:name="android.permission.ACCESS_FINE_LOCATION" />
    <uses-permission android:name="android.permission.ACCESS_COARSE_LOCATION" />
    <!-- ここまで-->
    <application
        android:label="google_map_tutorial"
        android:name="${applicationName}"
        android:icon="@mipmap/ic_launcher">
       <!-- google_maps_flutterのAPI KEYの設定 ここから-->
       <meta-data android:name="com.google.android.geo.API_KEY"
           android:value="API KEYを貼る"/>
       <!-- ここまで-->
        <activity
            android:name=".MainActivity"
            android:exported="true"
            android:launchMode="singleTop"
            android:theme="@style/LaunchTheme"
            android:configChanges="orientation|keyboardHidden|keyboard|screenSize|smallestScreenSize|locale|layoutDirection|fontScale|screenLayout|density|uiMode"
            android:hardwareAccelerated="true"
            android:windowSoftInputMode="adjustResize">
            <!-- Specifies an Android theme to apply to this Activity as soon as
                 the Android process has started. This theme is visible to the user
                 while the Flutter UI initializes. After that, this theme continues
                 to determine the Window background behind the Flutter UI. -->
            <meta-data
              android:name="io.flutter.embedding.android.NormalTheme"
              android:resource="@style/NormalTheme"
              />
            <intent-filter>
                <action android:name="android.intent.action.MAIN"/>
                <category android:name="android.intent.category.LAUNCHER"/>
            </intent-filter>
        </activity>
        <!-- Don't delete the meta-data below.
             This is used by the Flutter tool to generate GeneratedPluginRegistrant.java -->
        <meta-data
            android:name="flutterEmbedding"
            android:value="2" />
    </application>
</manifest>
android/app/build.gradleを設定
def localProperties = new Properties()
def localPropertiesFile = rootProject.file('local.properties')
if (localPropertiesFile.exists()) {
    localPropertiesFile.withReader('UTF-8') { reader ->
        localProperties.load(reader)
    }
}

def flutterRoot = localProperties.getProperty('flutter.sdk')
if (flutterRoot == null) {
    throw new GradleException("Flutter SDK not found. Define location with flutter.sdk in the local.properties file.")
}

def flutterVersionCode = localProperties.getProperty('flutter.versionCode')
if (flutterVersionCode == null) {
    flutterVersionCode = '1'
}

def flutterVersionName = localProperties.getProperty('flutter.versionName')
if (flutterVersionName == null) {
    flutterVersionName = '1.0'
}

apply plugin: 'com.android.application'
apply plugin: 'kotlin-android'
apply from: "$flutterRoot/packages/flutter_tools/gradle/flutter.gradle"

android {
    compileSdkVersion 33 // 33に設定
    ndkVersion flutter.ndkVersion

    compileOptions {
        sourceCompatibility JavaVersion.VERSION_1_8
        targetCompatibility JavaVersion.VERSION_1_8
    }

    kotlinOptions {
        jvmTarget = '1.8'
    }

    sourceSets {
        main.java.srcDirs += 'src/main/kotlin'
    }

    defaultConfig {
        // TODO: Specify your own unique Application ID (https://developer.android.com/studio/build/application-id.html).
        applicationId "com.example.google_map_tutorial"
        // You can update the following values to match your application needs.
        // For more information, see: https://docs.flutter.dev/deployment/android#reviewing-the-build-configuration.
        minSdkVersion 21 // 21に設定
        targetSdkVersion 33 // 33に設定
        versionCode flutterVersionCode.toInteger()
        versionName flutterVersionName
    }

    buildTypes {
        release {
            // TODO: Add your own signing config for the release build.
            // Signing with the debug keys for now, so `flutter run --release` works.
            signingConfig signingConfigs.debug
        }
    }
}

flutter {
    source '../..'
}

dependencies {
    implementation "org.jetbrains.kotlin:kotlin-stdlib-jdk7:$kotlin_version"
}
iOSの設定
packageをpub getすると自動生成される。
ios/Podfileを編集
# Uncomment this line to define a global platform for your project
platform :ios, '11.0' # コメントを外して、今回は11.0に設定、x-codeも11.0になっているか確認.

# CocoaPods analytics sends network stats synchronously affecting flutter build latency.
ENV['COCOAPODS_DISABLE_STATS'] = 'true'

project 'Runner', {
  'Debug' => :debug,
  'Profile' => :release,
  'Release' => :release,
}

def flutter_root
  generated_xcode_build_settings_path = File.expand_path(File.join('..', 'Flutter', 'Generated.xcconfig'), __FILE__)
  unless File.exist?(generated_xcode_build_settings_path)
    raise "#{generated_xcode_build_settings_path} must exist. If you're running pod install manually, make sure flutter pub get is executed first"
  end

  File.foreach(generated_xcode_build_settings_path) do |line|
    matches = line.match(/FLUTTER_ROOT\=(.*)/)
    return matches[1].strip if matches
  end
  raise "FLUTTER_ROOT not found in #{generated_xcode_build_settings_path}. Try deleting Generated.xcconfig, then run flutter pub get"
end

require File.expand_path(File.join('packages', 'flutter_tools', 'bin', 'podhelper'), flutter_root)

flutter_ios_podfile_setup

target 'Runner' do
  use_frameworks!
  use_modular_headers!

  flutter_install_all_ios_pods File.dirname(File.realpath(__FILE__))
end

post_install do |installer|
  installer.pods_project.targets.each do |target|
    flutter_additional_ios_build_settings(target)
  end
end
ios/Runner/AppDelegate.swiftを編集
正しく設定されていないと、シュミレーターが落ちちゃうので注意!
import UIKit
import Flutter
import GoogleMaps

@UIApplicationMain
@objc class AppDelegate: FlutterAppDelegate {
  override func application(
    _ application: UIApplication,
    didFinishLaunchingWithOptions launchOptions: [UIApplication.LaunchOptionsKey: Any]?
  ) -> Bool {
  //   API KEYを追加↓
    GMSServices.provideAPIKey("API KEYを追加")
    GeneratedPluginRegistrant.register(with: self)

    return super.application(application, didFinishLaunchingWithOptions: launchOptions)
  }
}
ios/Runner/info.plistを編集
xmlに設定を追加
<?xml version="1.0" encoding="UTF-8"?>
<!DOCTYPE plist PUBLIC "-//Apple//DTD PLIST 1.0//EN" "http://www.apple.com/DTDs/PropertyList-1.0.dtd">
<plist version="1.0">
<dict>
    <!-- geolocatorの設定 ここから -->
    <key>NSLocationWhenInUseUsageDescription</key>
    <string>ロケーション情報を利用する理由を記載</string>
    <key>NSLocationAlwaysUsageDescription</key>
    <string>ロケーション情報を利用する理由を記載</string>
    <!-- ここまで-->
    <key>NSLocationAlwaysUsageDescription</key>
    <string>This app needs access to location when in the background.</string>
	<key>CFBundleDevelopmentRegion</key>
	<string>$(DEVELOPMENT_LANGUAGE)</string>
	<key>CFBundleDisplayName</key>
	<string>Google Map Tutorial</string>
	<key>CFBundleExecutable</key>
	<string>$(EXECUTABLE_NAME)</string>
	<key>CFBundleIdentifier</key>
	<string>$(PRODUCT_BUNDLE_IDENTIFIER)</string>
	<key>CFBundleInfoDictionaryVersion</key>
	<string>6.0</string>
	<key>CFBundleName</key>
	<string>google_map_tutorial</string>
	<key>CFBundlePackageType</key>
	<string>APPL</string>
	<key>CFBundleShortVersionString</key>
	<string>$(FLUTTER_BUILD_NAME)</string>
	<key>CFBundleSignature</key>
	<string>????</string>
	<key>CFBundleVersion</key>
	<string>$(FLUTTER_BUILD_NUMBER)</string>
	<key>LSRequiresIPhoneOS</key>
	<true/>
	<key>UILaunchStoryboardName</key>
	<string>LaunchScreen</string>
	<key>UIMainStoryboardFile</key>
	<string>Main</string>
	<key>UISupportedInterfaceOrientations</key>
	<array>
		<string>UIInterfaceOrientationPortrait</string>
		<string>UIInterfaceOrientationLandscapeLeft</string>
		<string>UIInterfaceOrientationLandscapeRight</string>
	</array>
	<key>UISupportedInterfaceOrientations~ipad</key>
	<array>
		<string>UIInterfaceOrientationPortrait</string>
		<string>UIInterfaceOrientationPortraitUpsideDown</string>
		<string>UIInterfaceOrientationLandscapeLeft</string>
		<string>UIInterfaceOrientationLandscapeRight</string>
	</array>
	<key>UIViewControllerBasedStatusBarAppearance</key>
	<false/>
	<key>CADisableMinimumFrameDurationOnPhone</key>
	<true/>
	<key>UIApplicationSupportsIndirectInputEvents</key>
	<true/>
</dict>
</plist>
アプリのコード
今回使用したアプリのコード
これなんですけど、initStateの中に、関数が書いてあるのですが、非同期処理が実行されてないらしく、権限の許可が出てなかったようです😱
main関数の中に、直接書いて非同期処理を使えるようにしました。これをやってた時に、Flutterのライフサイクルの話が出てきたので、調べていくと難しくなっていきました!
- ロジックについて
- WidgetsFlutterBinding.ensureInitialized();を書く.
- バインディングを初期する.
- こうすることで、非同期処理がアプリを立ち上げたときに、最初に実行される.
import 'dart:async';
import 'package:flutter/material.dart';
import 'package:geolocator/geolocator.dart';
import 'package:google_maps_flutter/google_maps_flutter.dart';
void main() async {
// runAppを呼び出す前にバインディングを初期化する.
WidgetsFlutterBinding.ensureInitialized();
// initStateの中には、書けないので、main関数の中で実行する.
LocationPermission permission = await Geolocator.checkPermission();
if (permission == LocationPermission.denied) {
await Geolocator.requestPermission();
}
runApp(const MyApp());
}
class MyApp extends StatelessWidget {
const MyApp({Key? key}) : super(key: key);
Widget build(BuildContext context) {
return const MaterialApp(
title: 'Flutter Google Maps Demo',
home: MapSample(),
);
}
}
class MapSample extends StatefulWidget {
const MapSample({Key? key}) : super(key: key);
State<MapSample> createState() => MapSampleState();
}
class MapSampleState extends State<MapSample> {
Position? currentPosition;
late GoogleMapController _controller;
late StreamSubscription<Position> positionStream;
//初期位置
final CameraPosition _kGooglePlex = const CameraPosition(
target: LatLng(35.12694, 136.28902),
zoom: 14,
);
final LocationSettings locationSettings = const LocationSettings(
accuracy: LocationAccuracy.high, //正確性:highはAndroid(0-100m),iOS(10m)
distanceFilter: 100,
);
void initState() {
super.initState();
// initStateの中で、async、awaitは使えない!
//位置情報が許可されていない時に許可をリクエストする
Future(() async {
LocationPermission permission = await Geolocator.checkPermission();
if (permission == LocationPermission.denied) {
await Geolocator.requestPermission();
}
});
//現在位置を更新し続ける
positionStream =
Geolocator.getPositionStream(locationSettings: locationSettings)
.listen((Position? position) {
currentPosition = position;
print(position == null
? 'Unknown'
: '${position.latitude.toString()}, ${position.longitude.toString()}');
});
}
Widget build(BuildContext context) {
return GoogleMap(
mapType: MapType.normal,
initialCameraPosition: _kGooglePlex,
myLocationEnabled: true, //現在位置をマップ上に表示
onMapCreated: (GoogleMapController controller) {
_controller = controller;
},
);
}
}
アプリをiOSとAndroidで実行
スクリーンショット
Android

iOS

geolocatorの内部を見てみる
どんな仕組みなのか気になって見てみました!
これが分かれば、自分でpackageを作るのもできるようになるかも?
開発を始める前に、こうやって内部を見ると、メソッドの使い方書いてあるので、機能の実装の仕方がわかるかも?
日本語に翻訳しましたが、英語を読むのが理想ですね😅
毎日英会話やってるが、まだ読めない💦
import 'dart:async';

import 'package:flutter/foundation.dart';
import 'package:geolocator_android/geolocator_android.dart';
import 'package:geolocator_apple/geolocator_apple.dart';
import 'package:geolocator_platform_interface/geolocator_platform_interface.dart';

export 'package:geolocator_android/geolocator_android.dart'
    show AndroidSettings, ForegroundNotificationConfig, AndroidResource;
export 'package:geolocator_apple/geolocator_apple.dart'
    show AppleSettings, ActivityType;
export 'package:geolocator_platform_interface/geolocator_platform_interface.dart';

/// CLLocationManager (iOS) と FusedLocationProviderClient をラップする、もしくは
/// LocationManager
/// (Android) をラップし、デバイスの位置情報の取得をサポートします。
/// デバイスの位置情報の取得をサポートします。
///
/// 位置情報を取得する際に、自動的にパーミッションが処理されます。information.
/// However utility methods for manual permission management are also
/// provided.
class Geolocator {
  ユーザーがアプリから端末の位置情報にアクセスすることを許可しているかどうかを示す [Future] を返します /// 端末の位置情報にアクセスすることを許可しているかどうかを示す [Future] を返します。
  /// デバイスの位置情報へのアクセスを許可するかどうかを示す[Future]を返します。
  static Future<LocationPermission> checkPermission() =>
      GeolocatorPlatform.instance.checkPermission();


  static Future<LocationPermission> requestPermission() =>
      GeolocatorPlatform.instance.requestPermission();

  /// を示す [bool] 値を含む [Future] を返します。

  location
  /// services are enabled on the device.
  static Future<bool> isLocationServiceEnabled() =>
      GeolocatorPlatform.instance.isLocationServiceEnabled();

  /// サービスがデバイス上で有効になっていることを示します。
  ///
  /// Android では、プラグインに古い Android の
  /// LocationManager の実装を強制的に使用させることができます。
  /// forceAndroidLocationManager] パラメータに true を渡します。iOS の場合
  /// iOS では、このパラメータは無視されます。
  /// 利用可能な位置がない場合、null を返します。
  static Future<Position?> getLastKnownPosition(
          {bool forceAndroidLocationManager = false}) =>
      GeolocatorPlatform.instance.getLastKnownPosition(
          forceLocationManager: forceAndroidLocationManager);

  /// 与えられた [desiredAccuracy] を考慮に入れて、現在の位置を返します。
  /// を考慮した位置を返します。
  ///
  /// 位置情報の更新の精度は
  /// desiredAccuracy] パラメータを指定します (デフォルトは "best")。Androidでは、以下のことが可能です。
  /// FusedLocationProvider の代わりに Android LocationManager を使用するように強制することができます。
  Android では、[forceAndroidLocationManager] パラメータを true に設定することで、 /// FusedLocationProvider の代わりに Android LocationManager を強制的に使用することができます。
  /// パラメータを true に設定します。timeLimit] パラメータで、タイムアウト時間(デフォルト)を指定することができます。
  /// タイムアウト間隔を指定します(デフォルトではタイムアウトは設定されていません)。
  ///
  /// 与えられた[timeLimit]期間内に位置情報を受信しなかった場合、[TimeoutException]をスローします。
  /// 与えられた[timeLimit]時間内に位置情報を受信できなかった場合、[TimeoutException]をスローします。
  /// アクセスを許可したユーザーが、端末の位置情報サービスを無効にしている場合、 /// [LocationServiceDisabledException]をスローします。
  /// しかし、デバイスの位置情報サービスが無効になっている場合、[LocationServiceDisabledException] をスローします。

  static Future<Position> getCurrentPosition({
    LocationAccuracy desiredAccuracy = LocationAccuracy.best,
    bool forceAndroidLocationManager = false,
    Duration? timeLimit,
  }) {
    late LocationSettings locationSettings;
    if (defaultTargetPlatform == TargetPlatform.android) {
      locationSettings = AndroidSettings(
        accuracy: desiredAccuracy,
        forceLocationManager: forceAndroidLocationManager,
        timeLimit: timeLimit,
      );
    } else {
      locationSettings = LocationSettings(
        accuracy: desiredAccuracy,
        timeLimit: timeLimit,
      );
    }

    return GeolocatorPlatform.instance
        .getCurrentPosition(locationSettings: locationSettings);
  }

  /// の範囲内で位置が変更されるたびに発生します。
  /// 与えられた [LocationSettings.accuracy] の範囲内で位置が変化したときに発生します。
  ///
  /// このイベントは、デバイス上のすべての位置センサーを開始し、ストリームのリスニングをキャンセルするか、アプリケーションが停止するまで
  /// ストリームのリッスンをキャンセルするか、アプリケーションが終了するまで、アクティブな状態を維持します。
  /// ストリームのリスニングをキャンセルするか、アプリケーションが強制終了するまで、アクティブな状態を維持します。
  ///
  /// ```
  /// StreamSubscription<Position> positionStream = getPositionStream()
  ///     .listen((Position position) {
  ///       // Handle position changes
  ///     });
  ///
  /// // When no longer needed cancel the subscription
  /// positionStream.cancel();
  /// ```
  ///
  /// [locationSettings]クラスのインスタンスを指定することで、ストリームの挙動を制御することができます。
  /// LocationSettings]クラスのインスタンスを[locationSettings]パラメータに指定することで、ストリームの動作を制御することができます。
  /// 標準的な設定は以下の通りです。
  /// * `LocationSettings.accuracy`: ストリームの精度を制御することができます。
  /// supplying (デフォルトは "best");
  /// * `LocationSettings.distanceFilter`: 更新が行われる前に、デバイスが移動する最小距離を制御することができます。
  /// * `LocationSettings.distanceFilter`: 更新が行われる前にデバイスが移動する必要のある最小距離を制御することができます (デフォルトは 0 です。
  /// 値は 0 で、フィルタを使用しないことを示します)。
  /// * `LocationSettings.timeLimit`: タイムアウトの間隔を設定することができます。もし
  /// ロケーションを取得する間にタイムアウトの間隔を超えた場合、タイムアウトの例外が発生します。
  /// [TimeoutException]がスローされます。デフォルトでは、タイムリミットは設定されていません。
  ///
  /// プラットフォーム固有の設定を行いたい場合は、以下のクラスを使用します。
  /// AndroidSettings] と [AppleSettings] クラスを使用します。
  ///
  /// 与えられた[timeLimit]期間内に位置情報を受信しなかった場合、[TimeoutException]をスローします。
  /// 与えられた[timeLimit]時間内に位置情報を受信できなかった場合、[TimeoutException]をスローします。
  /// アクセスを許可したユーザが位置情報サービスを利用している場合、[LocationServiceDisabledException] をスローします。
  /// しかし、デバイスの位置情報サービスが無効になっている場合、[LocationServiceDisabledException] をスローします。

  static Stream<Position> getPositionStream({
    LocationSettings? locationSettings,
  }) =>
      GeolocatorPlatform.instance.getPositionStream(
        locationSettings: locationSettings,
      );

  /// [LocationAccuracyStatus]を含む[Future]を返します。
  /// ユーザがおおよその位置情報を許可している場合、[LocationAccuracyStatus.reduced] を返します。
  /// [LocationAccuracyStatus.reduced] が返されます。
  /// 正確な位置情報を許可した場合は、[LocationAccuracyStatus.precision] が返されます。
  /// が返されます.

  static Future<LocationAccuracyStatus> getLocationAccuracy() =>
      GeolocatorPlatform.instance.getLocationAccuracy();

  /// で位置情報サービスが無効/有効になるたびに発生します. notification
 location
  サービスが有効な場合は /// ServiceStatus.disabledを返す.
  /// サービスを無効にする.
  static Stream<ServiceStatus> getServiceStatusStream() =>
      GeolocatorPlatform.instance.getServiceStatusStream();

  /// 正確な位置情報の取得を許可した場合、一時的に正確な位置情報を取得する。
  /// おおよその位置情報を要求する(iOS 14+のみ)。
  ///
  /// このメソッドを利用する場合、必須プロパティ `purposeKey` の値は
  /// で指定された <key> の値と一致する必要があります。
  /// `NSLocationTemporaryUsageDescription` 辞書で指定された <key> の値と一致する必要があります。
  /// Info.plist.
  ///
  /// 必要なキーがない場合、[PermissionDefinitionsNotFoundException] をスローします。
  Info.plistの /// が追加されていません。
  iOS 13 以下、またはその他のプラットフォームを使用している場合、 /// [LocationAccuracyStatus.precise] を返します。
  /// その他のプラットフォームを使用している場合

  static Future<LocationAccuracyStatus> requestTemporaryFullAccuracy({
    required String purposeKey,
  }) =>
      GeolocatorPlatform.instance.requestTemporaryFullAccuracy(
        purposeKey: purposeKey,
      );

  /// アプリの設定画面を表示します。
  ///
  /// 位置情報設定ページを開くことができた場合、[true]を返します。
  /// [false]を返します。
  static Future<bool> openAppSettings() =>
      GeolocatorPlatform.instance.openAppSettings();

  /// 位置情報の設定画面を表示します。
  ///
  /// 位置情報設定ページを開くことができた場合は[true]を、そうでない場合は[false]を返します。
  /// [false]を返します。
  static Future<bool> openLocationSettings() =>
      GeolocatorPlatform.instance.openLocationSettings();

  /// 与えられた座標間の距離をメートル単位で計算します。
  ///
  /// 座標間の距離は、Haversineの式(  参照)を用いて計算されます。
  /// 式(https://en.wikipedia.org/wiki/Haversine_formula 参照)を用いて計算されます。また
  /// 与えられた座標 [startLatitude]、[startLongitude]、[endLatitude]。and
  /// [endLongitude] should be supplied in degrees.
  static double distanceBetween(
    double startLatitude,
    double startLongitude,
    double endLatitude,
    double endLongitude,
  ) =>
      GeolocatorPlatform.instance.distanceBetween(
        startLatitude,
        startLongitude,
        endLatitude,
        endLongitude,
      );

  /// 2点間の初期方位を計算します.
  ///
  /// 初期方位は、ほとんどの場合、終了方位と異なります。
  /// 方位は、https://www.movable- を参照してください。type.co.uk/scripts/latlong.html#bearing.
  /// 与えられた座標 [startLatitude], [startLongitude], [endLatitude]
  static double bearingBetween(
    double startLatitude,
    double startLongitude,
    double endLatitude,
    double endLongitude,
  ) =>
      GeolocatorPlatform.instance.bearingBetween(
        startLatitude,
        startLongitude,
        endLatitude,
        endLongitude,
      );
}
最後に
地図アプリはJavaSctiptでやってみたことあるのですが、モバイルでは初めてでした。
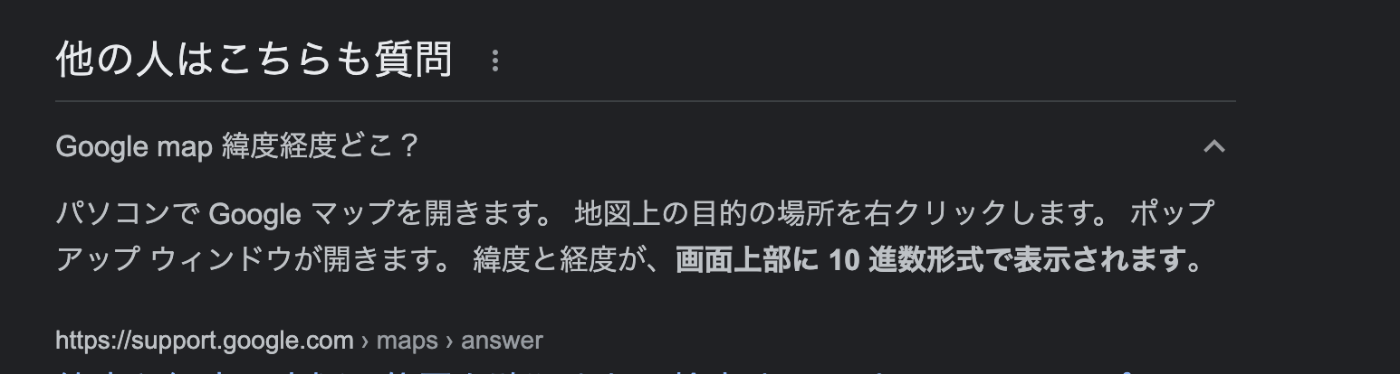
軽度と緯度の調べ方ですが、GoogleMapを使えば簡単に調べることができます。
- やること
- 地図で場所を検索.
- 赤いピンを右クリックする.
- 一番上に、軽度と緯度が表示される.

こちらを初期位置に指定すると、アプリが起動したときに現在地が表示されます。
//初期位置
  final CameraPosition _kGooglePlex = const CameraPosition(
    target: LatLng(35.12694, 136.28902),
    zoom: 14,
  );
Discussion