🎽
KotlinでRetrofitを使う


読んでほしい人
- Jetpack ComposeでHTTP通信をやってみたい人
- Retrofitがわからない?
記事の内容
Kotlinを使ったAndroidアプリ開発で、API通信をするサンプルコードを作っているのですけど、以前作ったのはコードが多すぎて分かりずらかった...
今回のは、Flutterの経験がある筆者だとオブジェクト思考わかってるのかなんとなく読めるな〜って感じなので、作ってみました。
依存関係の追加
パッケージを追加
plugins {
    id 'com.android.application'
    id 'org.jetbrains.kotlin.android'
}

android {
    namespace 'com.junichi.retrofitbasic'
    compileSdk 33

    defaultConfig {
        applicationId "com.junichi.retrofitbasic"
        minSdk 24
        targetSdk 33
        versionCode 1
        versionName "1.0"

        testInstrumentationRunner "androidx.test.runner.AndroidJUnitRunner"
        vectorDrawables {
            useSupportLibrary true
        }
    }

    buildTypes {
        release {
            minifyEnabled false
            proguardFiles getDefaultProguardFile('proguard-android-optimize.txt'), 'proguard-rules.pro'
        }
    }
    compileOptions {
        sourceCompatibility JavaVersion.VERSION_1_8
        targetCompatibility JavaVersion.VERSION_1_8
    }
    kotlinOptions {
        jvmTarget = '1.8'
    }
    buildFeatures {
        compose true
    }
    composeOptions {
        kotlinCompilerExtensionVersion '1.3.2'
    }
    packagingOptions {
        resources {
            excludes += '/META-INF/{AL2.0,LGPL2.1}'
        }
    }
}

dependencies {

    implementation 'androidx.core:core-ktx:1.8.0'
    implementation platform('org.jetbrains.kotlin:kotlin-bom:1.8.0')
    implementation 'androidx.lifecycle:lifecycle-runtime-ktx:2.3.1'
    implementation 'androidx.activity:activity-compose:1.5.1'
    implementation platform('androidx.compose:compose-bom:2022.10.00')
    implementation 'androidx.compose.ui:ui'
    implementation 'androidx.compose.ui:ui-graphics'
    implementation 'androidx.compose.ui:ui-tooling-preview'
    implementation 'androidx.compose.material3:material3'
    testImplementation 'junit:junit:4.13.2'
    androidTestImplementation 'androidx.test.ext:junit:1.1.5'
    androidTestImplementation 'androidx.test.espresso:espresso-core:3.5.1'
    androidTestImplementation platform('androidx.compose:compose-bom:2022.10.00')
    androidTestImplementation 'androidx.compose.ui:ui-test-junit4'
    debugImplementation 'androidx.compose.ui:ui-tooling'
    debugImplementation 'androidx.compose.ui:ui-test-manifest'
    // Retrofit for API requests
    implementation "com.squareup.retrofit2:retrofit:2.9.0"
    implementation "com.squareup.retrofit2:converter-gson:2.9.0"
    // ViewModel and LiveData for MVVM architecture
    implementation "androidx.lifecycle:lifecycle-viewmodel-compose:1.0.0-alpha07"
    implementation "androidx.lifecycle:lifecycle-livedata:2.3.1"
}
このままでは、権限の問題でインターネットに接続できないので権限の設定を追加します。
AndroidManifest.xmlを設定
<?xml version="1.0" encoding="utf-8"?>
<manifest xmlns:android="http://schemas.android.com/apk/res/android"
    xmlns:tools="http://schemas.android.com/tools">
    <!-- パーミッションの許可するxmlを追加 -->
    <uses-permission android:name="android.permission.INTERNET" />

    <application
        android:allowBackup="true"
        android:dataExtractionRules="@xml/data_extraction_rules"
        android:fullBackupContent="@xml/backup_rules"
        android:icon="@mipmap/ic_launcher"
        android:label="@string/app_name"
        android:roundIcon="@mipmap/ic_launcher_round"
        android:supportsRtl="true"
        android:theme="@style/Theme.RetrofitBasic"
        tools:targetApi="31">
        <activity
            android:name=".MainActivity"
            android:exported="true"
            android:label="@string/app_name"
            android:theme="@style/Theme.RetrofitBasic">
            <intent-filter>
                <action android:name="android.intent.action.MAIN" />

                <category android:name="android.intent.category.LAUNCHER" />
            </intent-filter>
        </activity>
    </application>

</manifest>
まずは、モデルとなるデータクラスを作成します。これはAPIのJSONのデータの構造に合わせて設計します。
データクラス
package com.junichi.retrofitbasic.model
/* jsonplaceholderのTODO APIのレスポンスのデータクラス
JSONデータ型に合わせてクラスのメンバー変数を定義する
 */
data class Todo(
    val id: Int,
    val userId: Int,
    val title: String,
    var completed: Boolean
)
よくあるリポジトリと呼ばれているAPIと接続するロジックをかいたクラスを定義します。今回はシングルトンになってますが、参考にしたのがたまたまこれだったので、そのまま使ってます。
リポジトリ
package com.junichi.retrofitbasic.repository

import retrofit2.Retrofit
import retrofit2.converter.gson.GsonConverterFactory

/*
シングルトンの Retrofit インスタンス
このインスタンスは実際の API 呼び出しを処理する
*/
object RetrofitInstance {
    private
    const val BASE_URL = "https://jsonplaceholder.typicode.com/"// jsonplaceholderのTODO APIのベースURL
    val api: ApiService by lazy {
        val retrofit = Retrofit.Builder()
            .baseUrl(BASE_URL)
            .addConverterFactory(GsonConverterFactory.create())
            .build()
        retrofit.create(ApiService::class.java)
    }
}
Flutterでも一応パッケージであるレトロフィットのオリジナルであるAndroid用のコード。これはHTTP GETするメソッドで、先ほど定義してベースURLの後に、/todosと言った感じでアクセスしたいエンドポイントを指定しています。
レトロフィットのコード
package com.junichi.retrofitbasic.repository

import com.junichi.retrofitbasic.model.Todo
import retrofit2.http.GET
// BASE URLの後に続くエンドポイントを定義する。今回だと`todos`を@GETの引数に指定する
interface ApiService {
    @GET("todos")
    // kotlinのsuspend関数を使って非同期処理を行う
    suspend fun getPosts(): List <Todo>
}
APIと画面の間にあってやりとりをするViewModelを定義します。これは、ロジックは書いてなくて、エラー処理や状態の変更を管理してるものです。
ViewModel
package com.junichi.retrofitbasic.view_model

import androidx.compose.runtime.MutableState
import androidx.compose.runtime.mutableStateOf
import androidx.lifecycle.ViewModel
import androidx.lifecycle.viewModelScope
import com.junichi.retrofitbasic.model.Todo
import com.junichi.retrofitbasic.repository.RetrofitInstance
import kotlinx.coroutines.launch

// データクラスとレポジトリ、View側との間でデータをやり取りするViewModel
class MainViewModel: ViewModel() {
    // レポジトリのインスタンスを取得
    private val apiService = RetrofitInstance.api
    // レポジトリから取得したデータを格納する変数
    val posts: MutableState<List<Todo>> = mutableStateOf(emptyList())
    // レポジトリからデータを取得する関数
    fun getPosts() {
        // viewModelScopeを使って非同期処理を行う
        viewModelScope.launch {
            try {
                // 例外処理が起きなかったらpostsにデータを格納する
                val response = apiService.getPosts()
                if (response.isNotEmpty()) {
                    posts.value = response
                }
                // エラーが起きたら例外を投げる
            } catch (e: Exception) {
                throw Exception(e)
            }
        }
    }
}
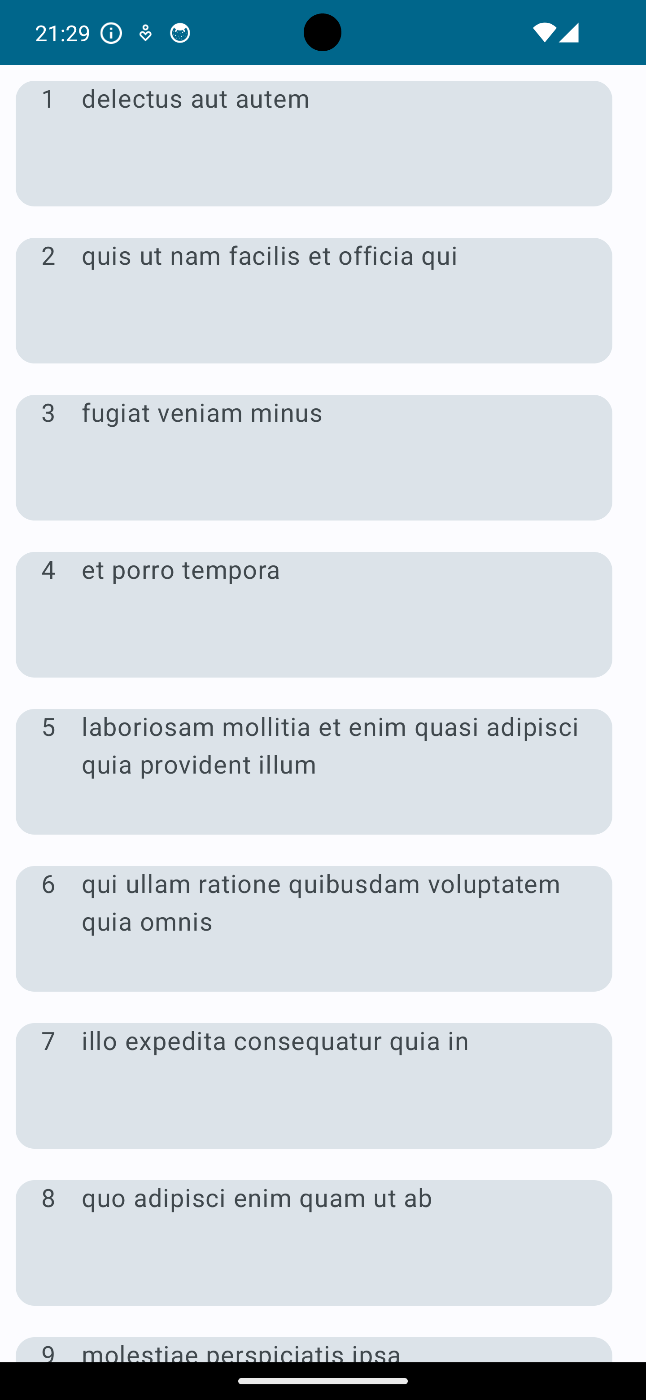
これがAPIのデータを表示するView側のコードです。Cardのデザインを追加しましたが、それでも美しくはないです。
fetchしたデータを表示するUI
package com.junichi.retrofitbasic.view_model

import androidx.compose.foundation.layout.Row
import androidx.compose.foundation.layout.Spacer
import androidx.compose.foundation.layout.padding
import androidx.compose.foundation.layout.size
import androidx.compose.foundation.lazy.LazyColumn
import androidx.compose.foundation.lazy.items
import androidx.compose.material3.Card
import androidx.compose.material3.CardDefaults
import androidx.compose.material3.MaterialTheme
import androidx.compose.material3.Text
import androidx.compose.runtime.Composable
import androidx.compose.runtime.DisposableEffect
import androidx.compose.ui.Modifier
import androidx.compose.ui.unit.dp

// ViewModelからデータを受け取って表示する`UI`のコンポーネント
@Composable
fun PostList(viewModel: MainViewModel) {
    // ViewModelからデータを受け取る
    val posts = viewModel.posts.value
    // 受け取ったデータを表示する
    LazyColumn {
        items(posts) { post ->// lambda式でデータを受け取る
            // Cardコンポーネントを使ってデータを表示する
            Card(
                colors = CardDefaults.cardColors(
                    containerColor = MaterialTheme.colorScheme.surfaceVariant,
                ),
                modifier = Modifier
                    .size(width = 400.dp, height = 100.dp)
                      .padding(10.dp)
            ) {
                Row {
                    Spacer(modifier = Modifier.padding(8.dp))
                    Text(text = post.id.toString())
                    Spacer(modifier = Modifier.padding(8.dp))
                    Text(text = post.title)
                }
            }
        }
    }
    // データを取得する関数を呼び出す
    DisposableEffect(Unit) {
        // onActiveで画面が表示された時にデータを取得する
        viewModel.getPosts()
        // onDisposeで画面が閉じられた時にデータを破棄する
        onDispose {
            // データを破棄する
            viewModel.posts.value = emptyList()
        }
    }
}
エントリーポイントとなるファイルで、Viewのコードをimportしてビルドすればデータを取得できるはずです。
エントリーポイント
package com.junichi.retrofitbasic

import android.os.Bundle
import androidx.activity.ComponentActivity
import androidx.activity.compose.setContent
import androidx.compose.foundation.layout.fillMaxSize
import androidx.compose.material3.MaterialTheme
import androidx.compose.material3.Surface
import androidx.compose.runtime.Composable
import androidx.compose.ui.Modifier
import androidx.compose.ui.tooling.preview.Preview
import com.junichi.retrofitbasic.ui.theme.RetrofitBasicTheme
import com.junichi.retrofitbasic.view_model.MainViewModel
import com.junichi.retrofitbasic.view_model.PostList

class MainActivity : ComponentActivity() {
    override fun onCreate(savedInstanceState: Bundle?) {
        super.onCreate(savedInstanceState)
        setContent {
            RetrofitBasicTheme {
                Surface(
                    modifier = Modifier.fillMaxSize(),
                    color = MaterialTheme.colorScheme.background
                ) {
                    PostList(viewModel = MainViewModel())
                }
            }
        }
    }
}


@Preview(showBackground = true)
@Composable
fun GreetingPreview() {
    RetrofitBasicTheme {
    }
}
実行結果:
補足情報
参考にしたMediumの記事の書き方だとエラー出る箇所があったので、書き換えてます。
最後に
今回は、簡単なようで難しかったですがAPIからデータを取得してViewに表示することができました。
参考にした記事
Discussion